Mount Alberta
3619m, 11873ft
August 21-23 2025
Mount Alberta is without a doubt the toughest peak over 11000 feet in the Canadian Rockies, even rivaling
Mount Robson.
It sits just northwest of the
The Twins
on the Columbia Icefield and its shear east and west faces rise sharply on either side creating a shark fin appearance with a sharp ridge over a kilometer long. Despite its lofty height Mount Alberta isn't visible from any road, but for those that go for it the first sight of this fearsome peak is from the Woolley Shoulder where it stands menacingly 4km away. There is no easy way up this guarded fortress of a mountain with the lowest grade going at 5.6-5.7 via the Japanese route, and in years where snow is more persistent through the summer it's not uncommon for the summit to see very few if any successful parties.

A bit over a week after Troy and I had an epic on
Deltaform Mountain
an exceptional high pressure window was forecasted to last for a sizable number of days, and given that it was likely one of the driest points of the summer and there was no telling if we'd get another opportunity as promising, Darren and I began making plans to go for the toughest peak among the Canadian Rockies 11000ers, Mount Alberta.
Initially we had thought about going for Alberta with just the two of us to optimize on speed while in technical terrain, but knowing that Tim Hrysh who Darren and I teamed up with on
Mount Robson
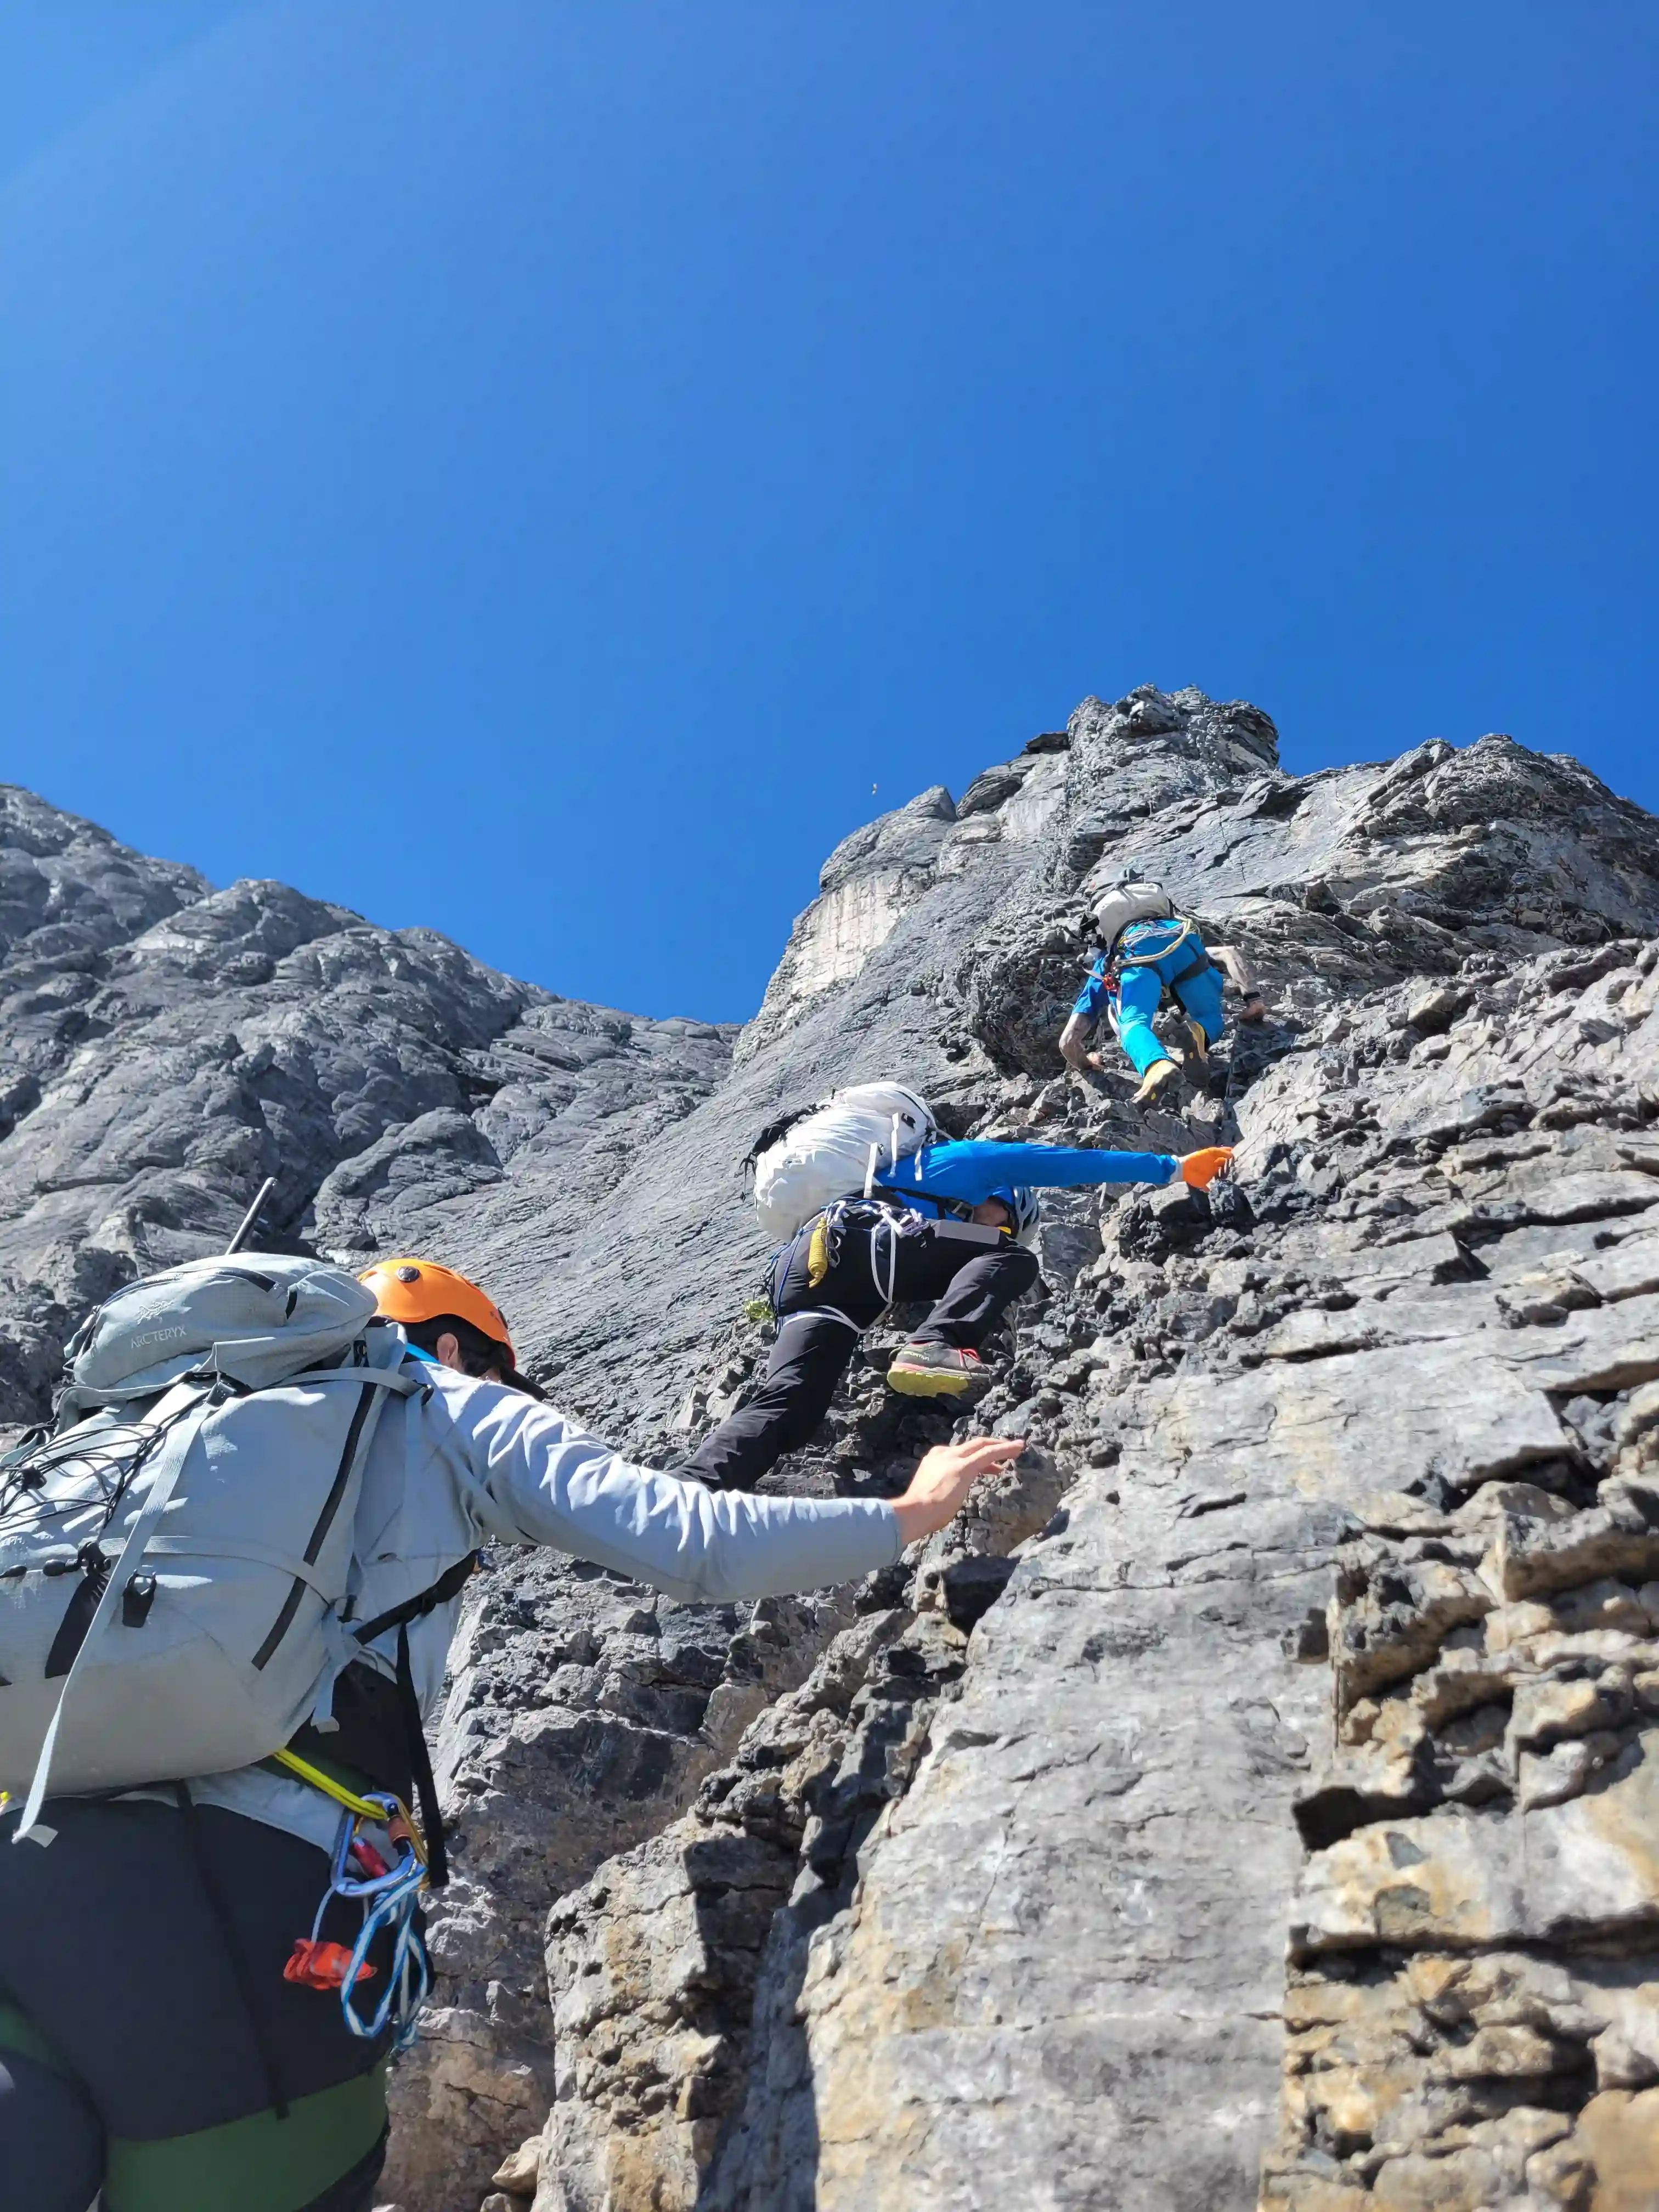
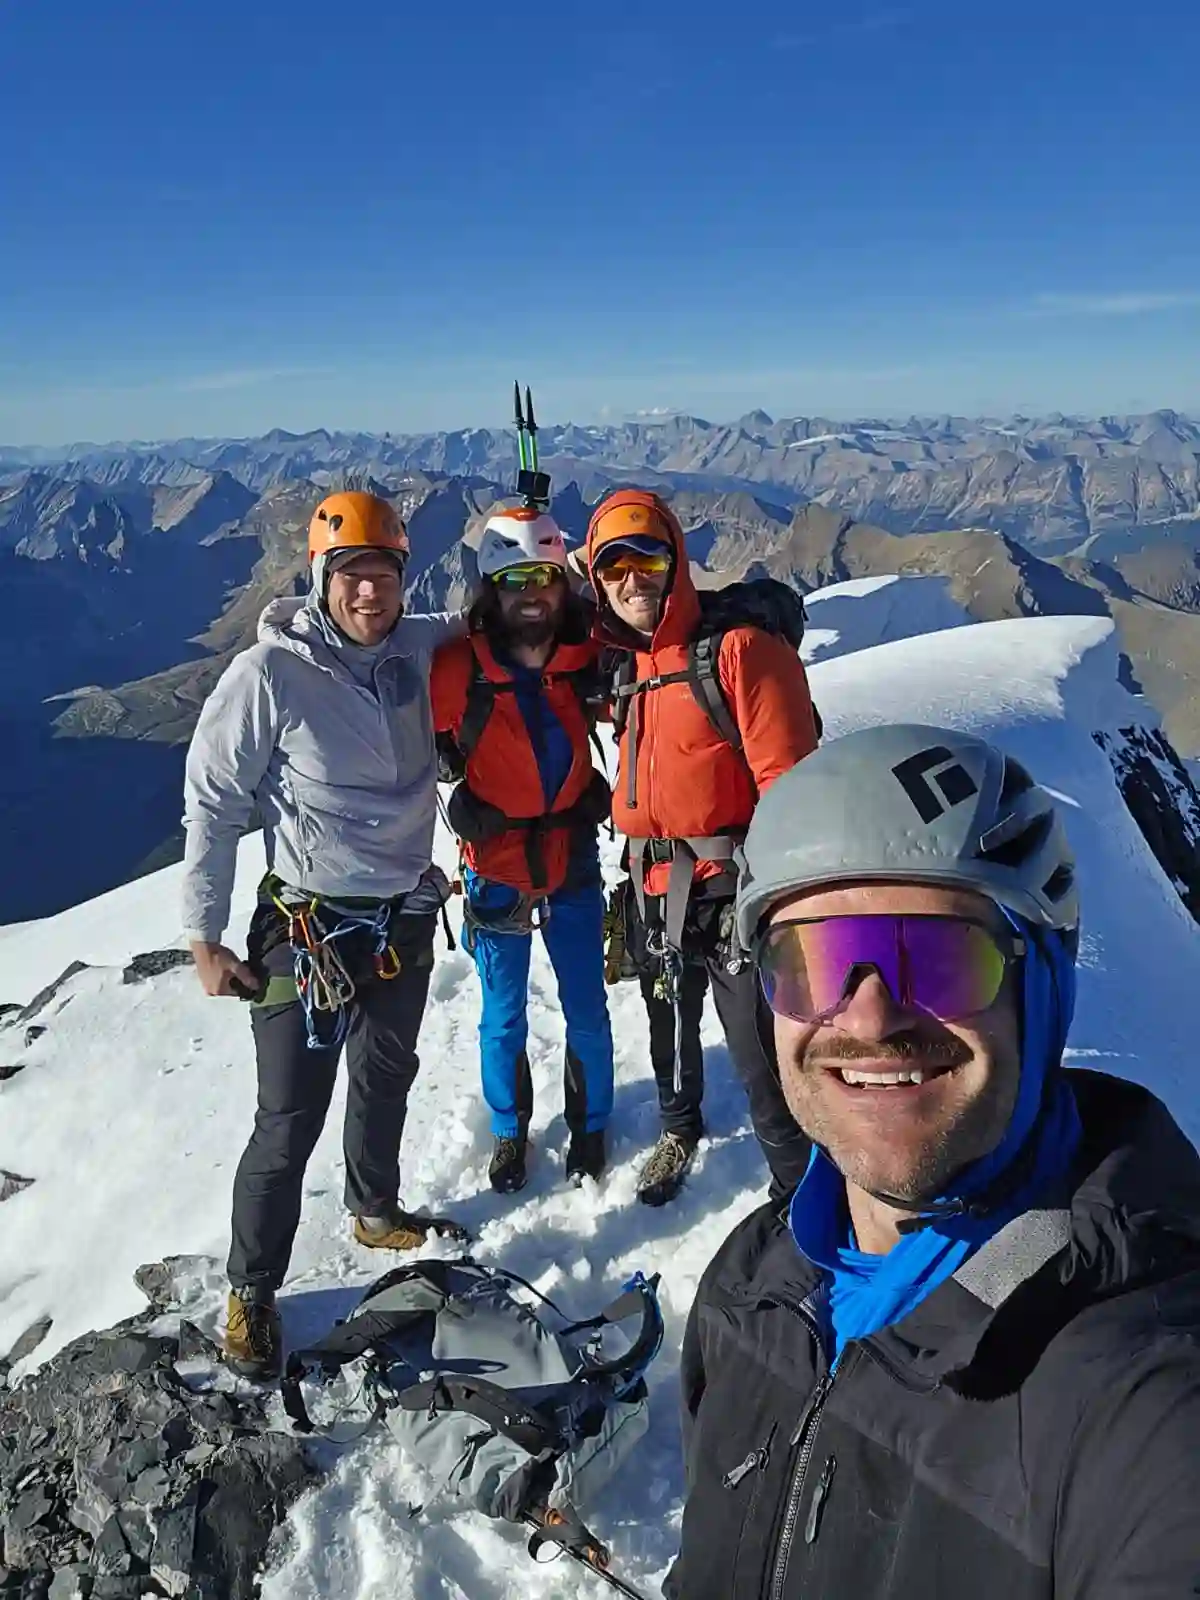
was also interested convinced us to push to a group of 3. What we hadn't planned for was that Tim wasn't initially available and I guess given that we were already planning for a group of 3 I felt comfortable inviting another, so when Mitchell Thomas who also has a large amount of 11000er and climbing experience expressed interest after we had been in communication for some time we decided to team up for the first time on this beast of an objective! The next unexpected turn in our planning was that a couple days out Tim had cleared his schedule and was free to join again but this put us at a group of 4, considered by most as far too large for Mount Alberta. I was a bit concerned about rockfall and the delays a big group can cause in technical terrain, but we weren't about to force anyone out and we were all exceedingly capable so we went for it with 4!
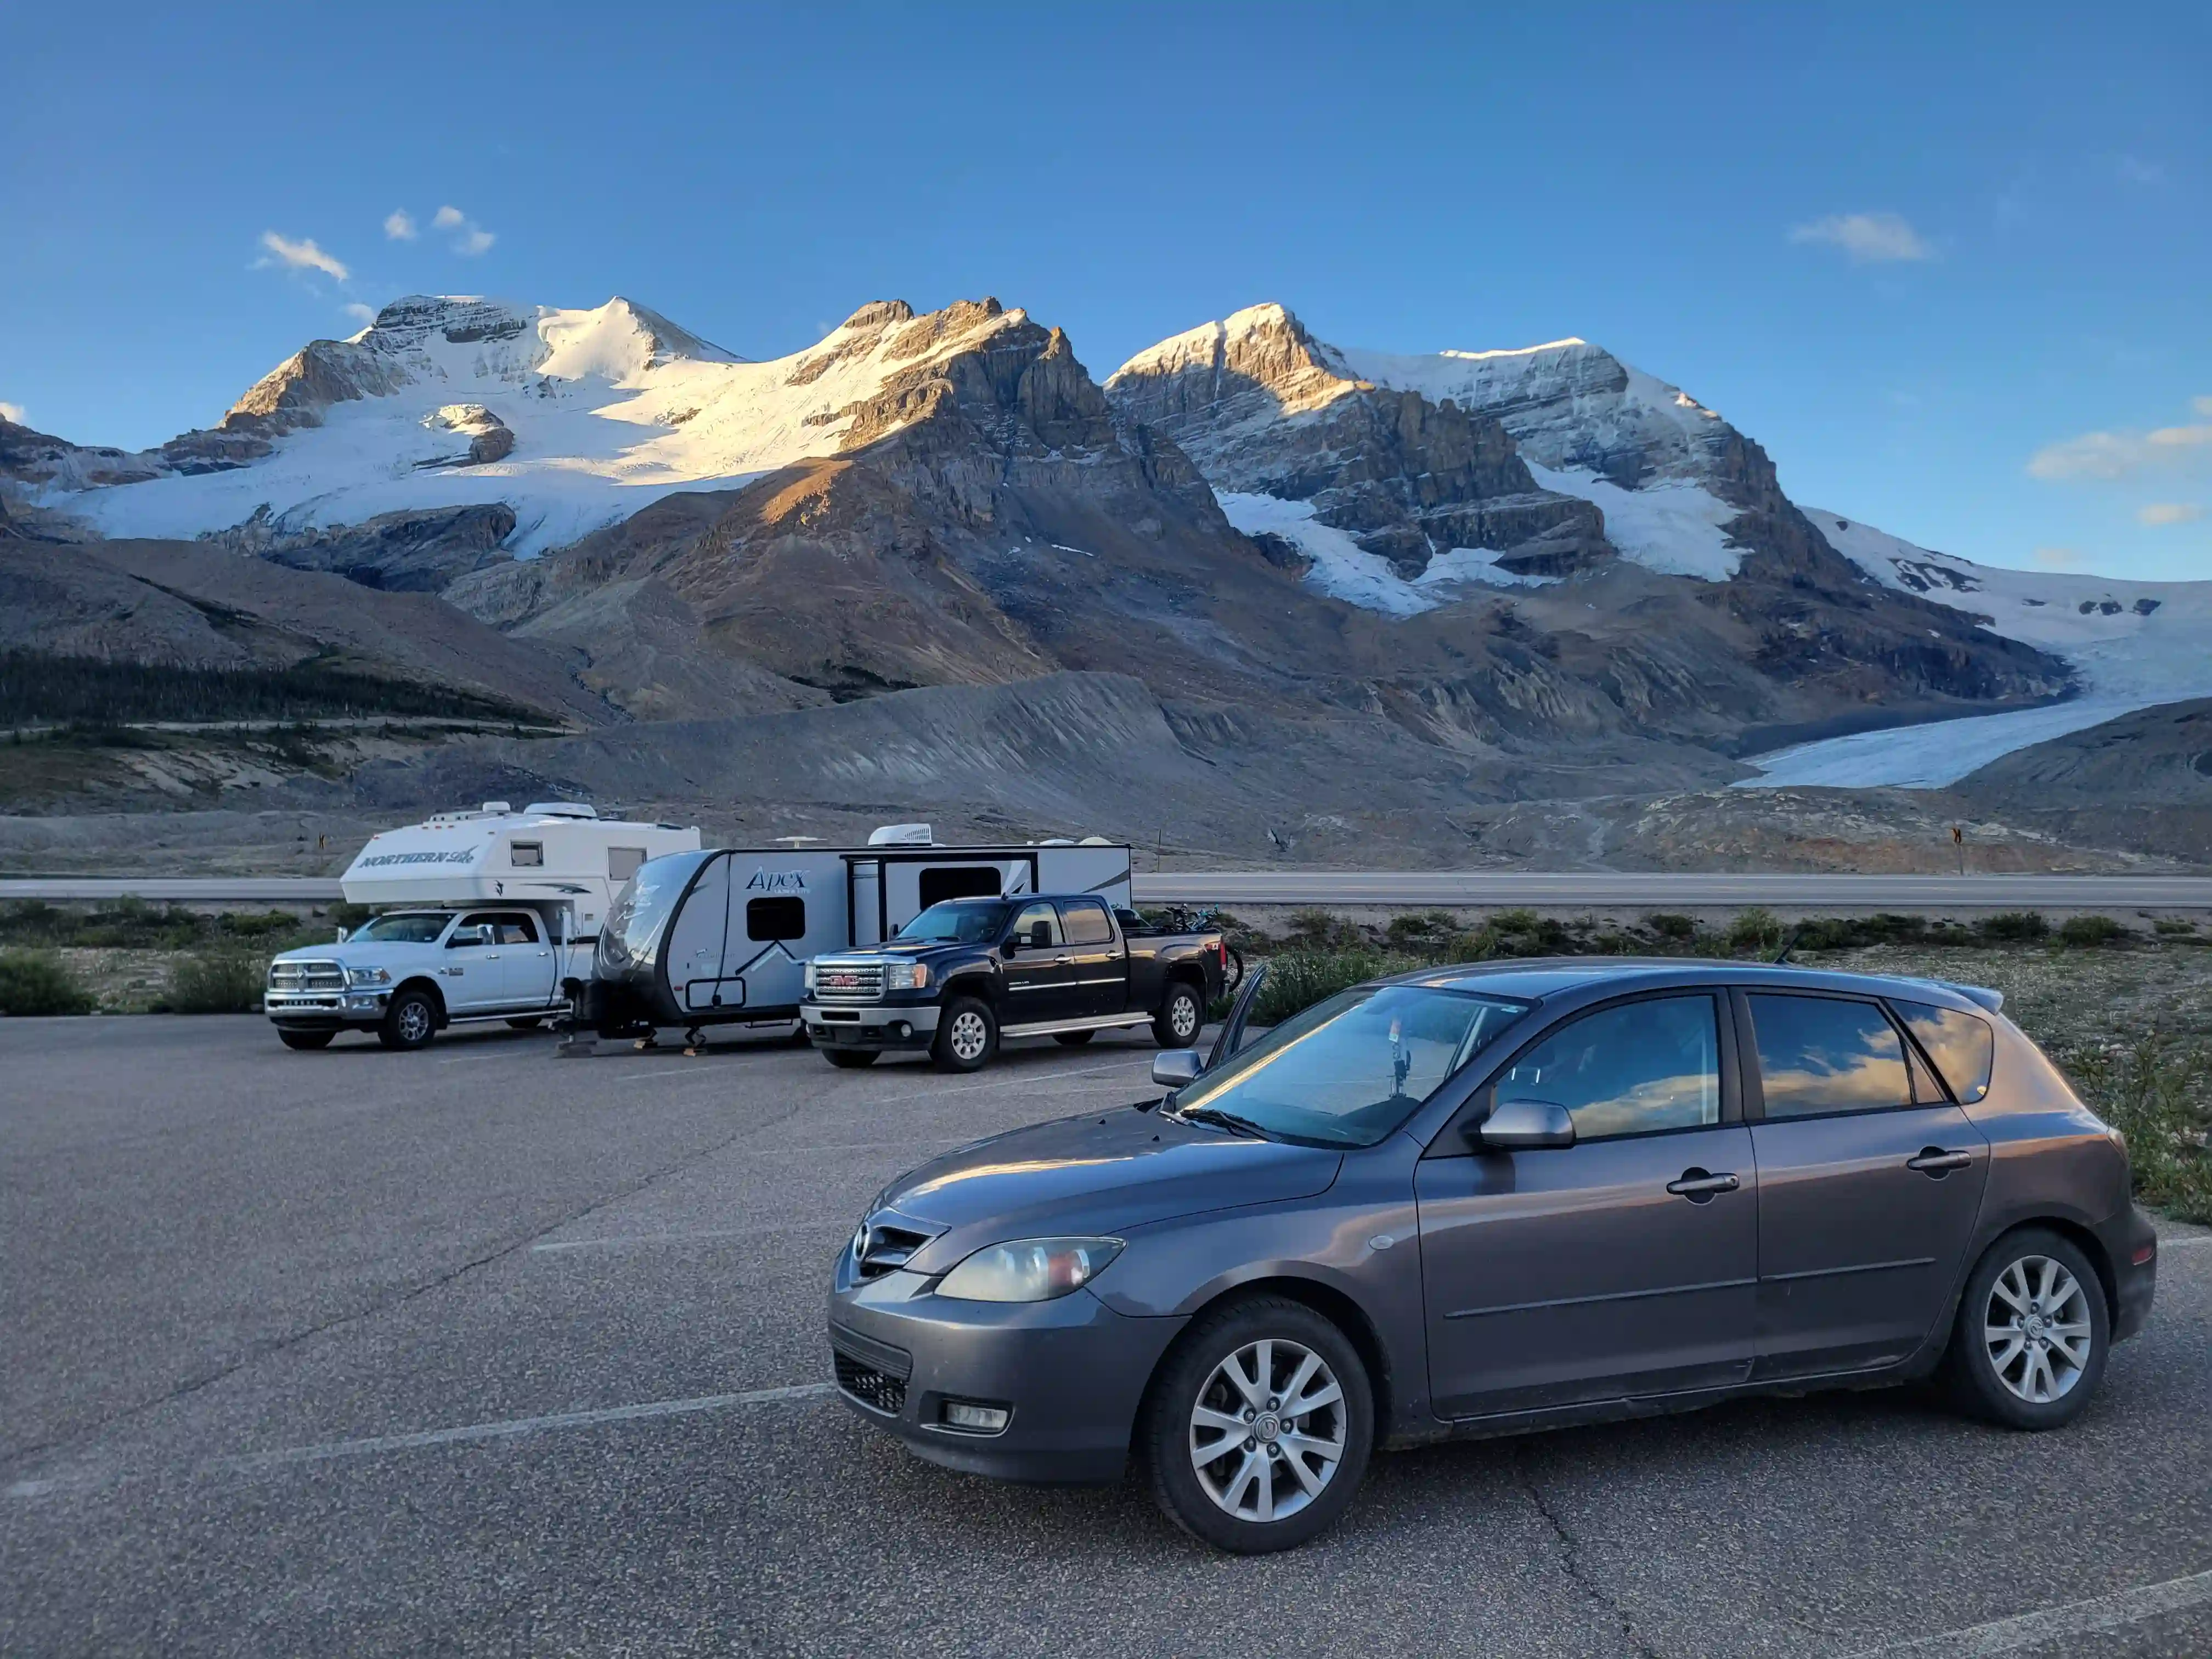
After a few days down near Pincher Creek for some coaching I was headed back up to Canmore the afternoon before our set approach day and after a number of hours spent packing I was headed for the Icefield Information Centre to car camp before meeting up with the crew early the next morning.
links:
STRAVA
|
GAIA
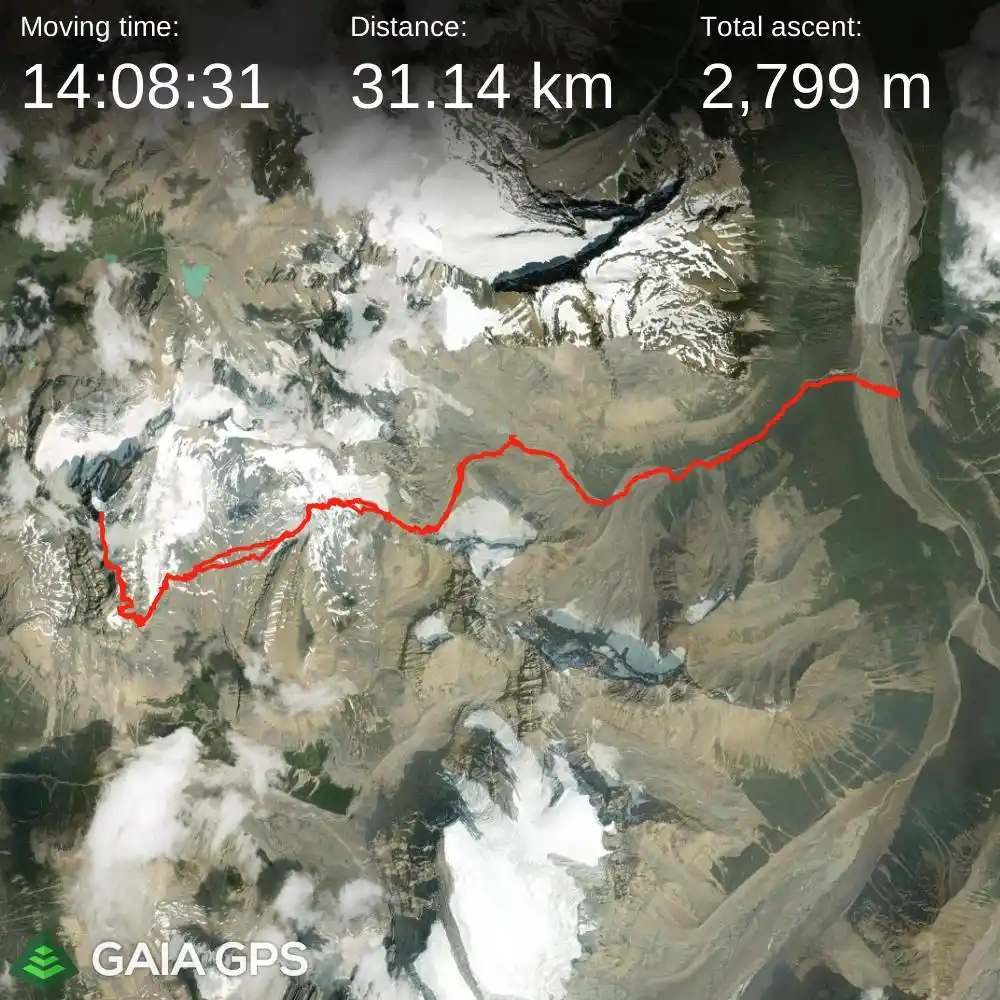
elapsed time: 60hrs
DIFFICULTY: D/D+, sustained 5th class up to 5.6-5.7, multiday, significant rockfall hazard, glacier travel, extremely committing, remote
Use the following links to jump to:
Follow the journey
I'll send you an email when a new trip report drops.
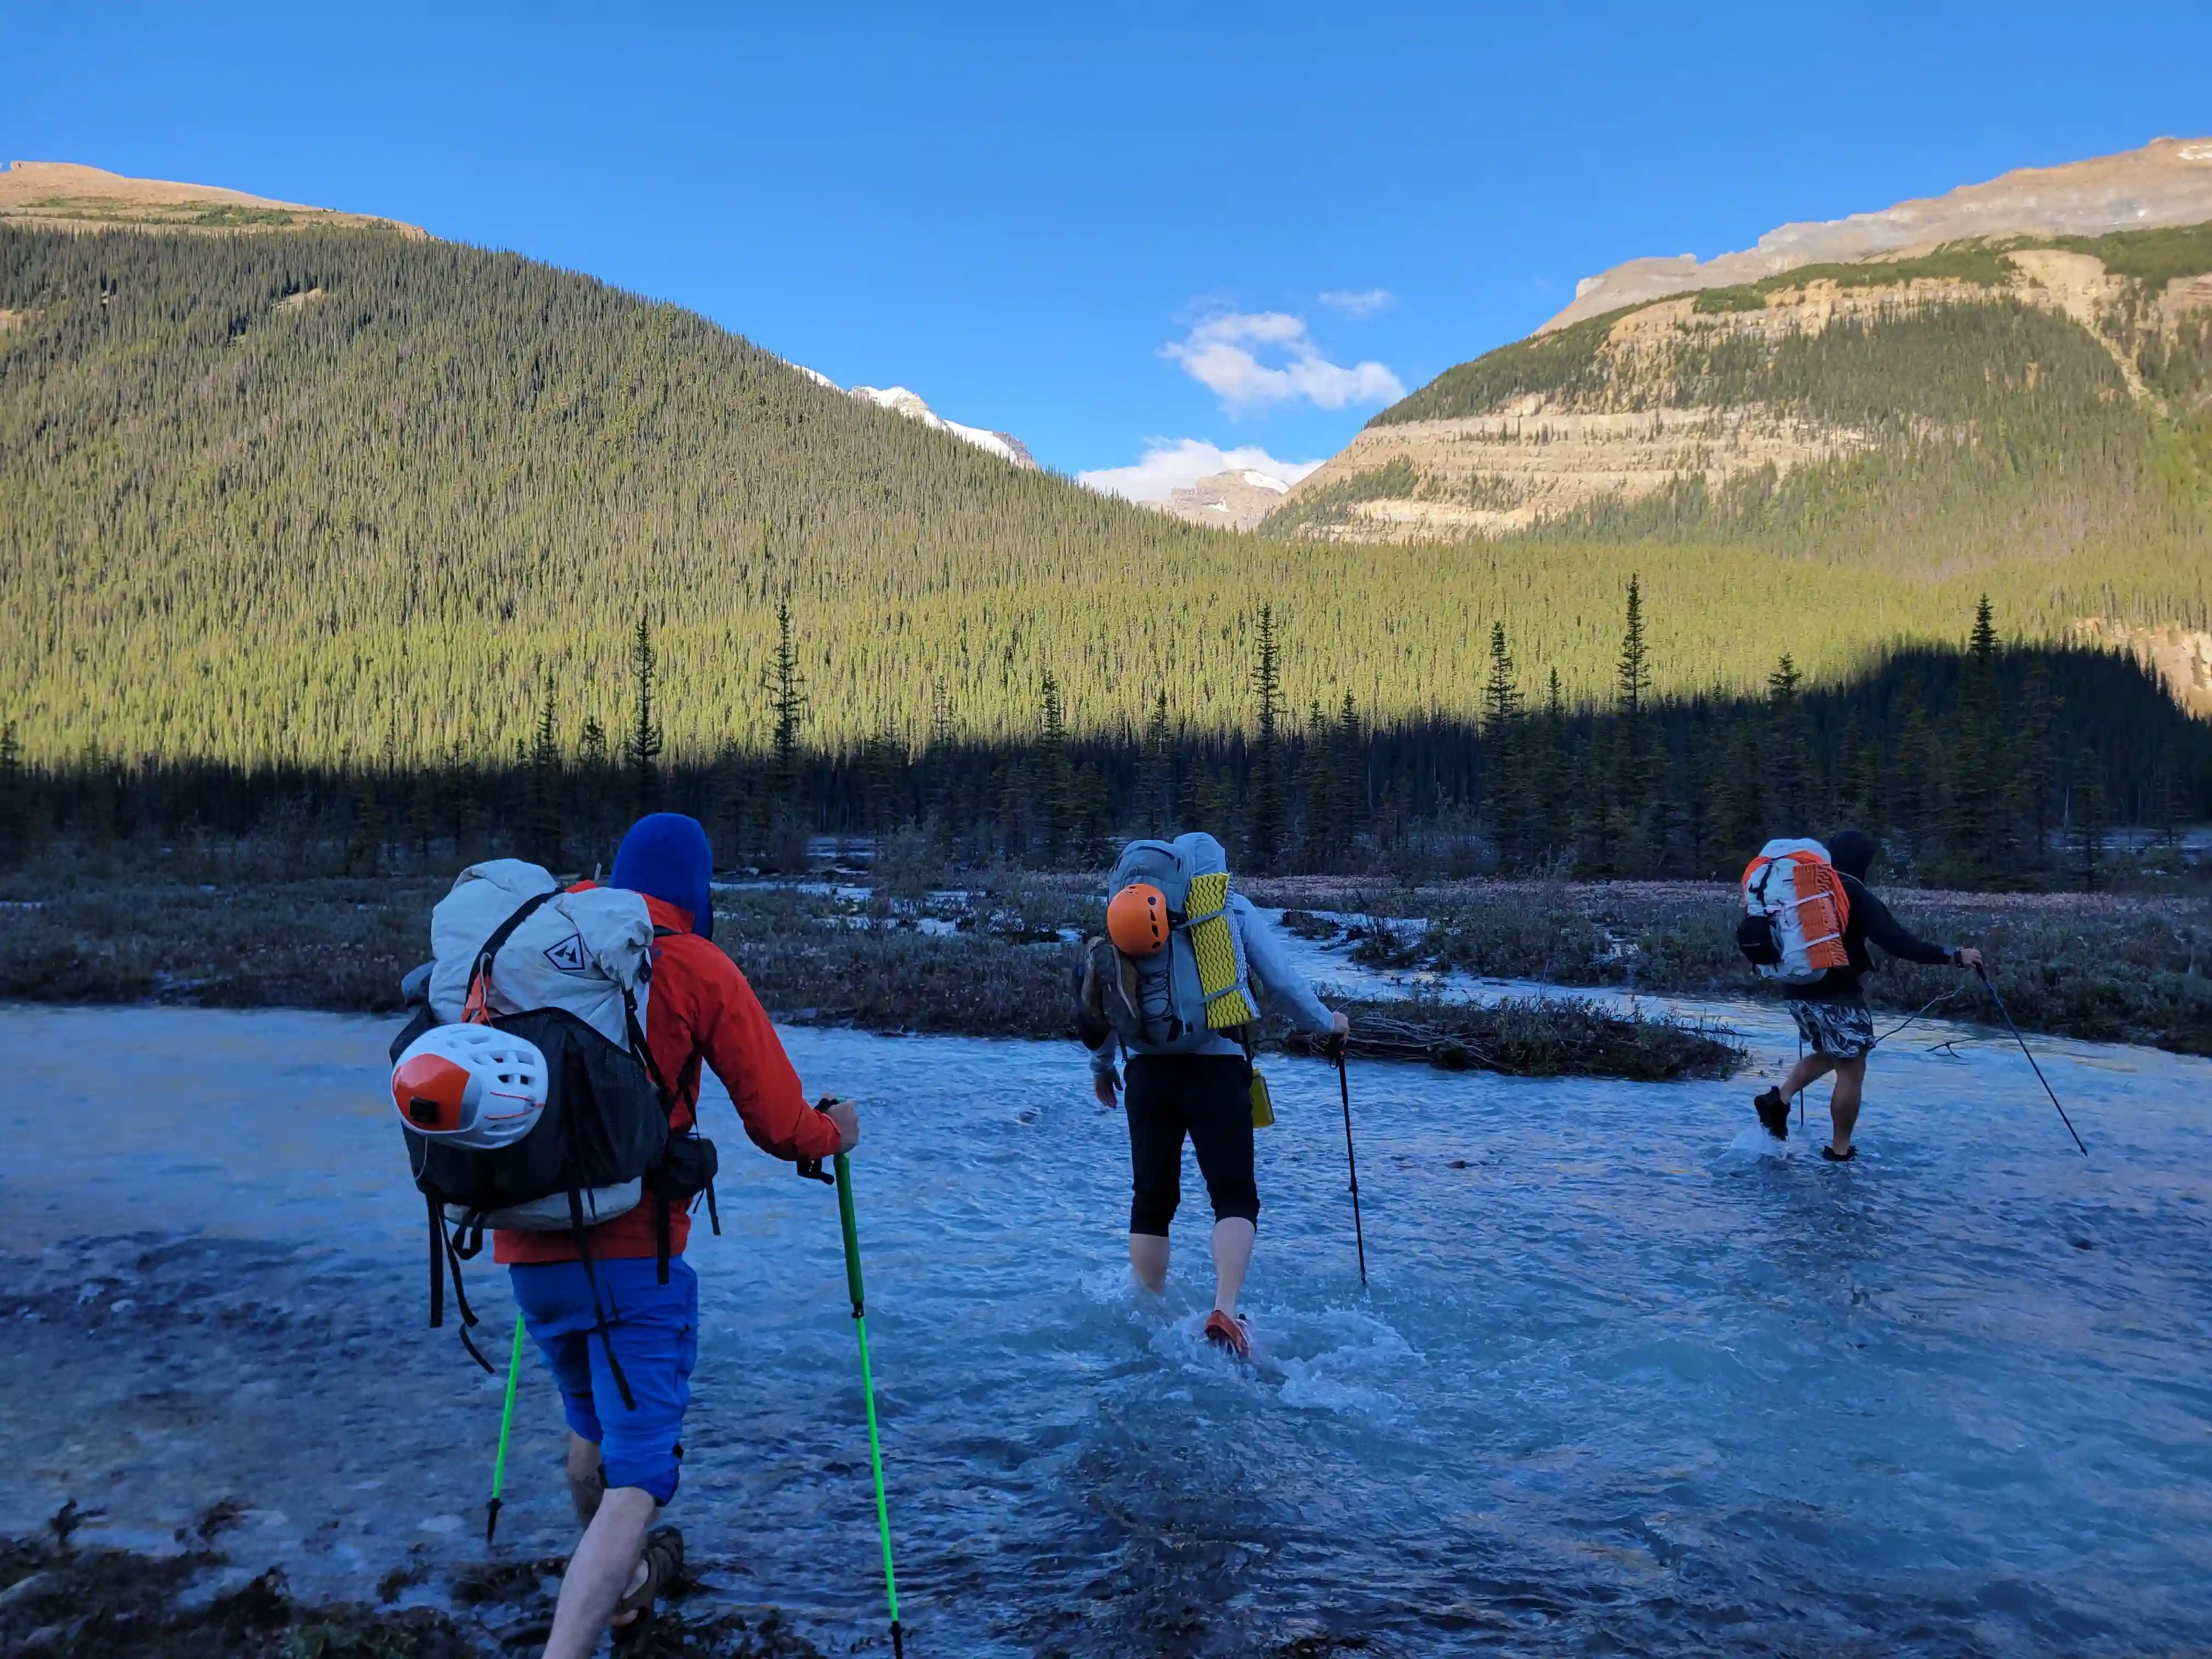
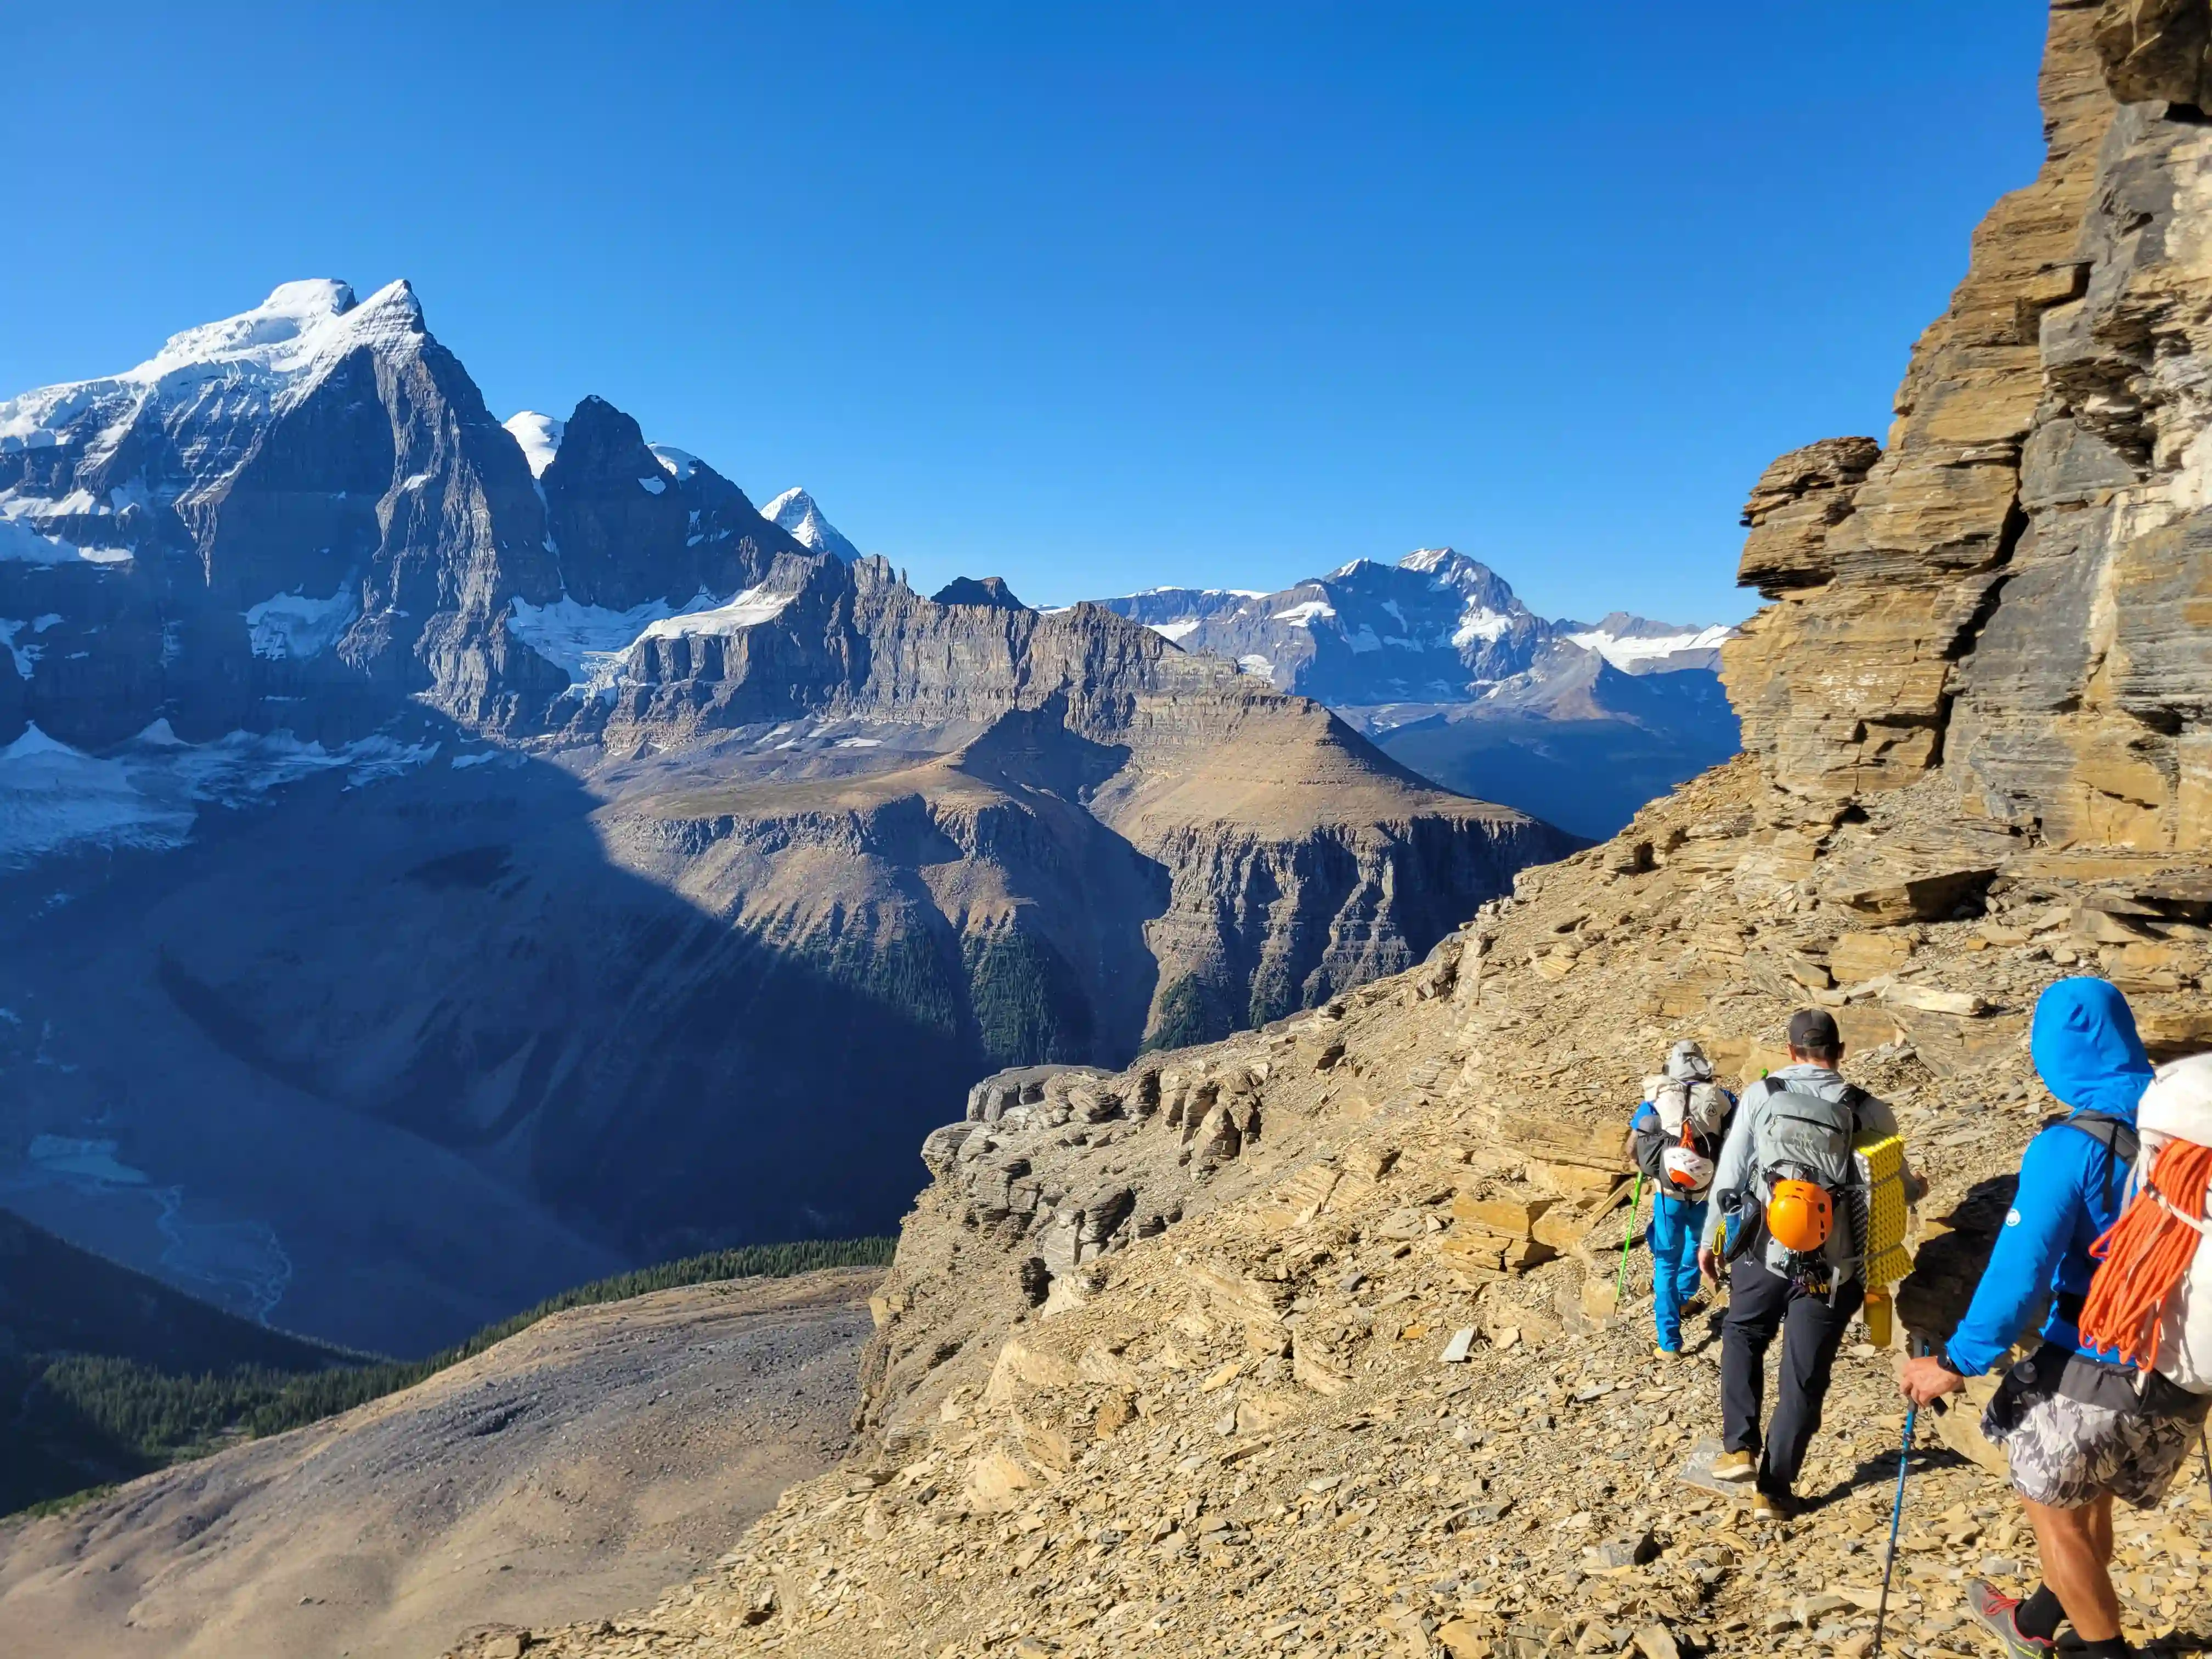
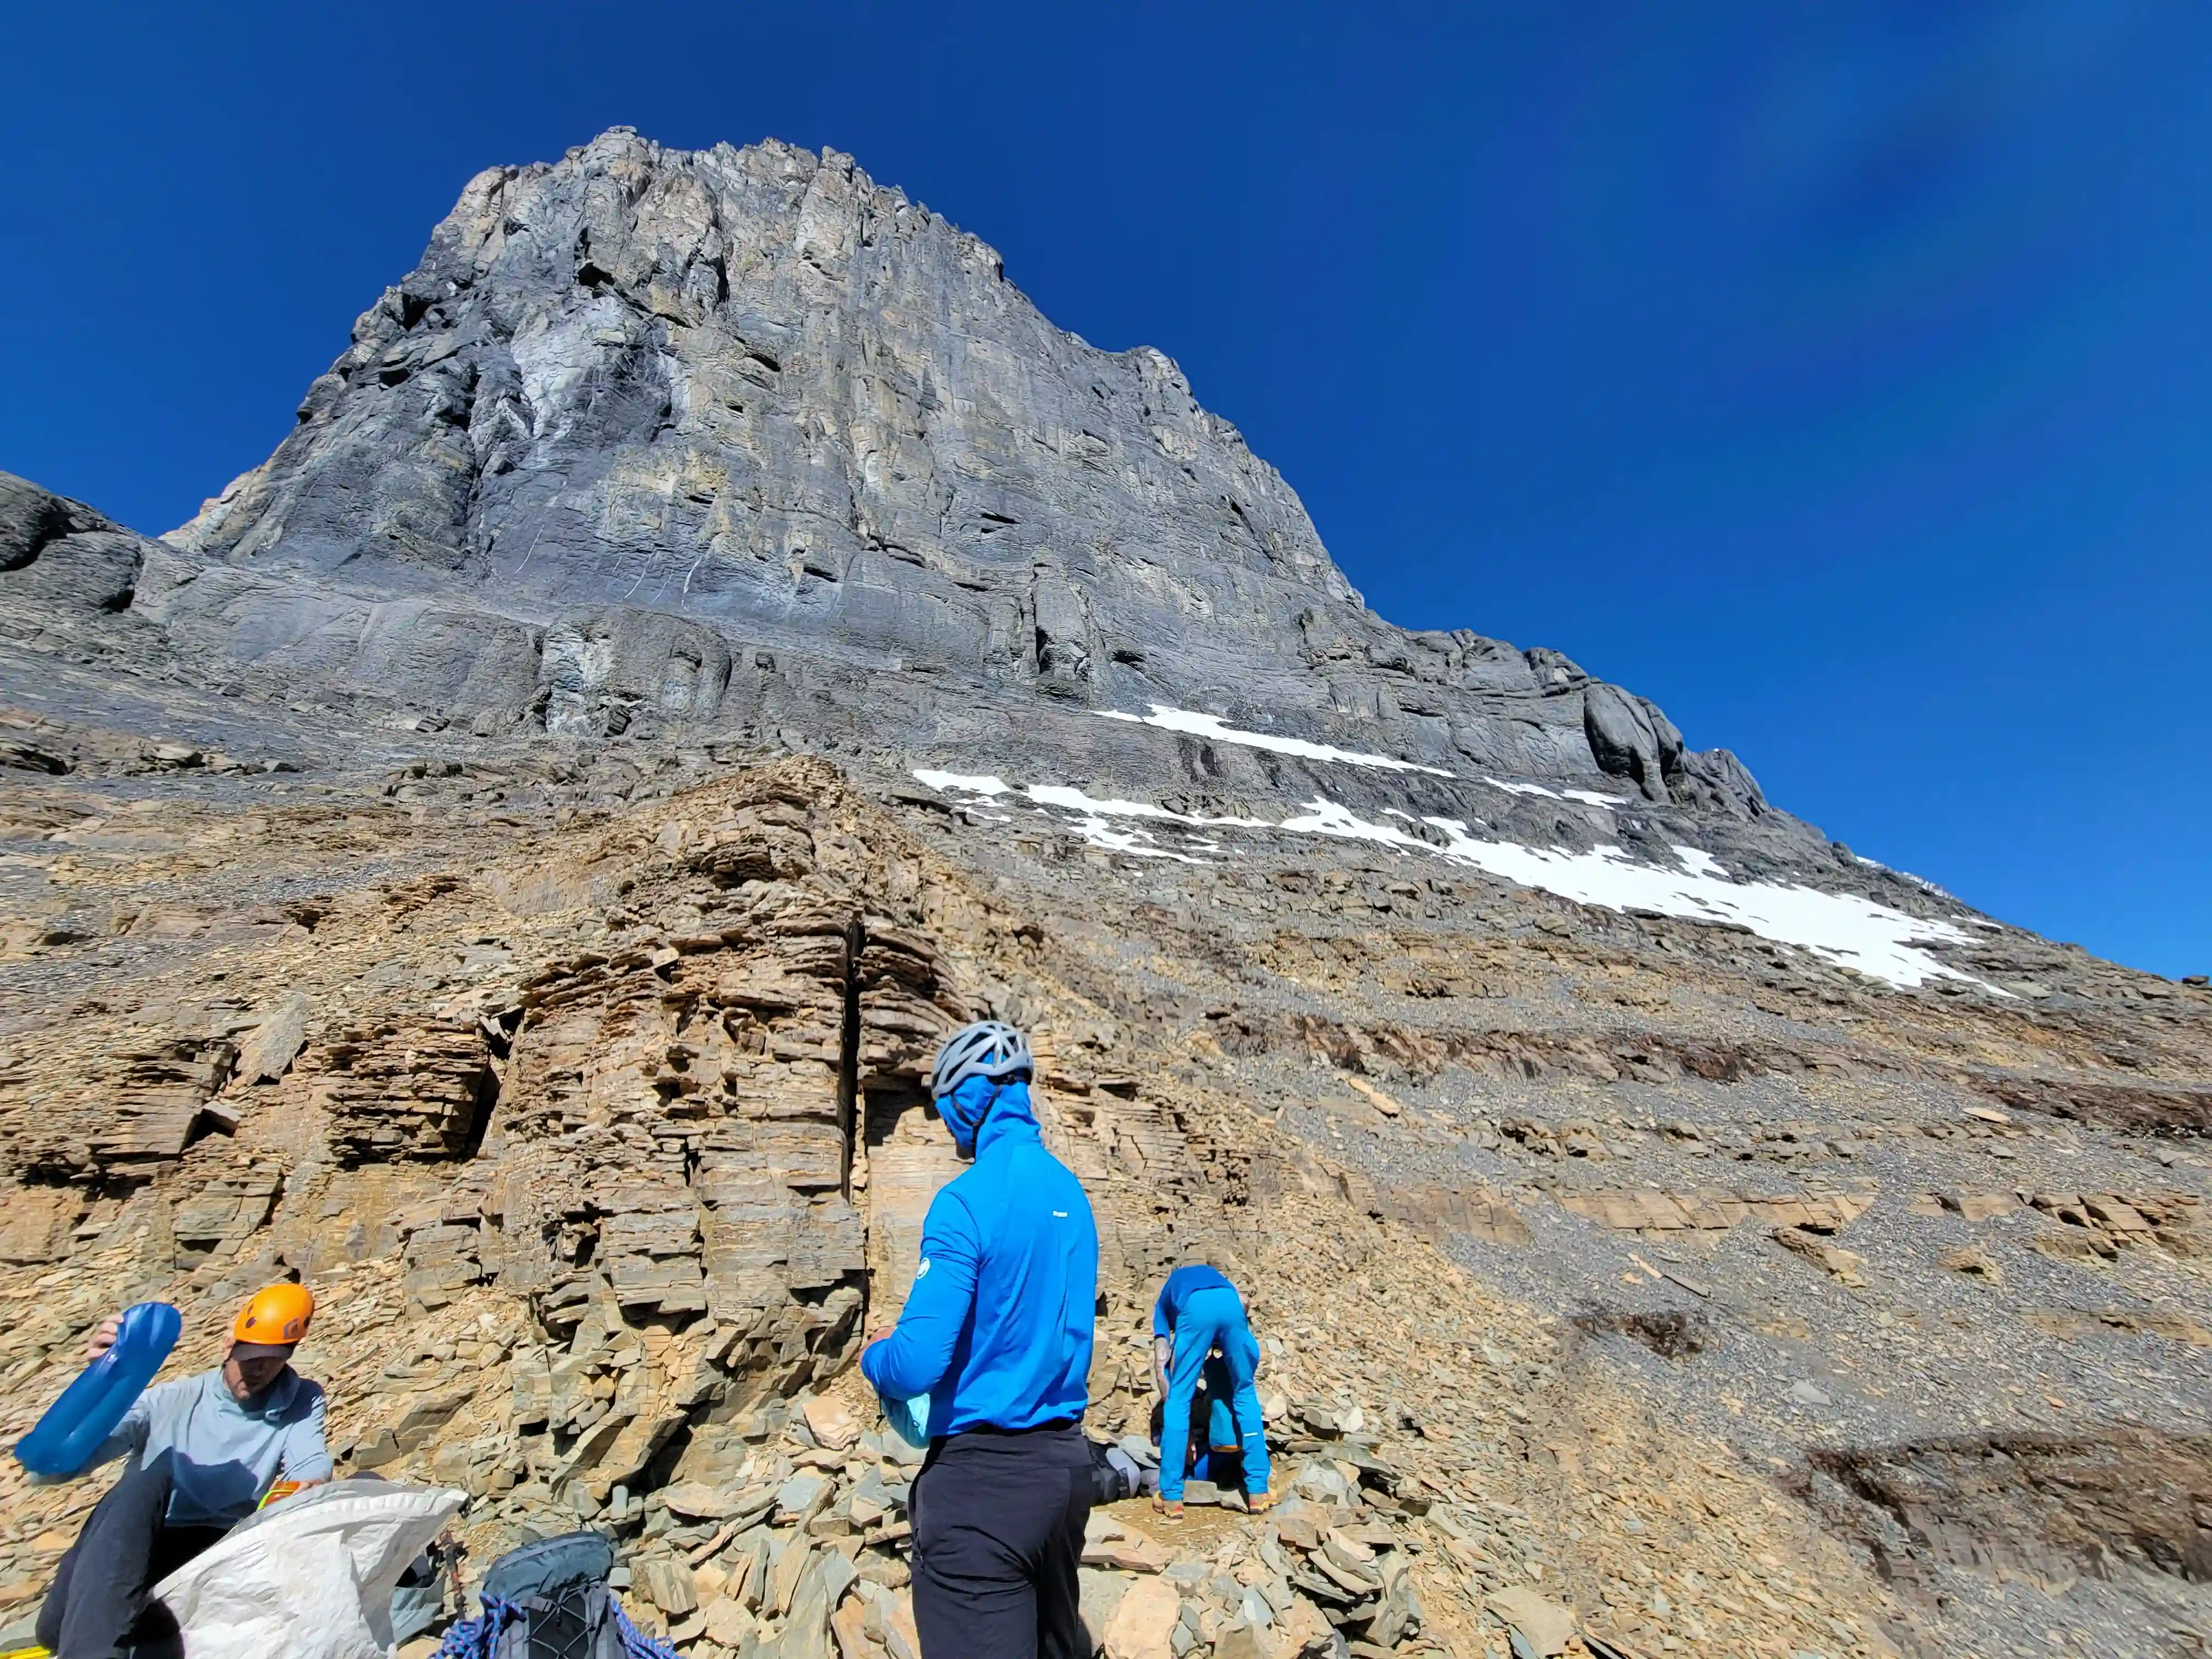
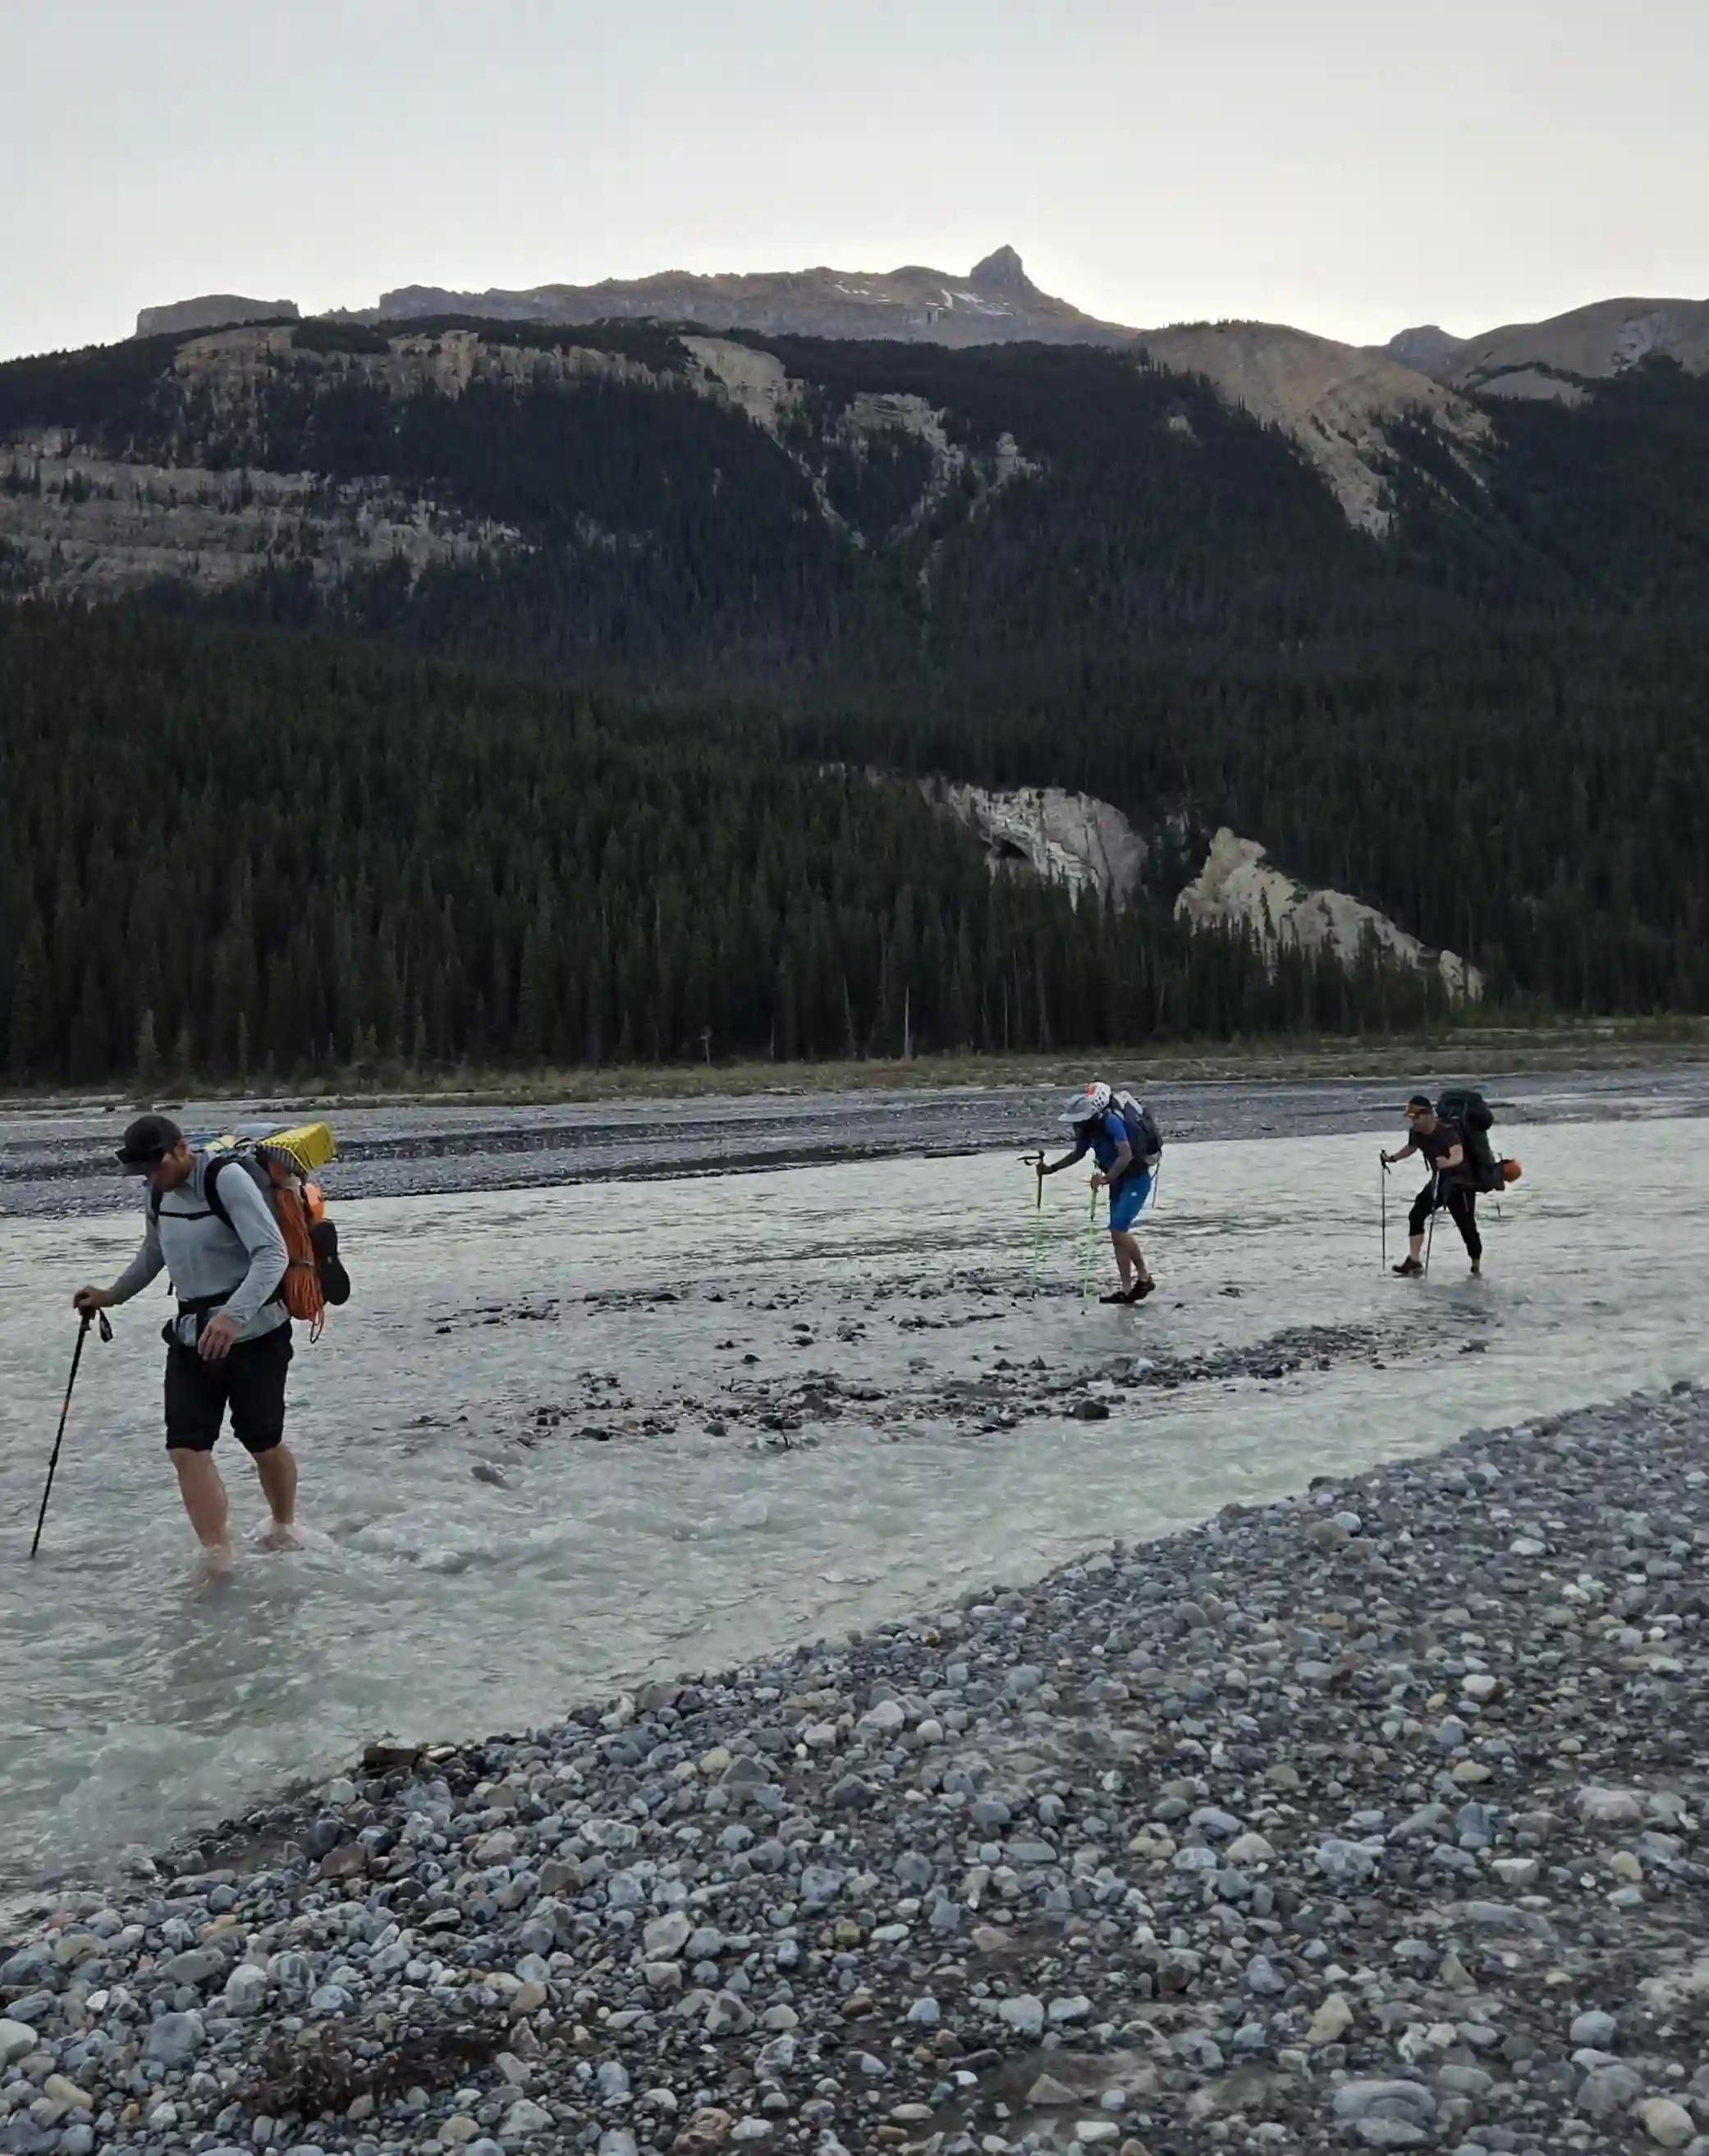
After meeting up at the Mount Alberta / Woolley and Diadem start point off the Icefields Parkway at 8 we had some decisions to make. Despite some frost on the east aspects of a few nearby peaks like Andromeda and Athabasca we decided to ditch the crampons, crampon captible footwear, and axes as we figured we wouldn't want to push for Alberta in conditions requiring that gear anyway, little did we know what was in store for us! After figuring out the amount of trad gear we wanted to bring we finalized our packs and headed for the Sunwapta River in our water crossing footwear. It was 9am by the time we got started so the river level was quite low and braided making for easy crossing but one or two deeper sections required a bit of focus and didn't take long to freeze the toes! Once we reached the other side we ditched the river shoes and noticed 4 other pairs which made us wonder whether we might encounter another party going for Alberta or potentially Woolley and Diadem at the same time as us.
sign but we didn't think much of it
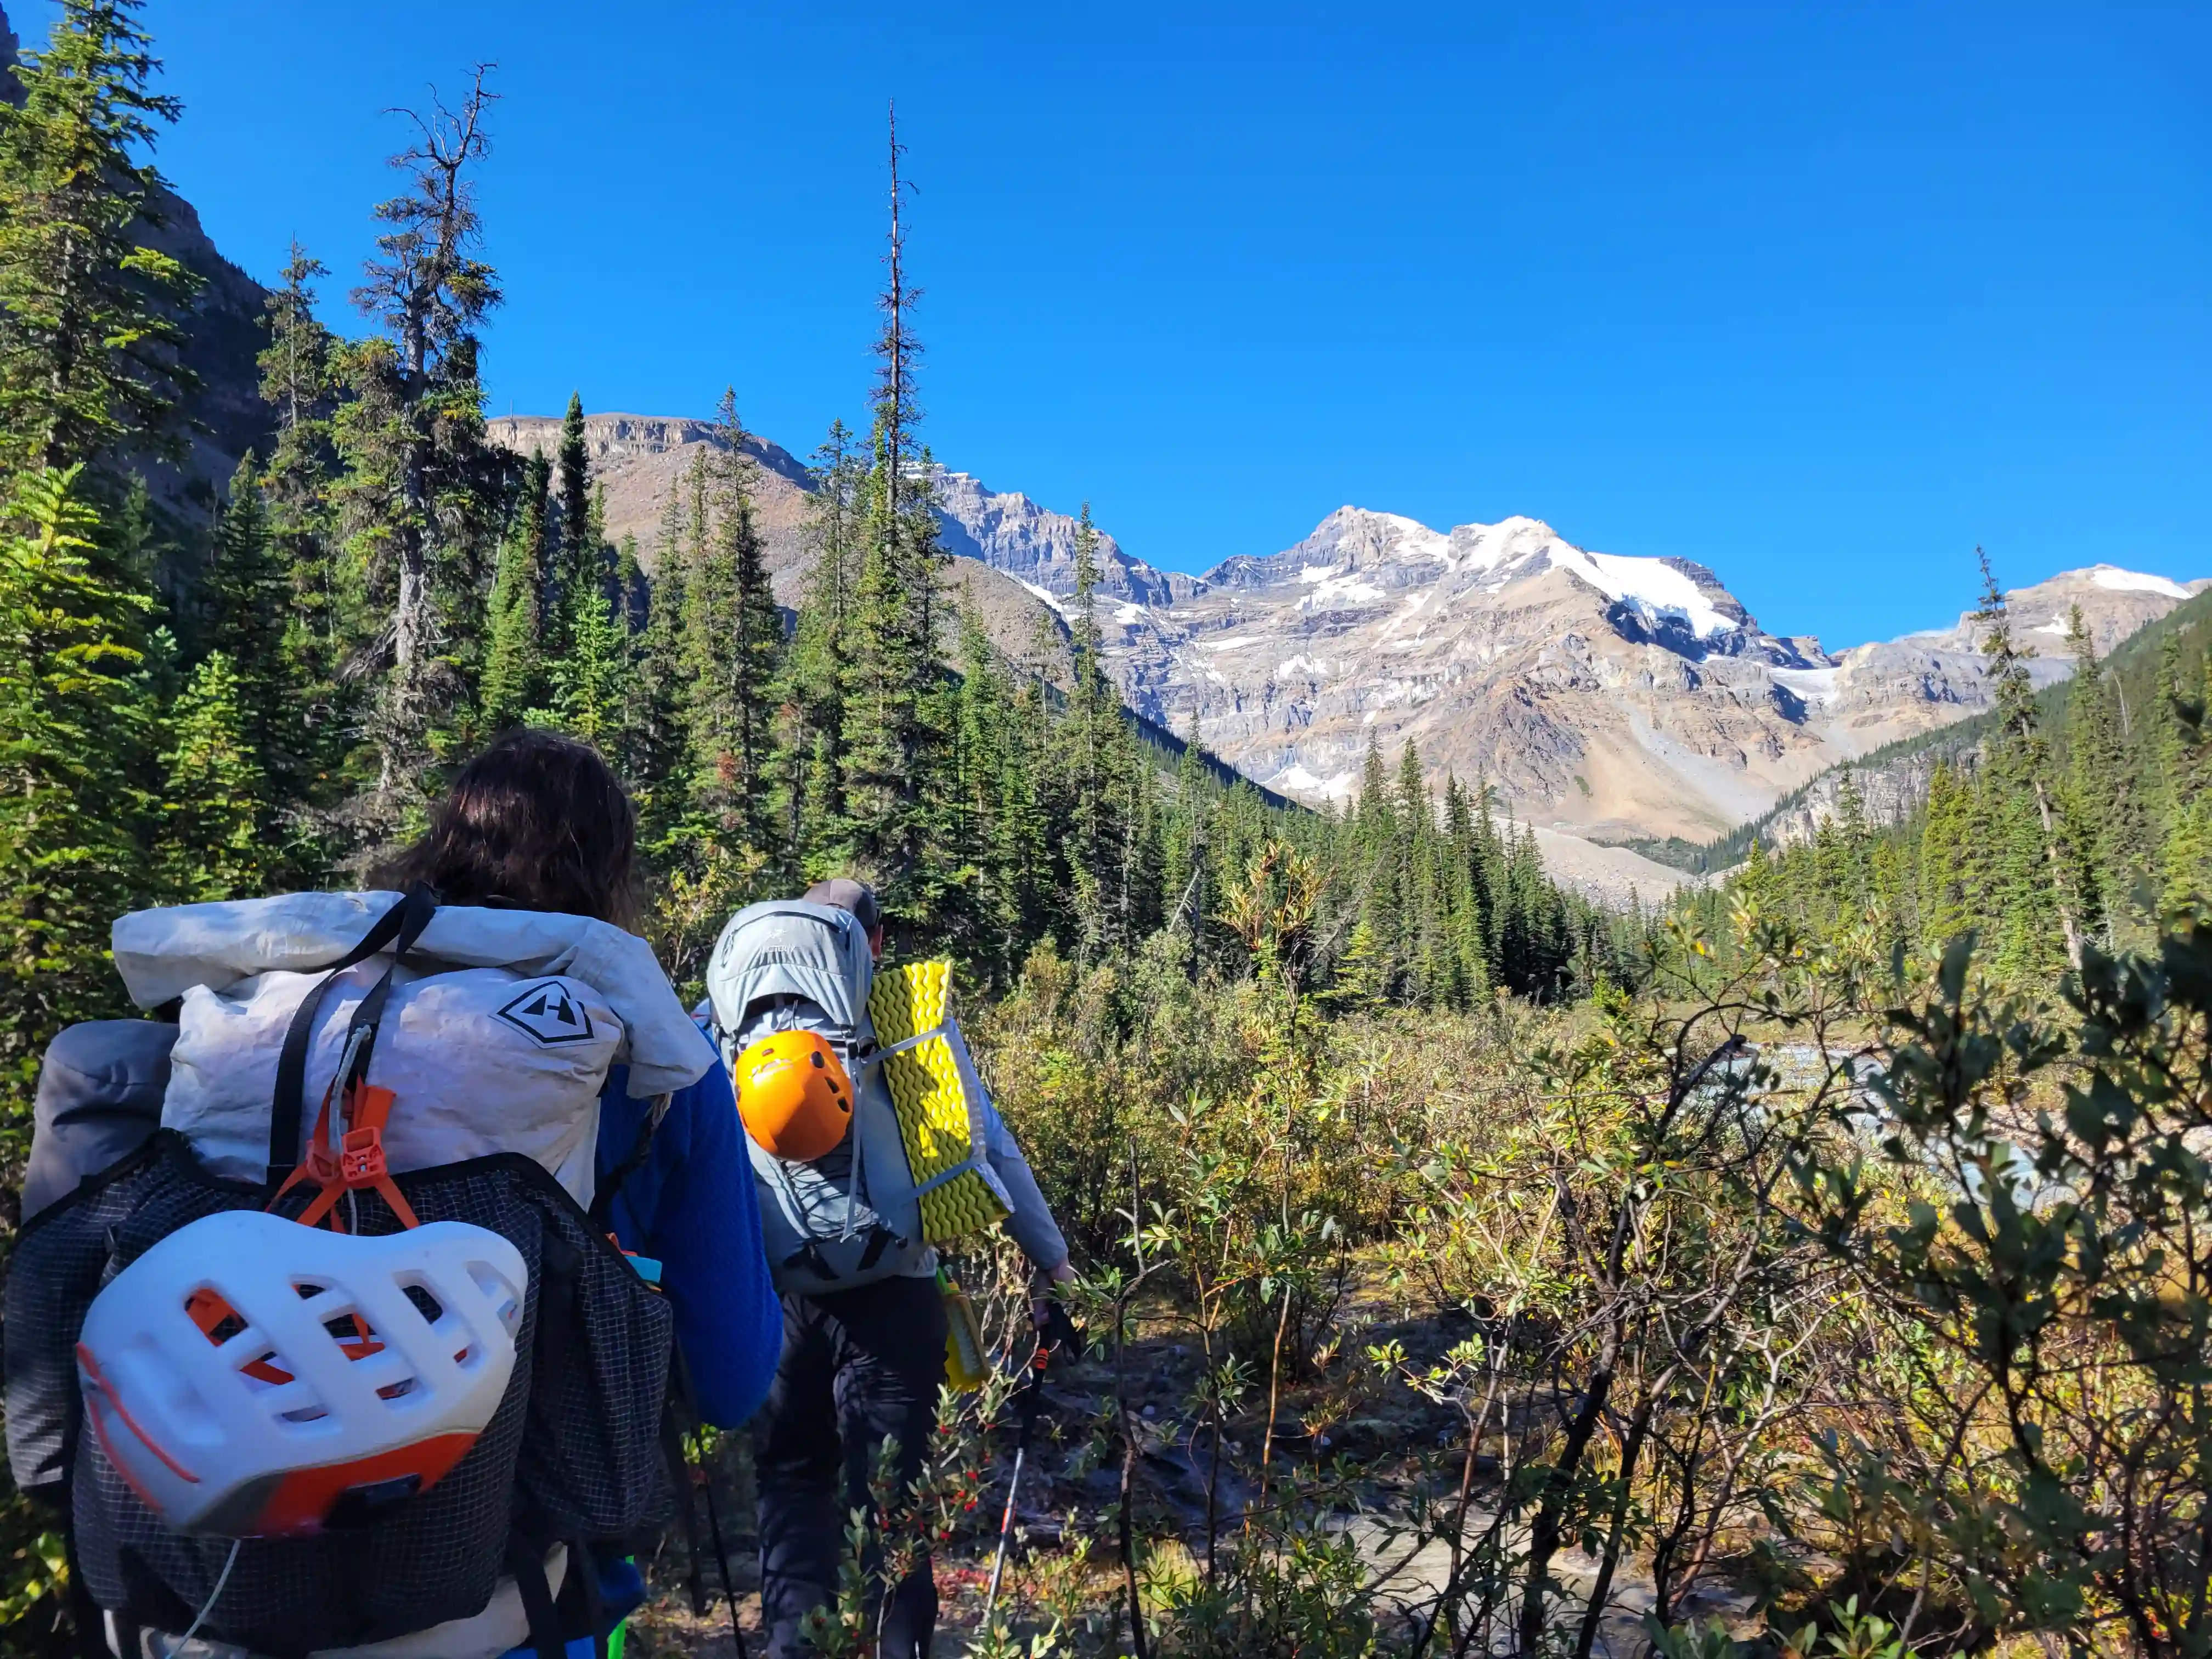
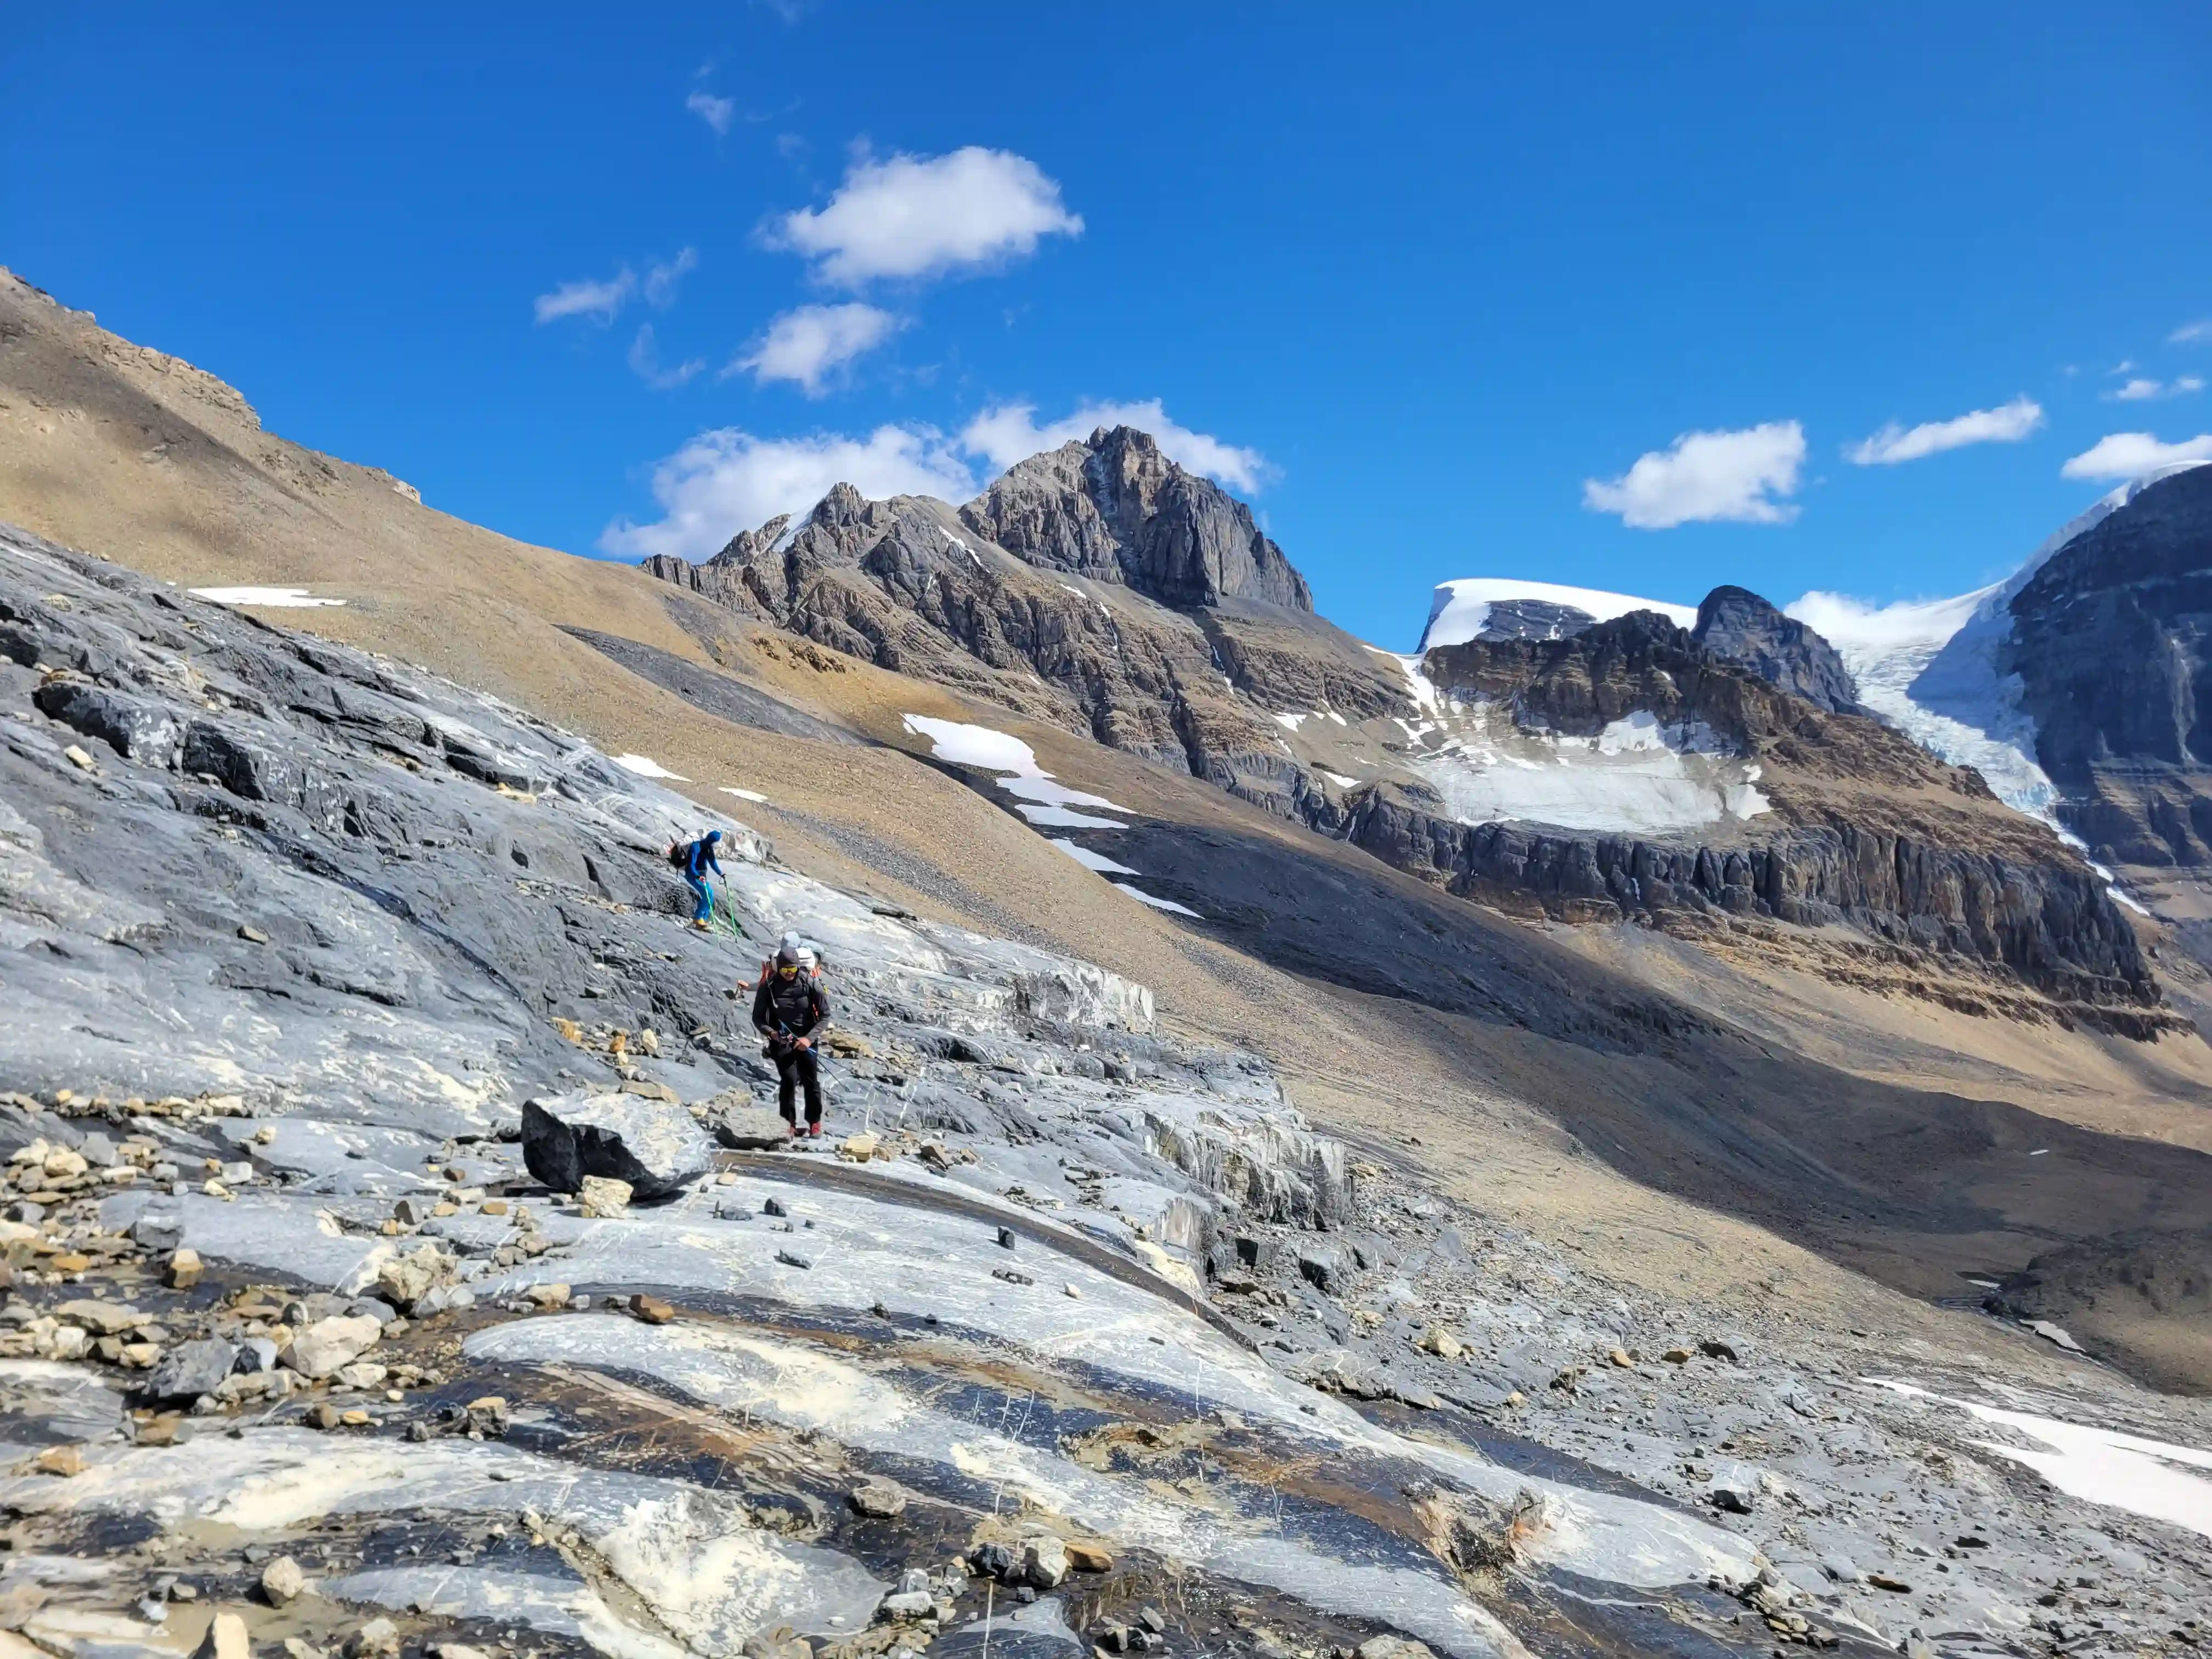
THE APPROACH
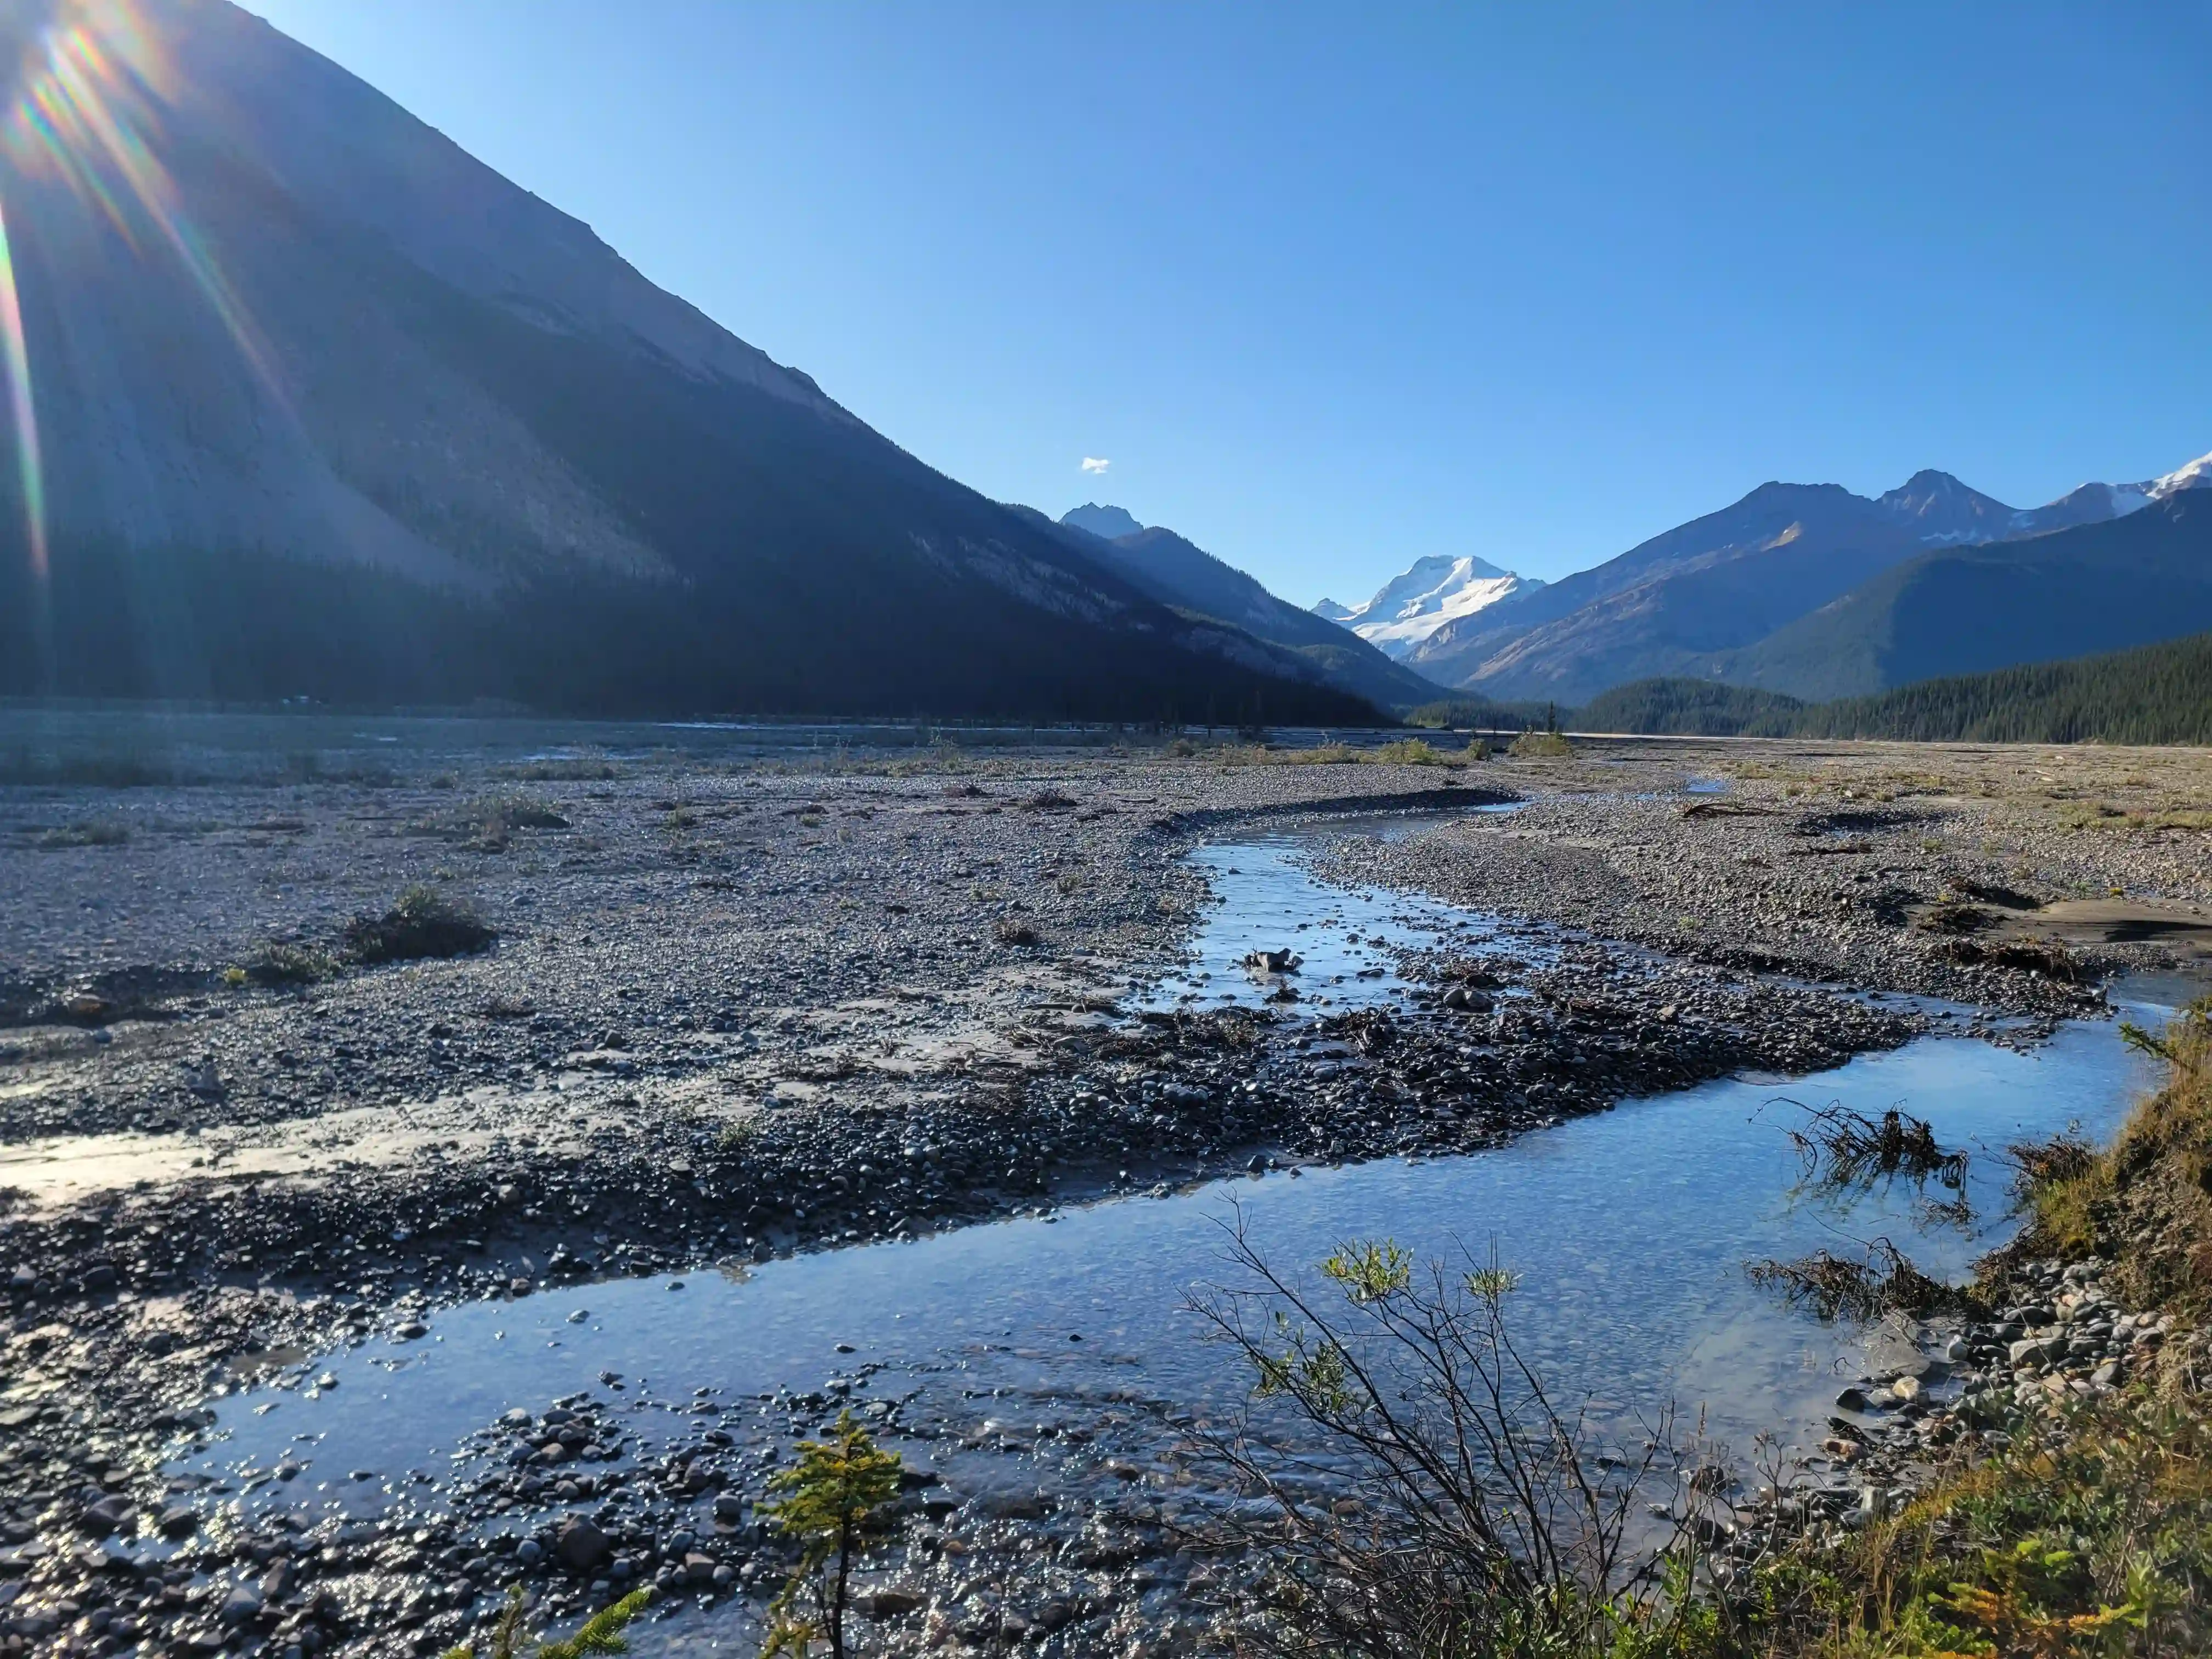
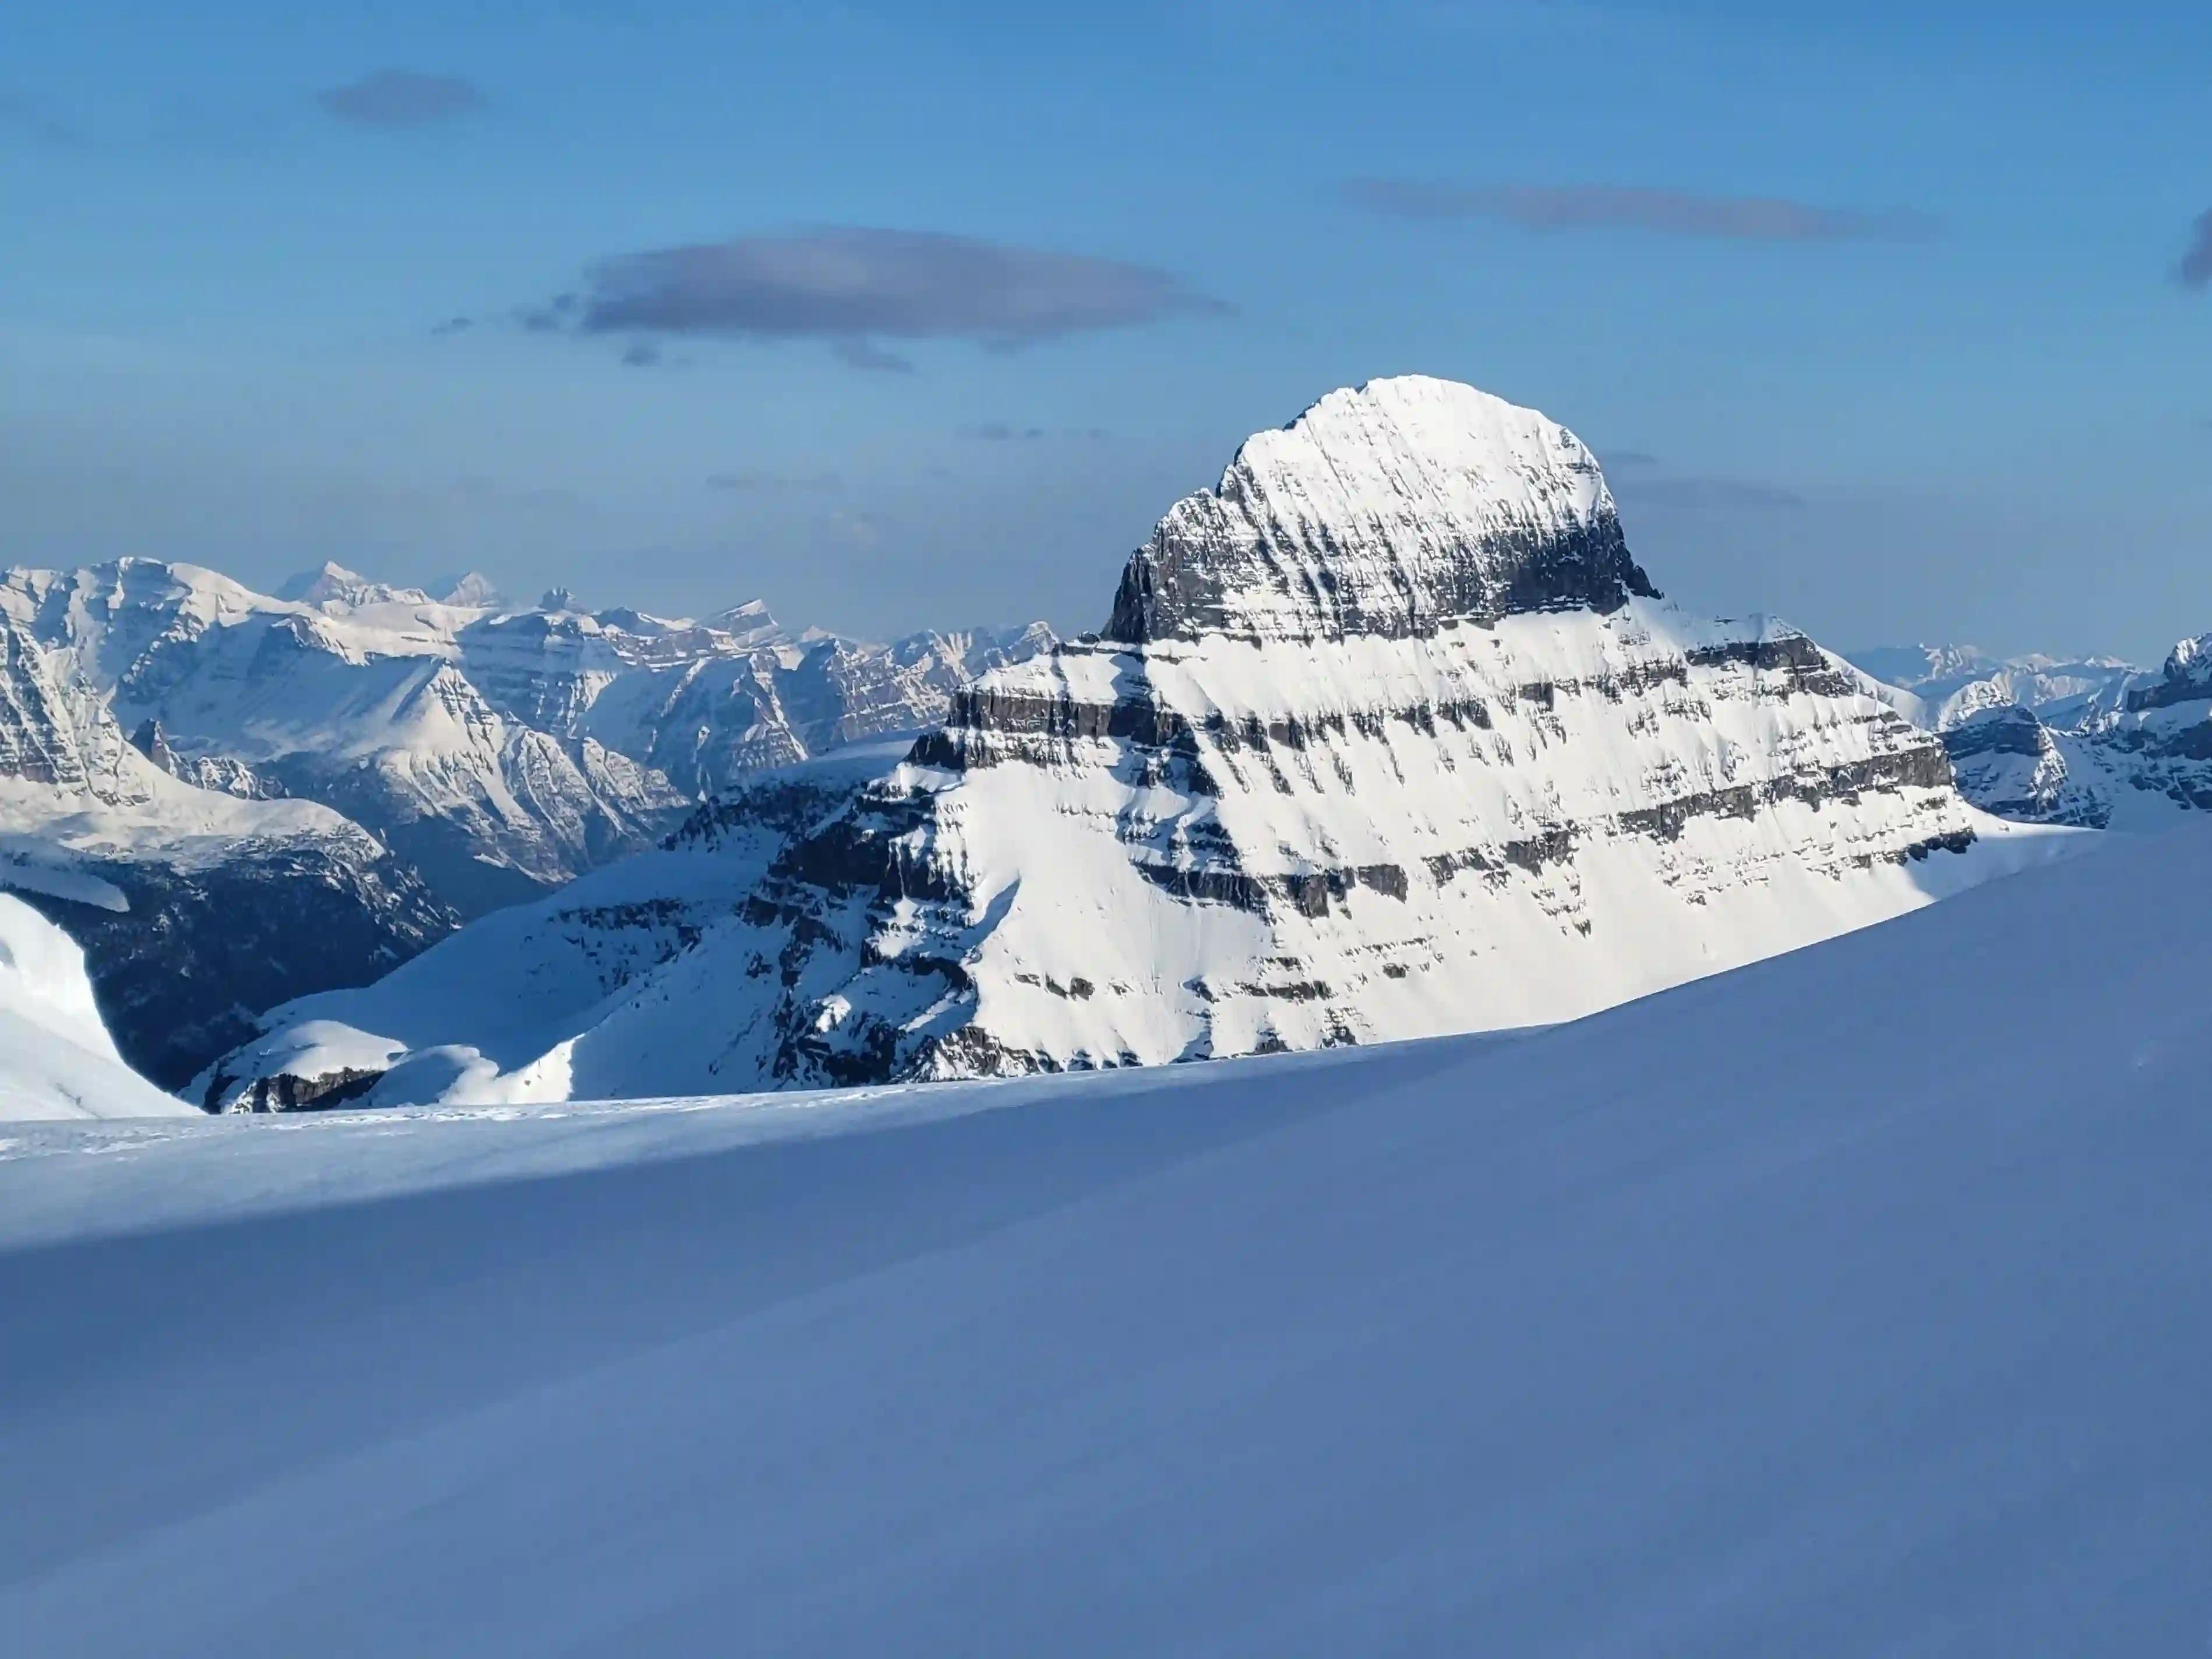
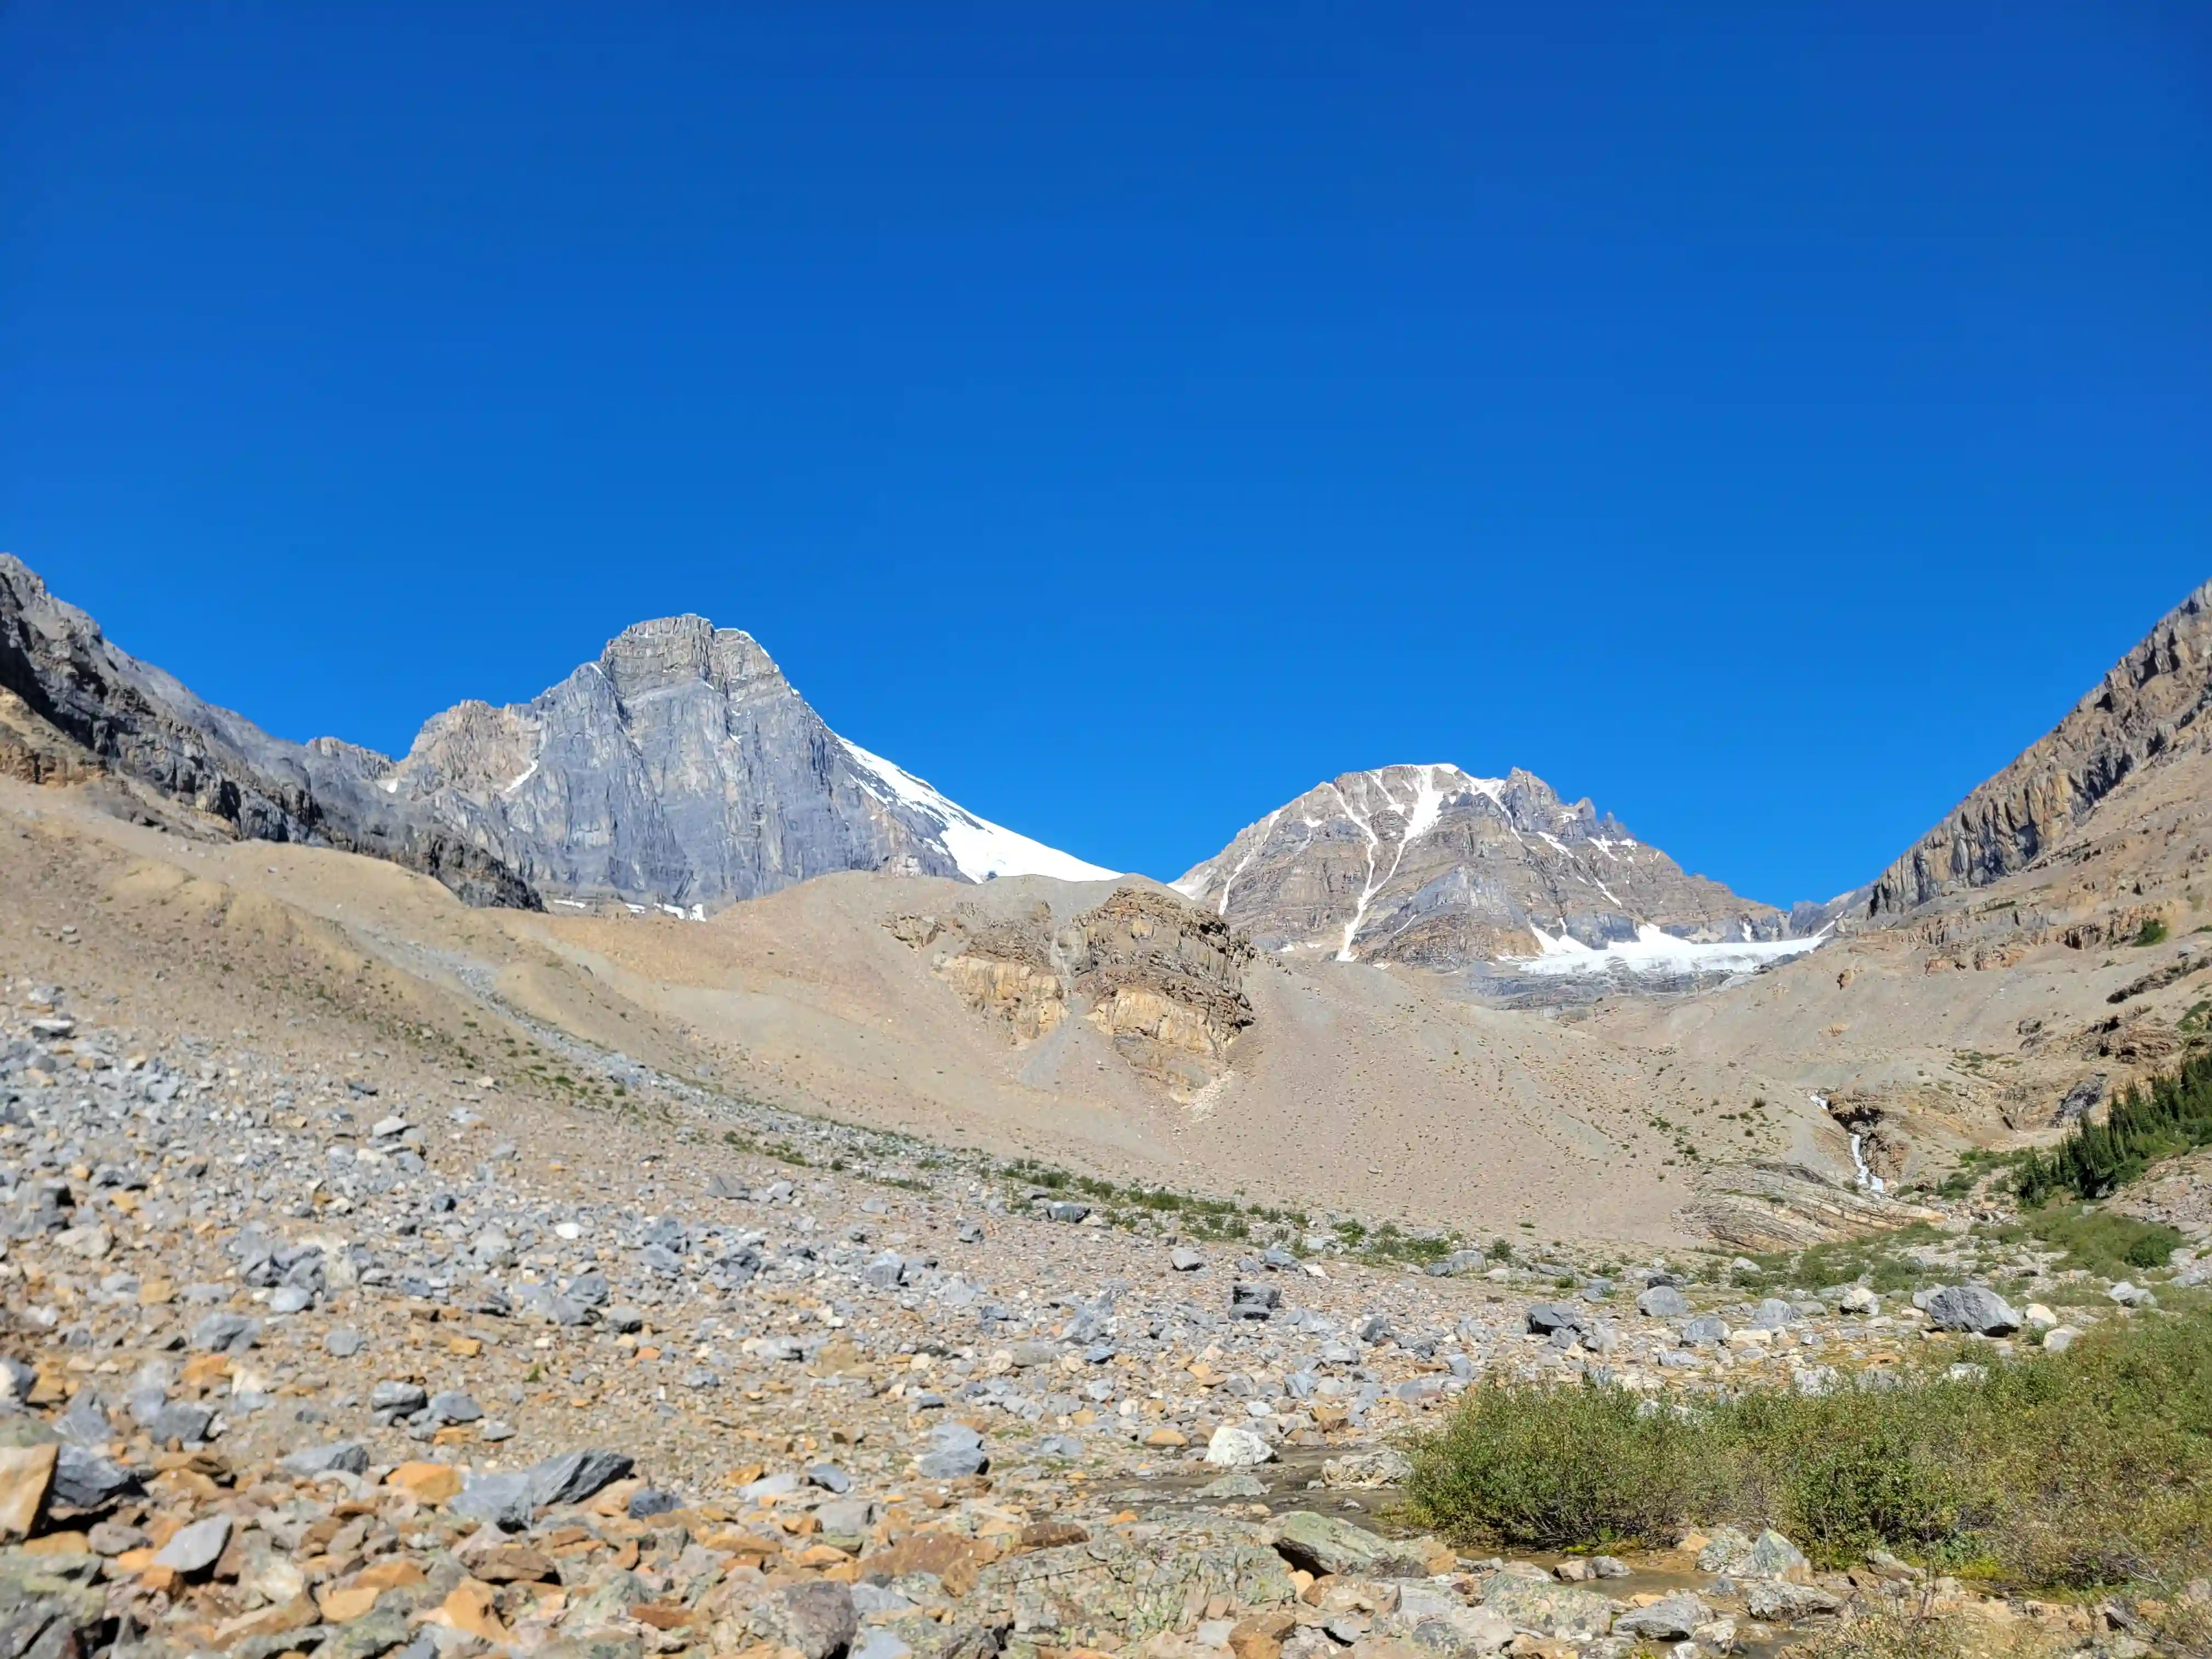
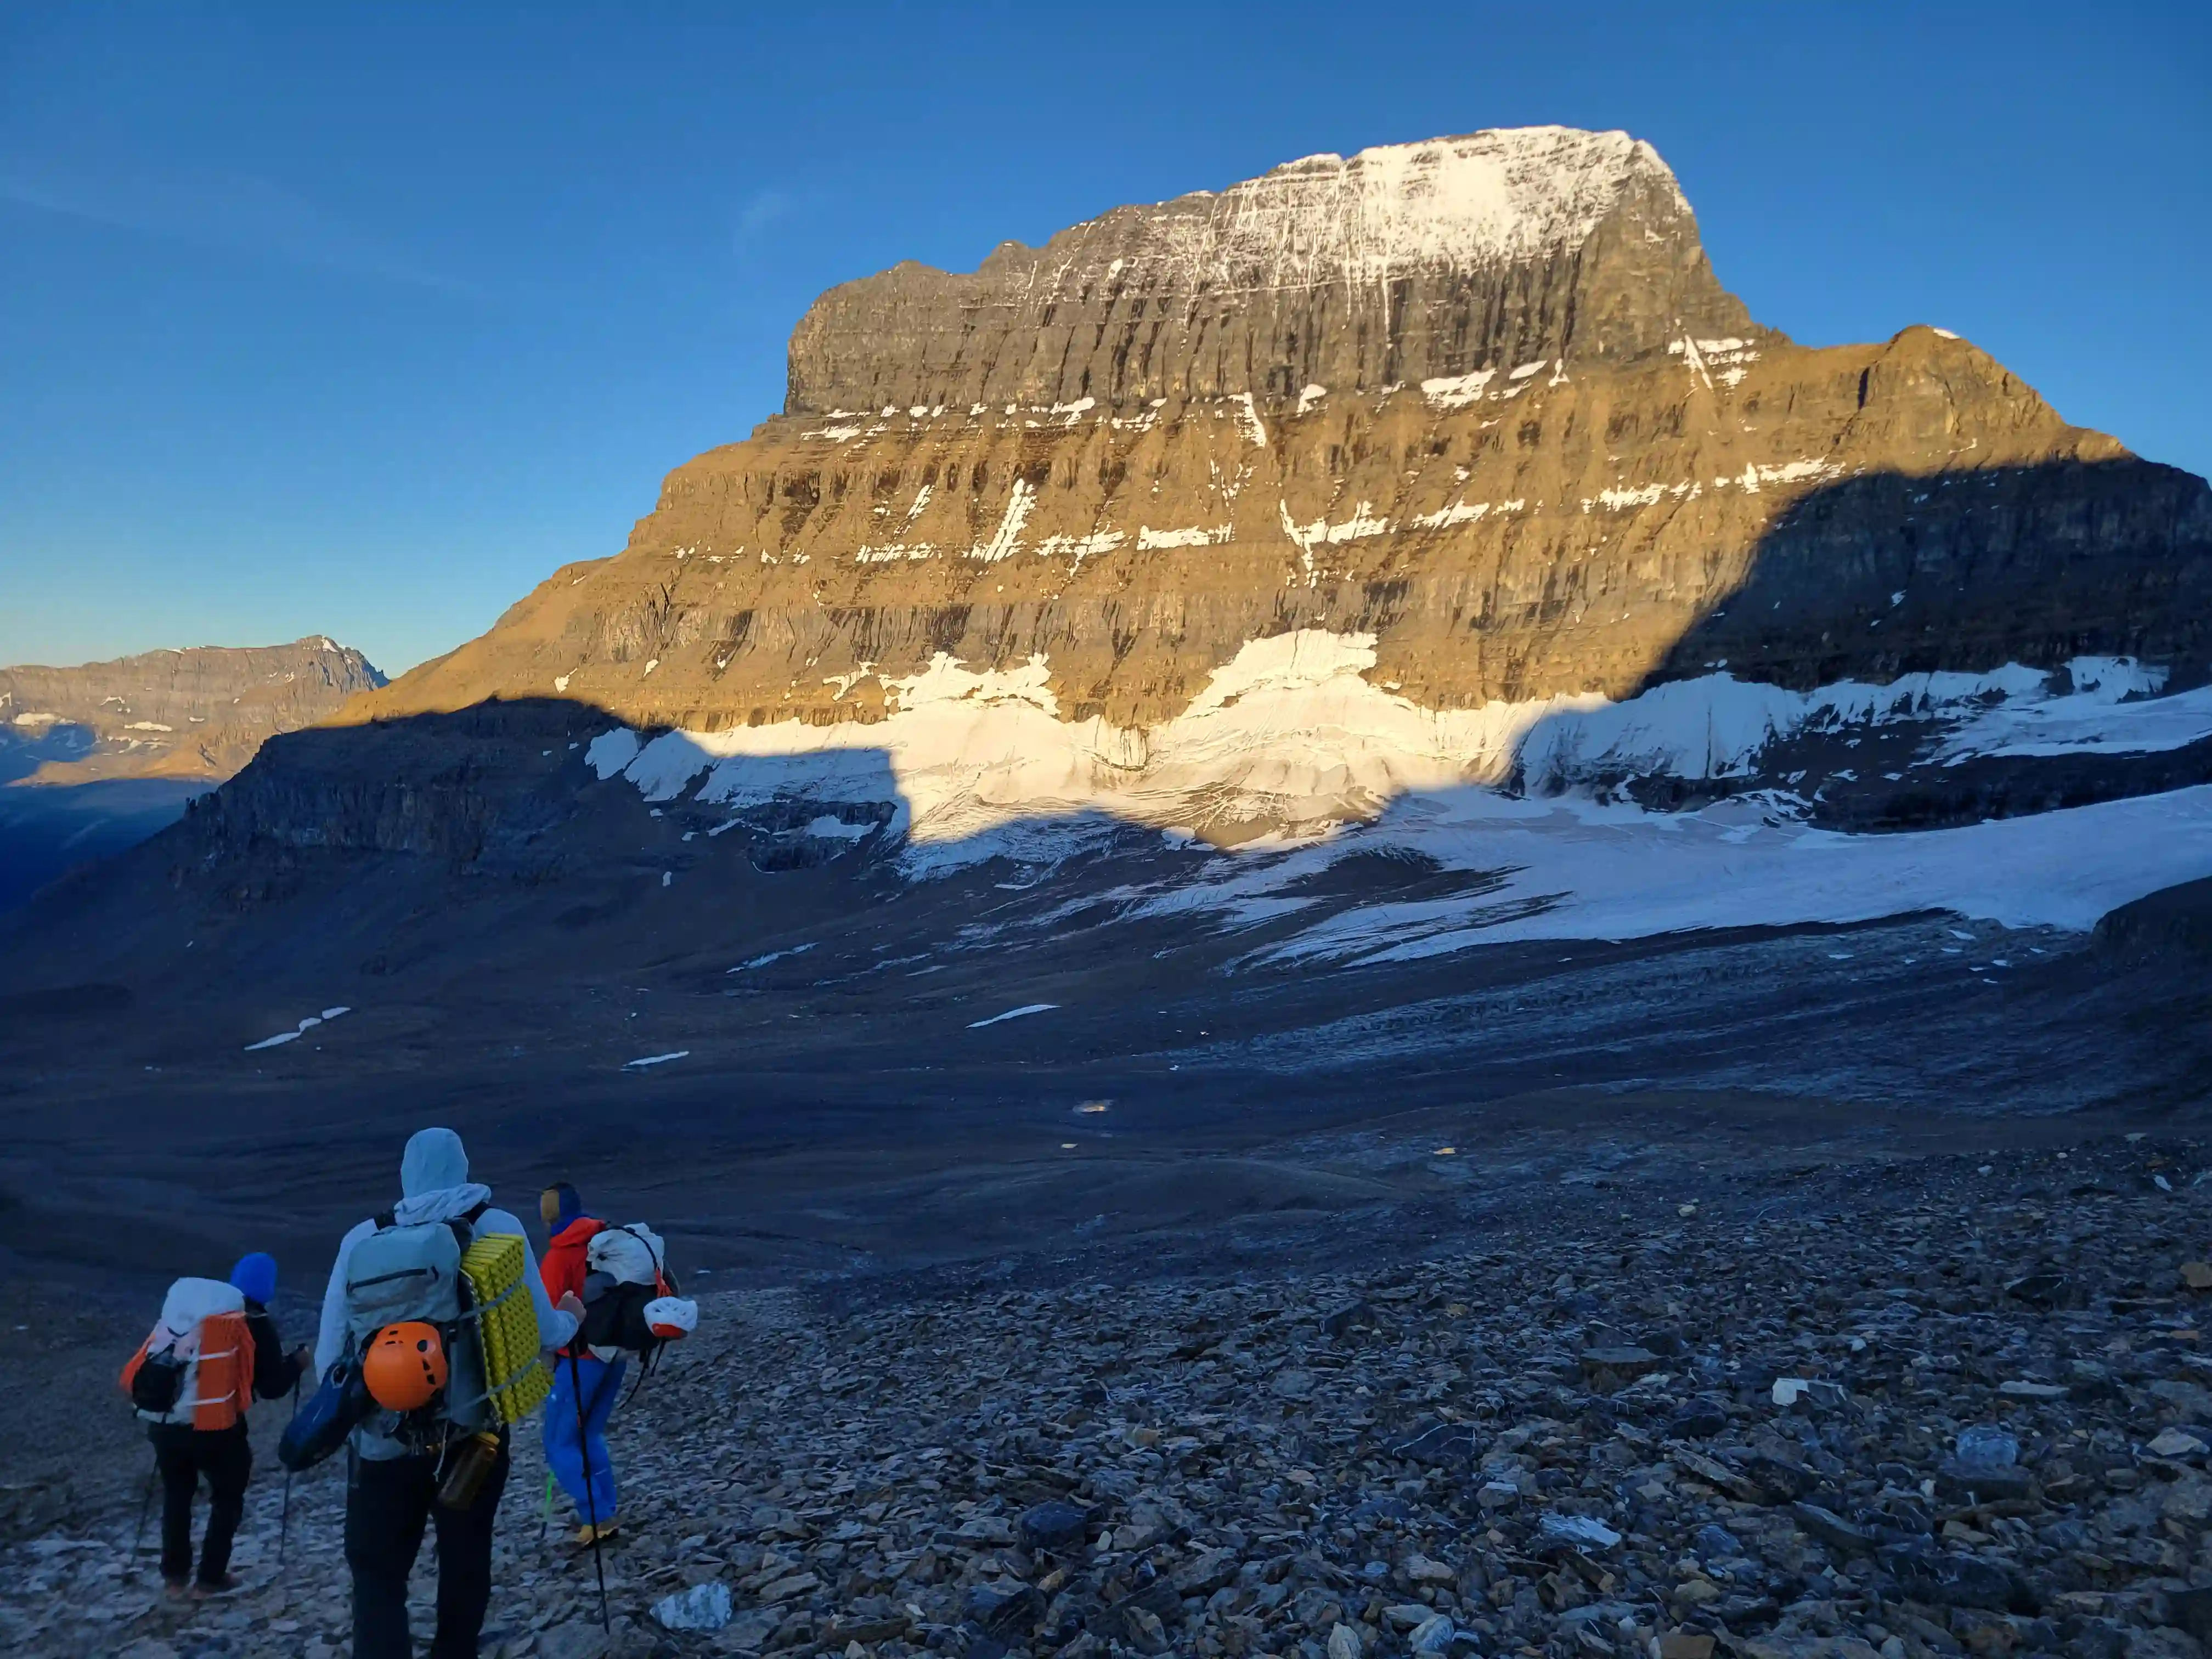
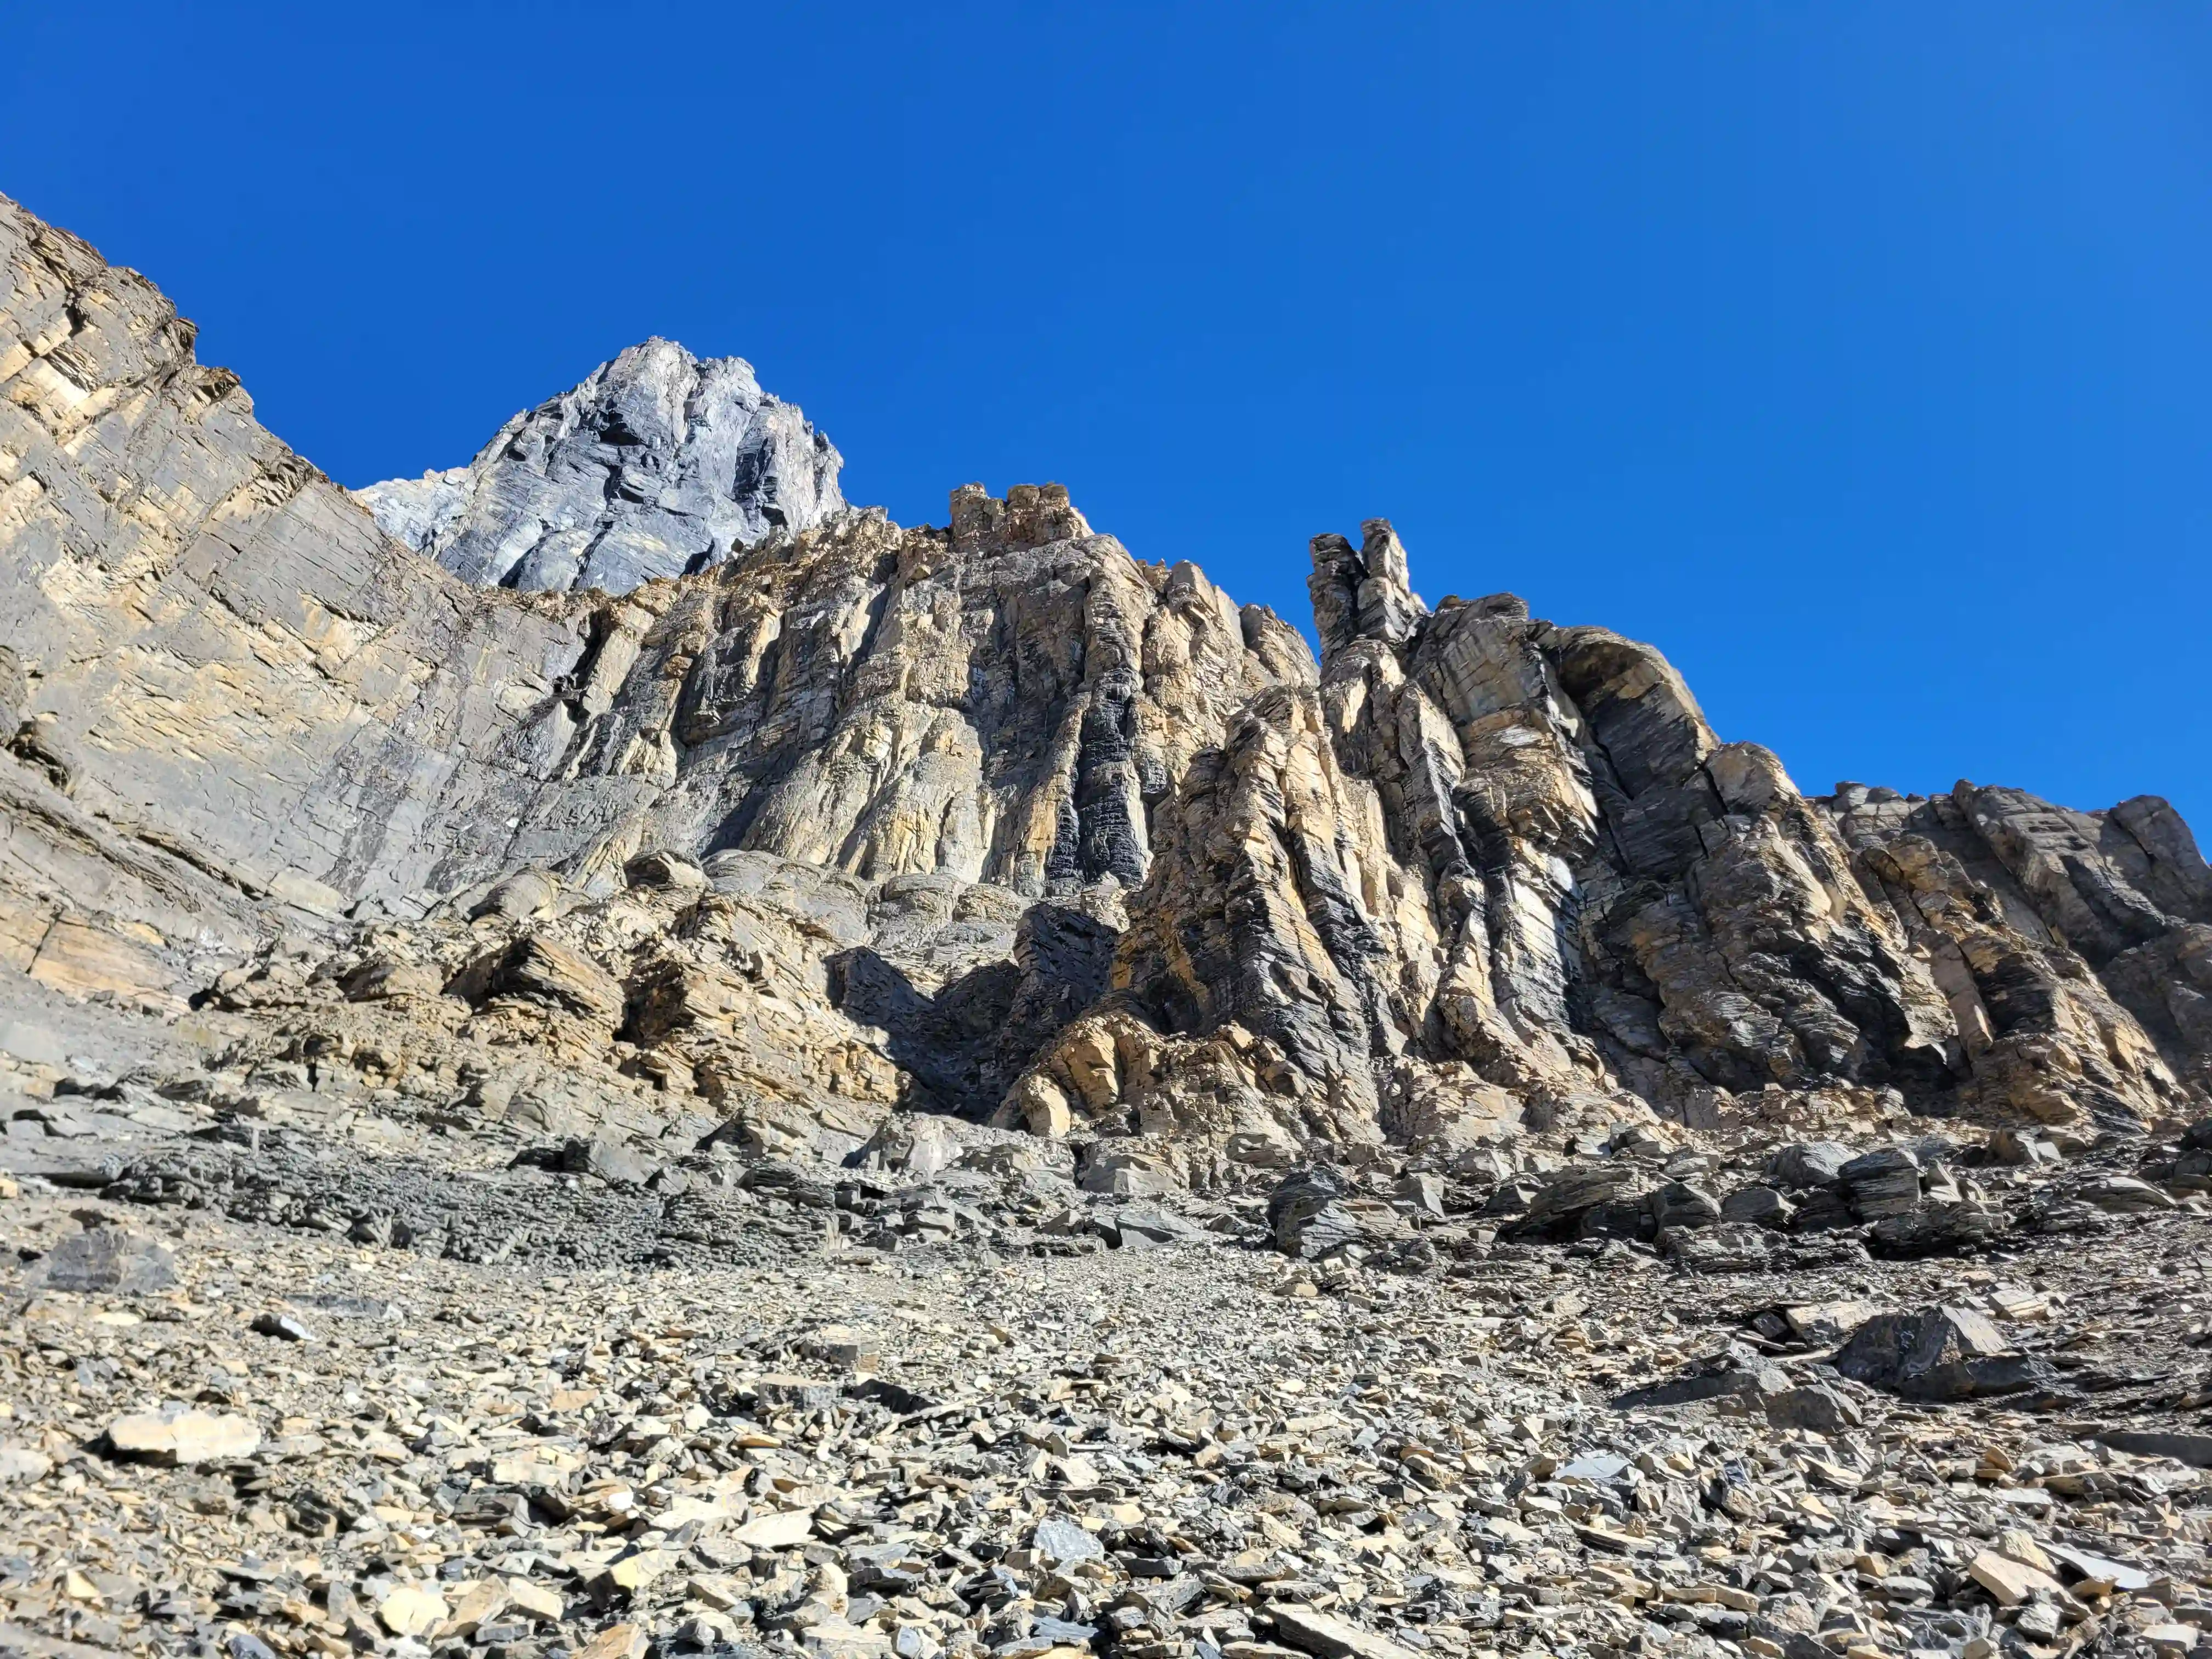
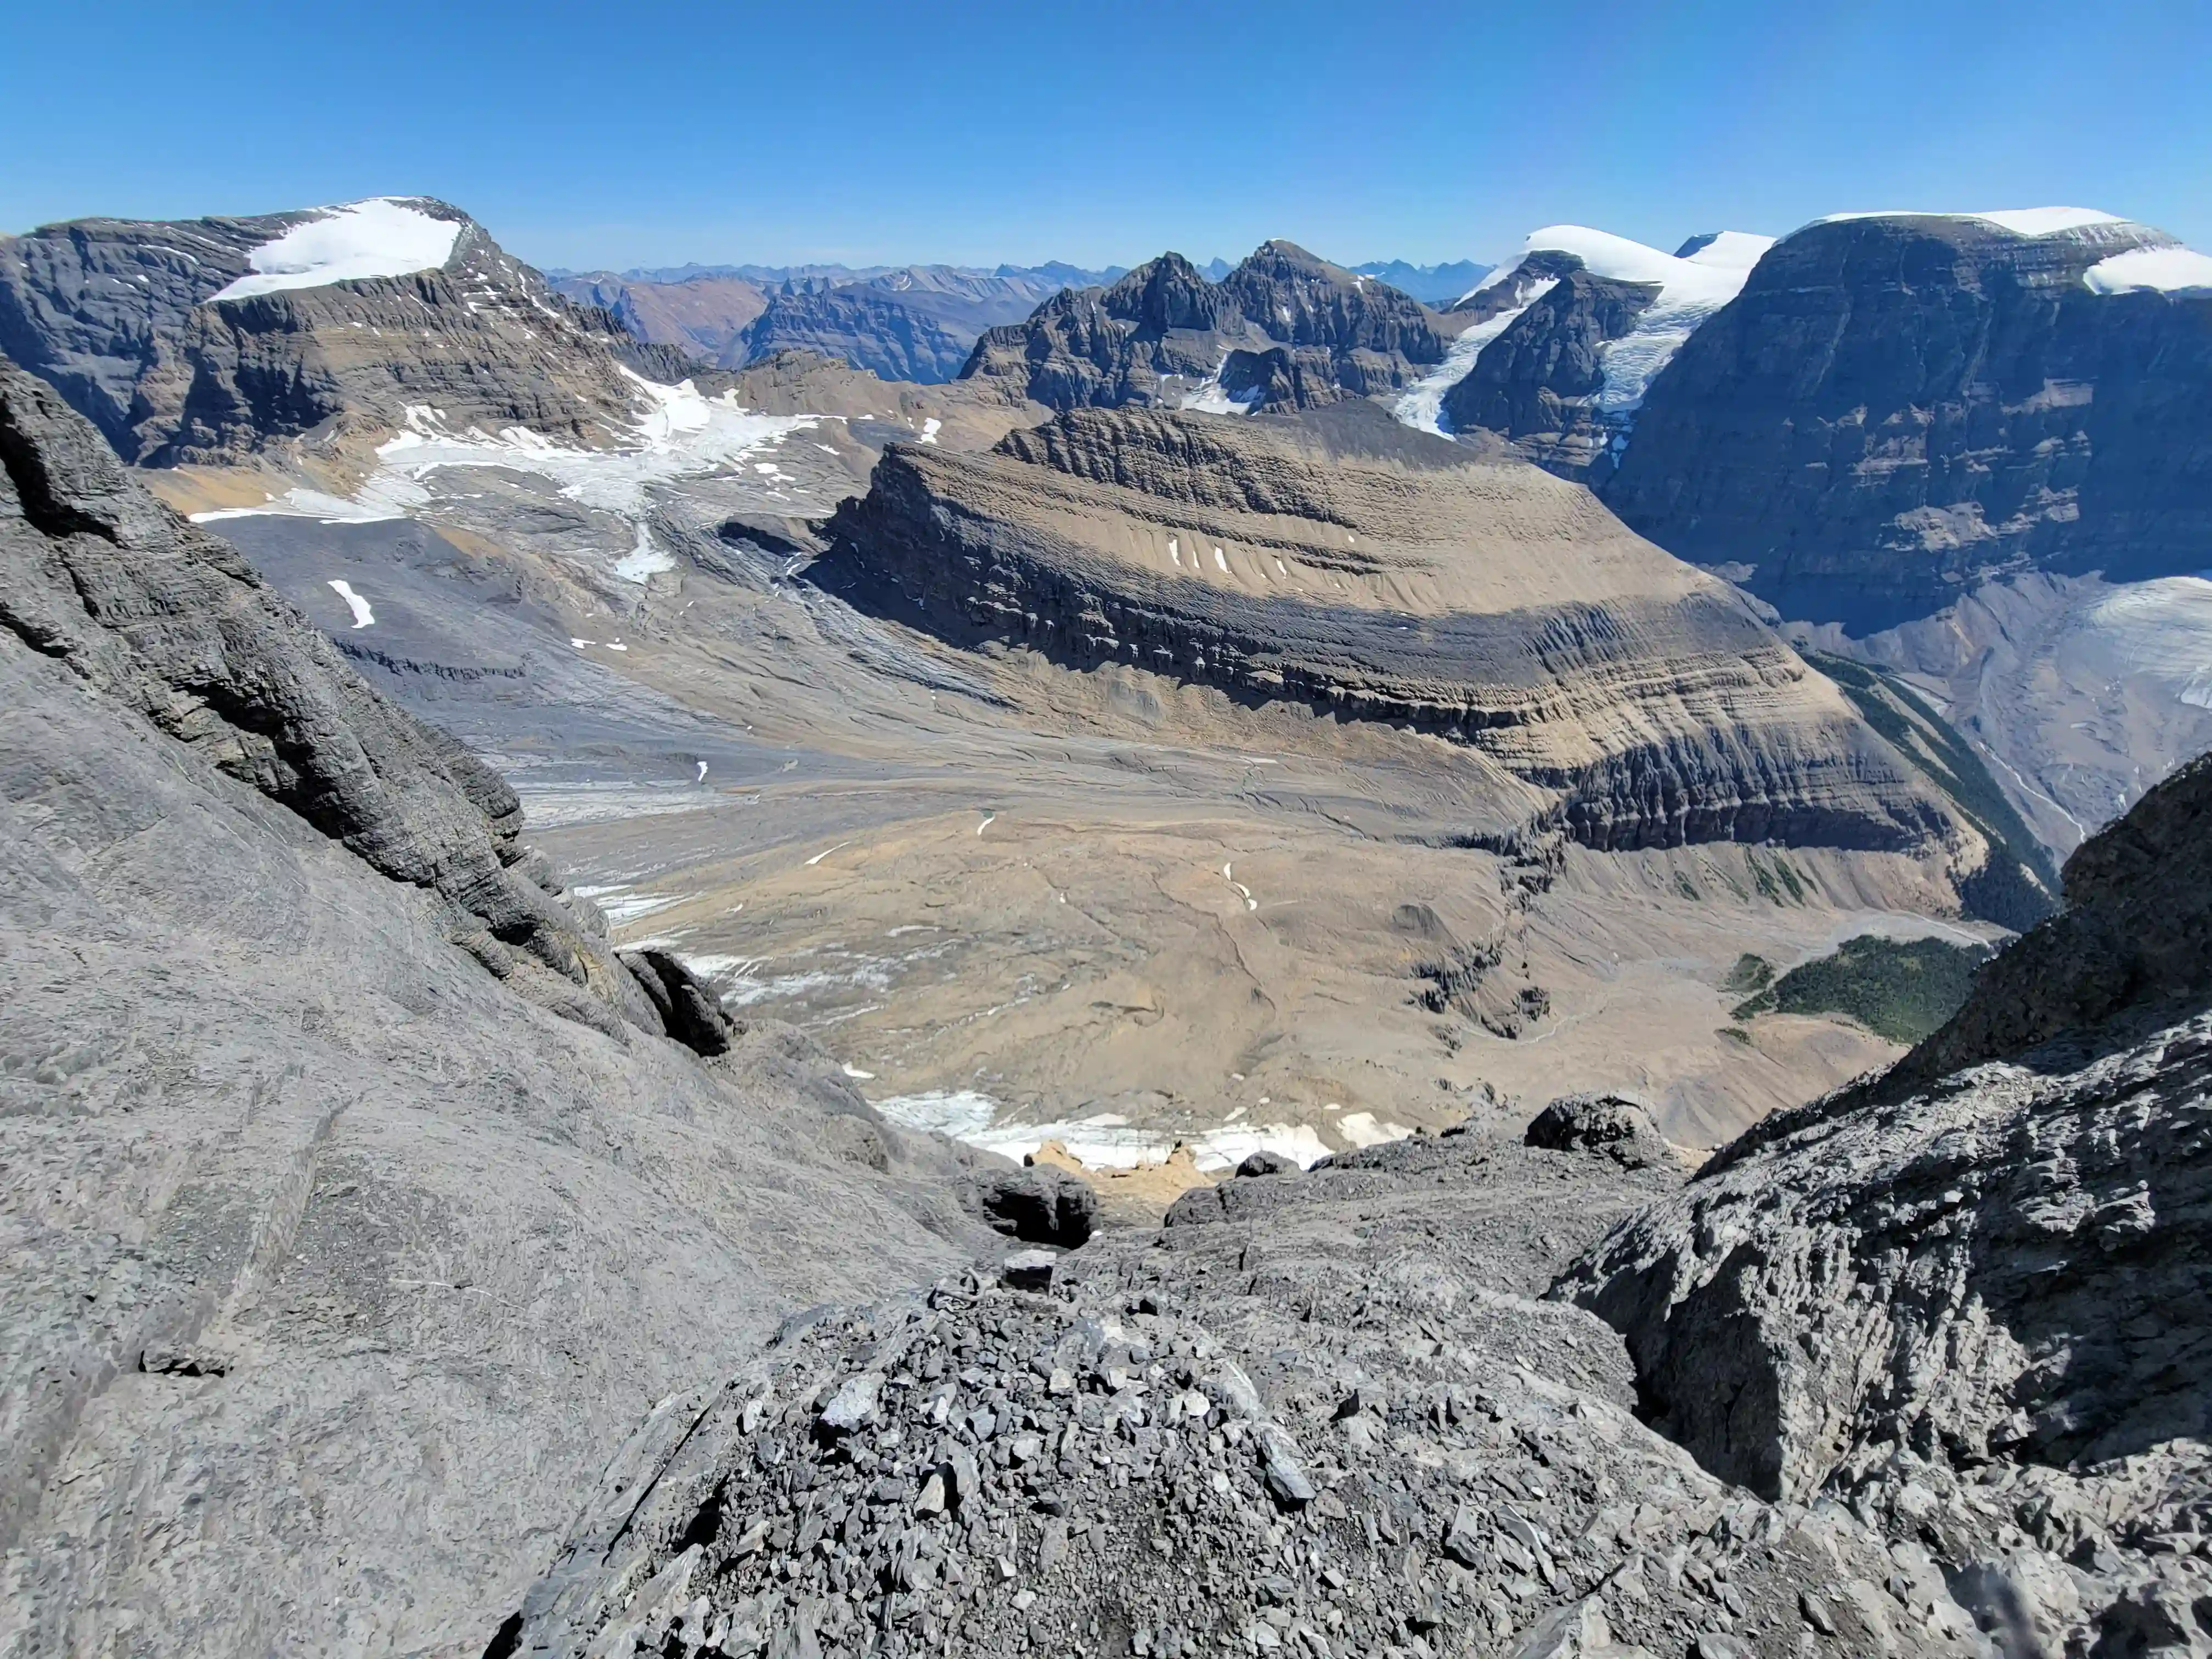
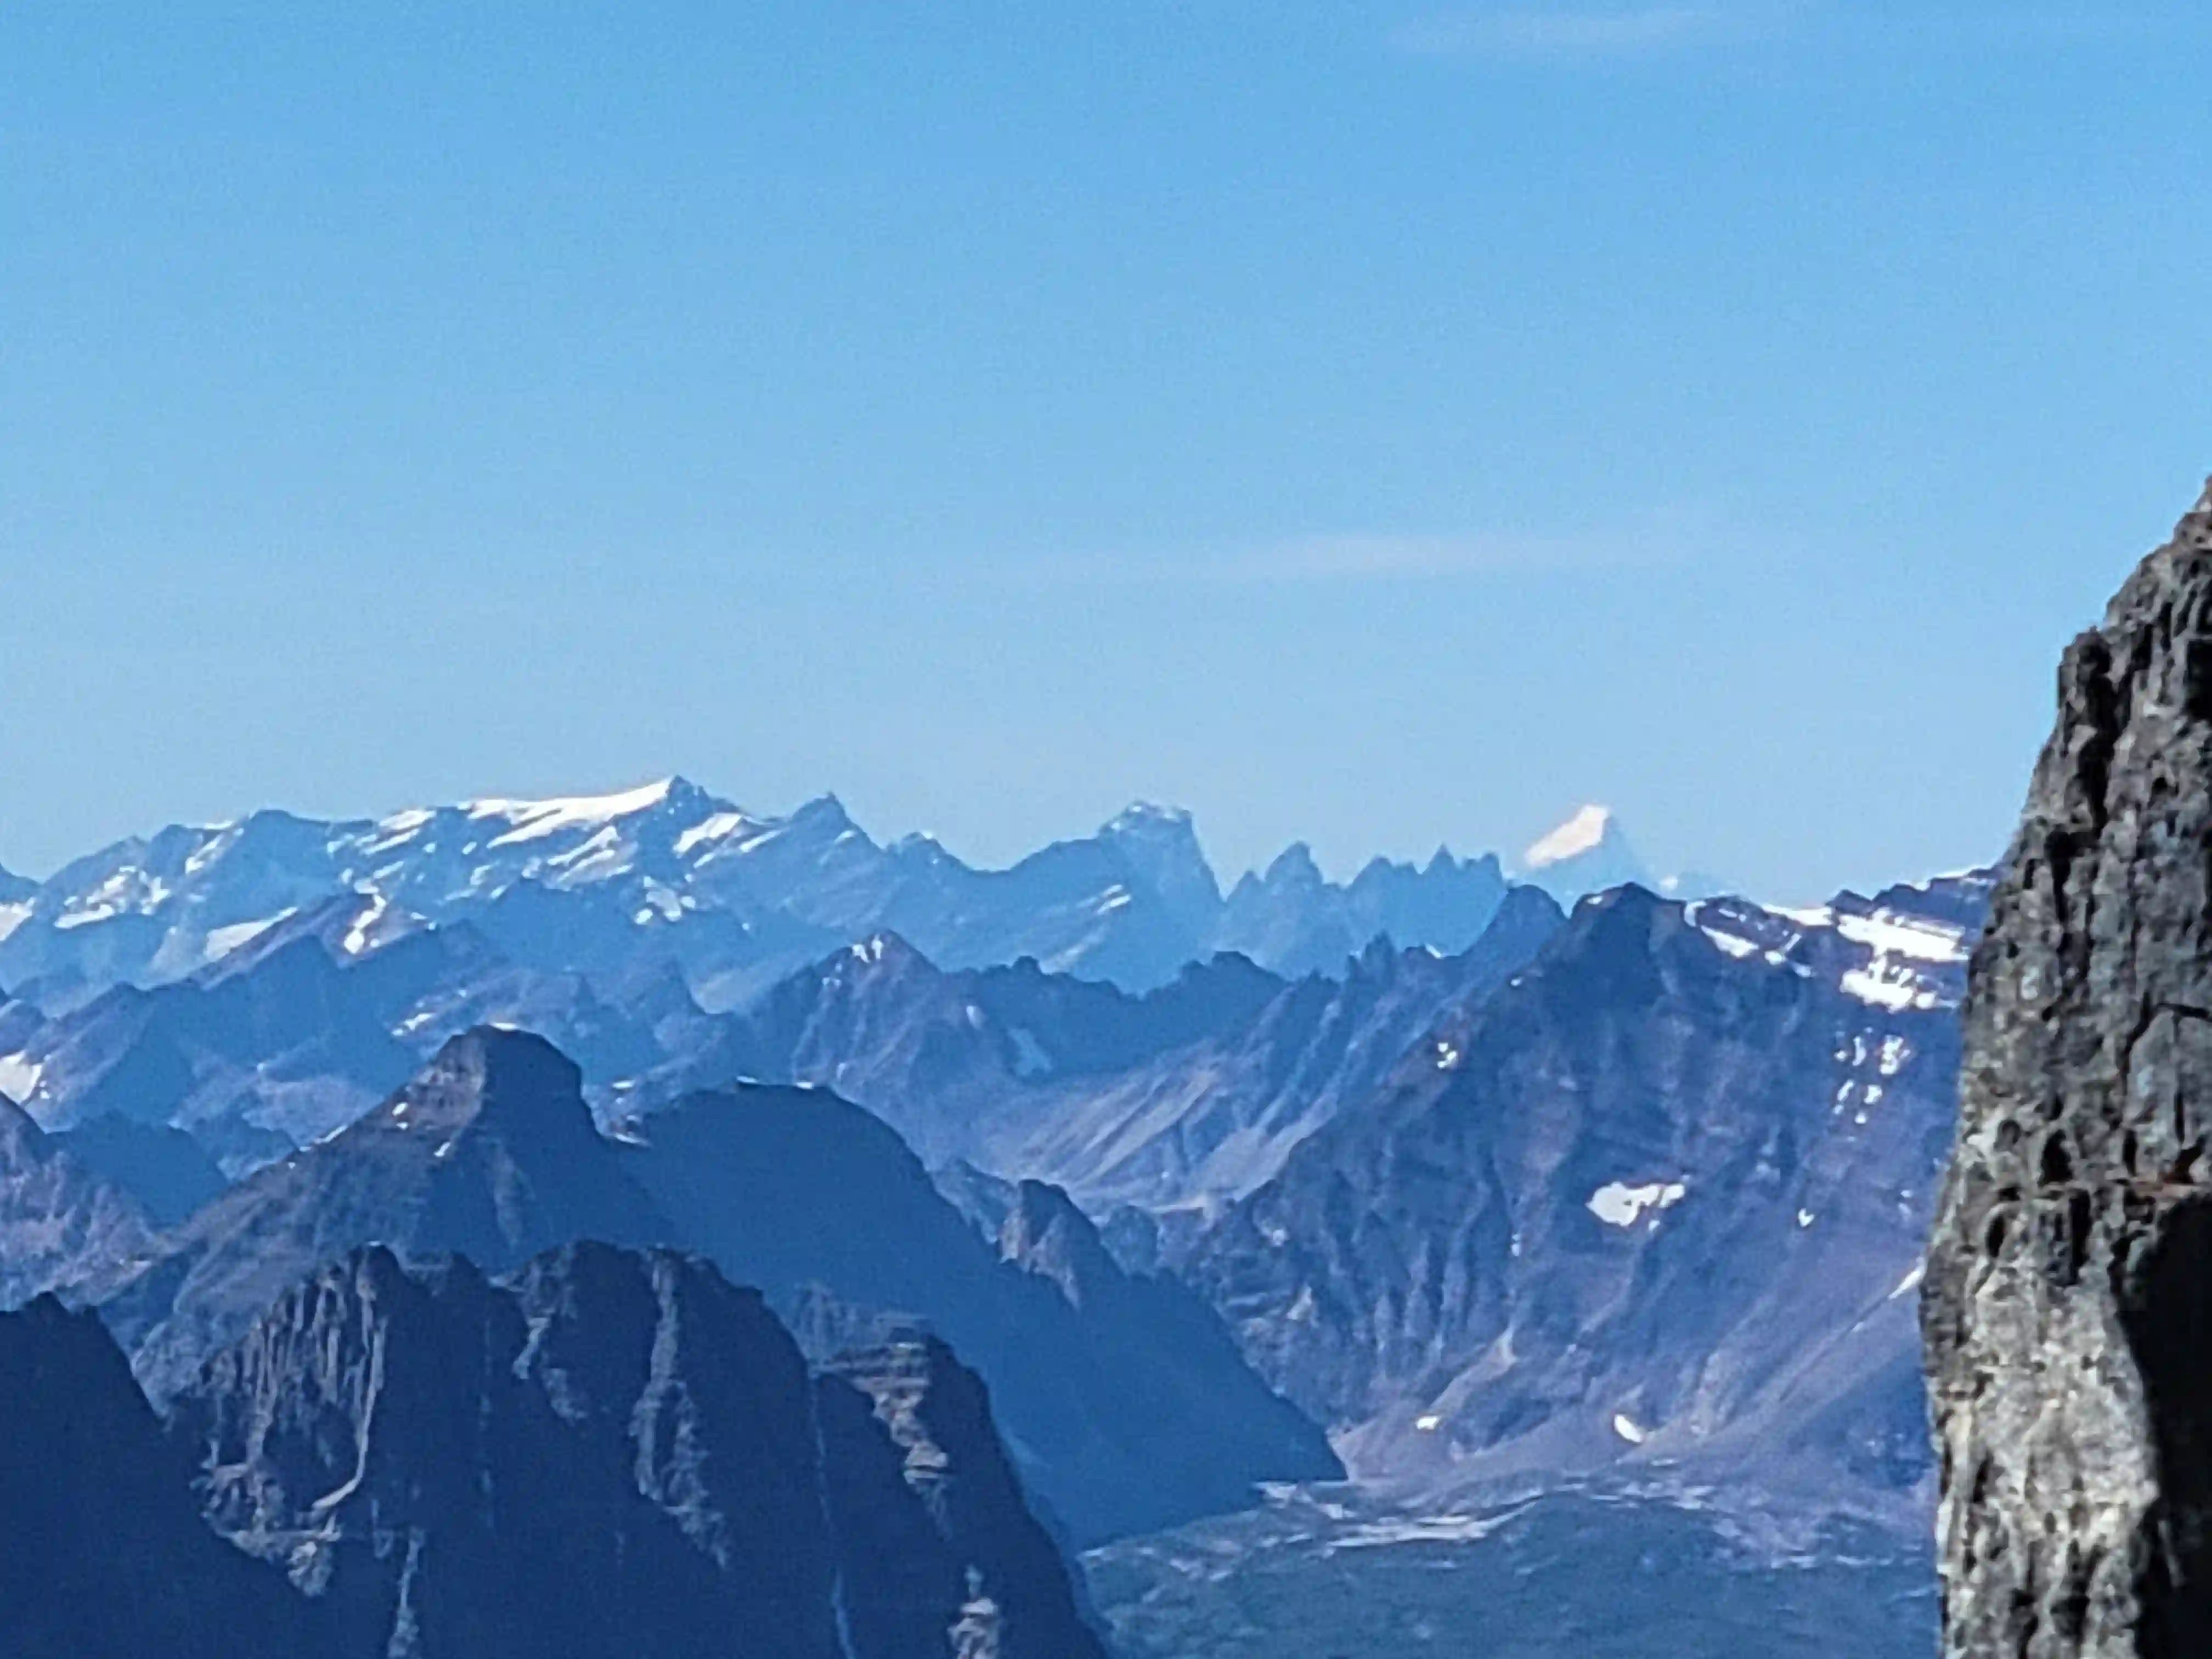
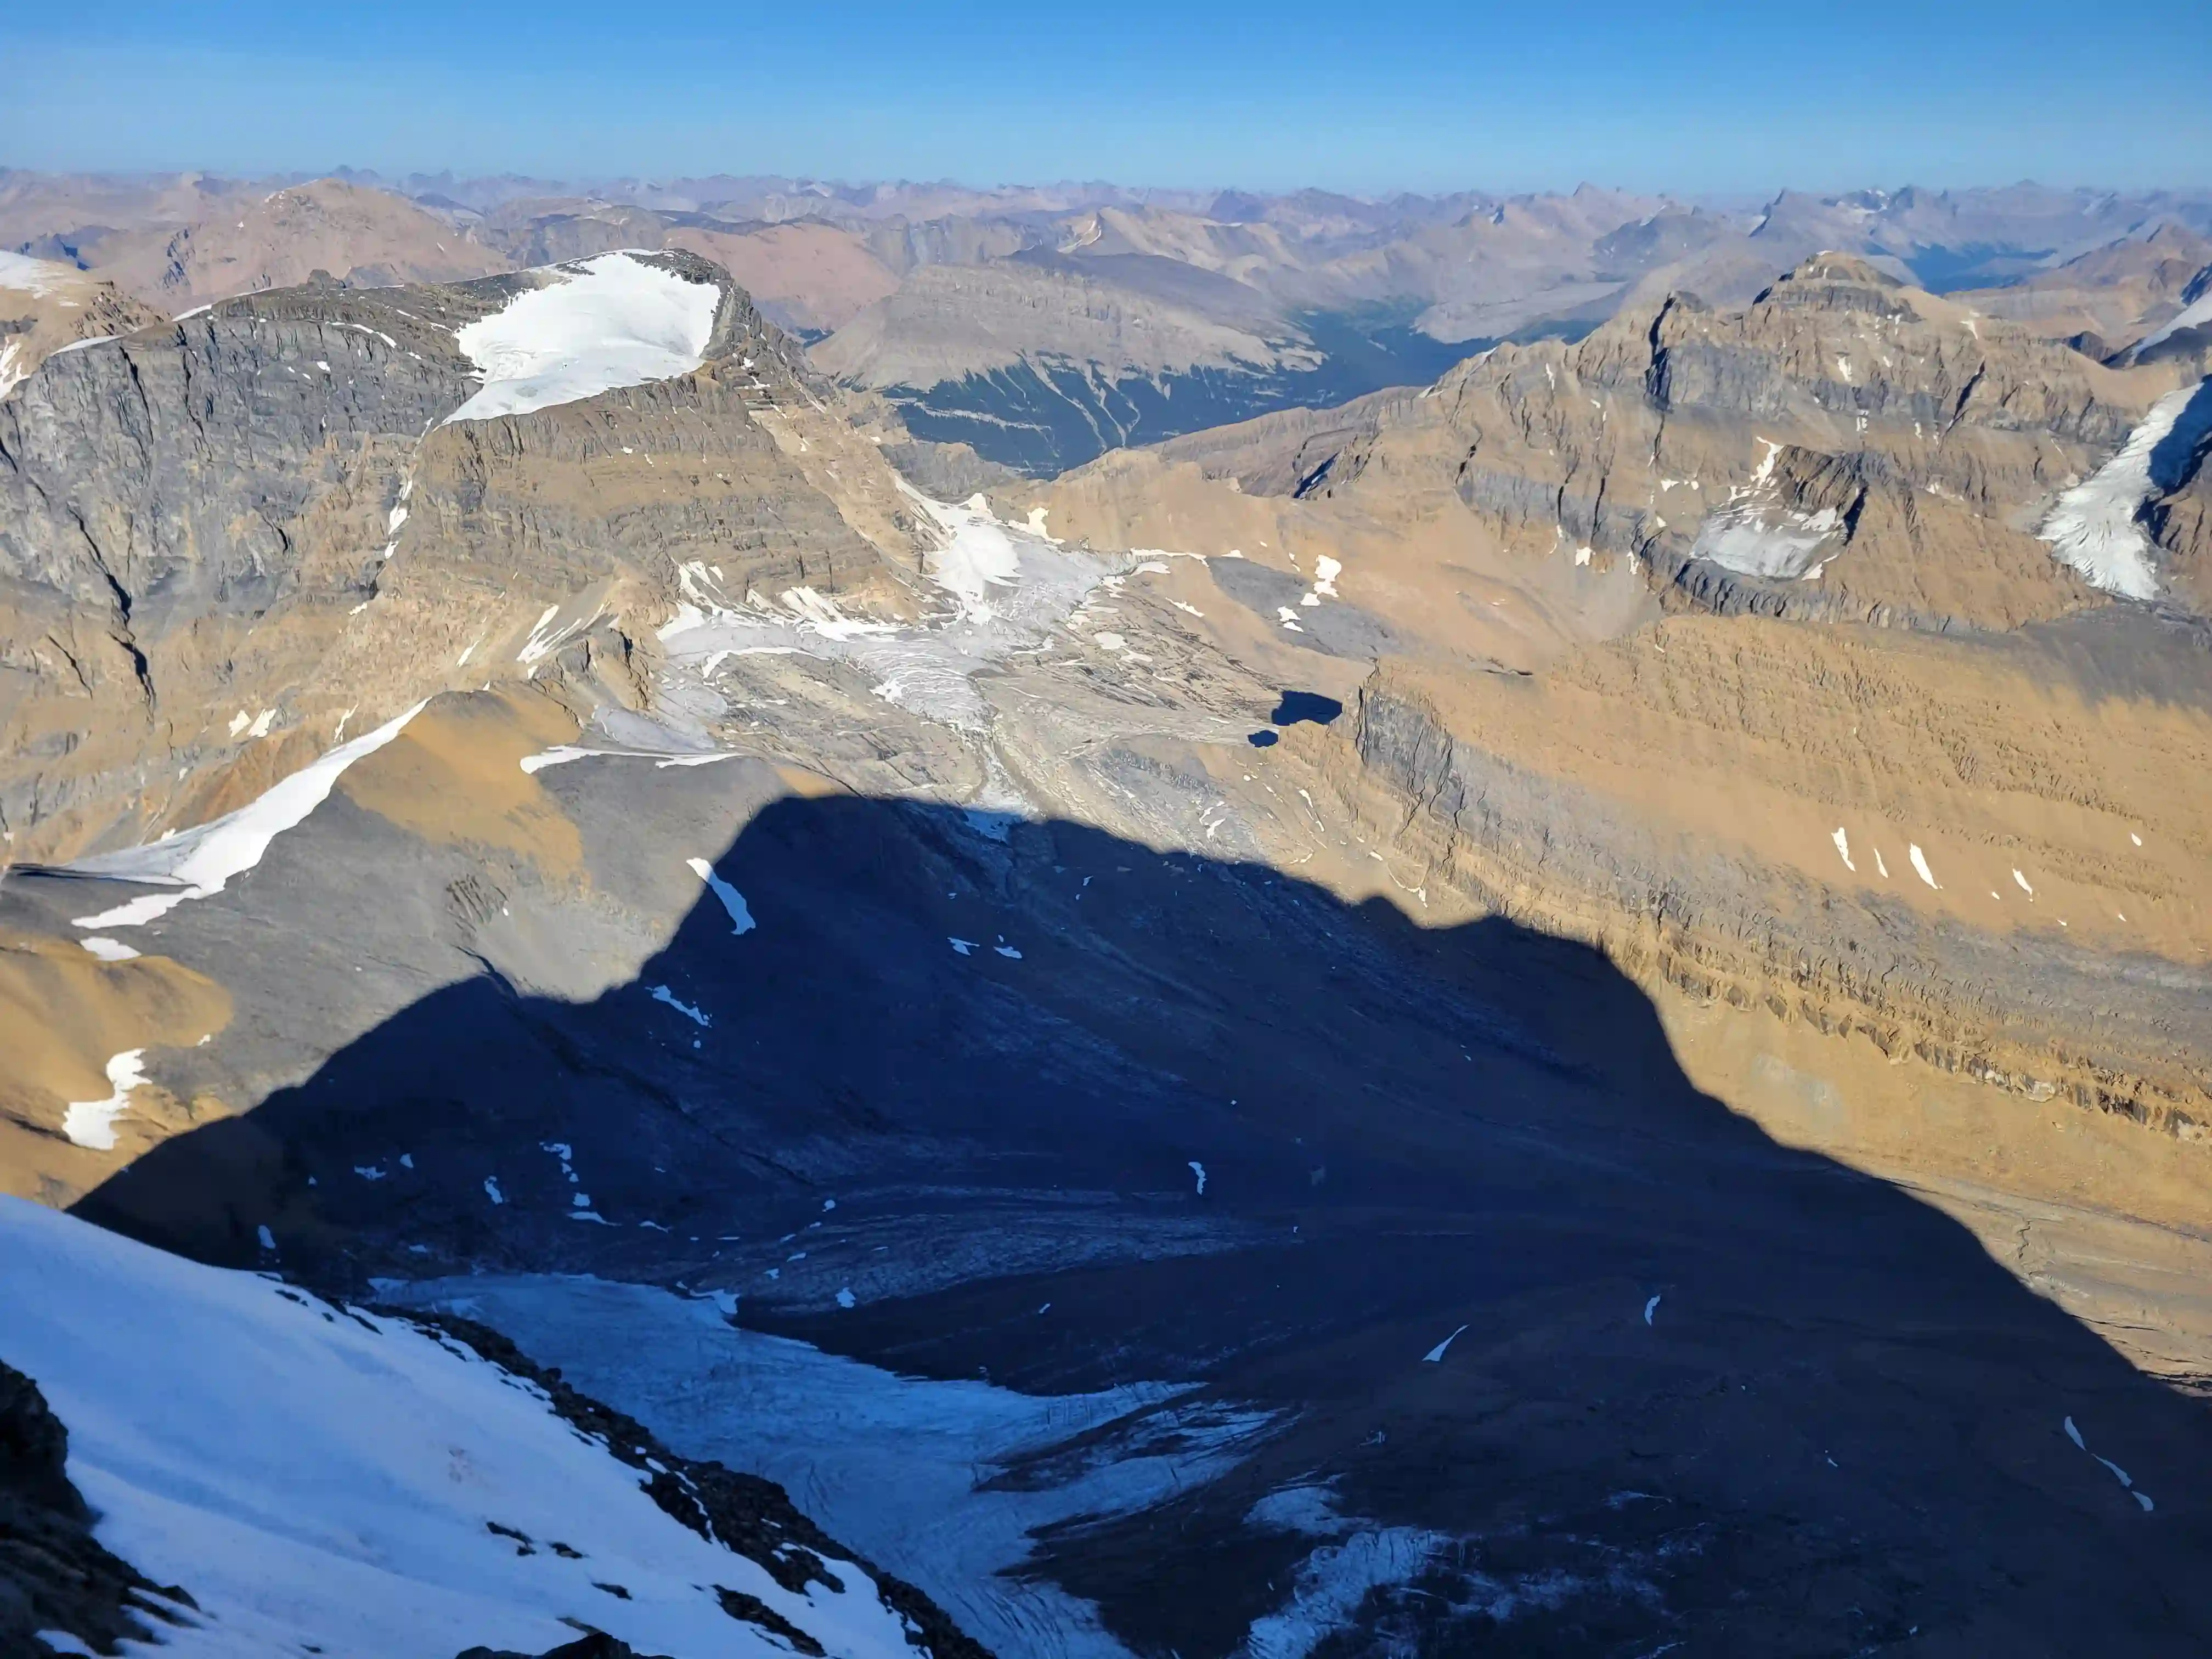
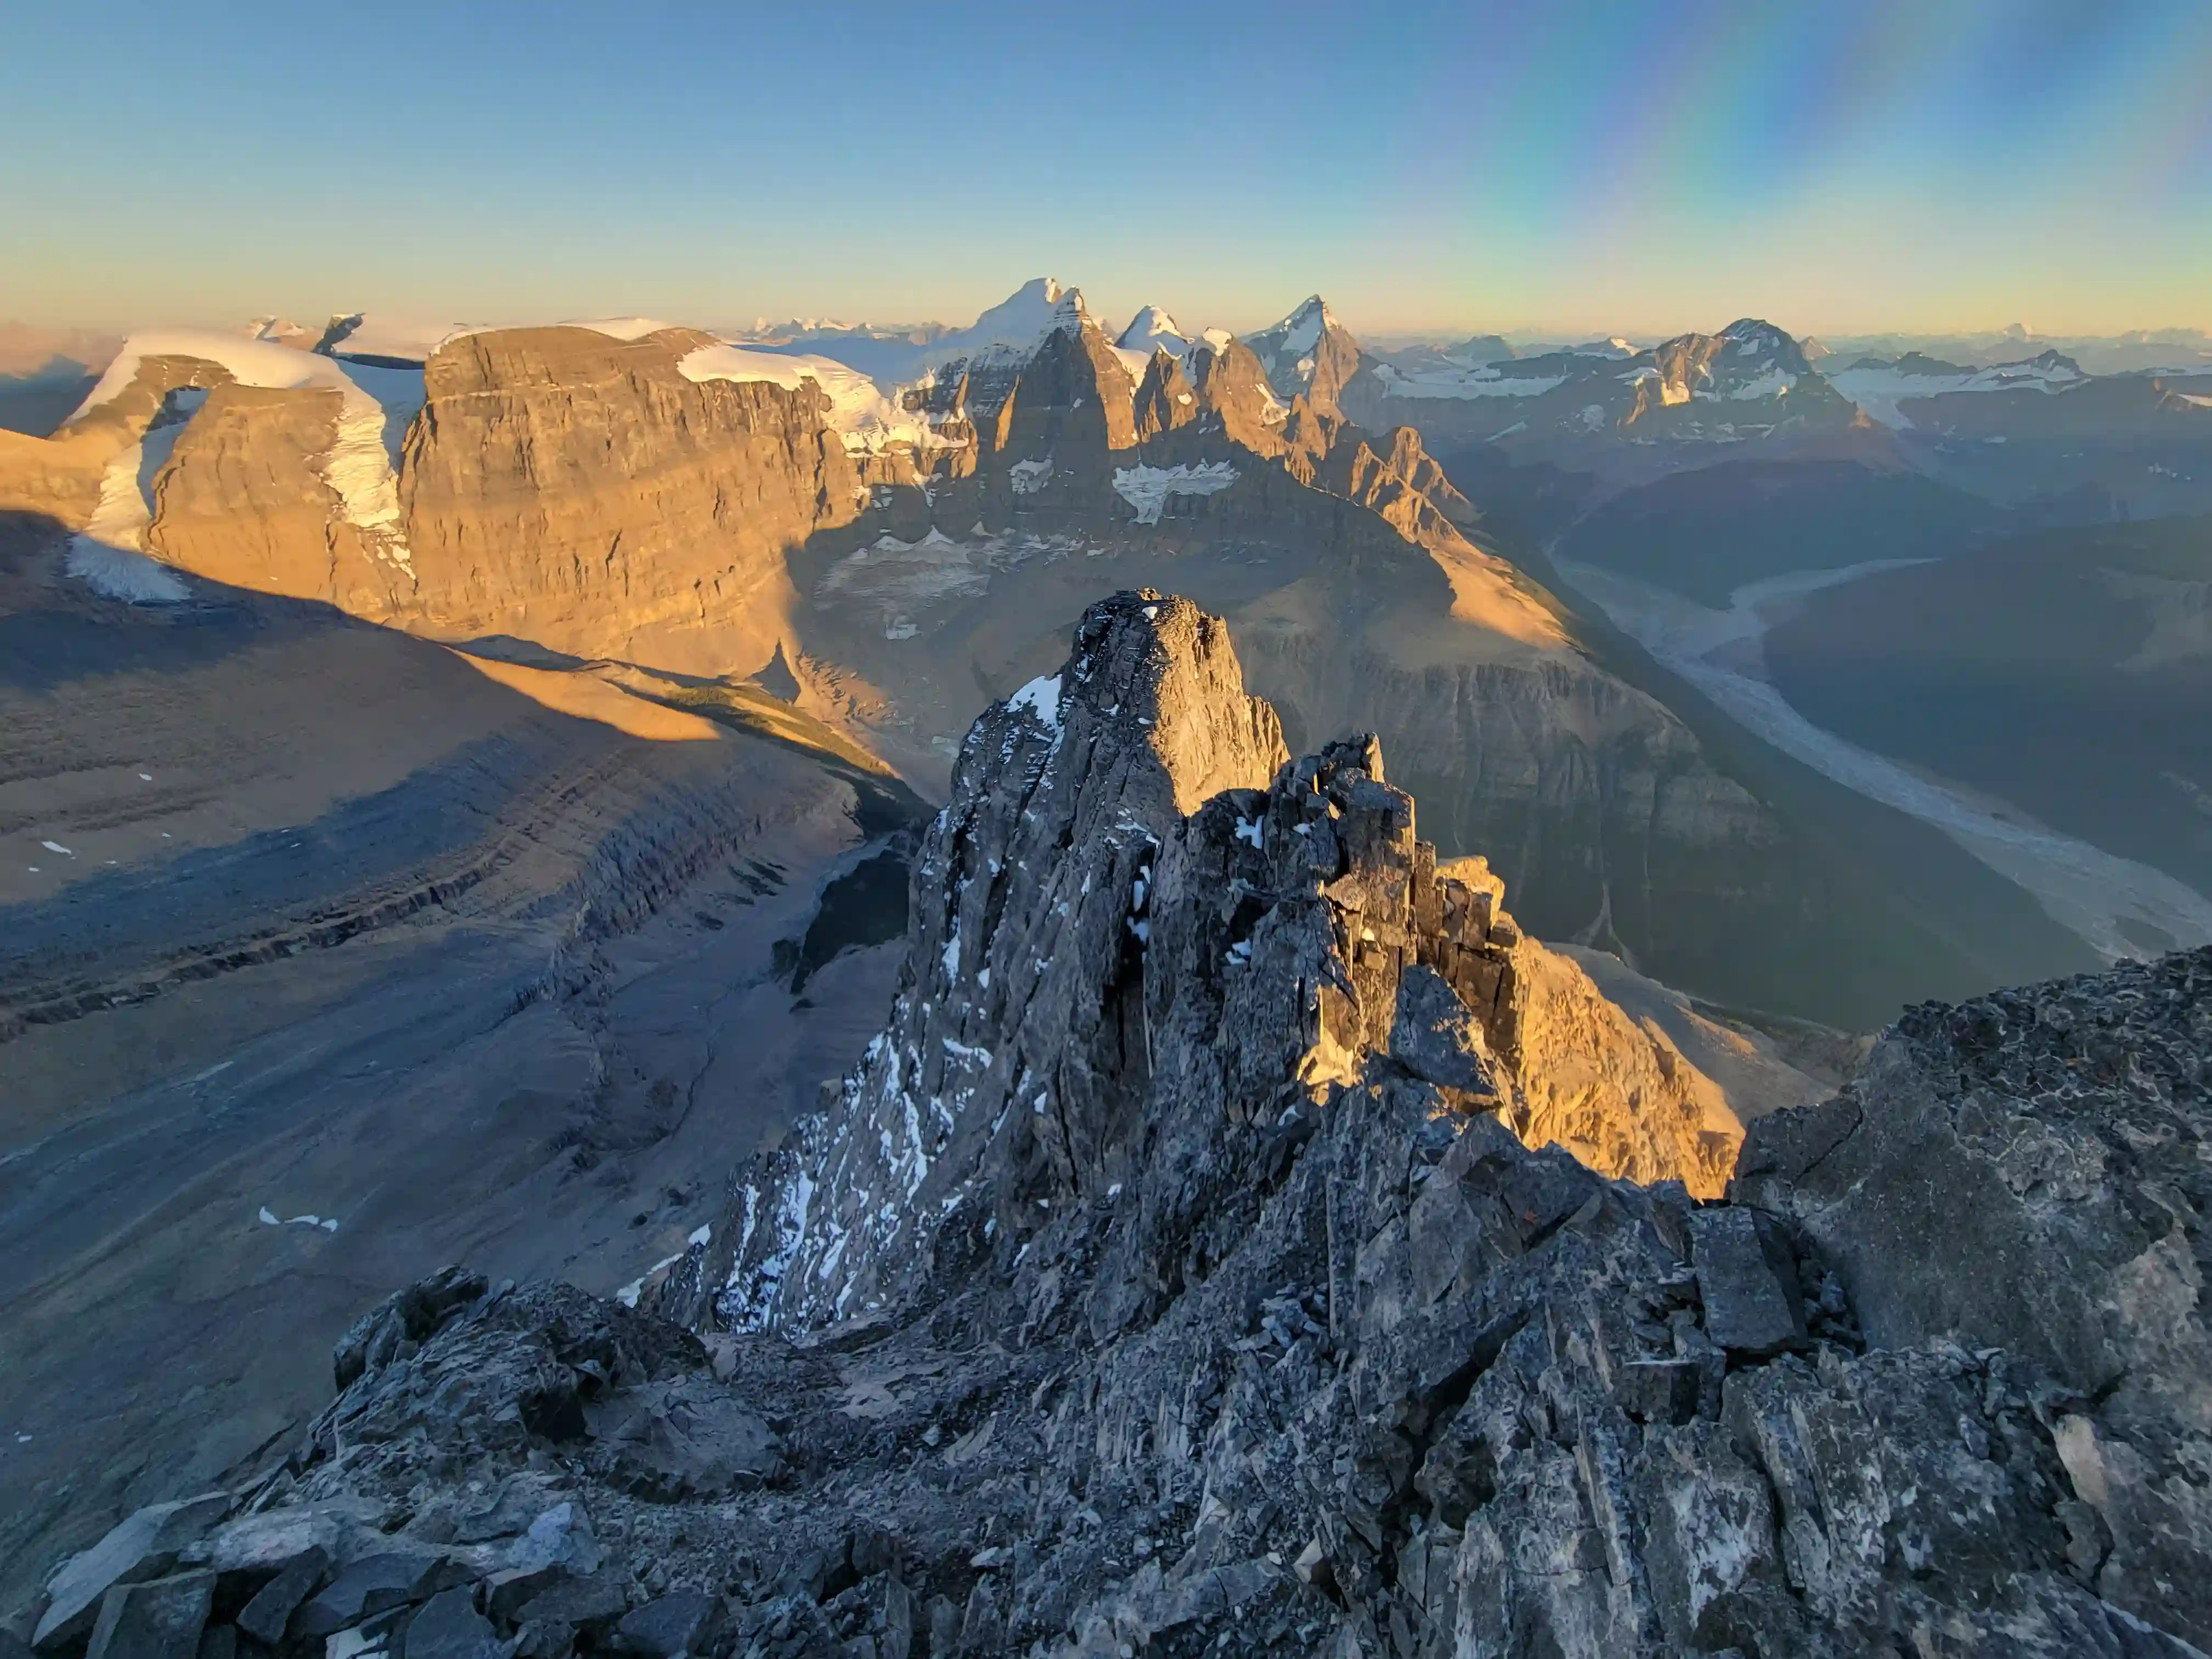
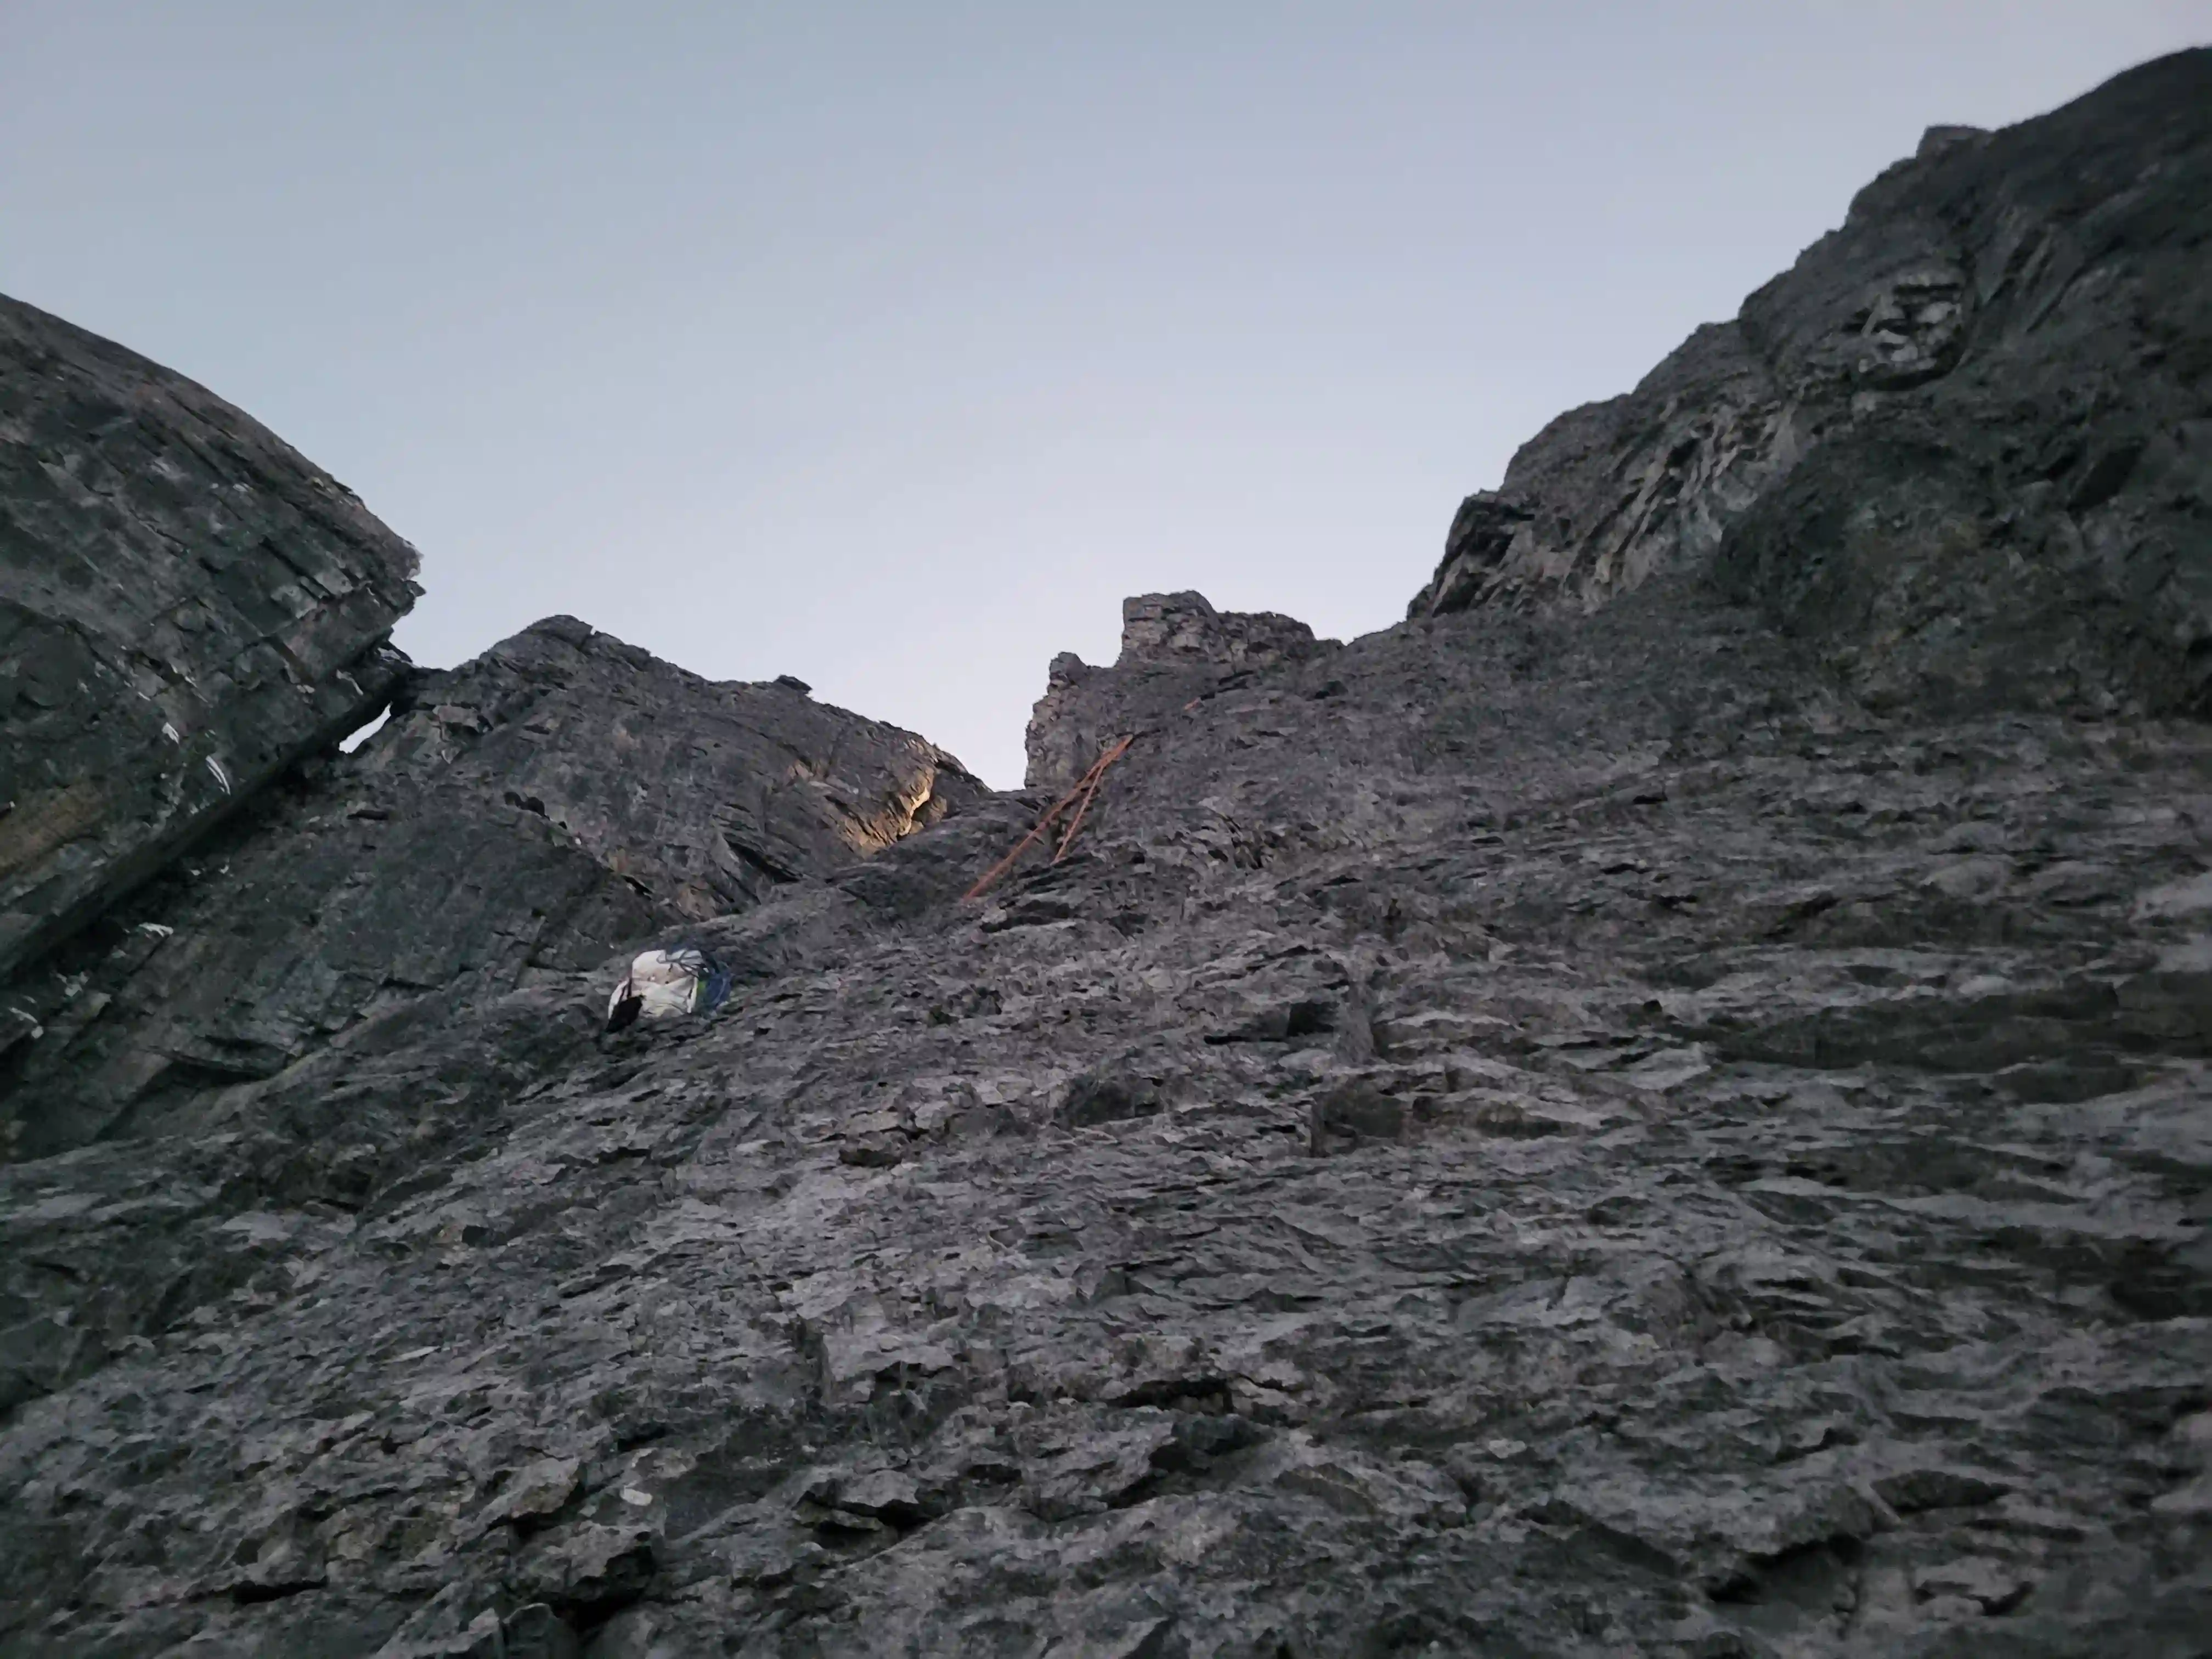
The initial portion of the approach was quite pleasant climbing on trail until passing a waterfall where it turns to creekbed hopping / dodging but travel was fast. This terrain lasts for around 6km with a few boulder fields before reaching more of an alpine meadow and then transitions to moraine as you near the Woolley and Diadem camp and bear SW for the Woolley Shoulder plod. This portion involves lots of loose scree and is a bit of a grind with a heavy pack but the views from the shoulder above are a worthy view for the effort! Once you're topped out on the shoulder Mount Alberta stands intimidatingly 4km away with its impenetrable looking east face that brings up thoughts of "we're climbing that?!," and we weren't stoked about the conditions we saw given our bluebird window and the fact it was late August which in a normal year is prime time for Alberta.
spring!
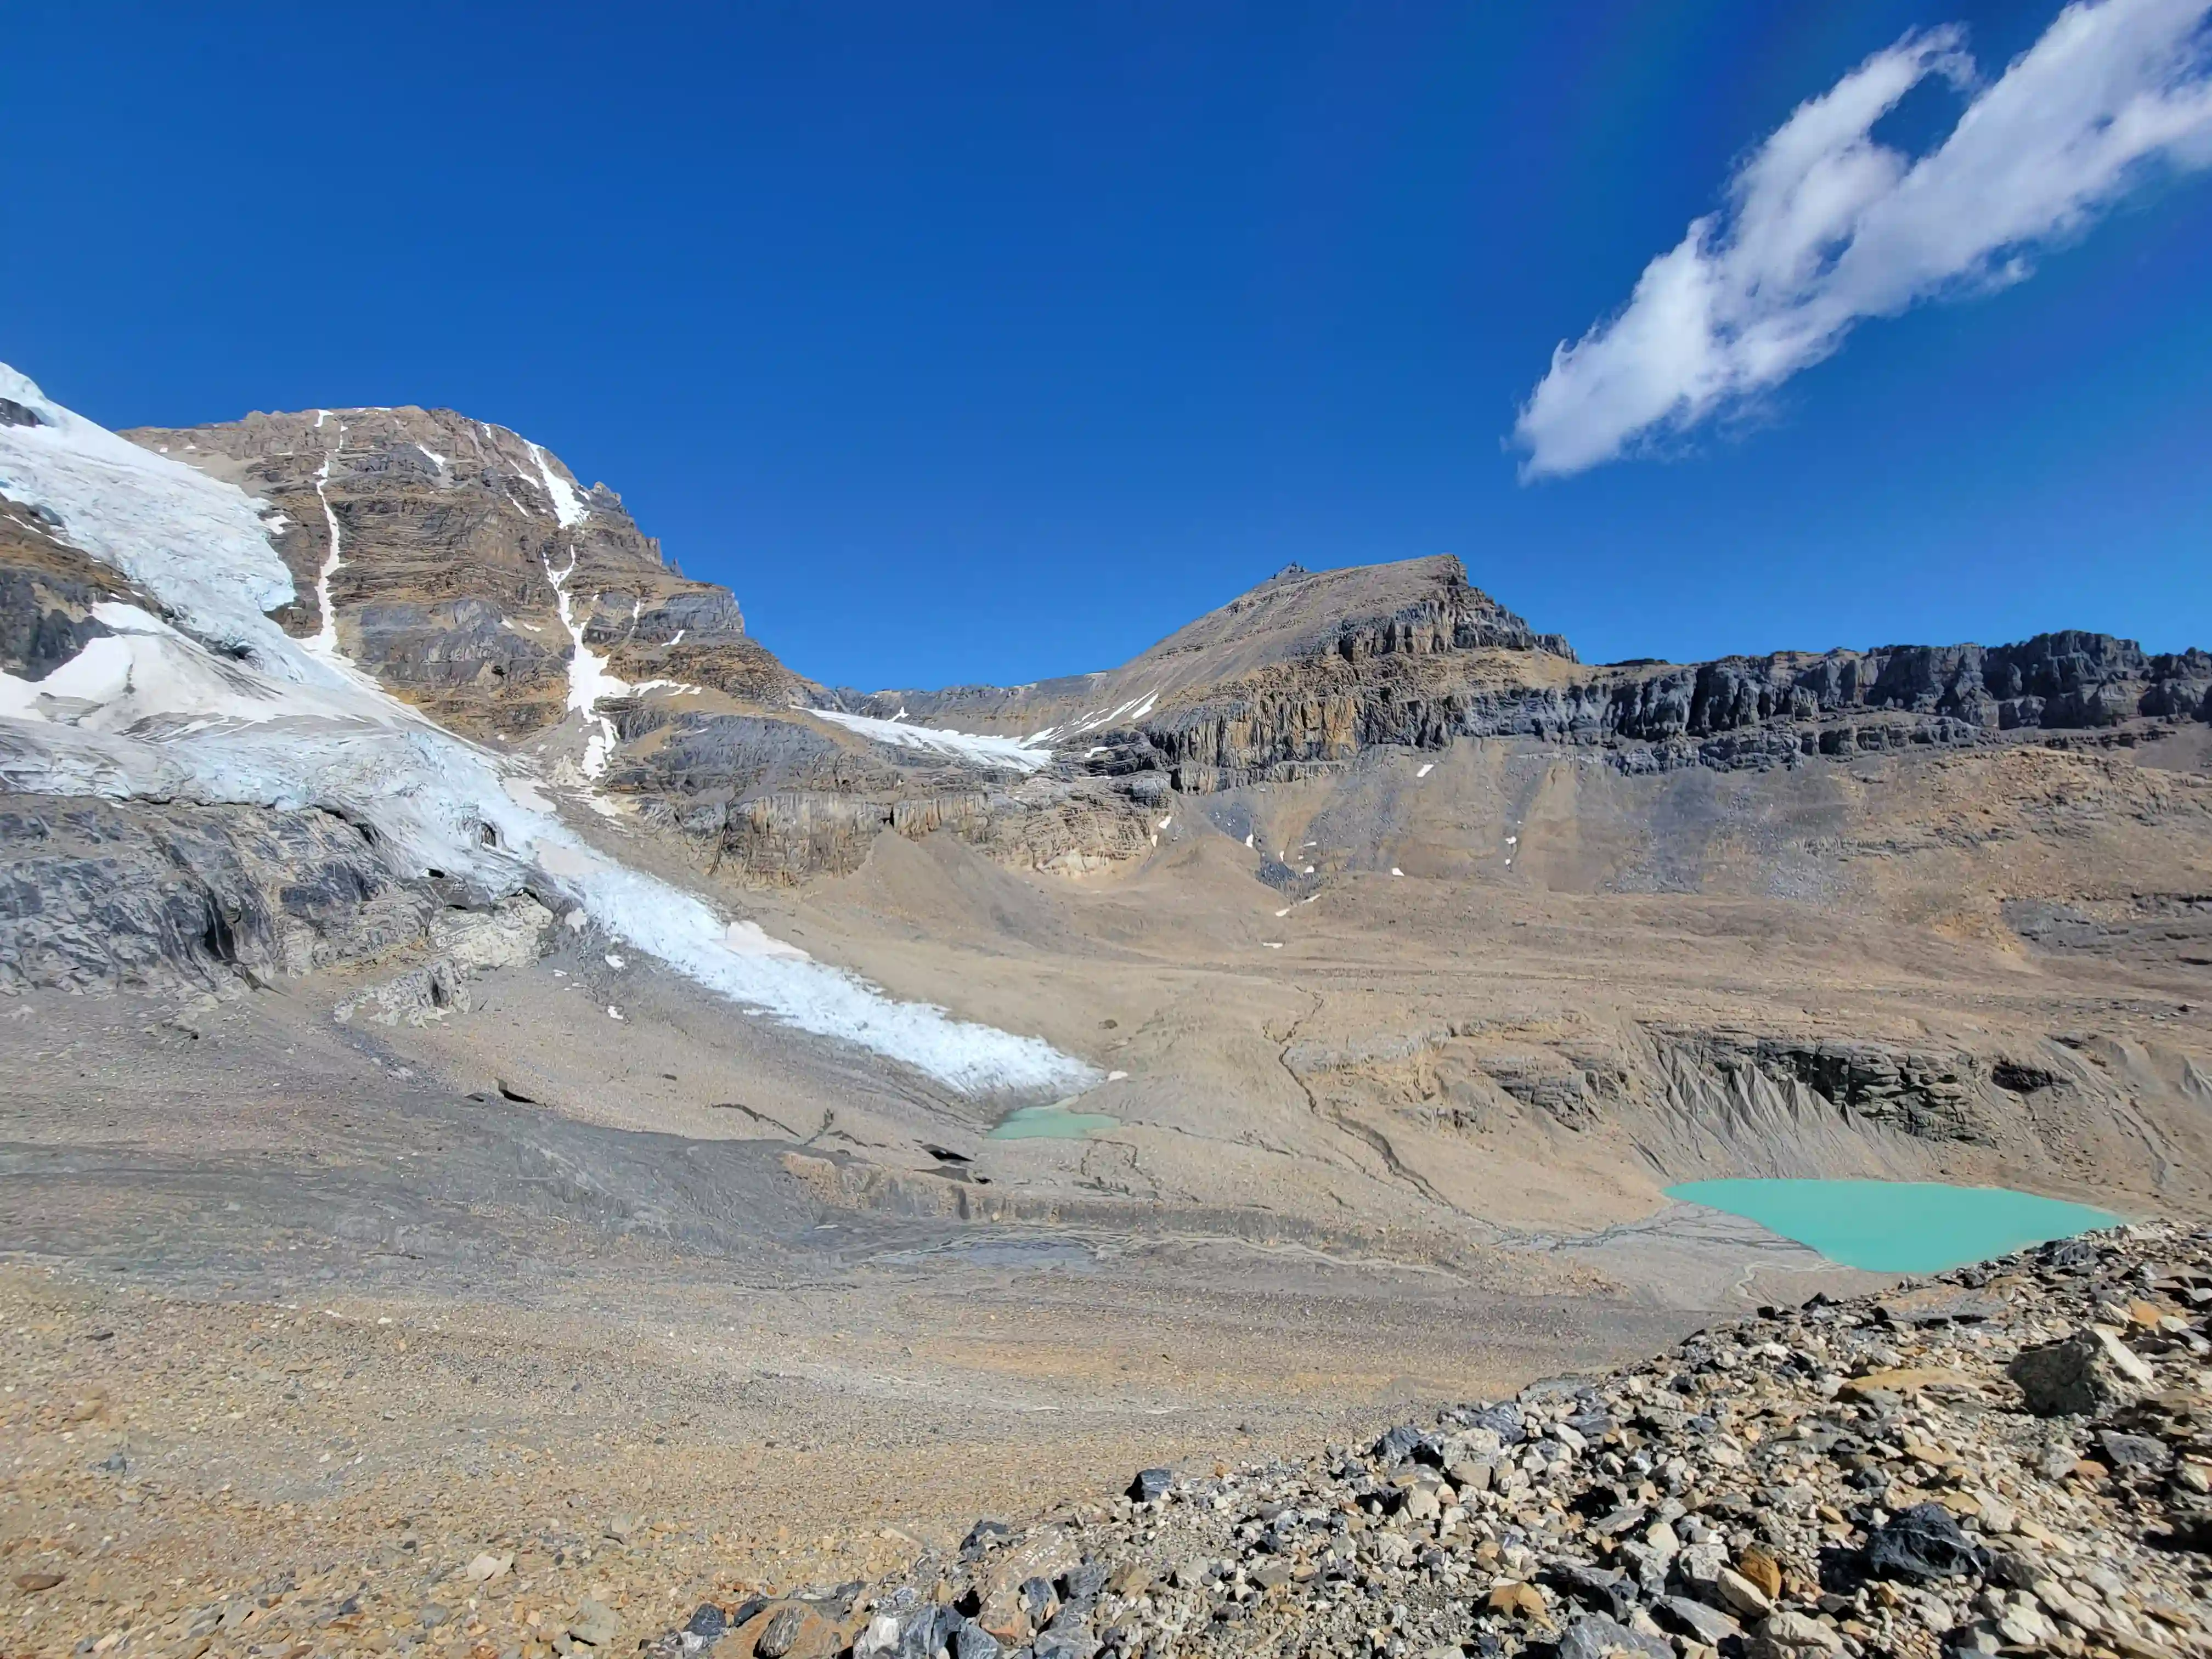
Woolley Shoulder
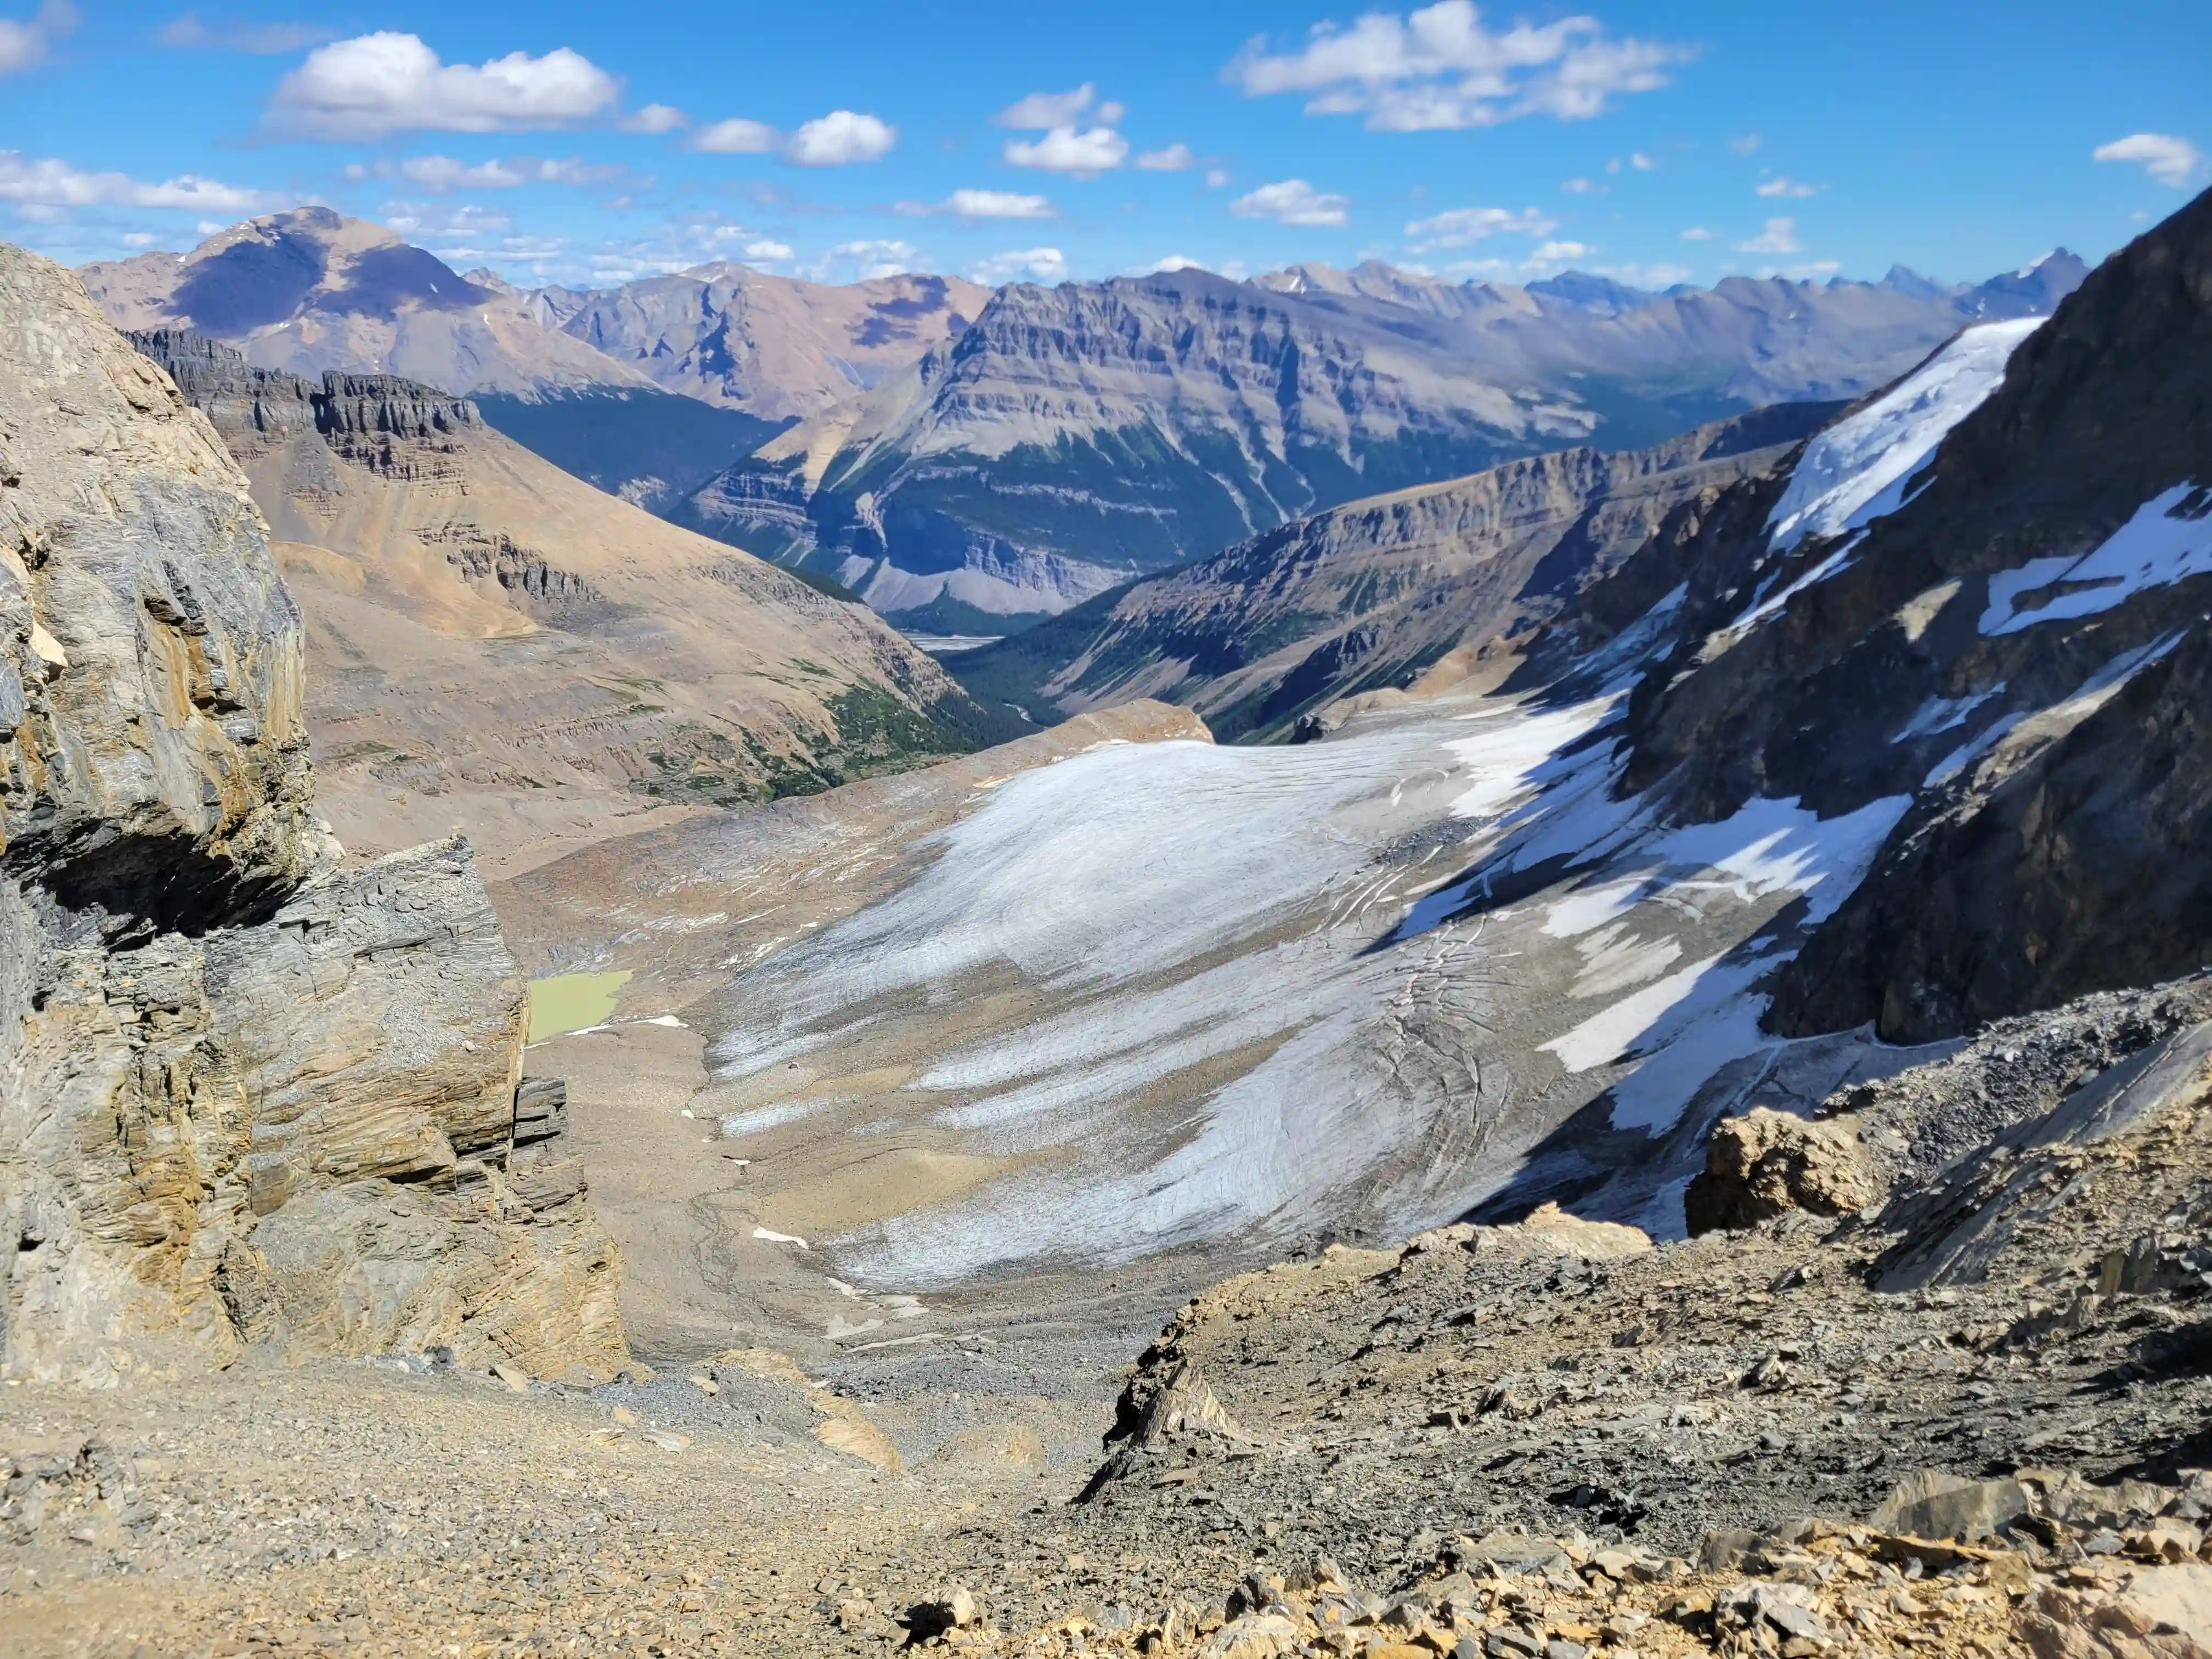
had to gain and the glacier coming off of Mount Engelhard below
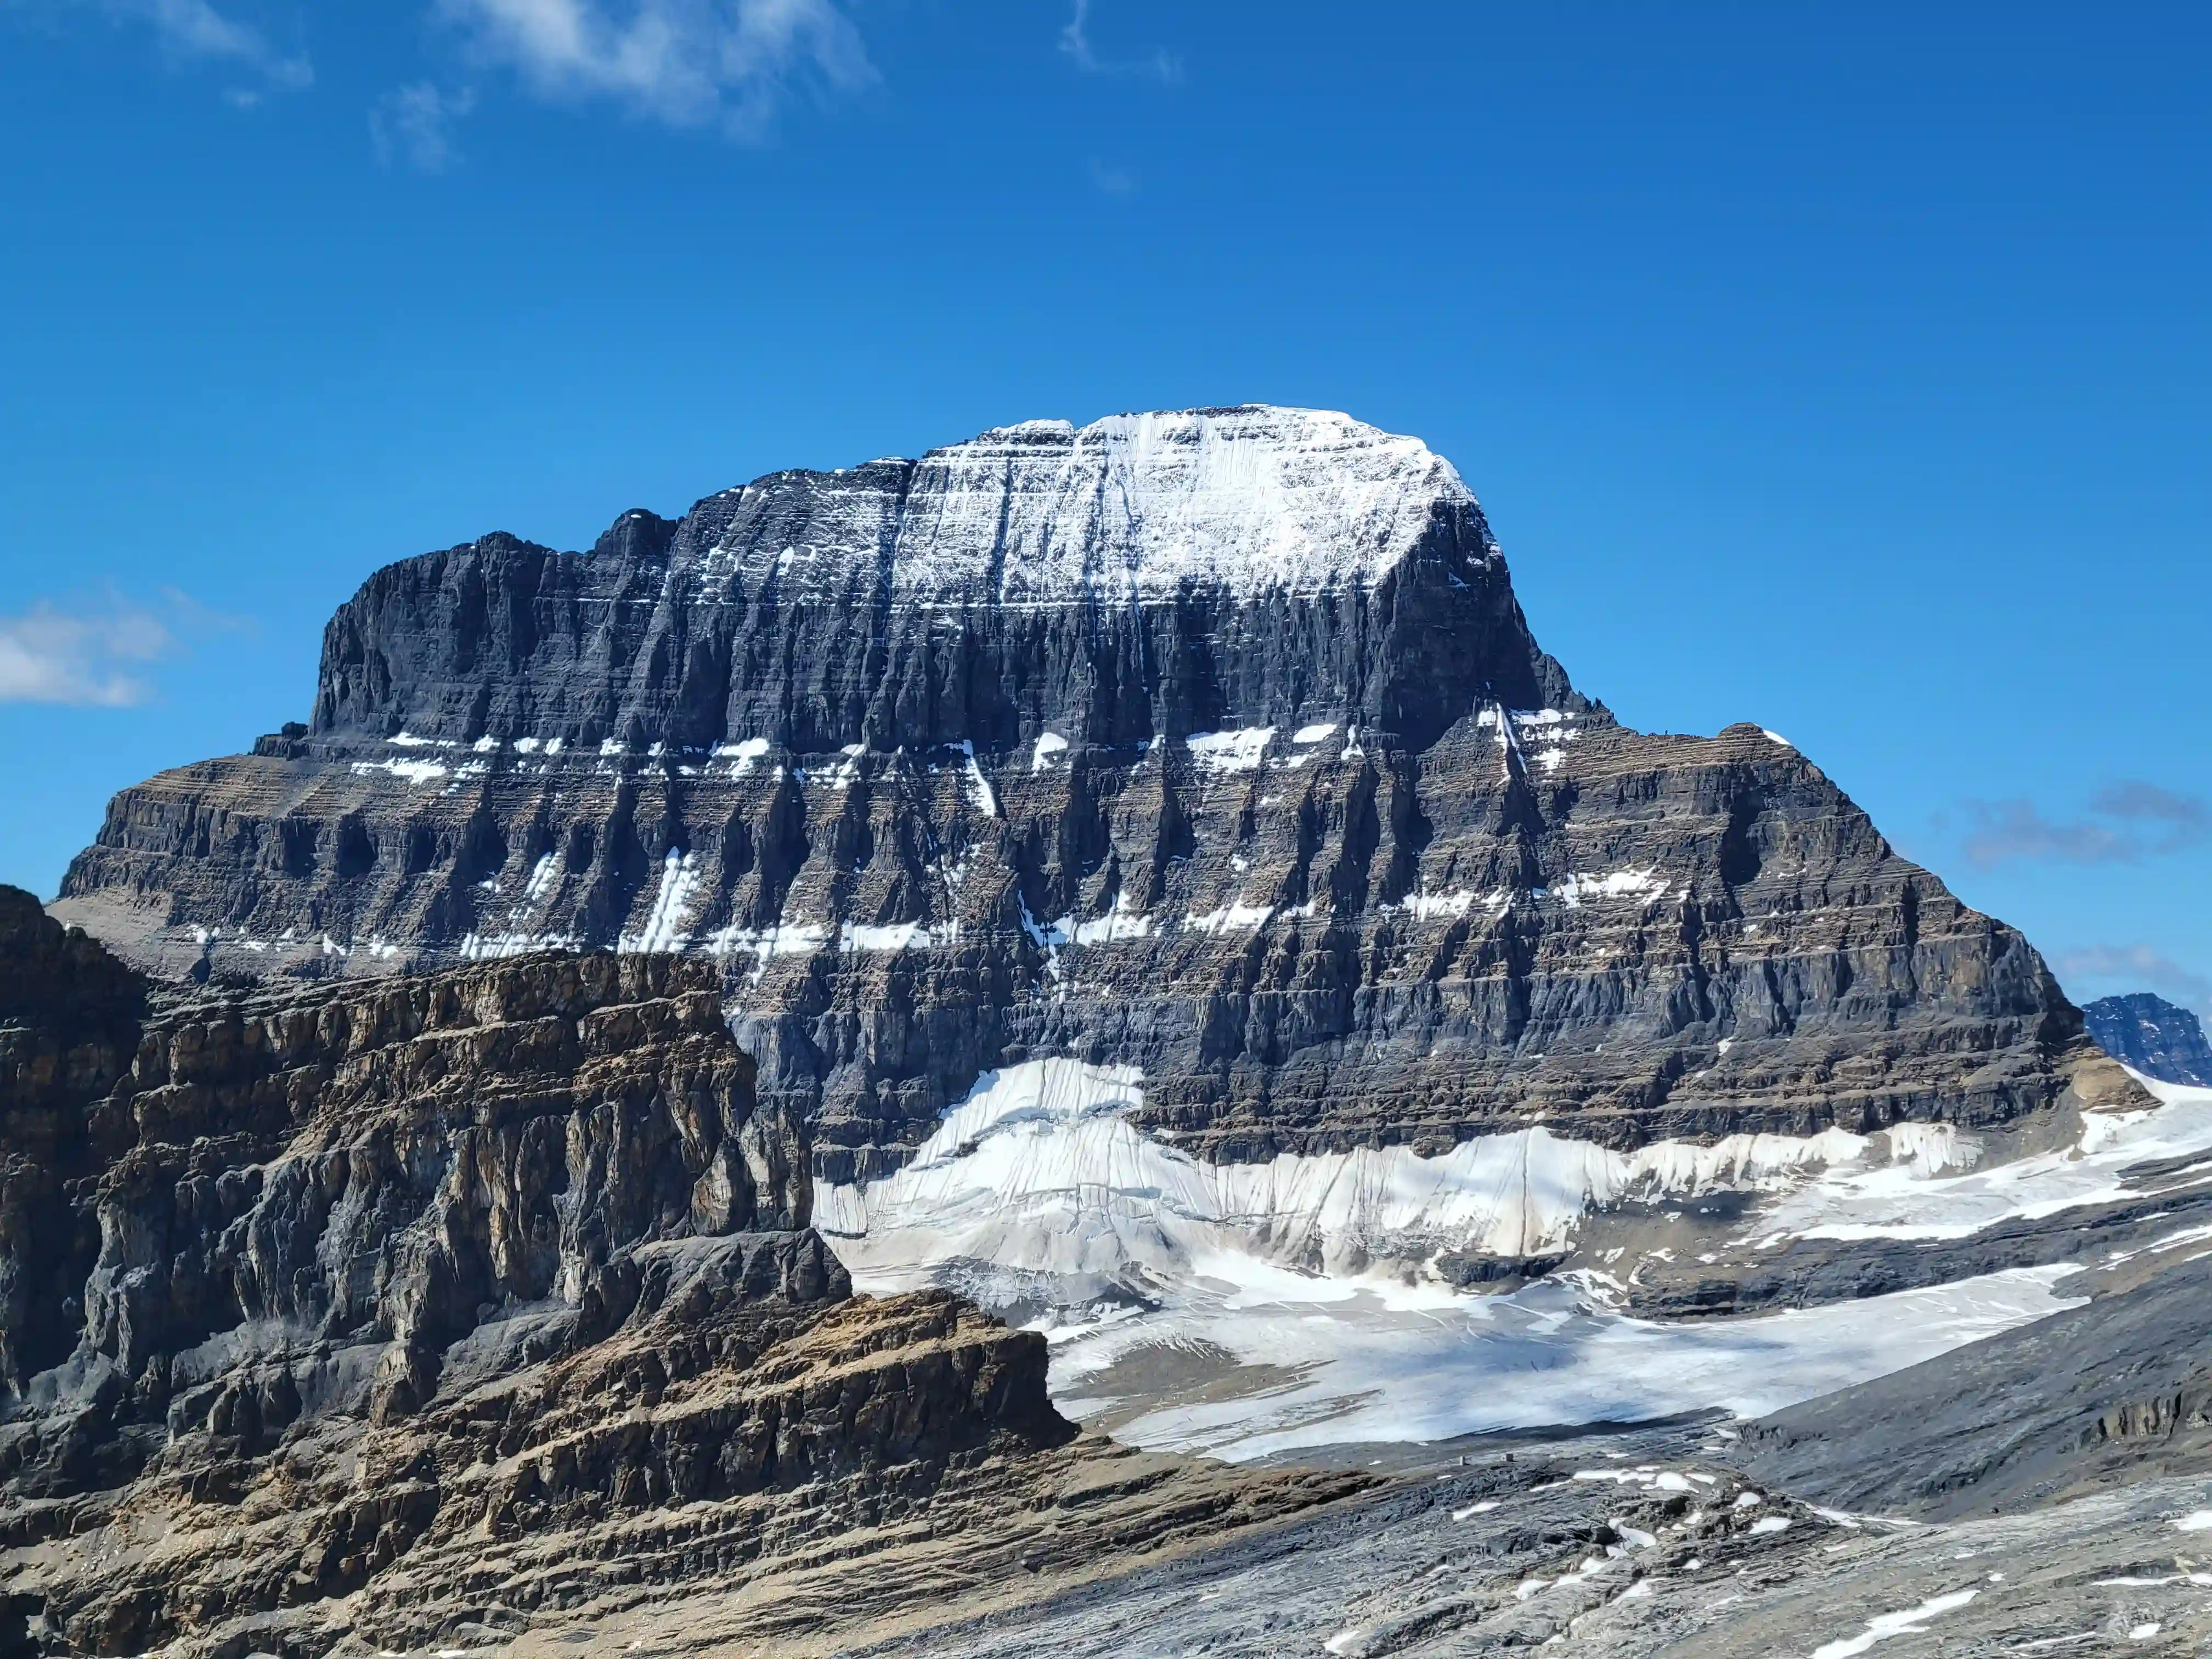
After reaching the Woolley Shoulder and getting our first view of Mount Alberta the stoke was high but with the lasting snow on the upper slopes the disappointment among the group was palpable and I was fairly certain this was the end of the trip for us. We had gone into the trip with the mindset of if the mountain's out of condition we wont go for it but the actual gully we'd be ascending on the upper mountain for the Japanese route didn't appear to be nearly as bad as the fully snow covered upper east face below the summit. That being said we could tell the ridge would have snowy sections and we left all our crampons and axes at the car so it seemed like we were lacking the proper equipment.
We hung out at the shoulder for about an hour and a half hashing out various options from bailing and going for other 11000er objectives like Edith Cavell or The Goodsirs, to going back to the cars and approaching the next day with our crampons and axes, to heading for the hut and waiting a day for the snow to hopefully melt, to sticking to our initial plan and pushing for the ledge bivy half way up the mountain on day 1. Even after discussing options with the group for an hour I was quite confident we had gotten cold feet and would pull the plug but there's something to be said about the desire to push on when you have a super capable group and a lot of planning has gone into the trip and this was no exception. It seemed like everyone wanted to continue but we needed to have a good plan in place to justify it and what we ended up landing on was rather than pushing for the ledge bivi site on our approach day we'd stay at the hut for the night and go for the full ascent the next day, leaving sleeping gear at the bivy site and if conditions were too snowy or wet we'd spend another day on the mountain to let it melt more if we thought that might improve our odds of success.
This seemed like a rock solid plan at the time given the conditions we were dealing with but what we didn't account for enough was the amount of time the upper mountain takes to get up and down in good conditions, not to mention what we'd be dealing with. We should've started a lot earlier from the hut the second day or pushed for the bivi ledge on our approach day but we opted to start from the hut the next morning at 7:30 to hopefully have the route more melted out and dry by the time we got there. With an earlier start the route would've melted out all the same considering it took us 6 hours to reach the snowy sections anyway so this was an oversight on our part, don't make the same mistake as us!
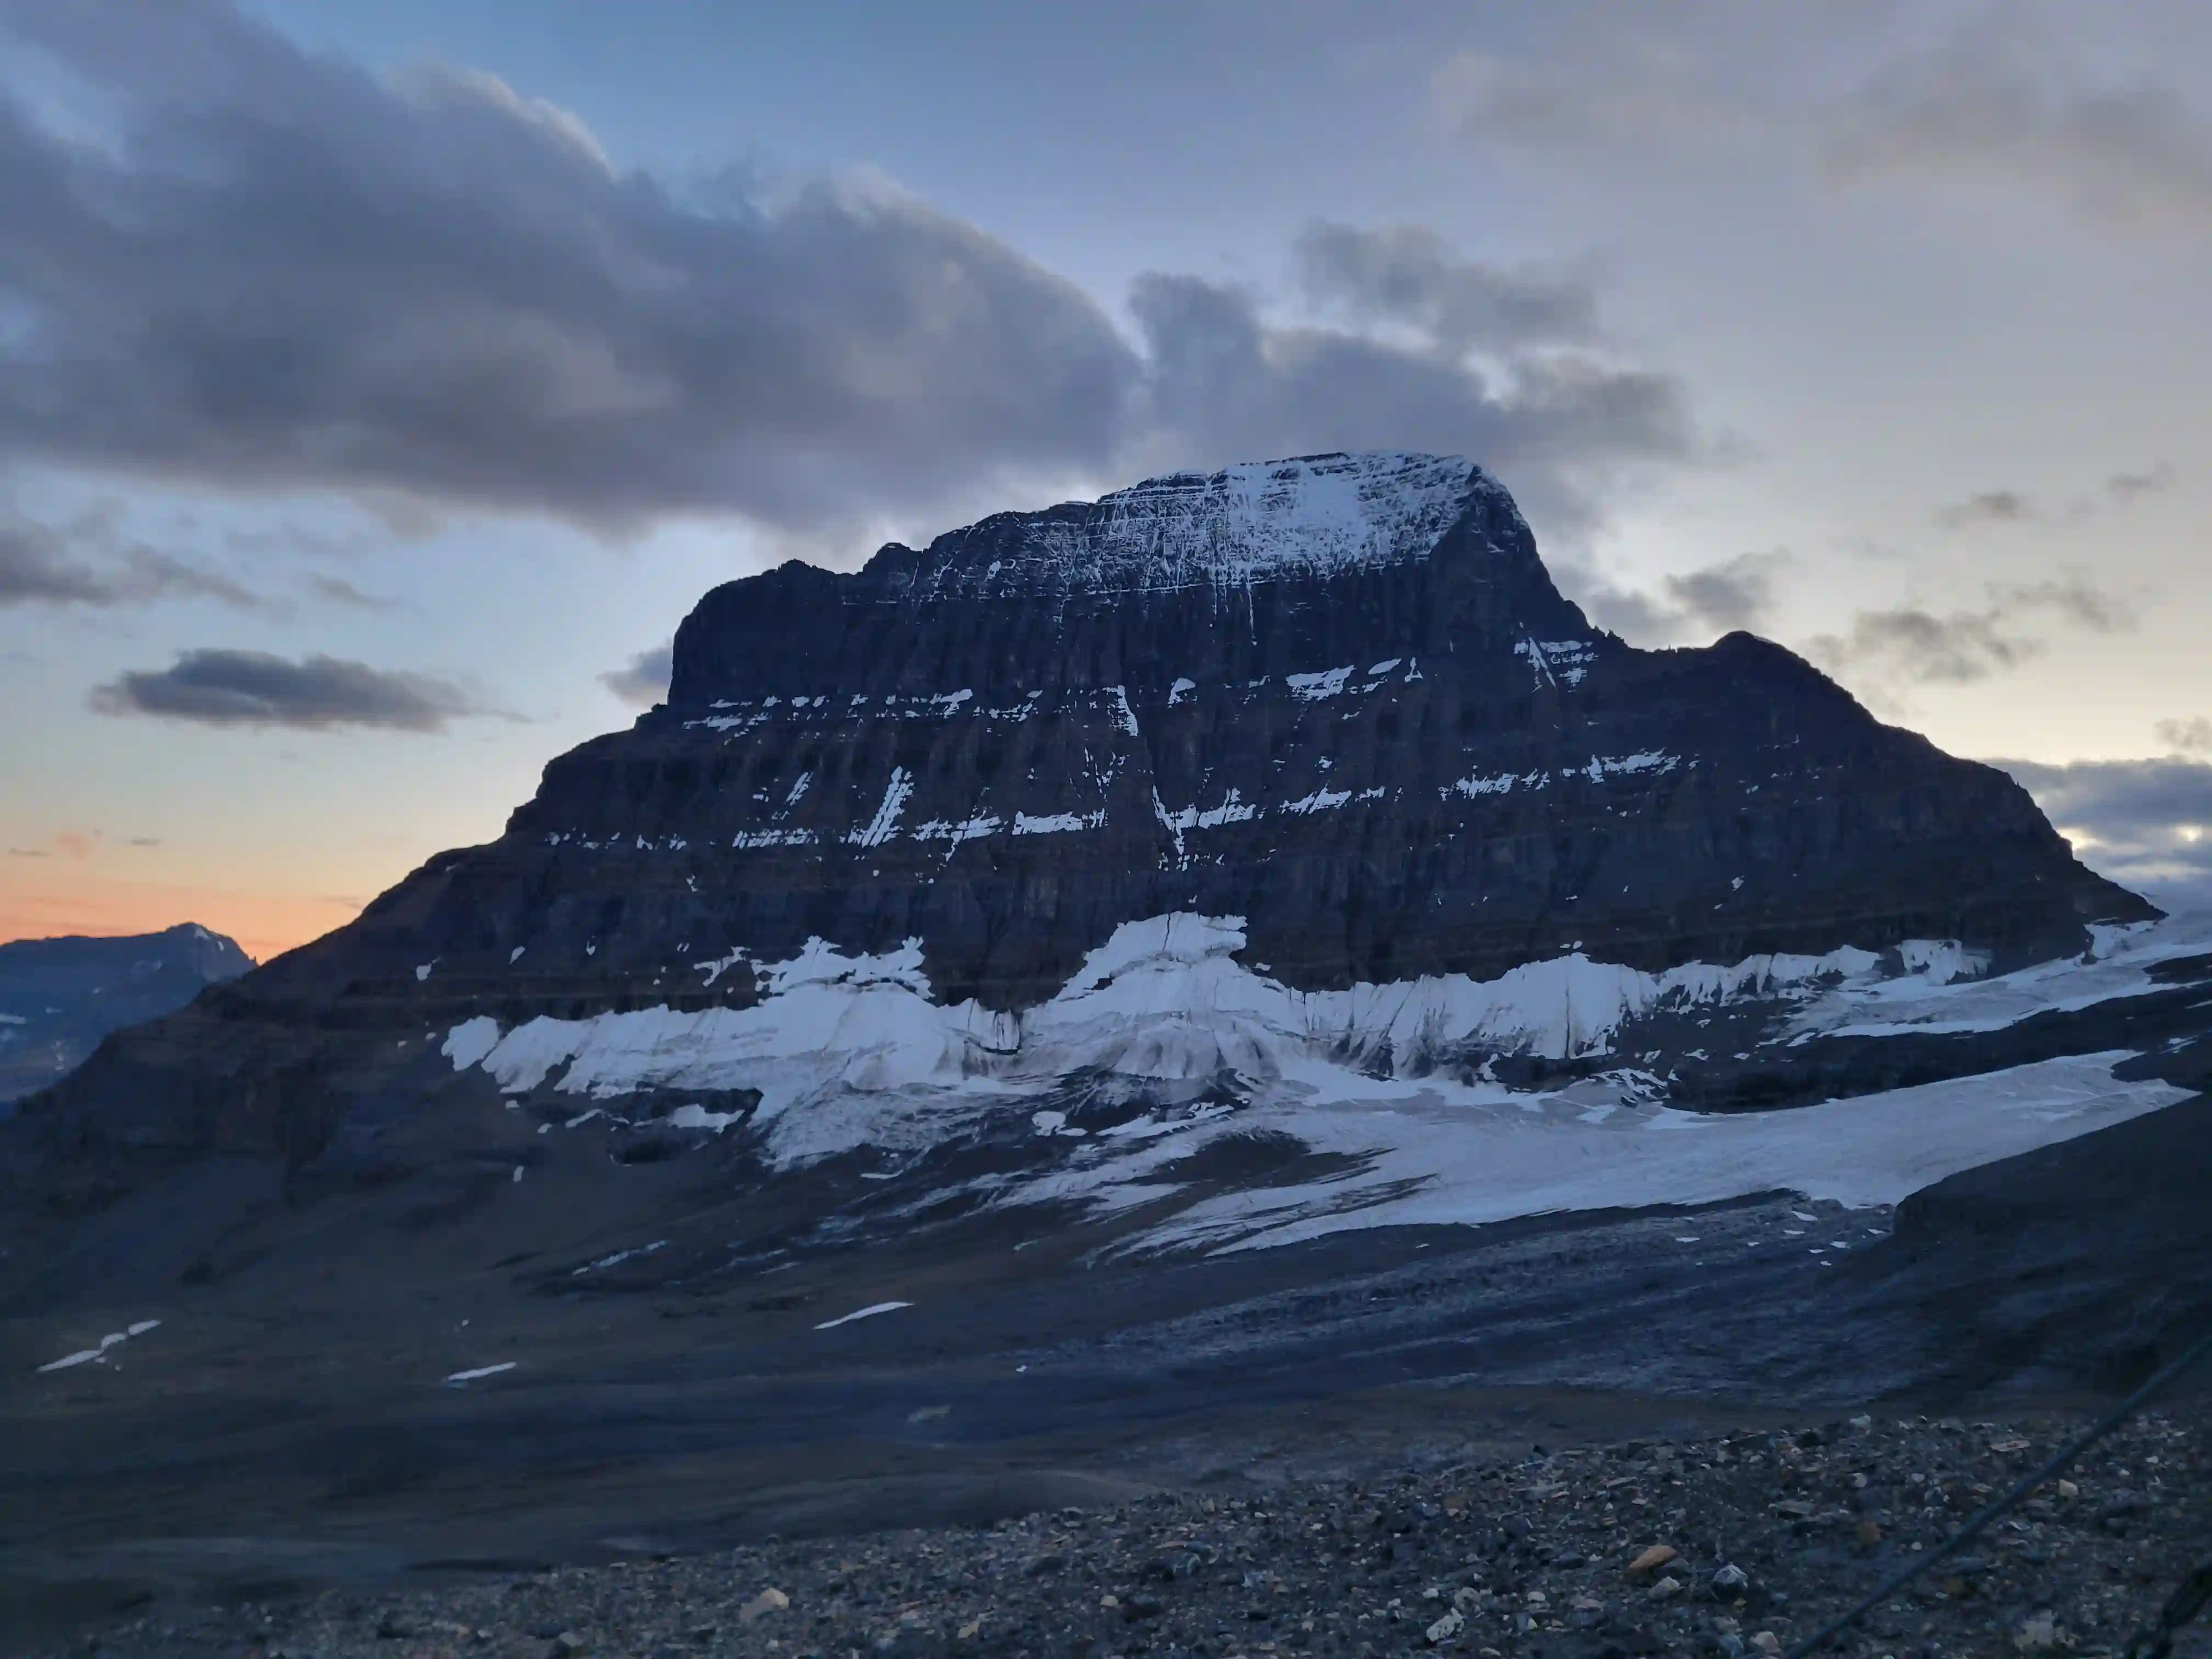
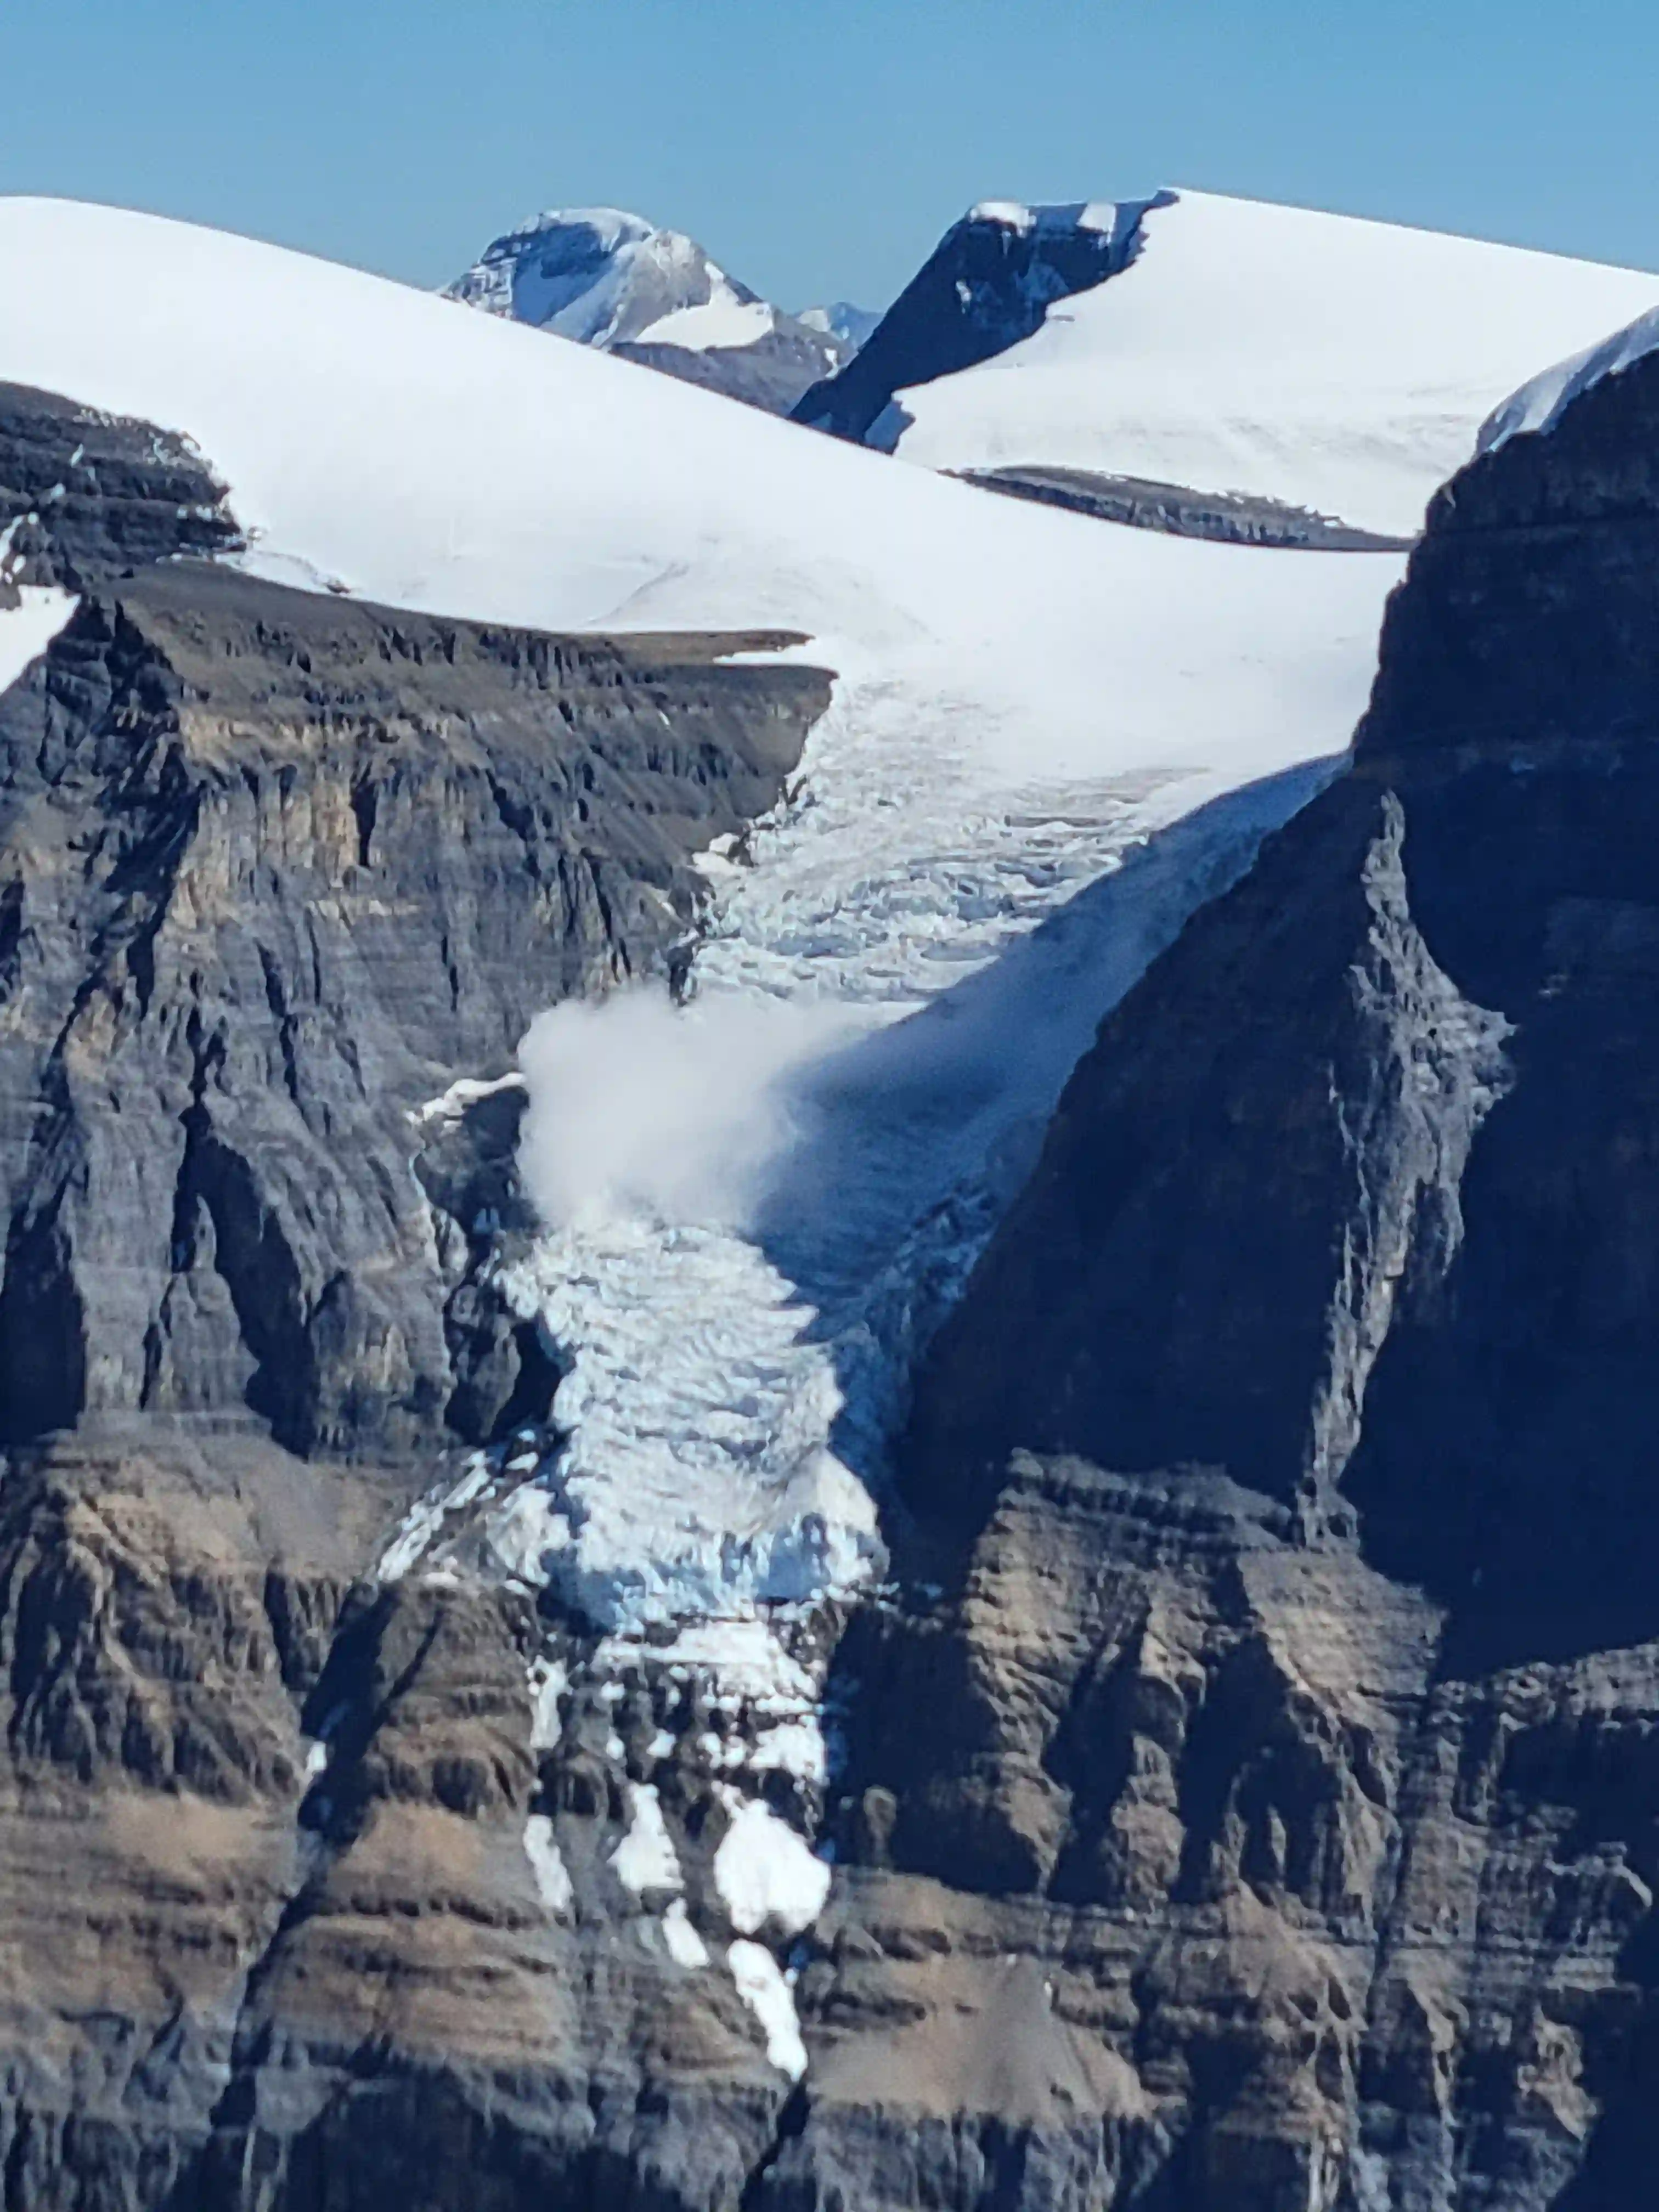
these peaks and cliff faces are massive
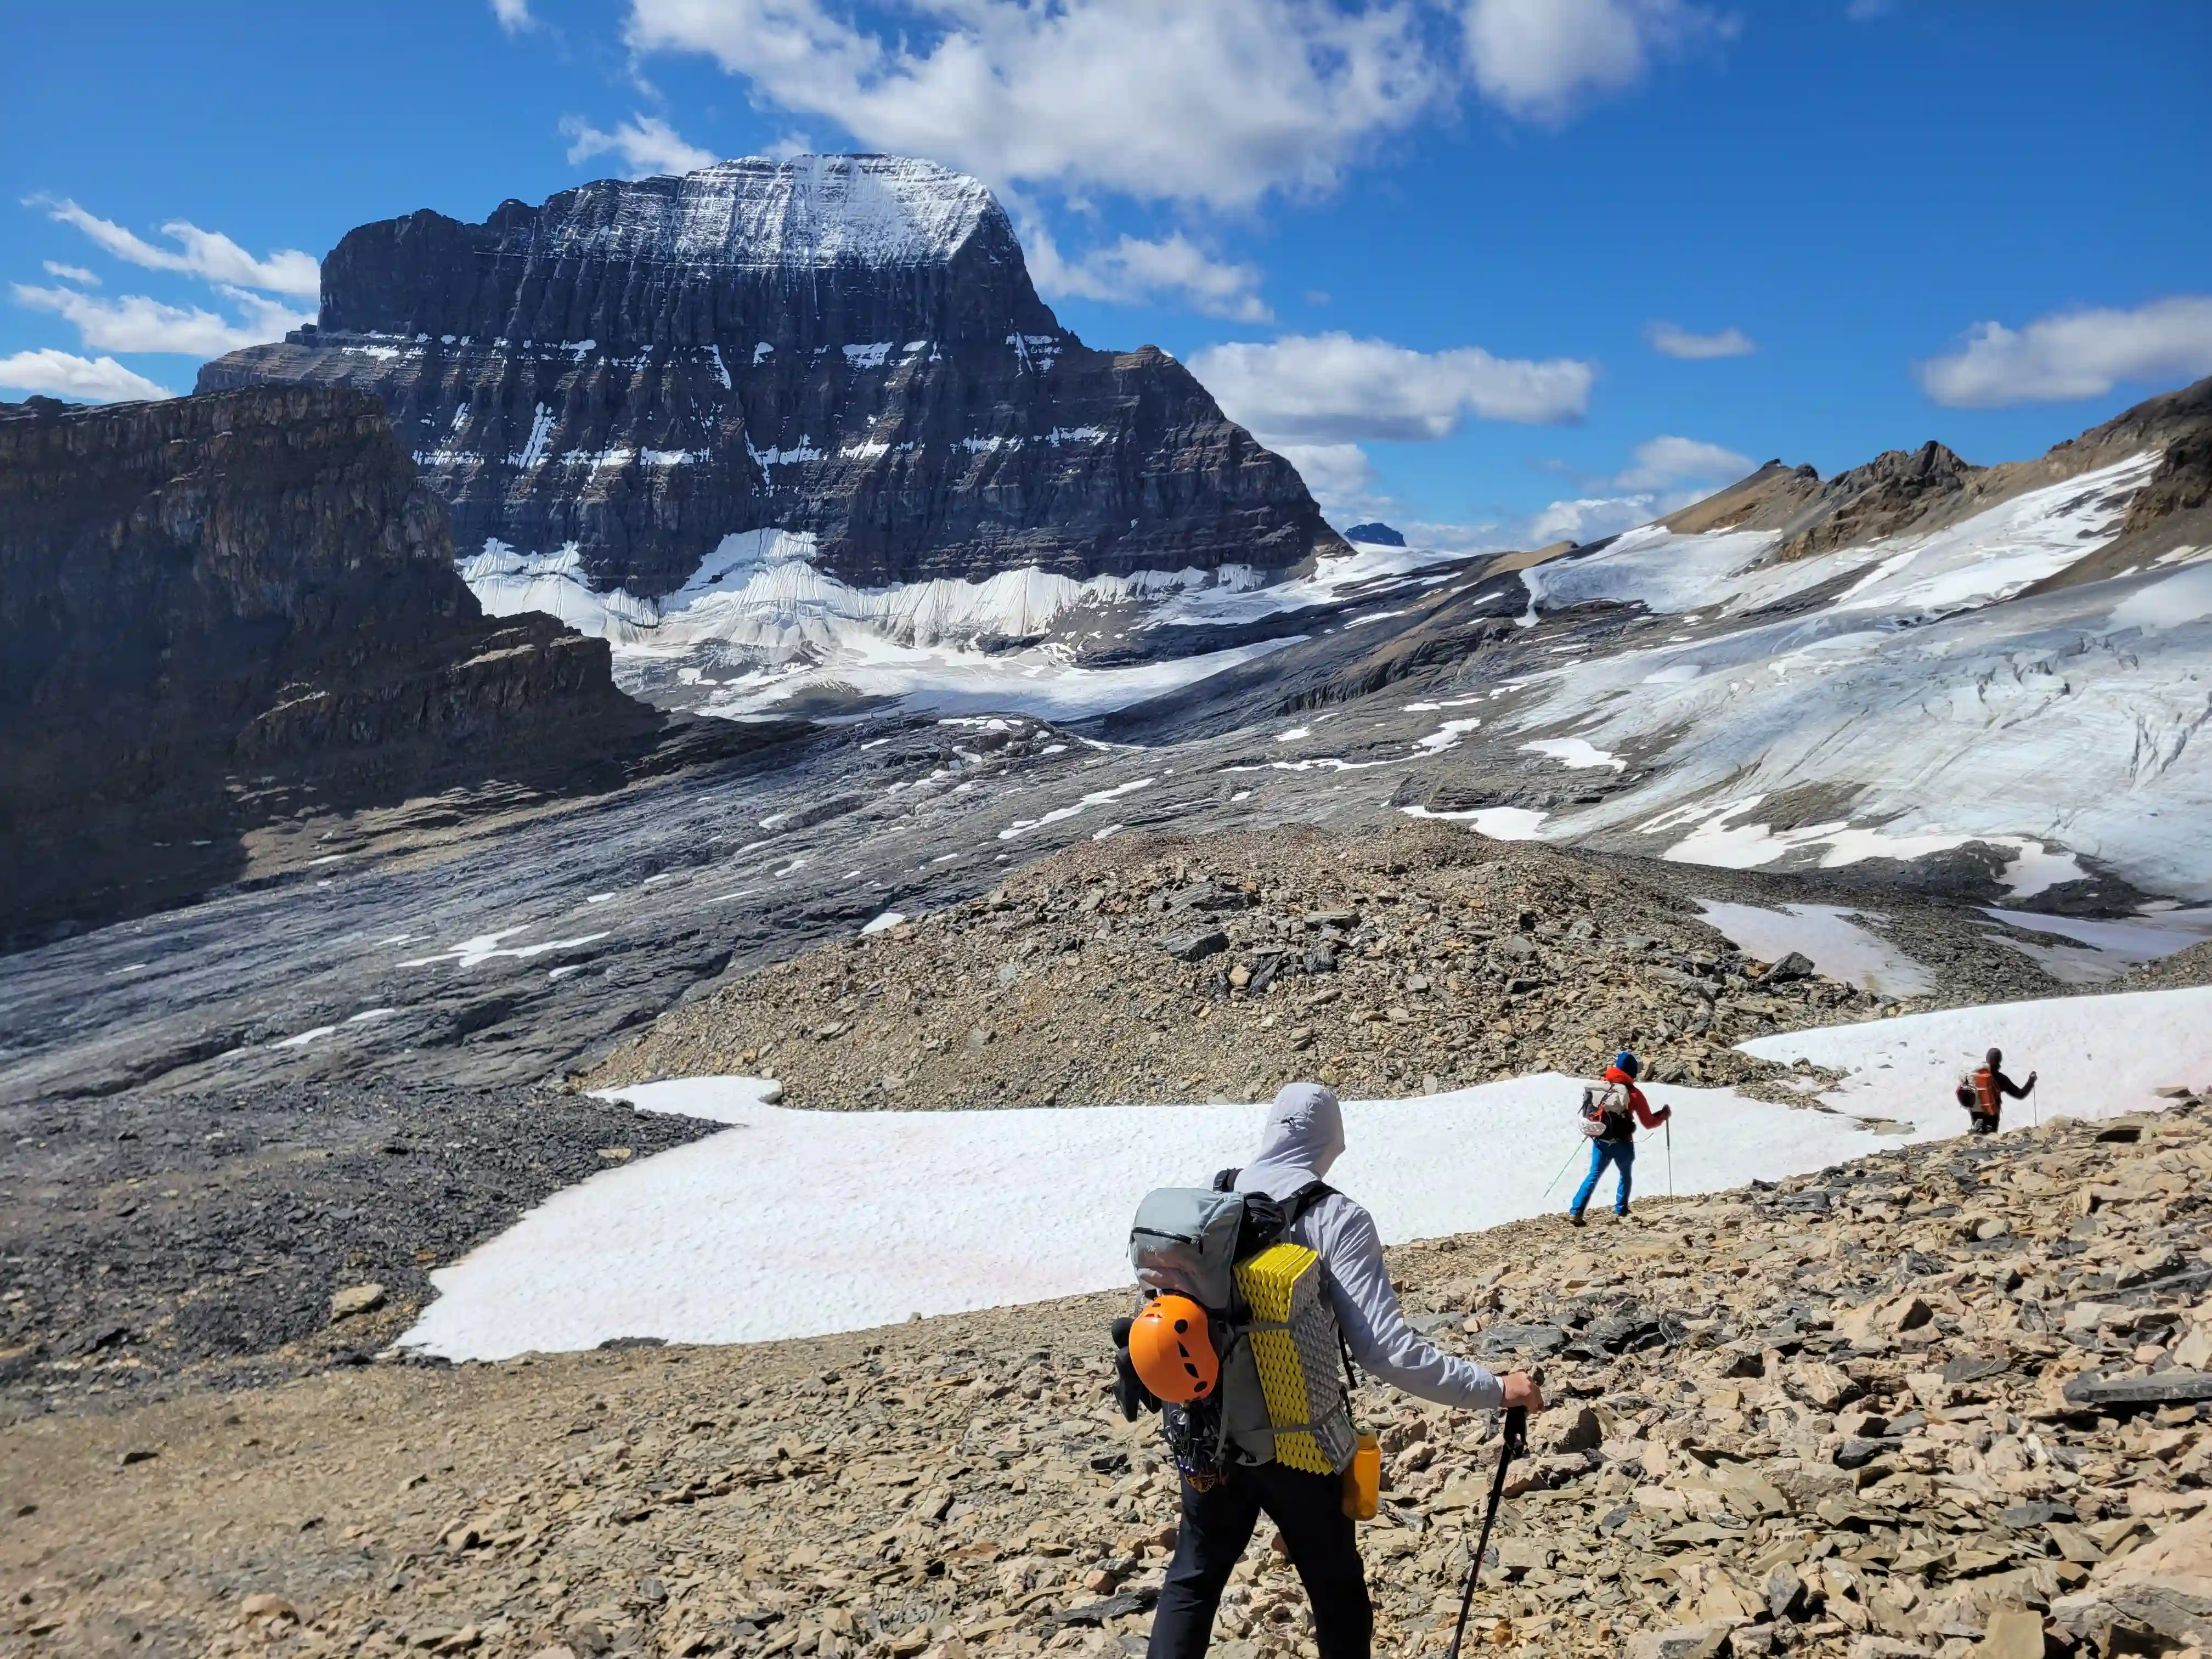
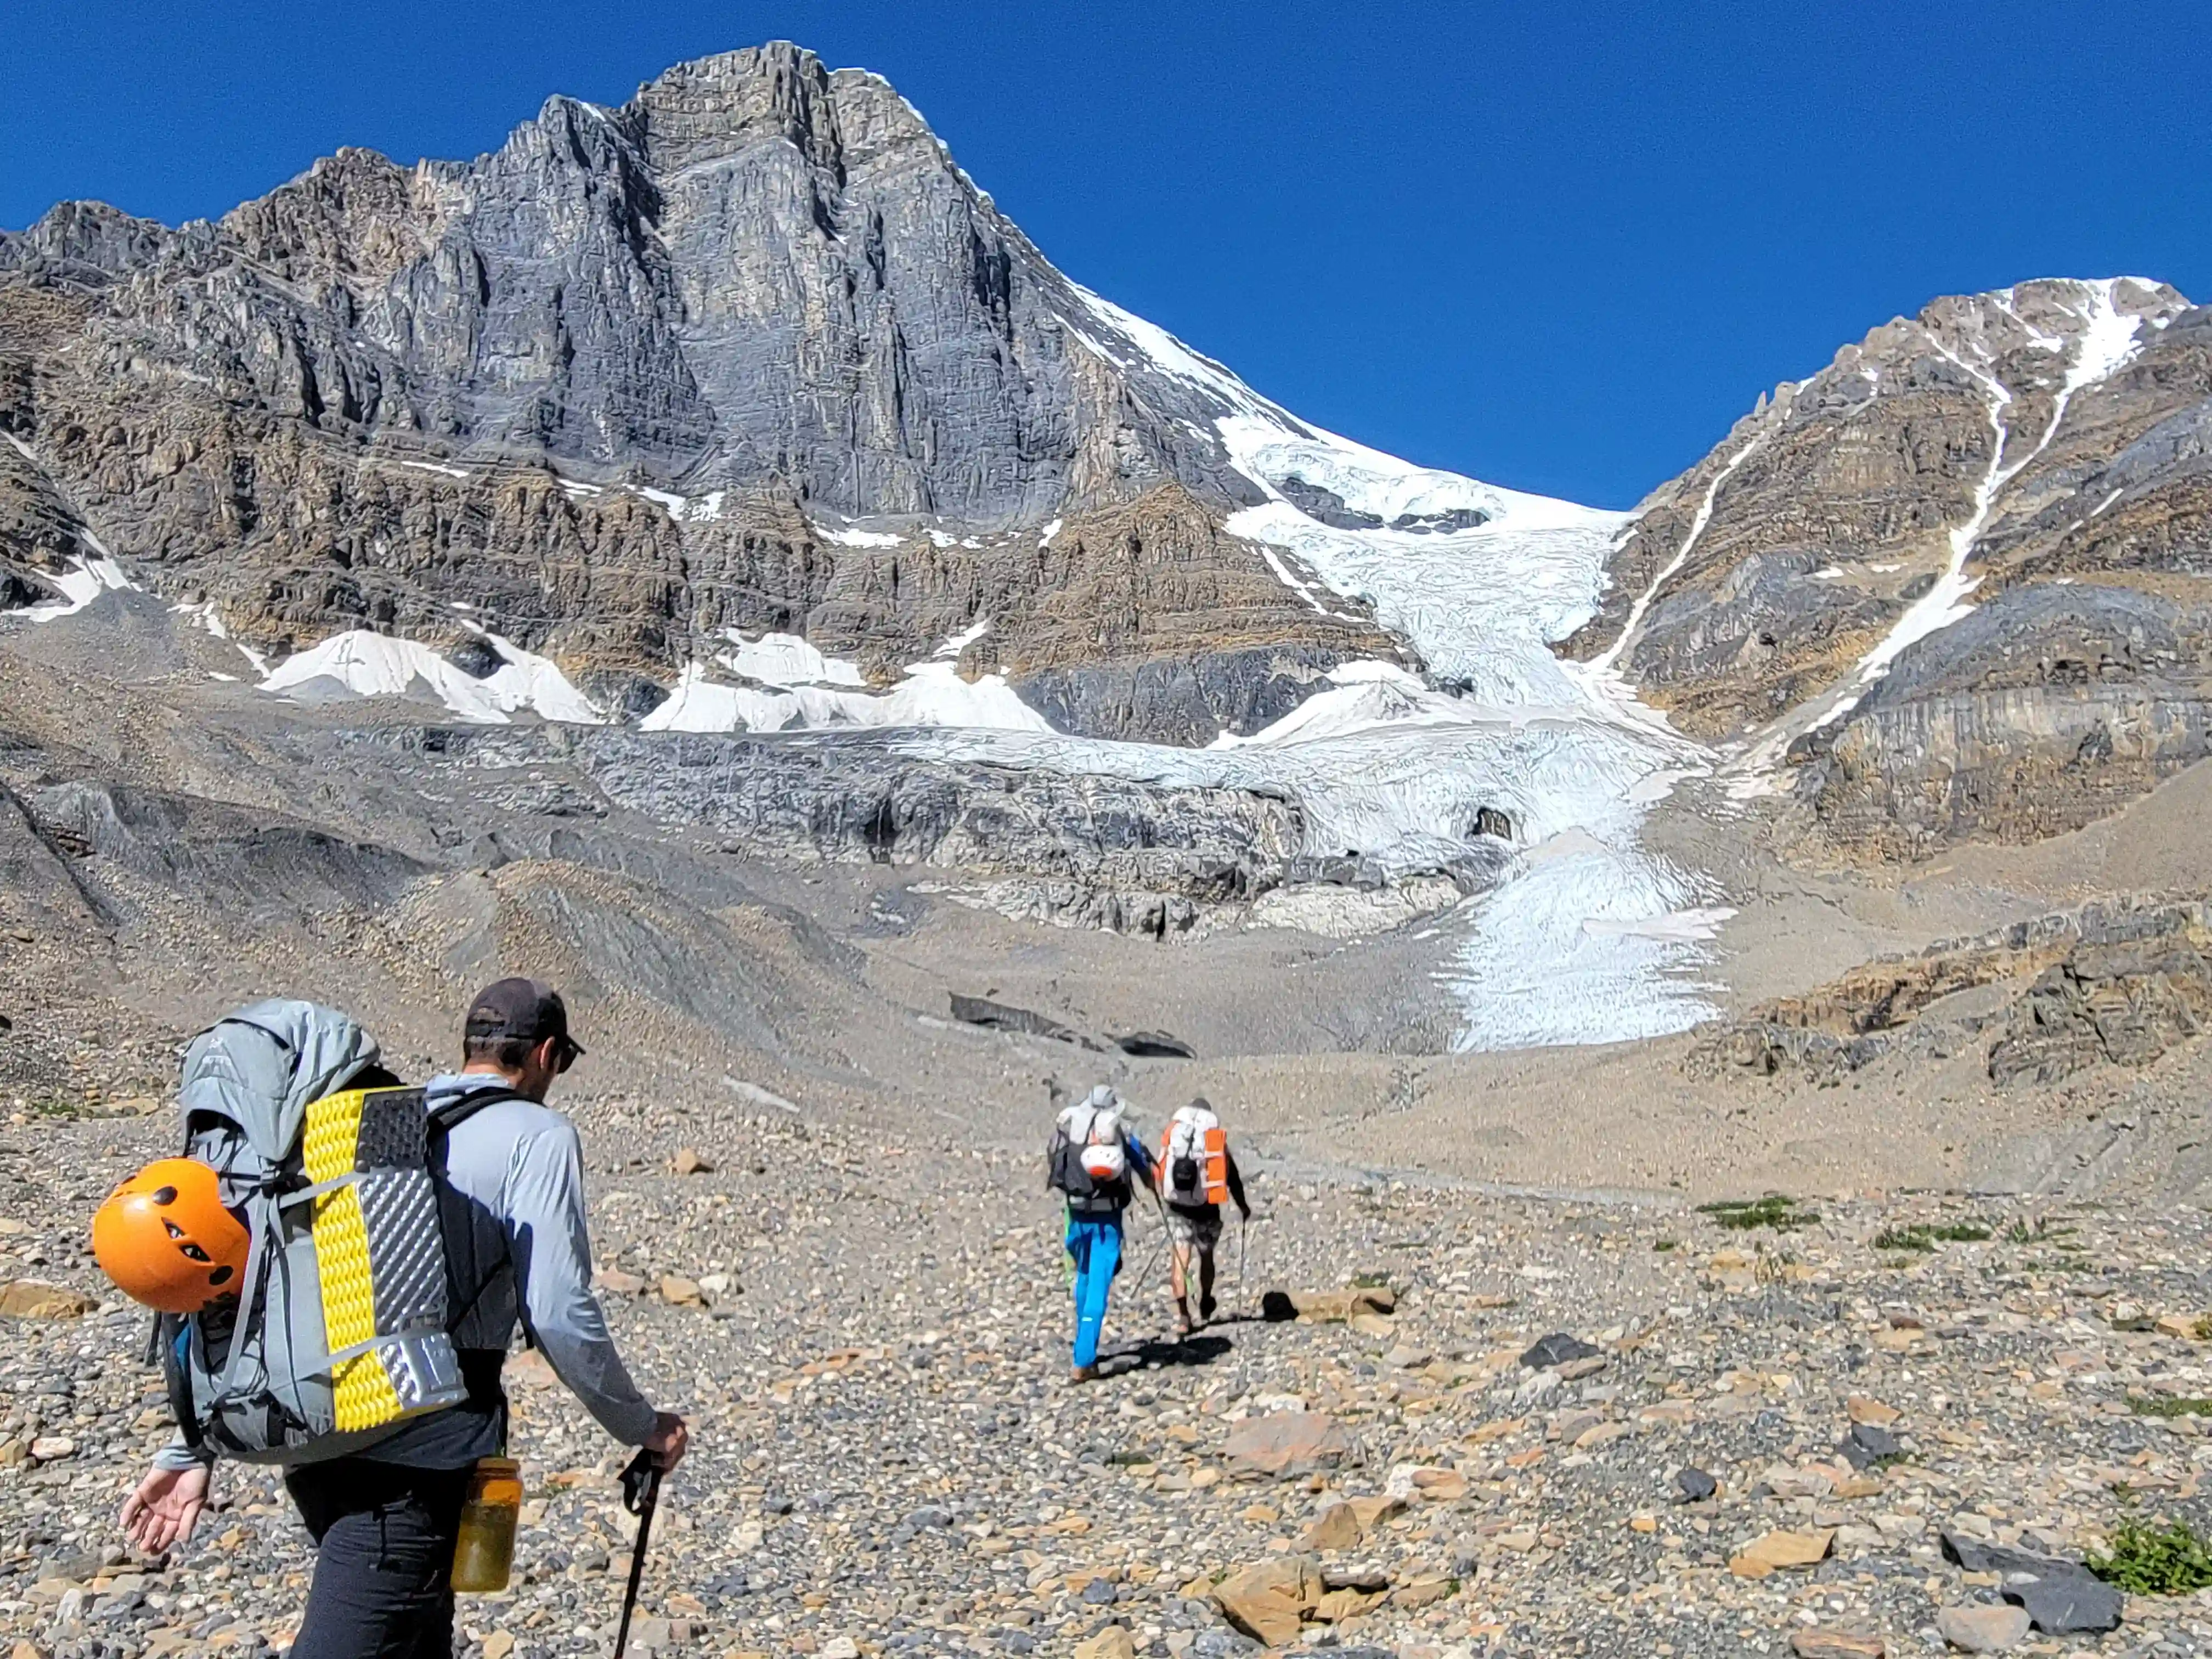
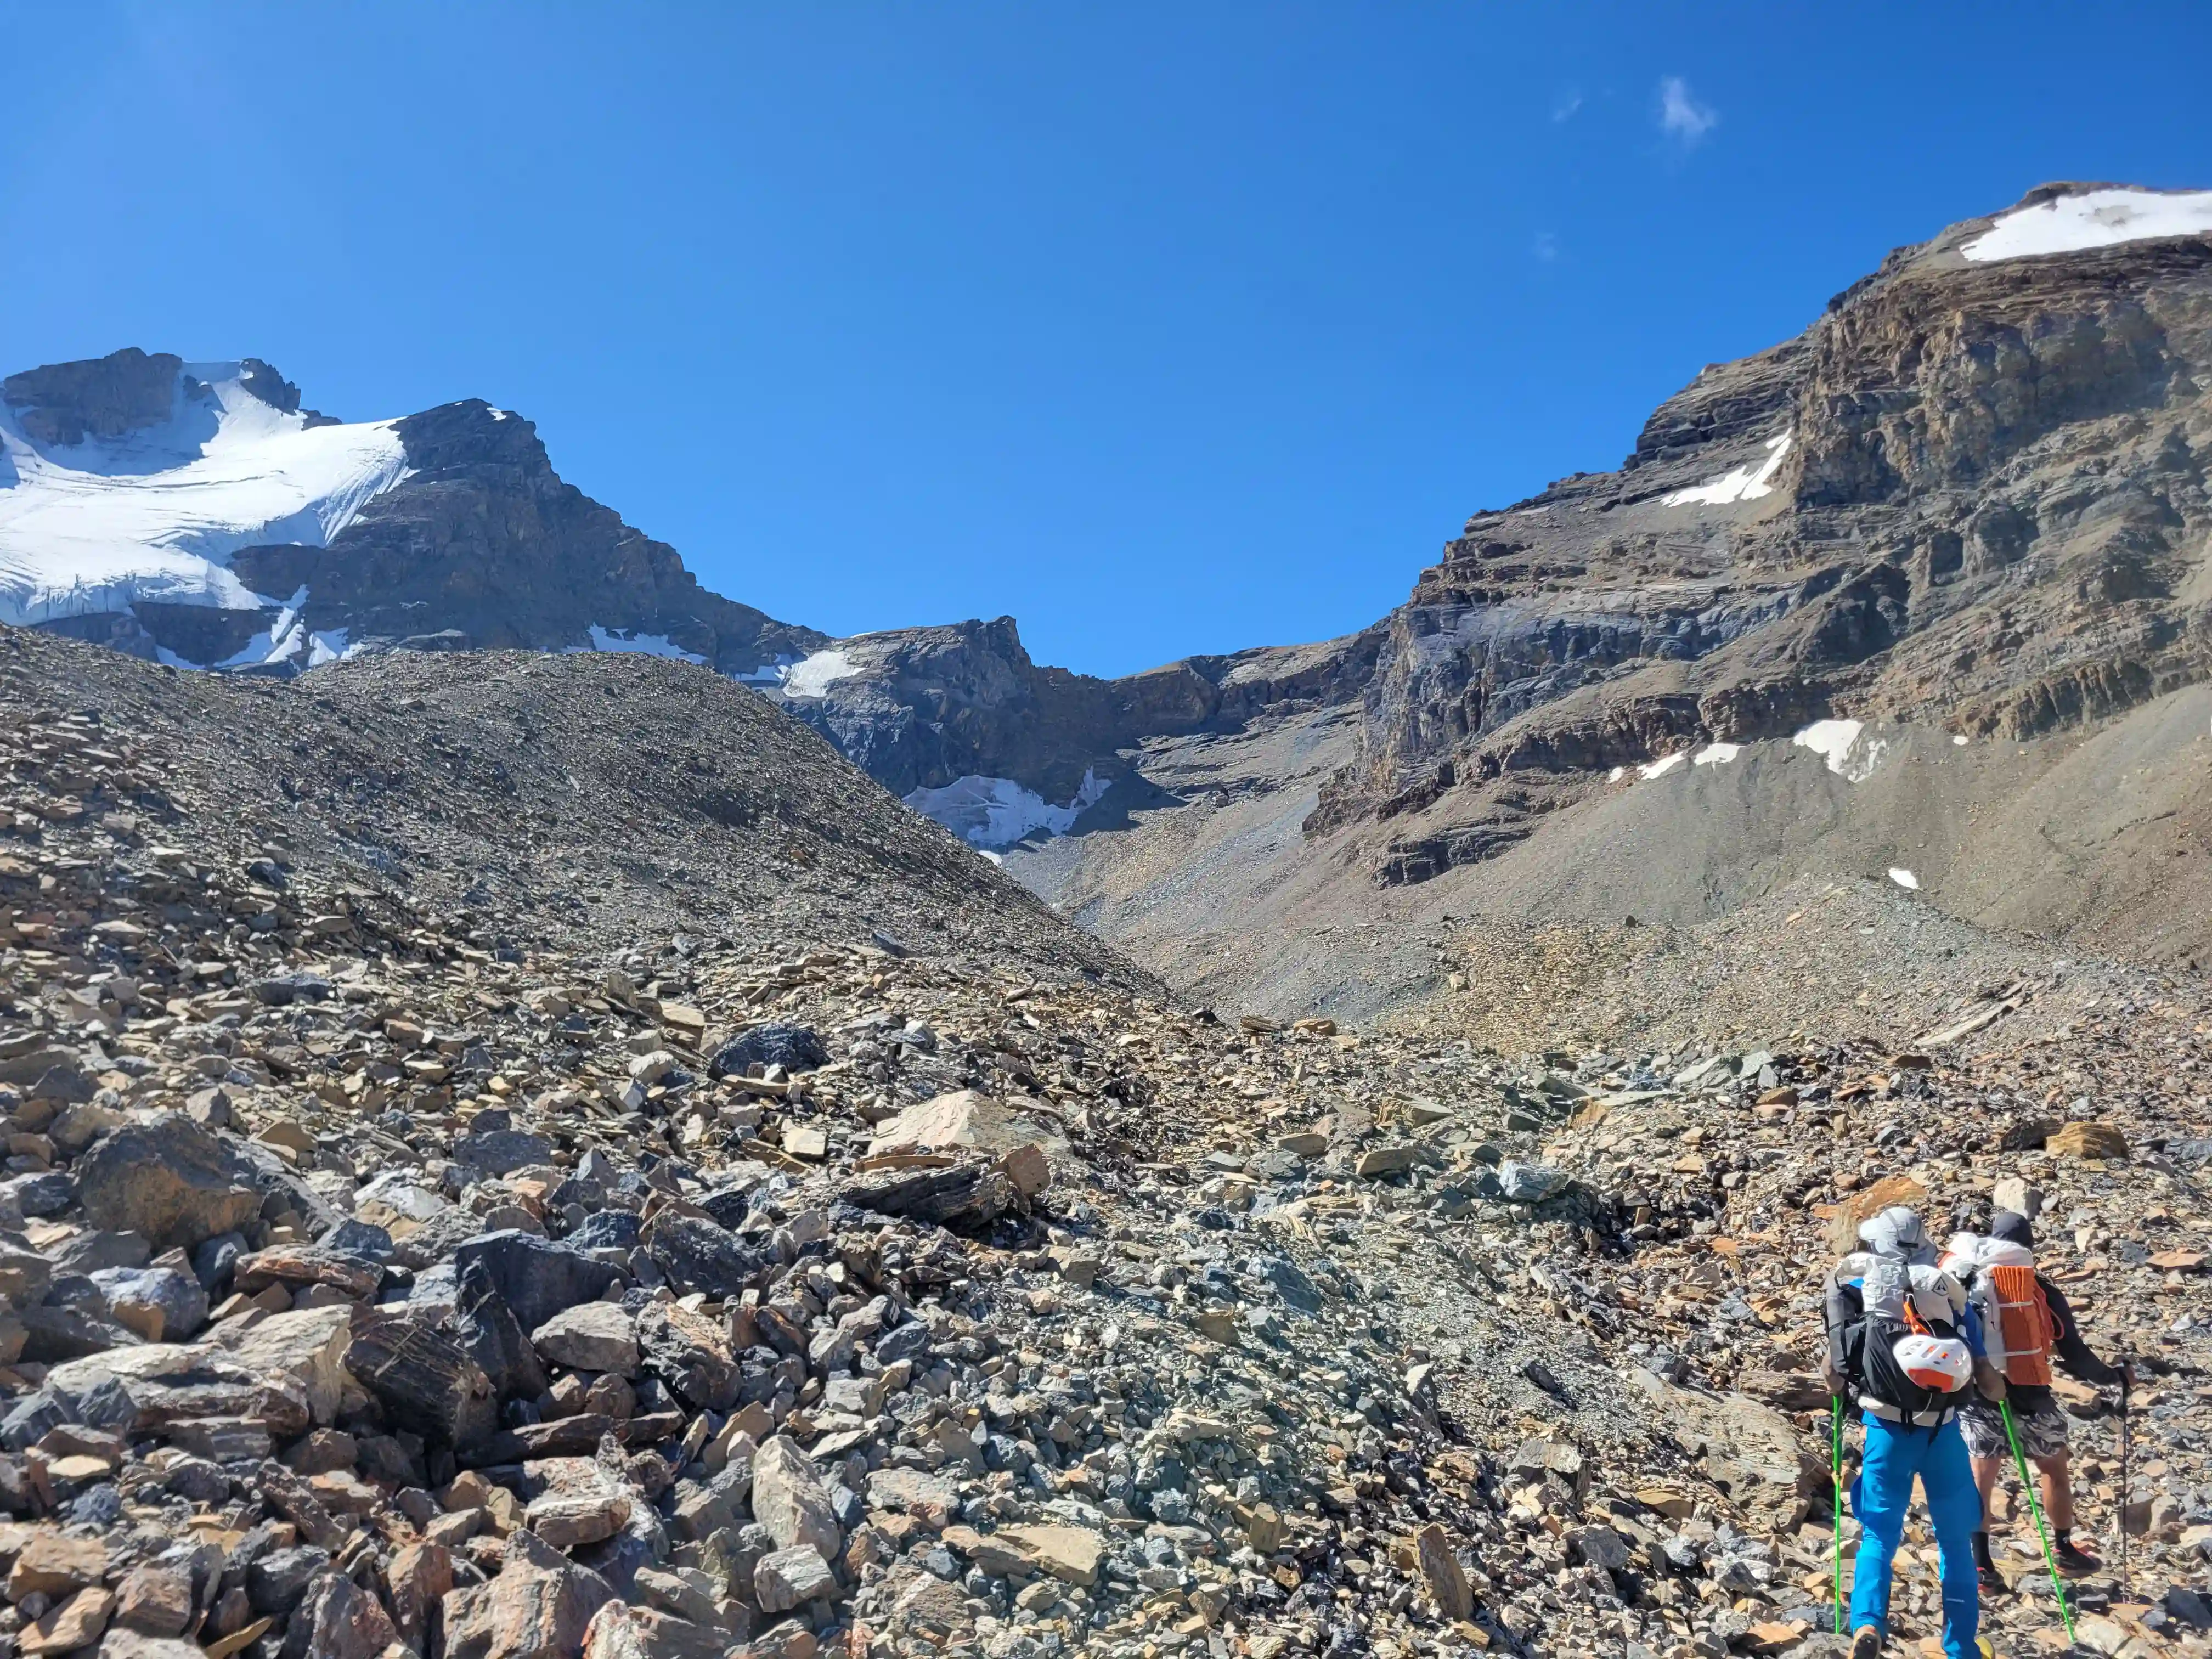
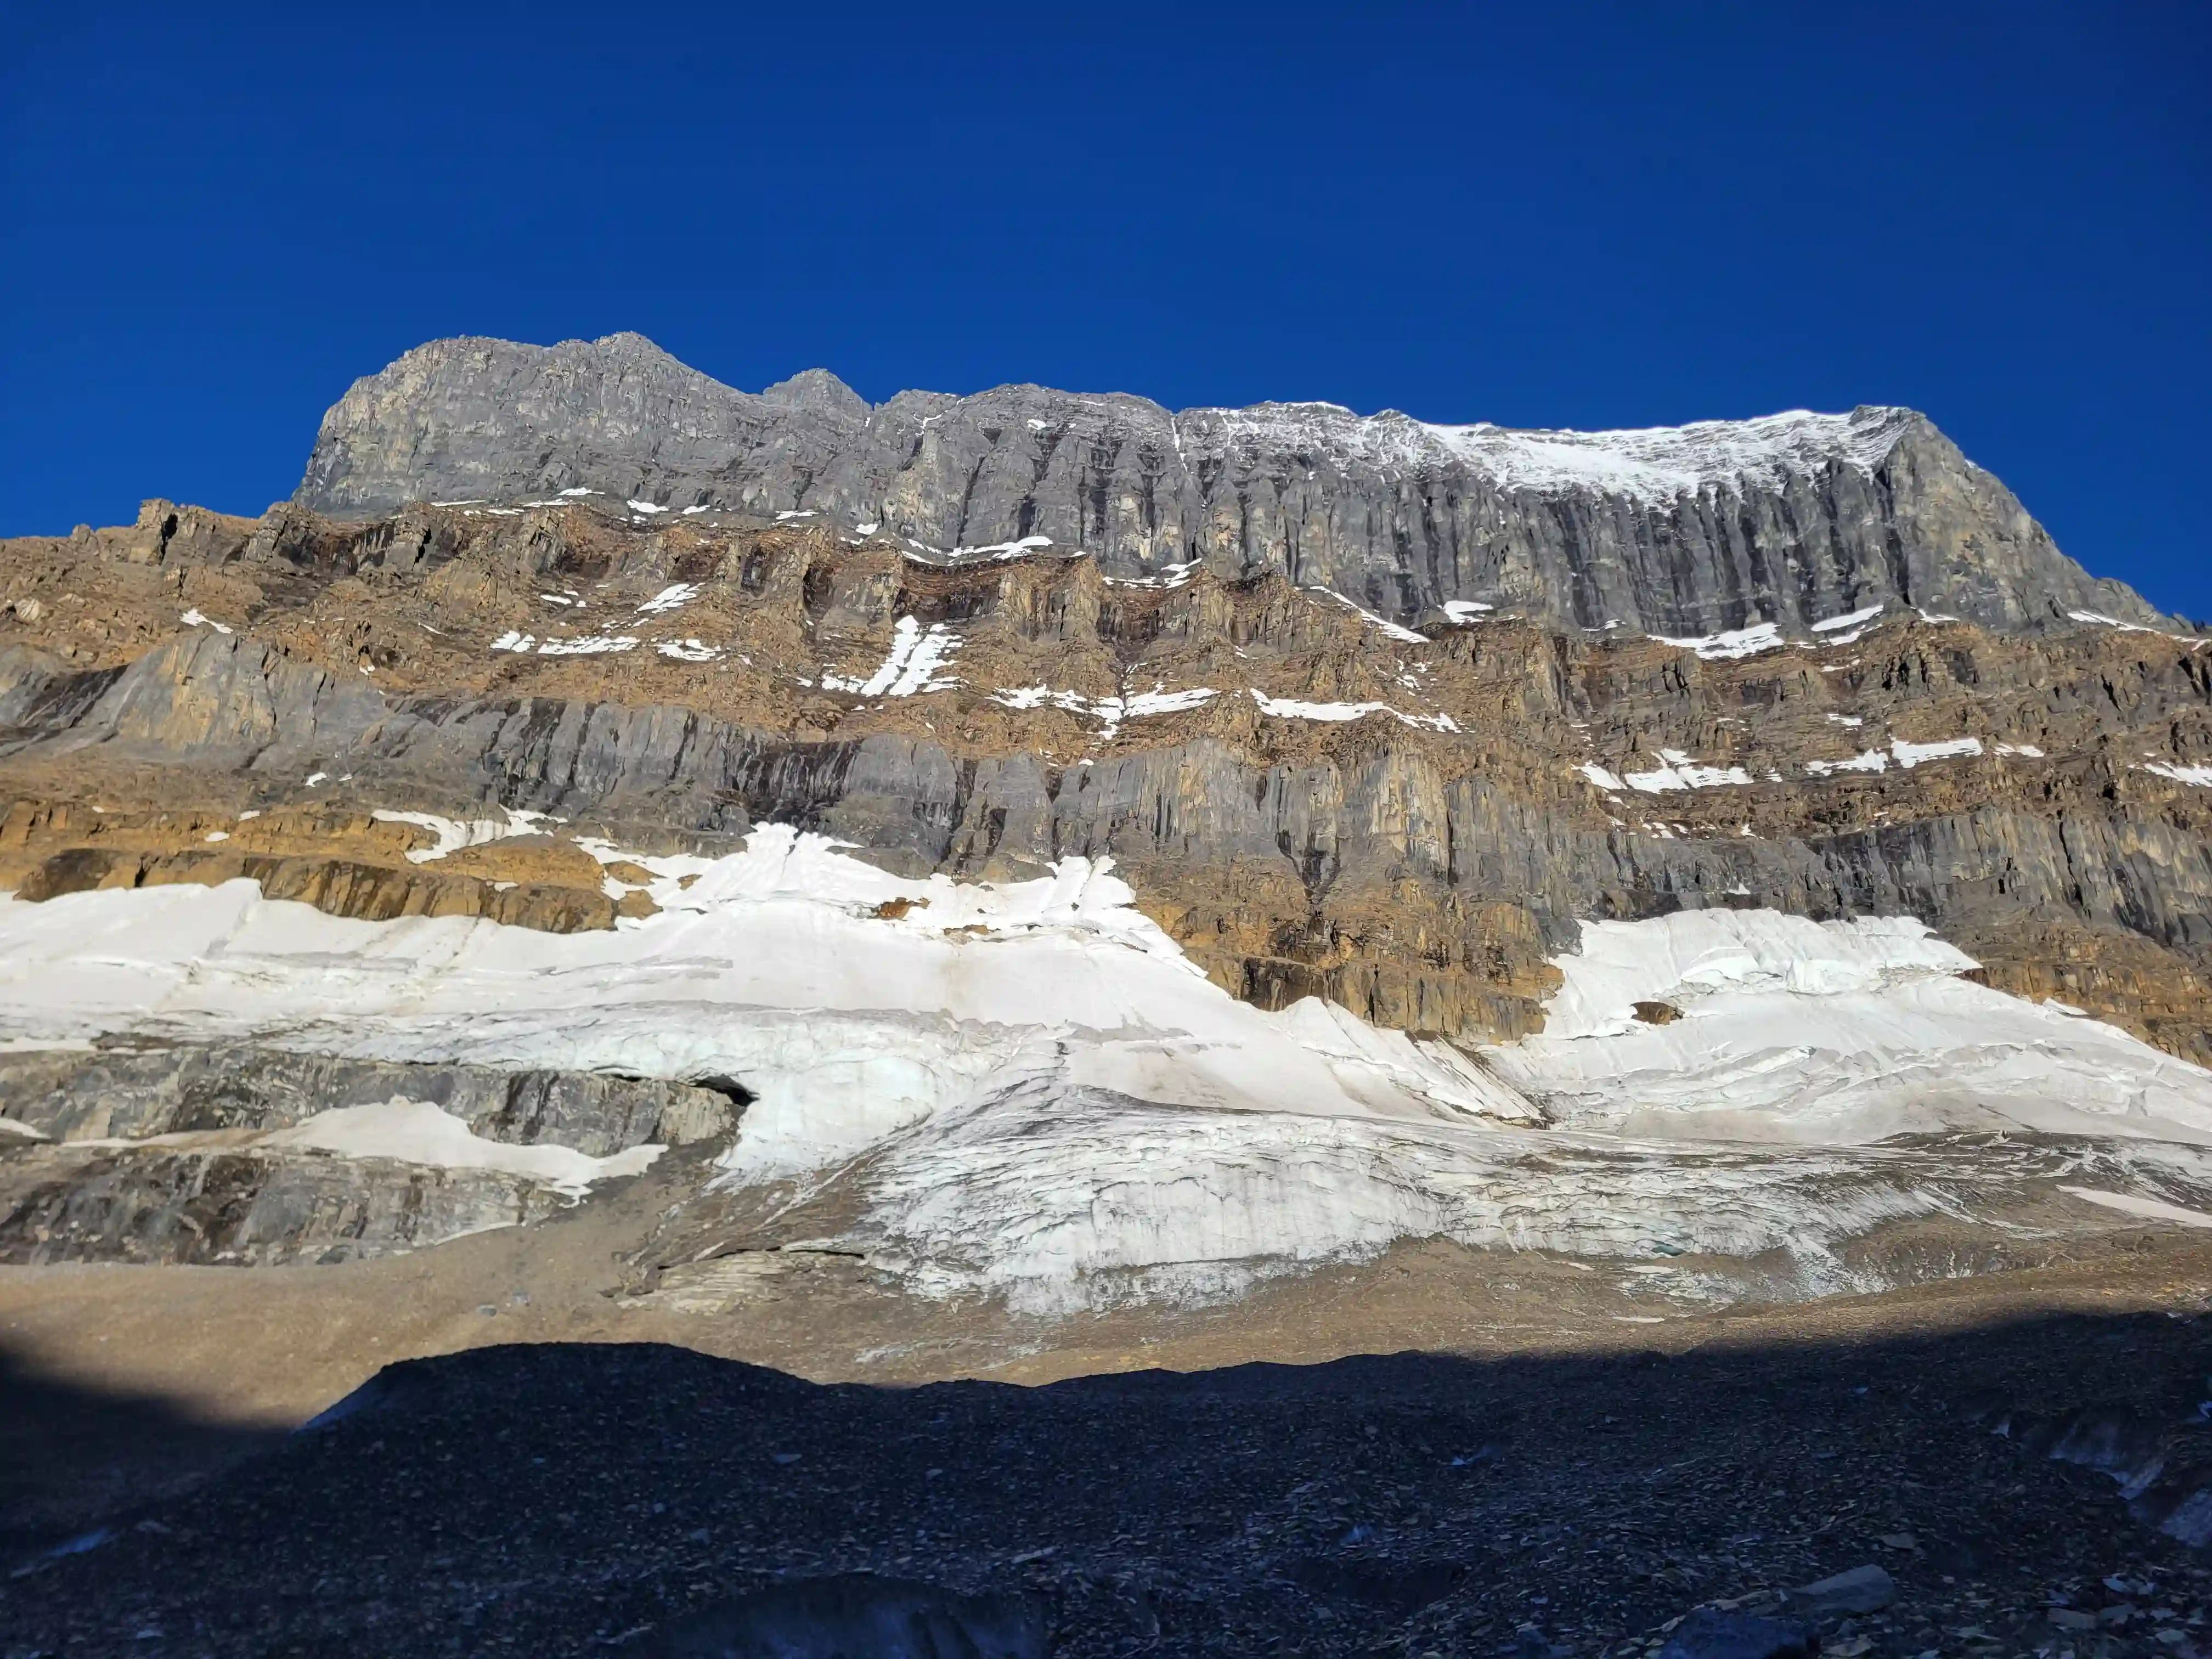
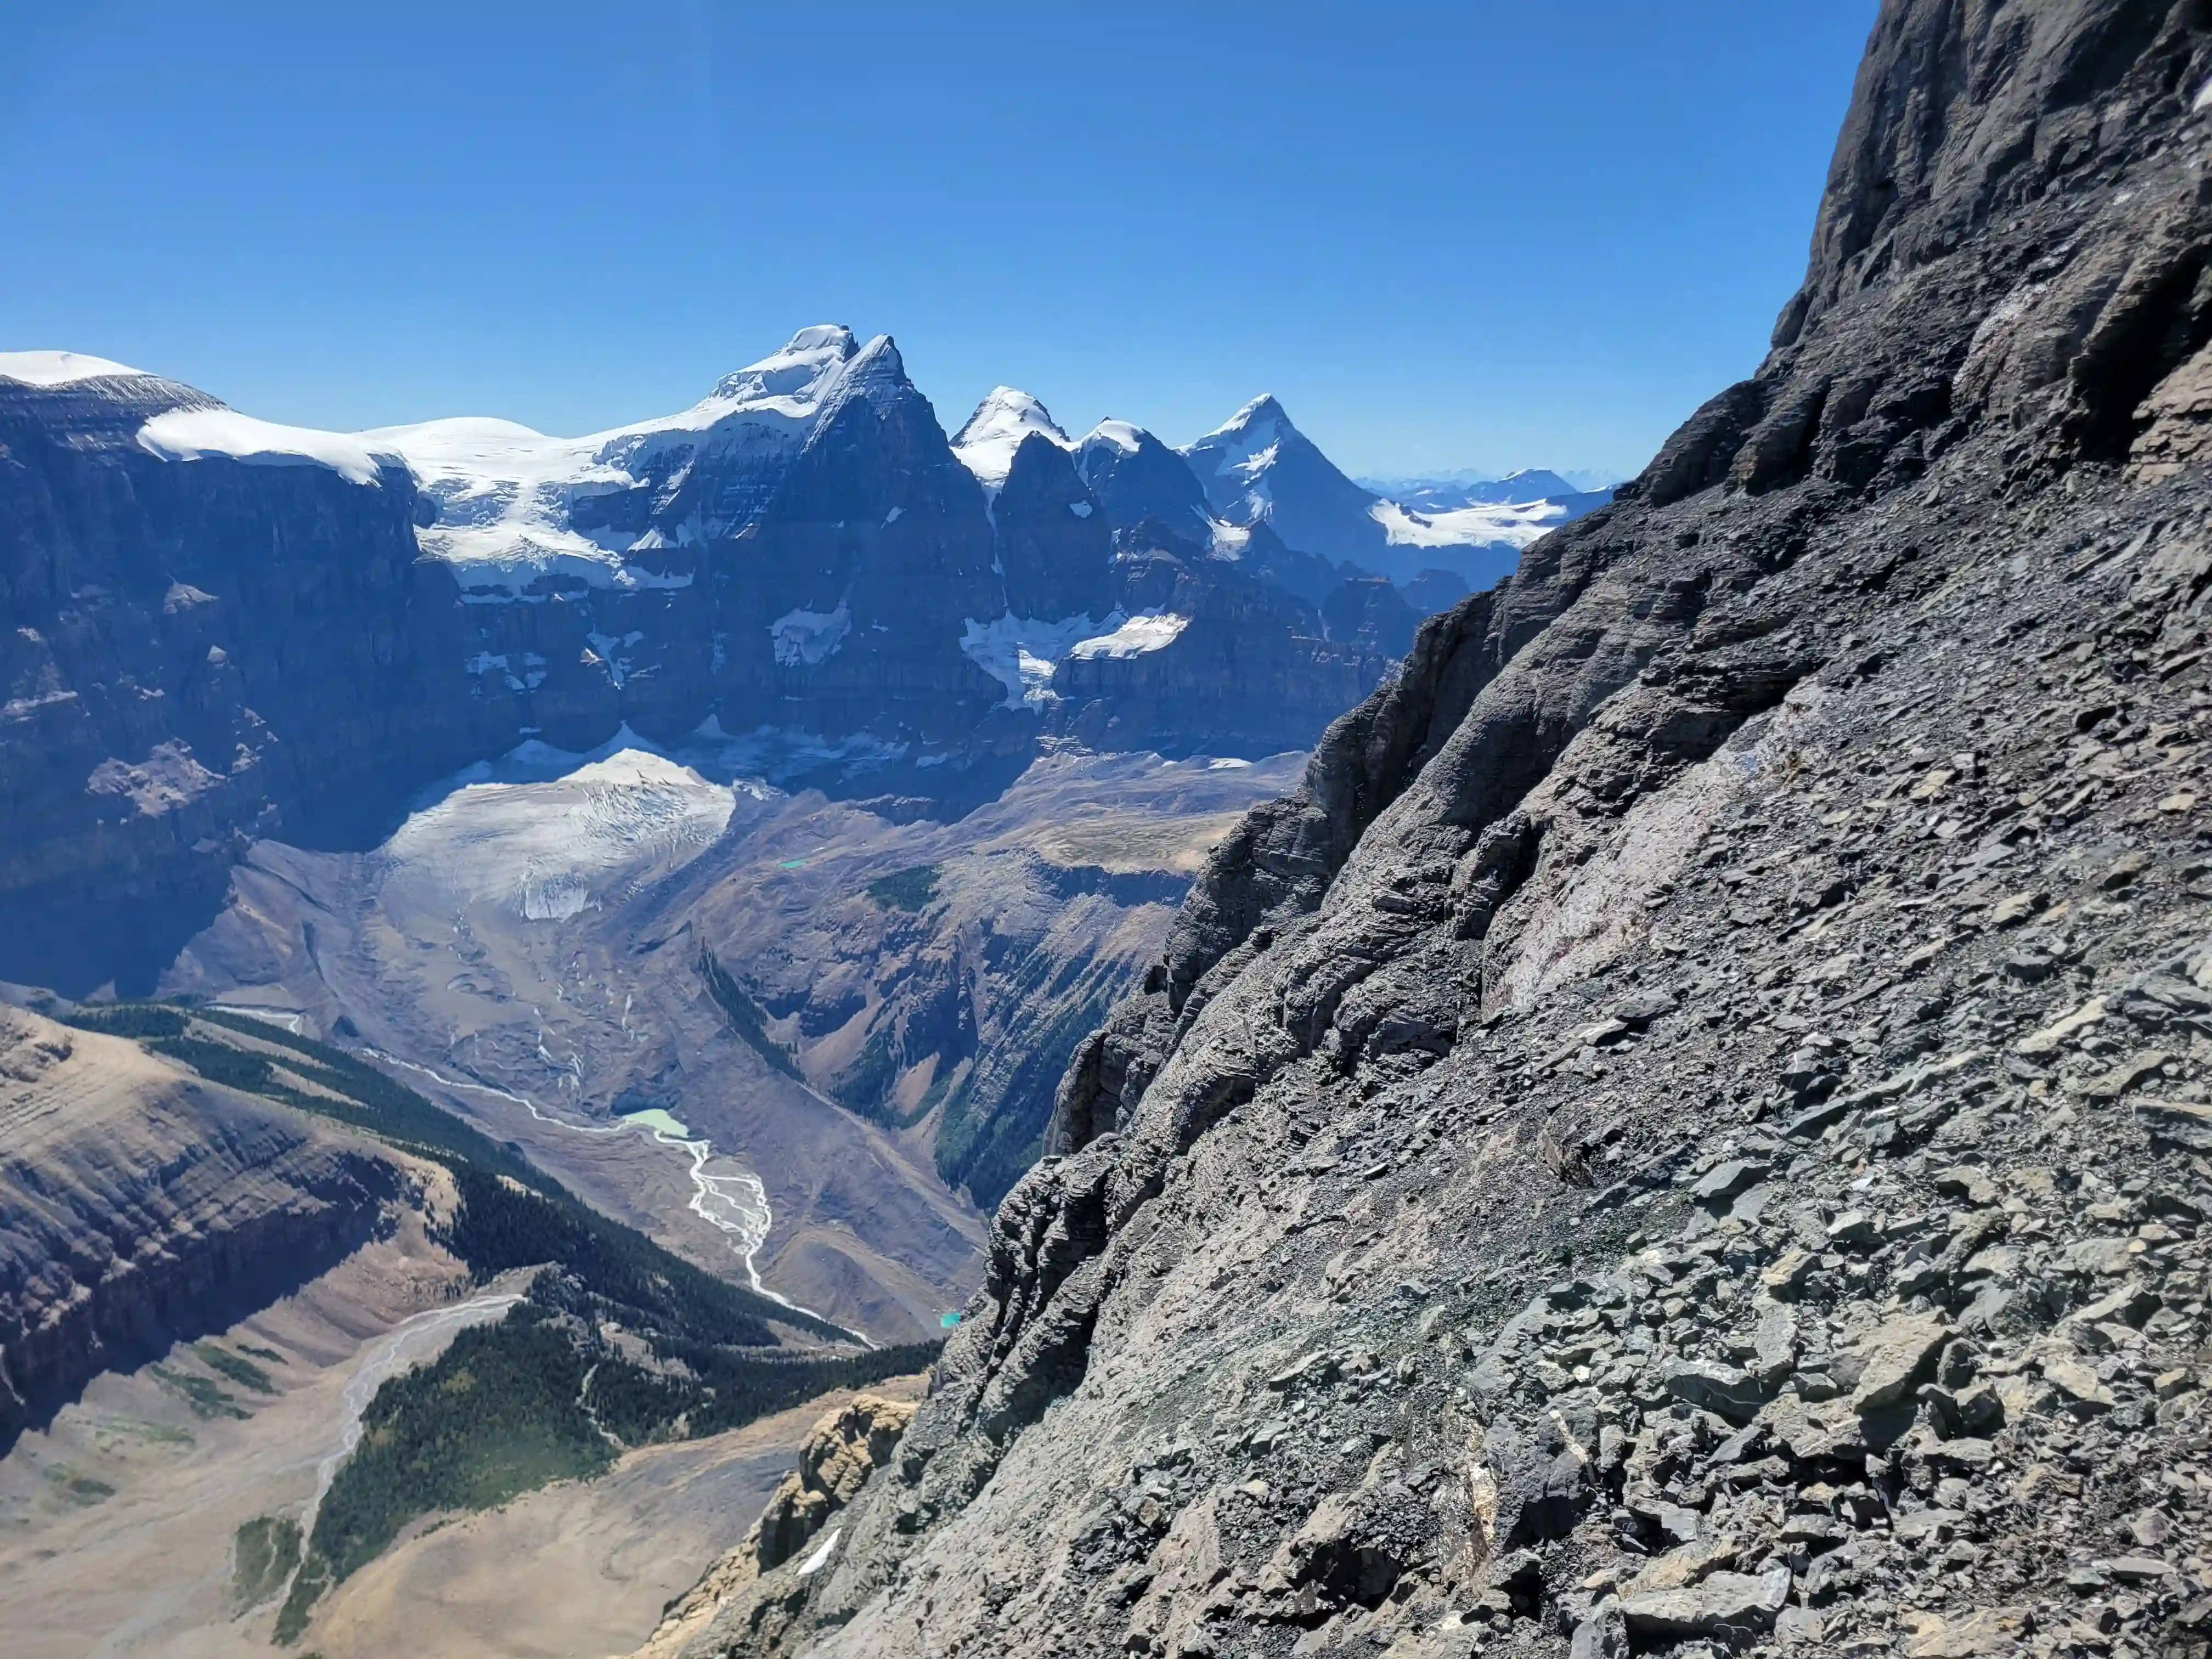
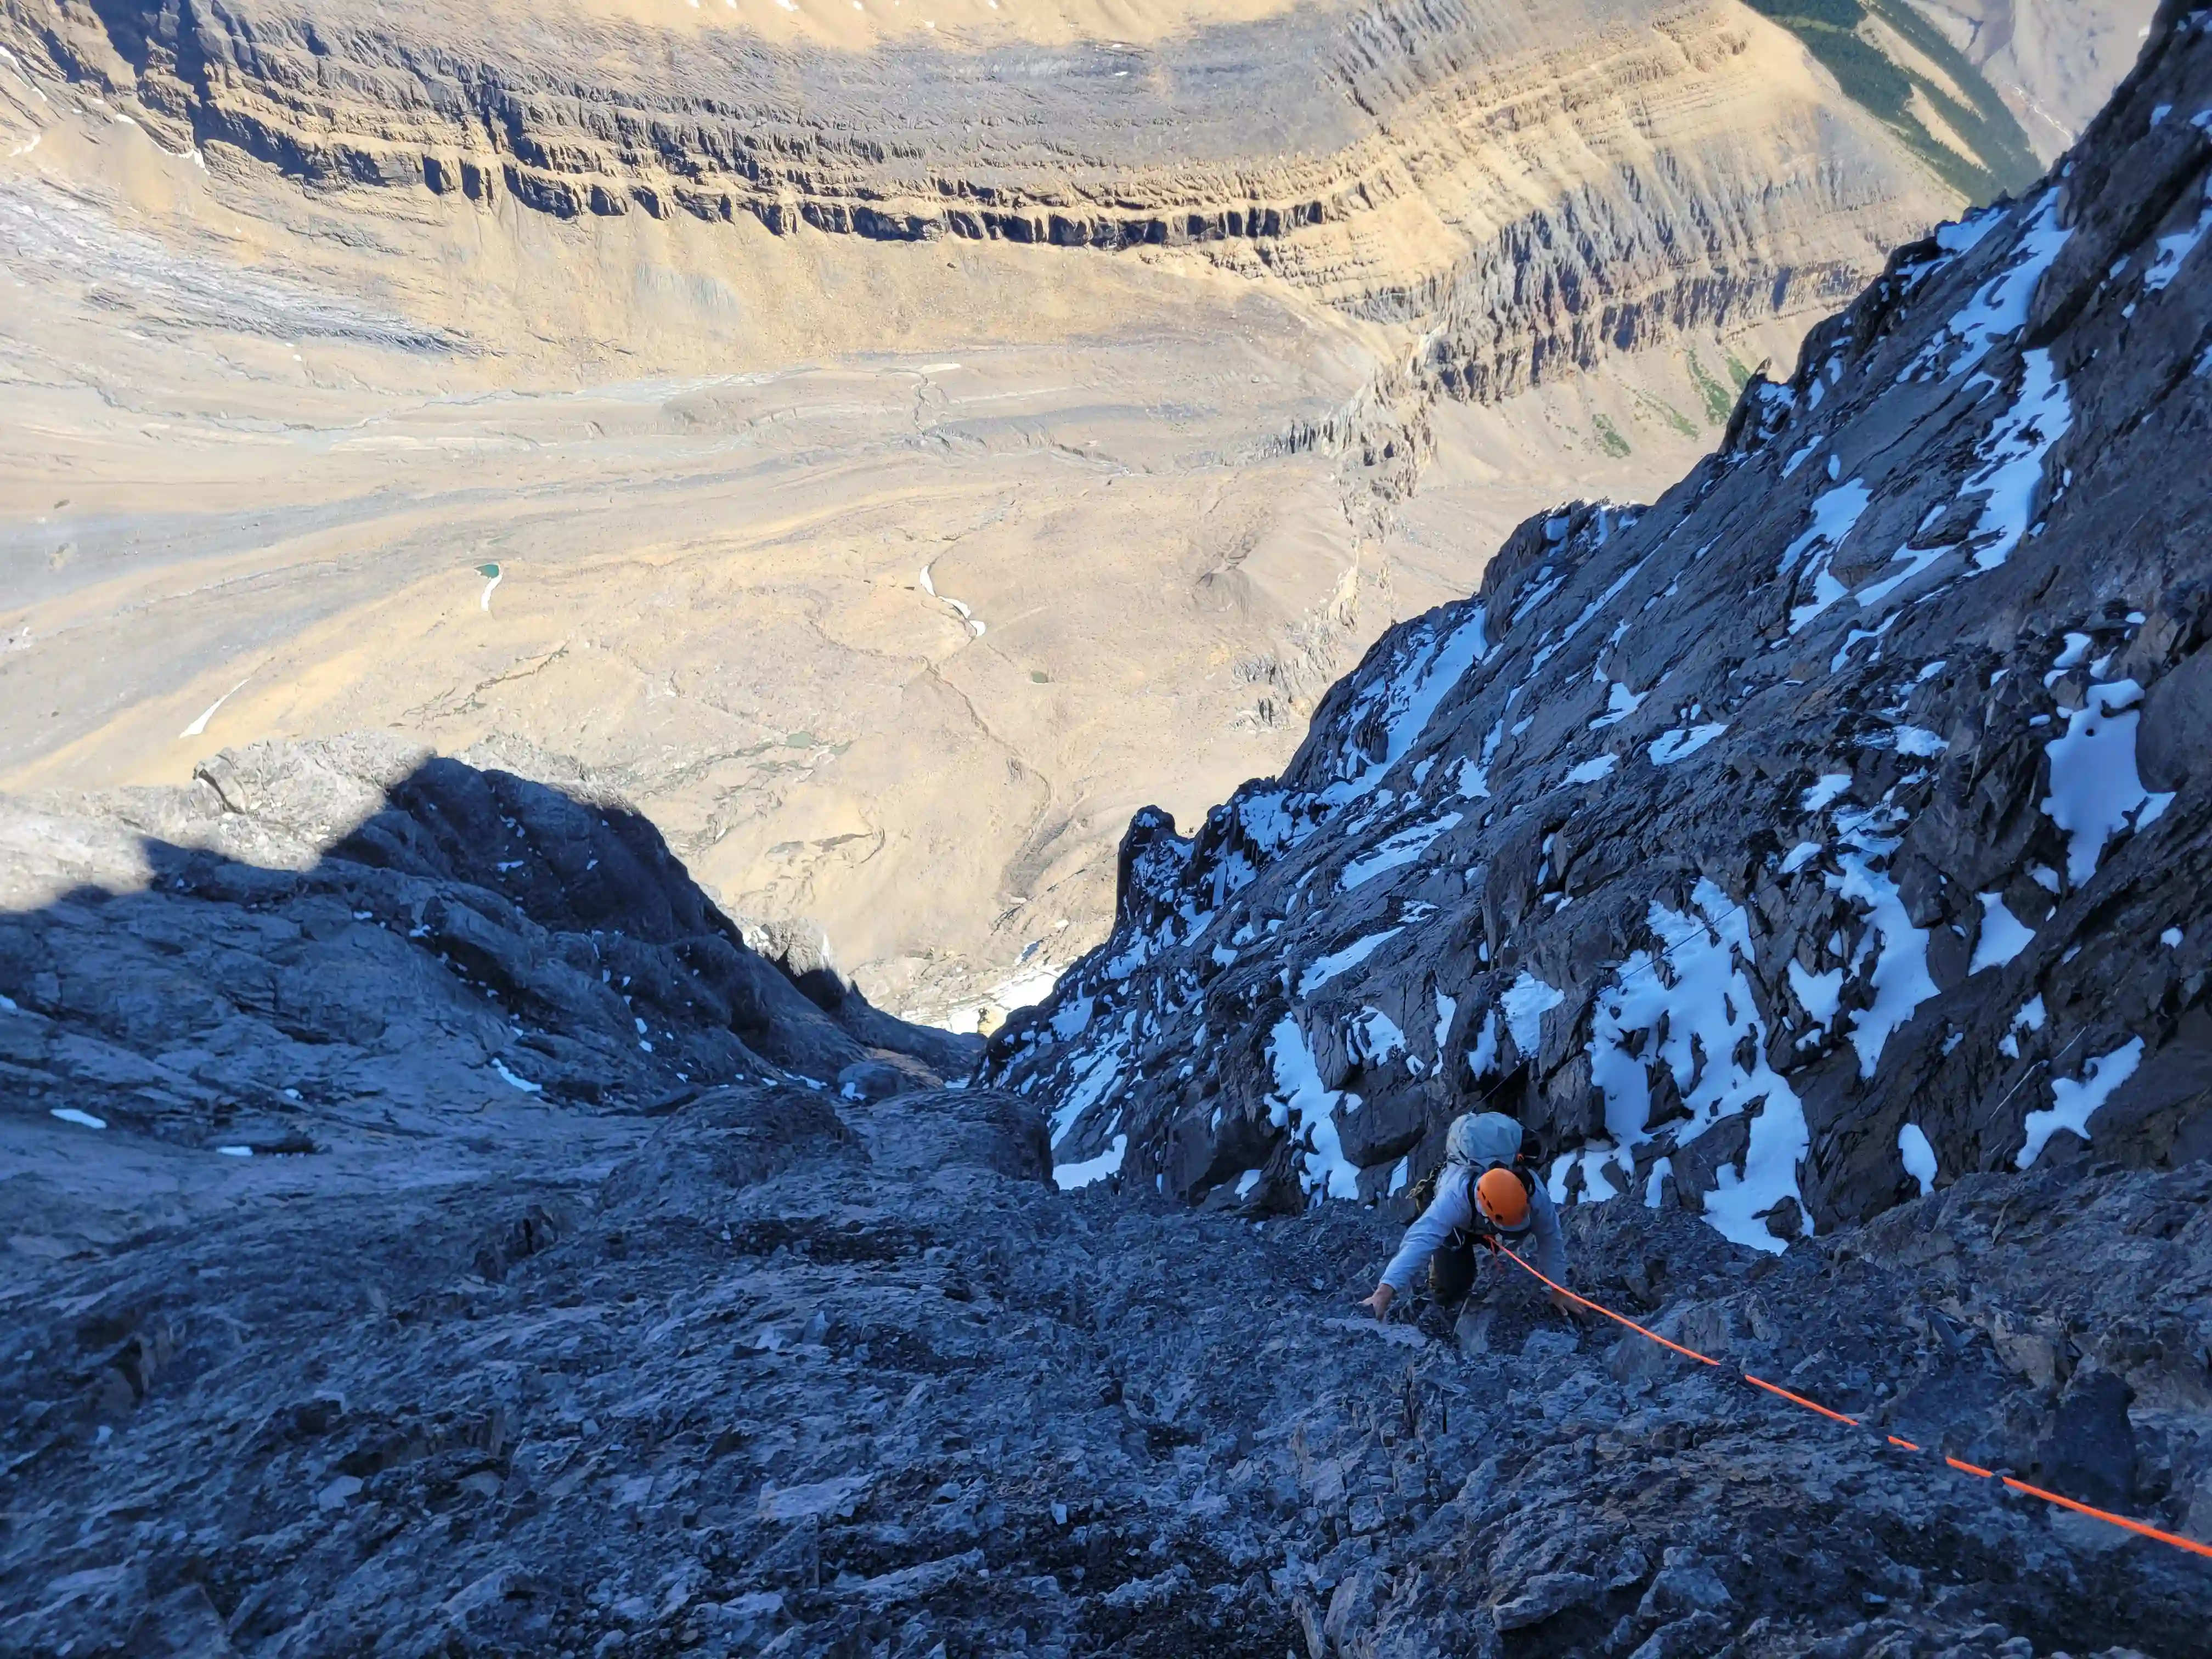
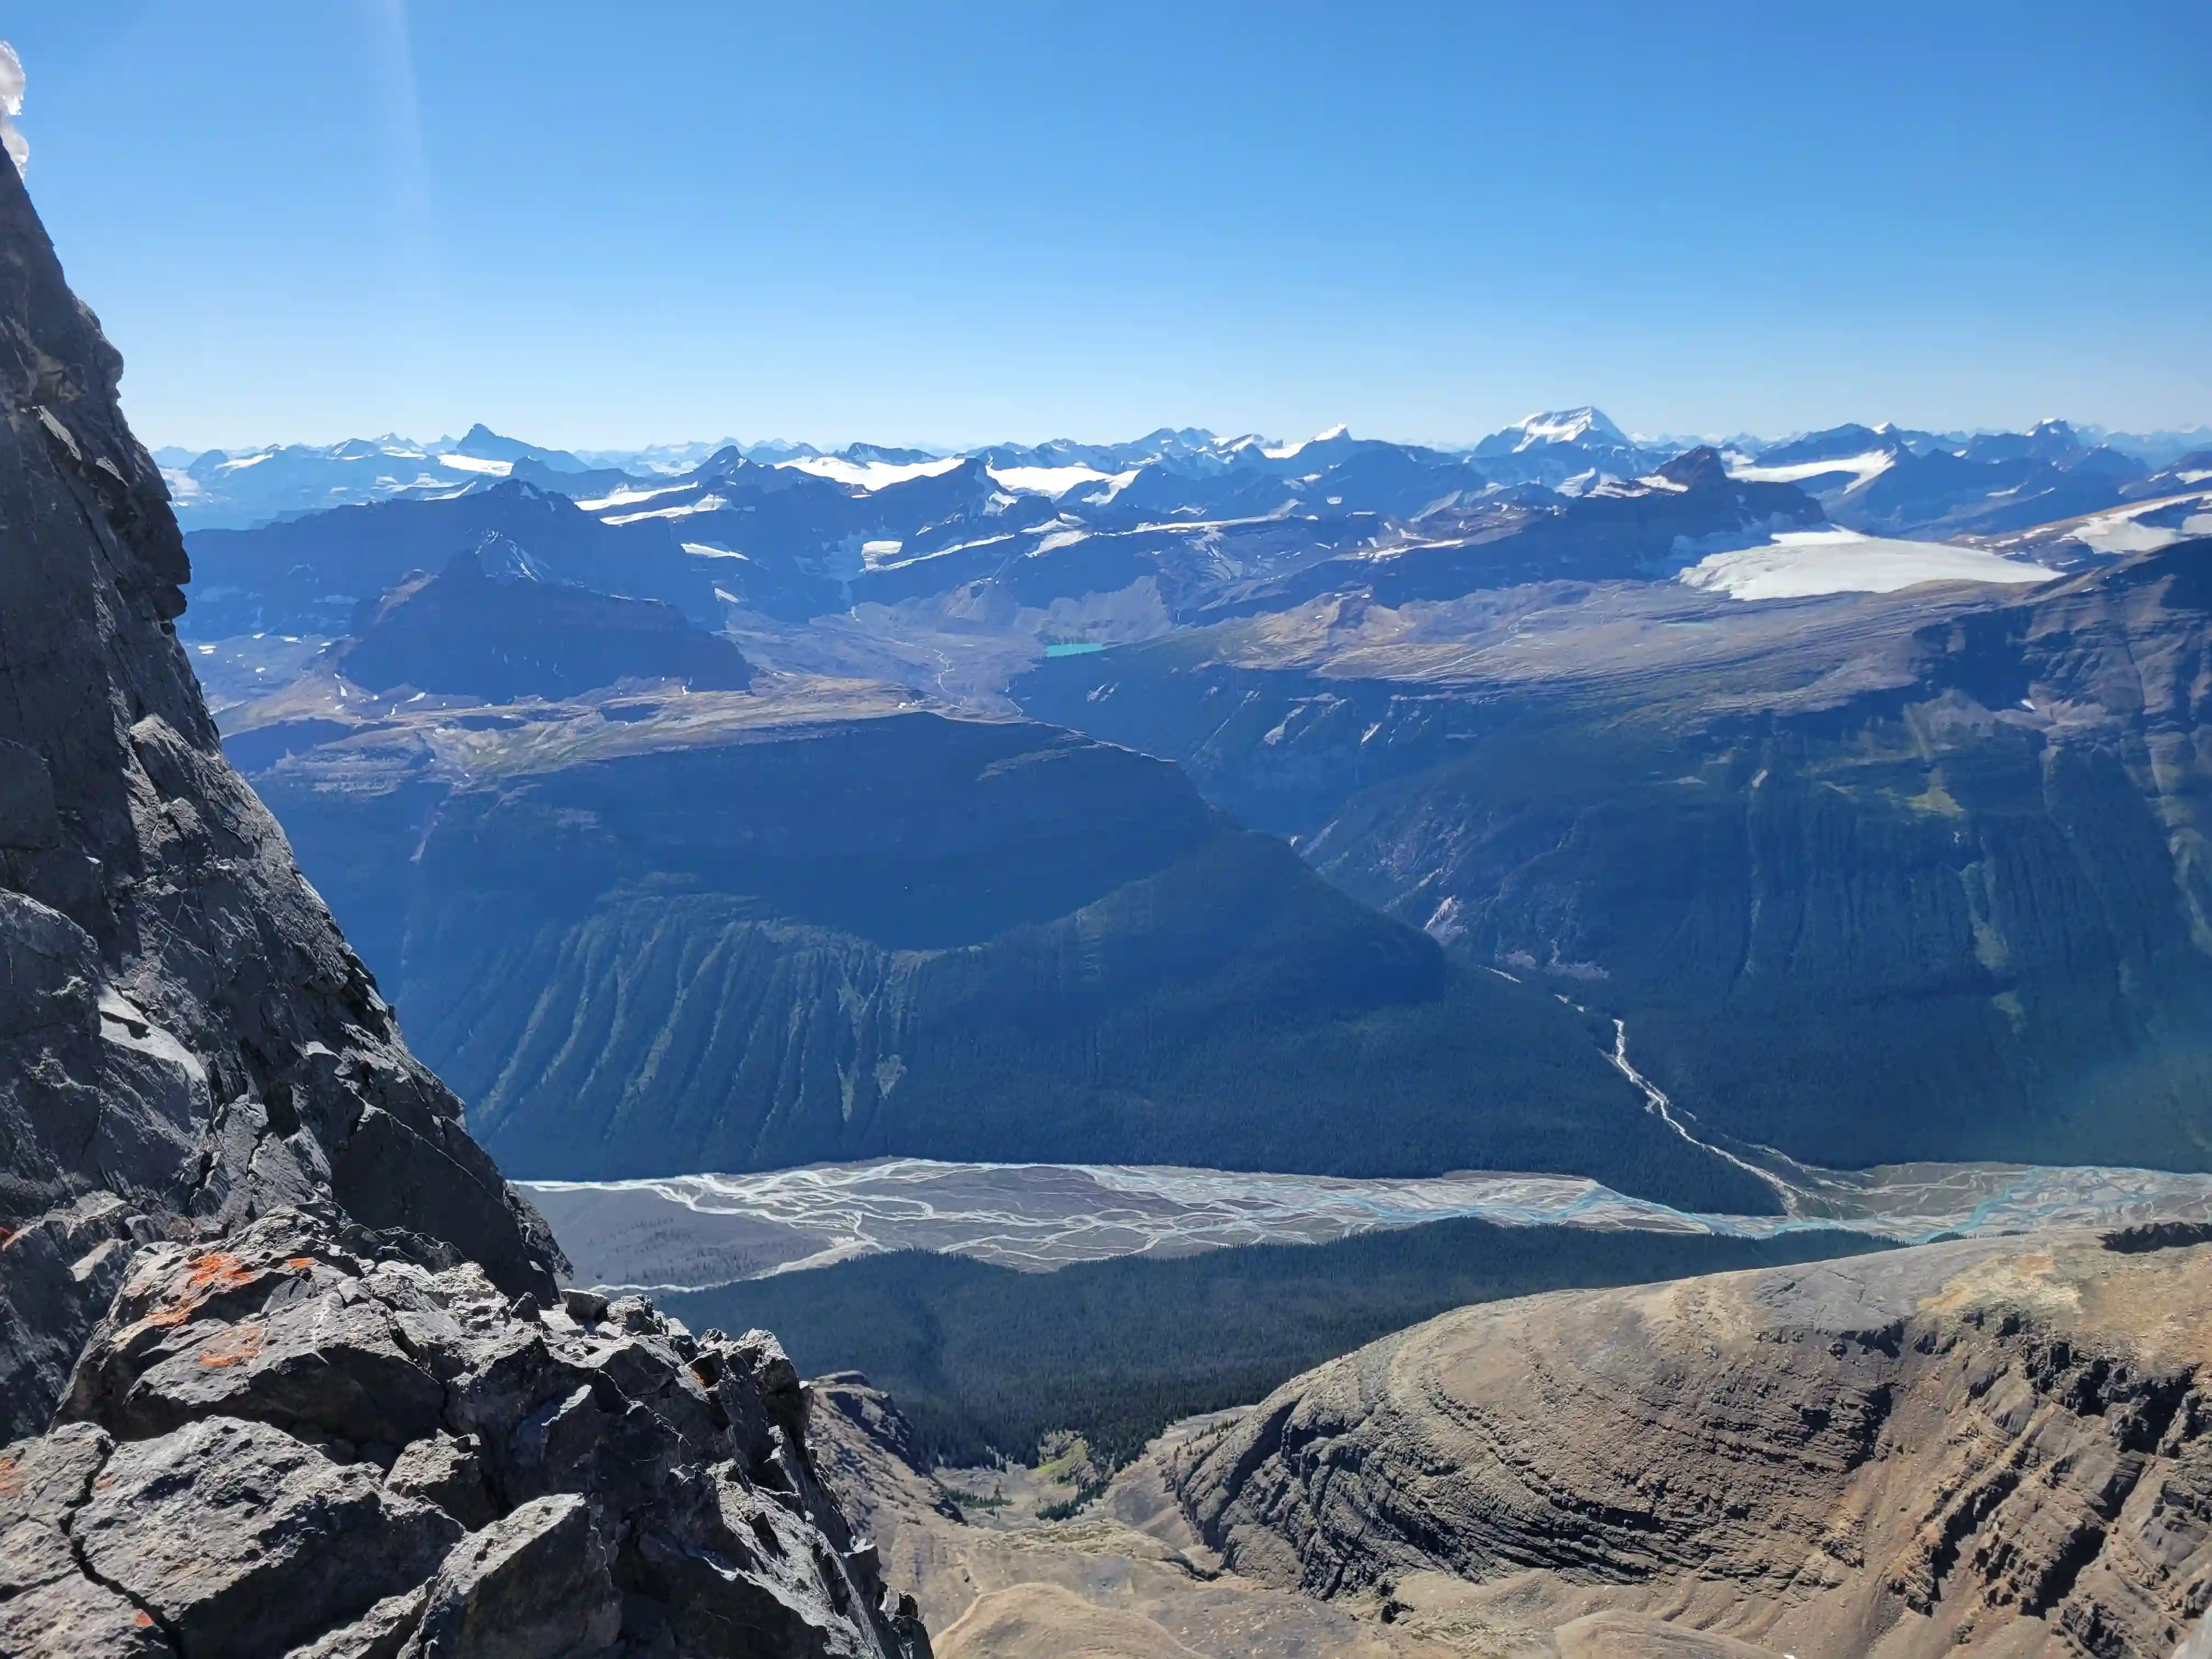
After a solid sleep in the hut we were up by 7am and moving not long after headed down towards the moraine terrain and what remains of the glacier on our way for the slopes of Mount Alberta! There's some pebble covered slab terrain on the way down from the hut which was tedious but after getting below that it was simple moraine choss and we just had to be aware of the remnant glacier and make sure we were south of it before we starting heading for the ascent route of Alberta. At the low point near some of the exposed glacier there were good places to fill our water bottles and this was the last easy opportunity to get water until returning to this spot unless we had melted some snow on the upper mountain so a proper hydration break here is highly advised!
DETAILED ROUTE BETA
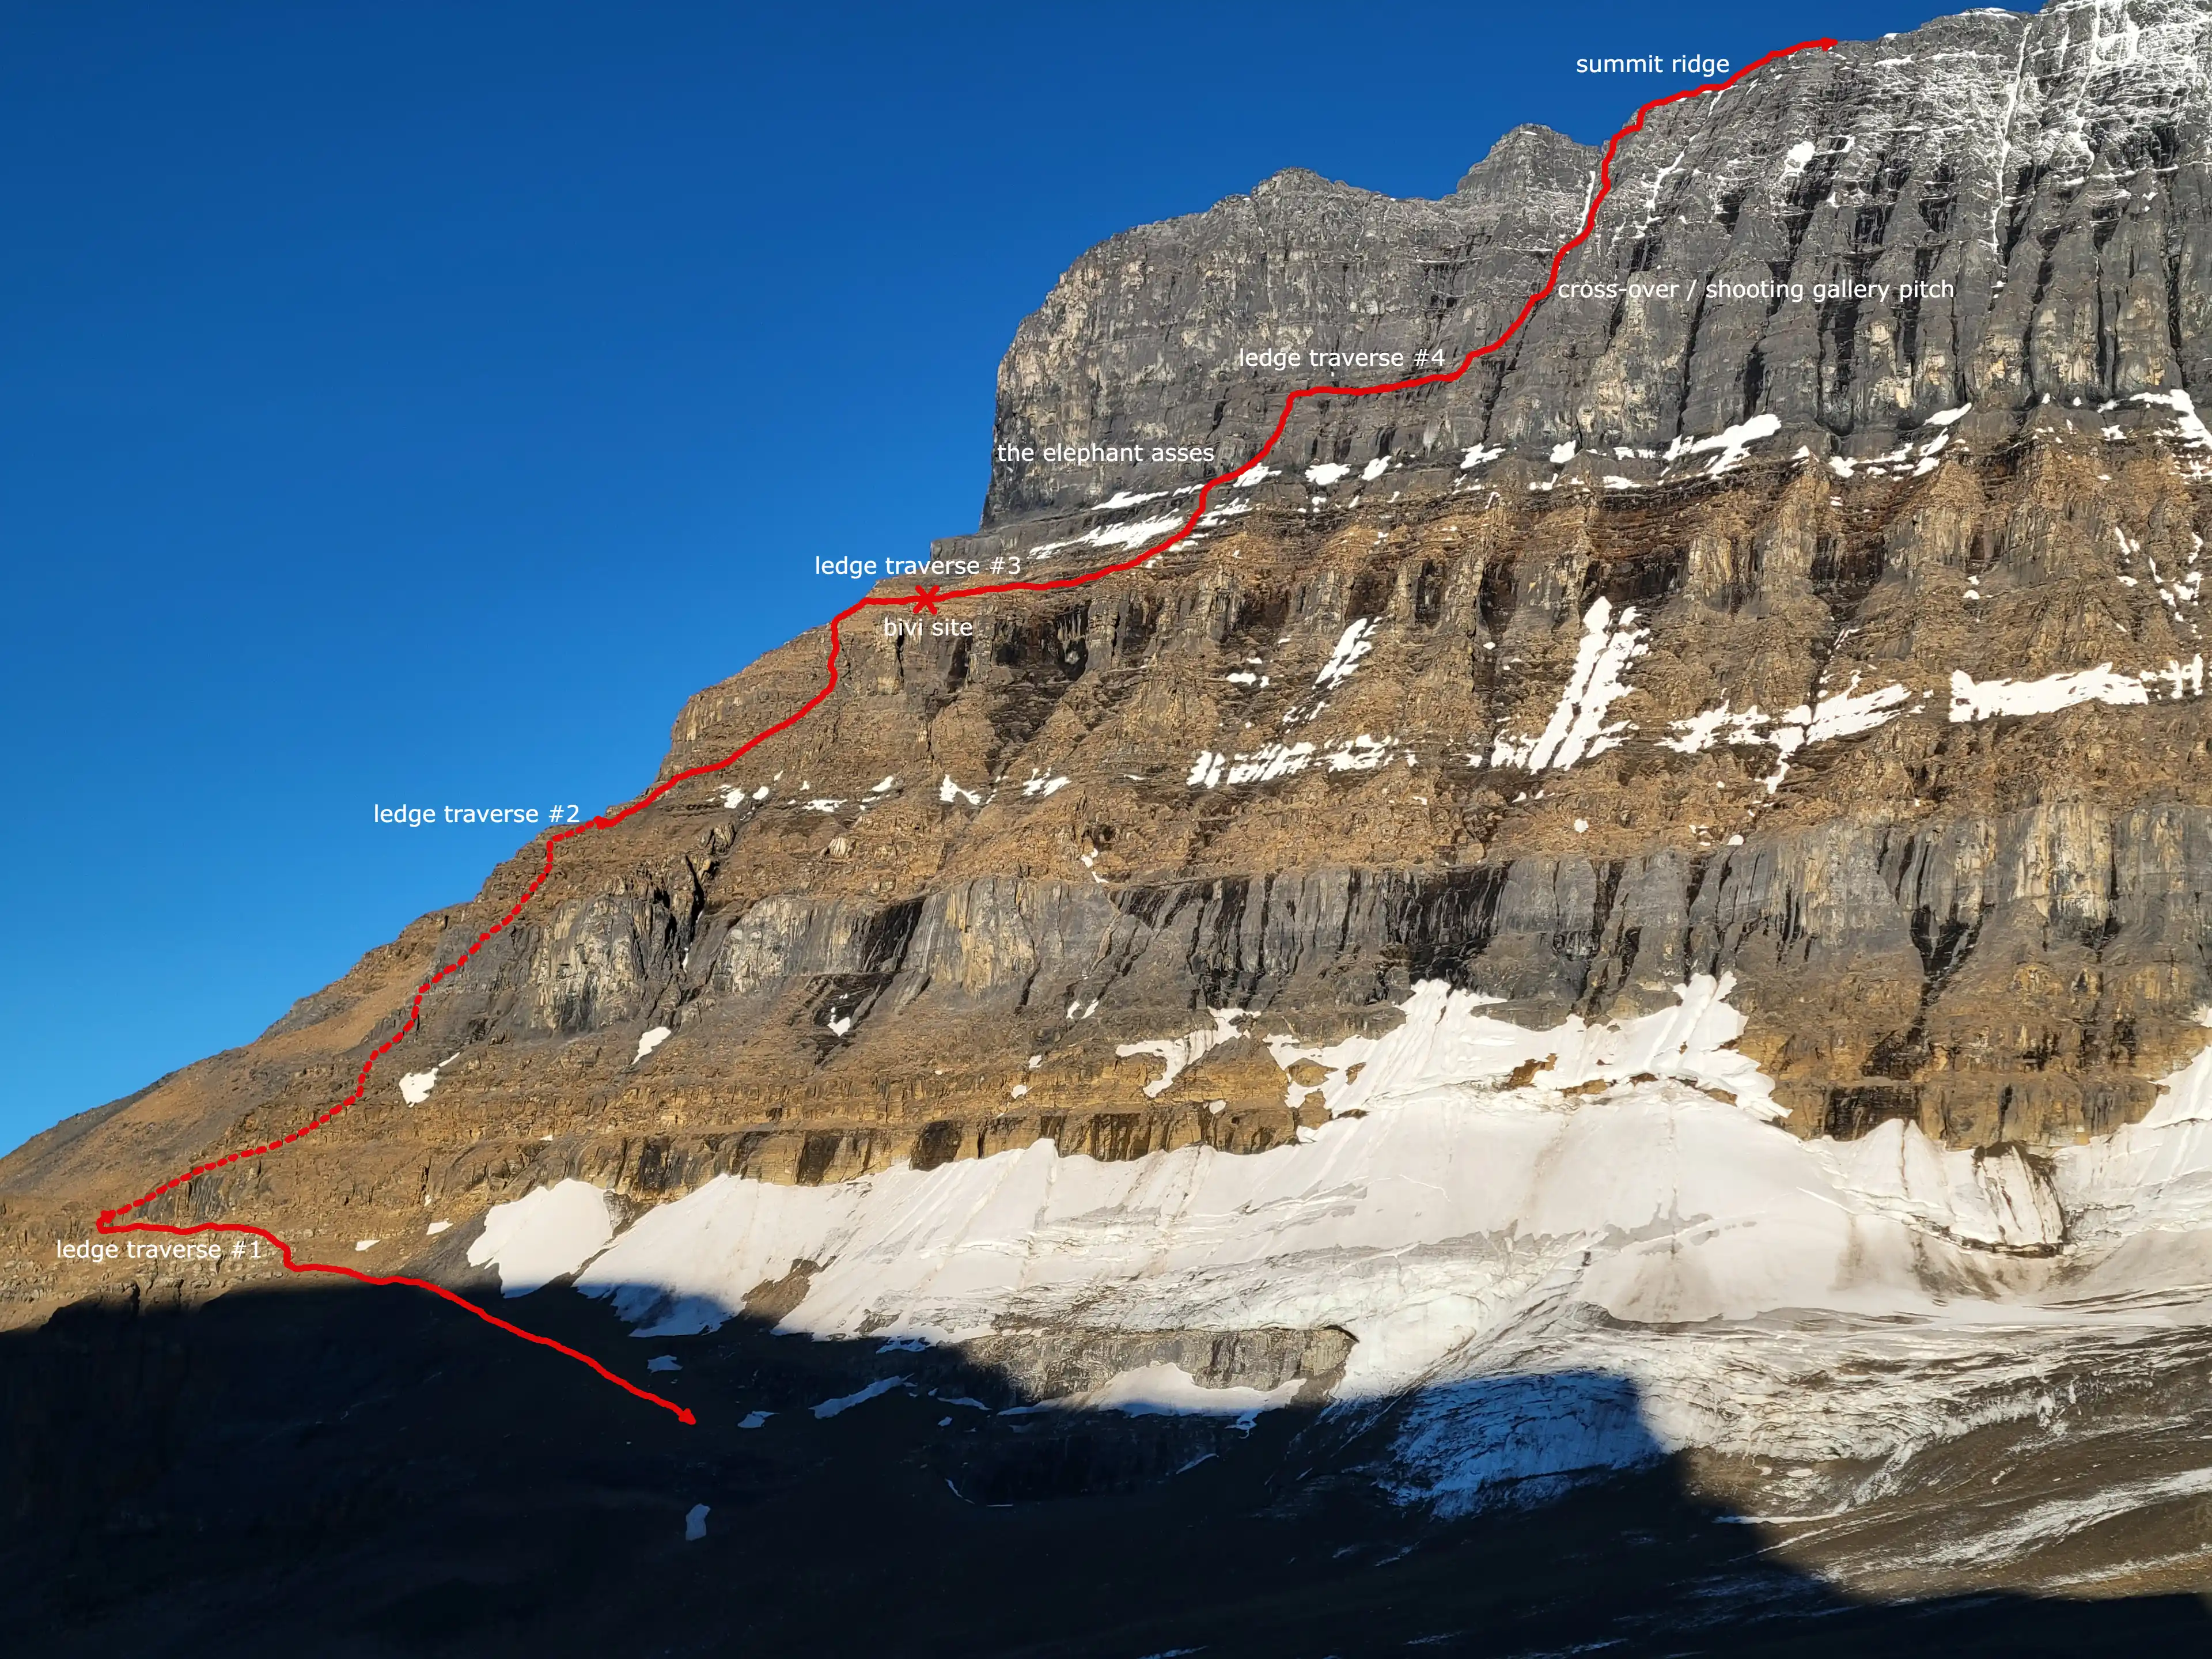
The ascent of Mount Alberta can easily be divided into two sections, the lower less technical portion and the upper more challenging half with the bivi site landing right between the two. Because of the steep nature of Alberta, the Japanese route which takes the easiest line up frequently traverses on ledges to bypass technical cliffy terrain and to access weaknesses in order to keep the grade at 5.6-5.7.
THE LOWER HALF:
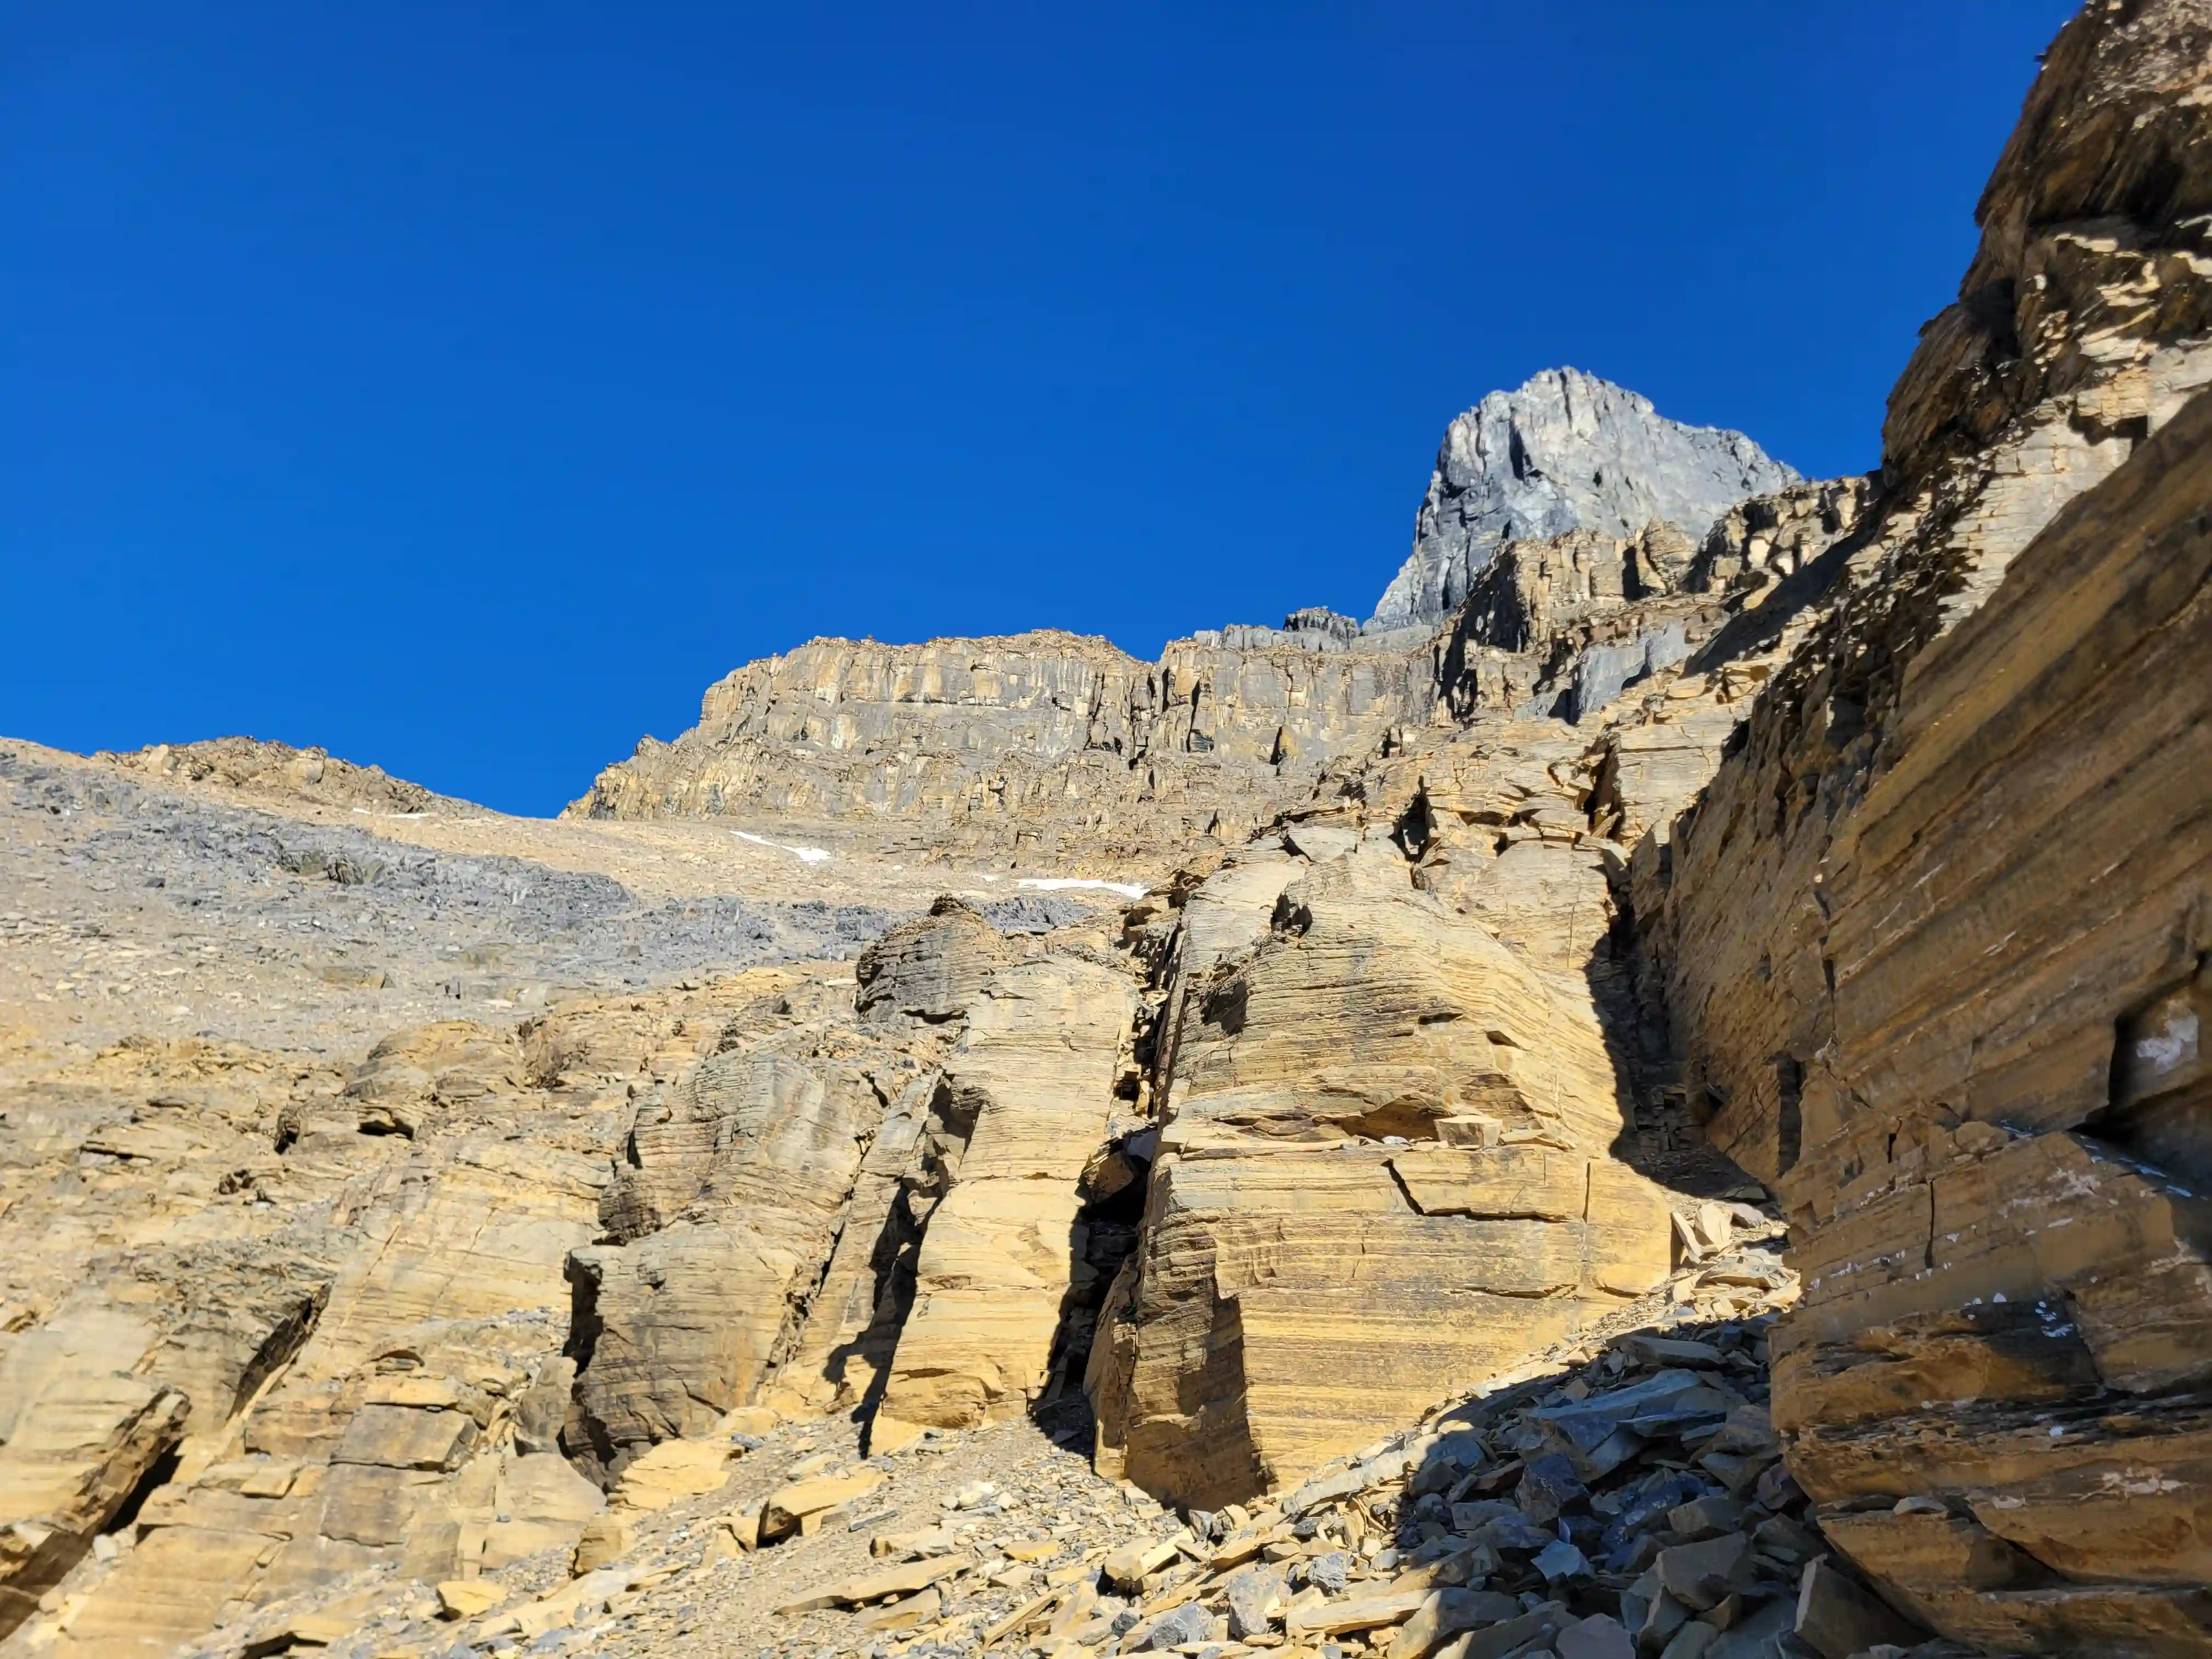
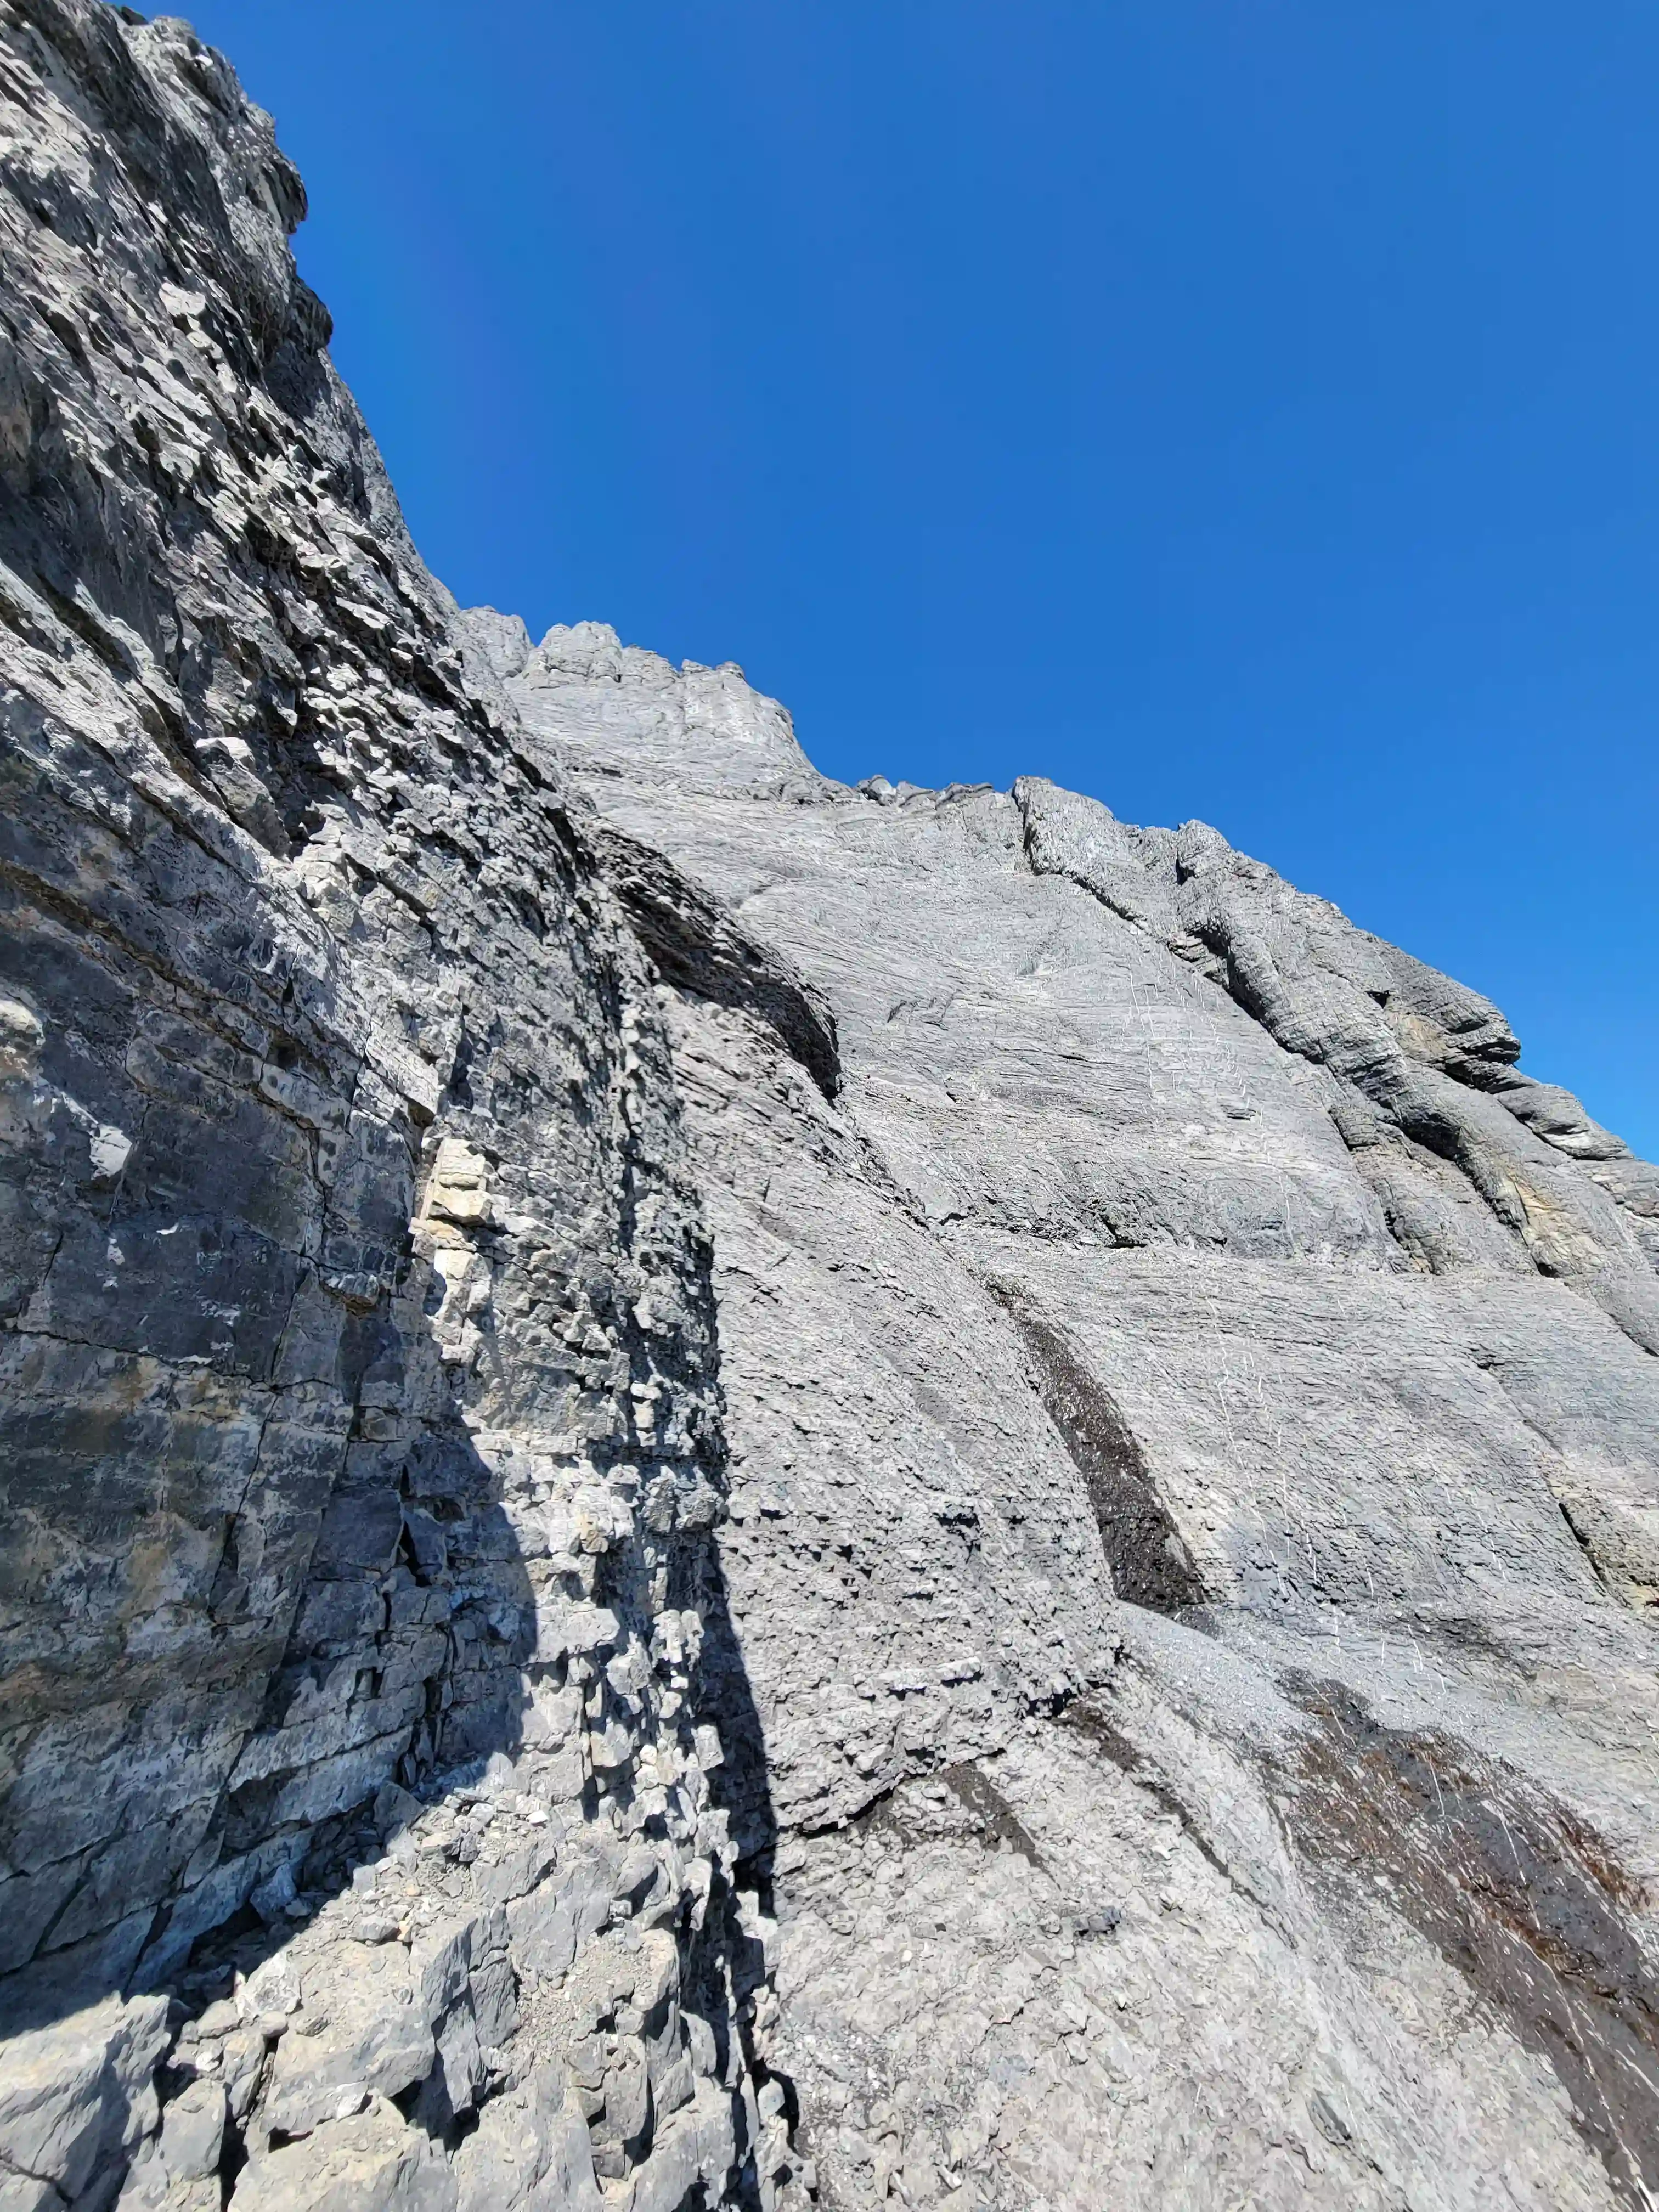
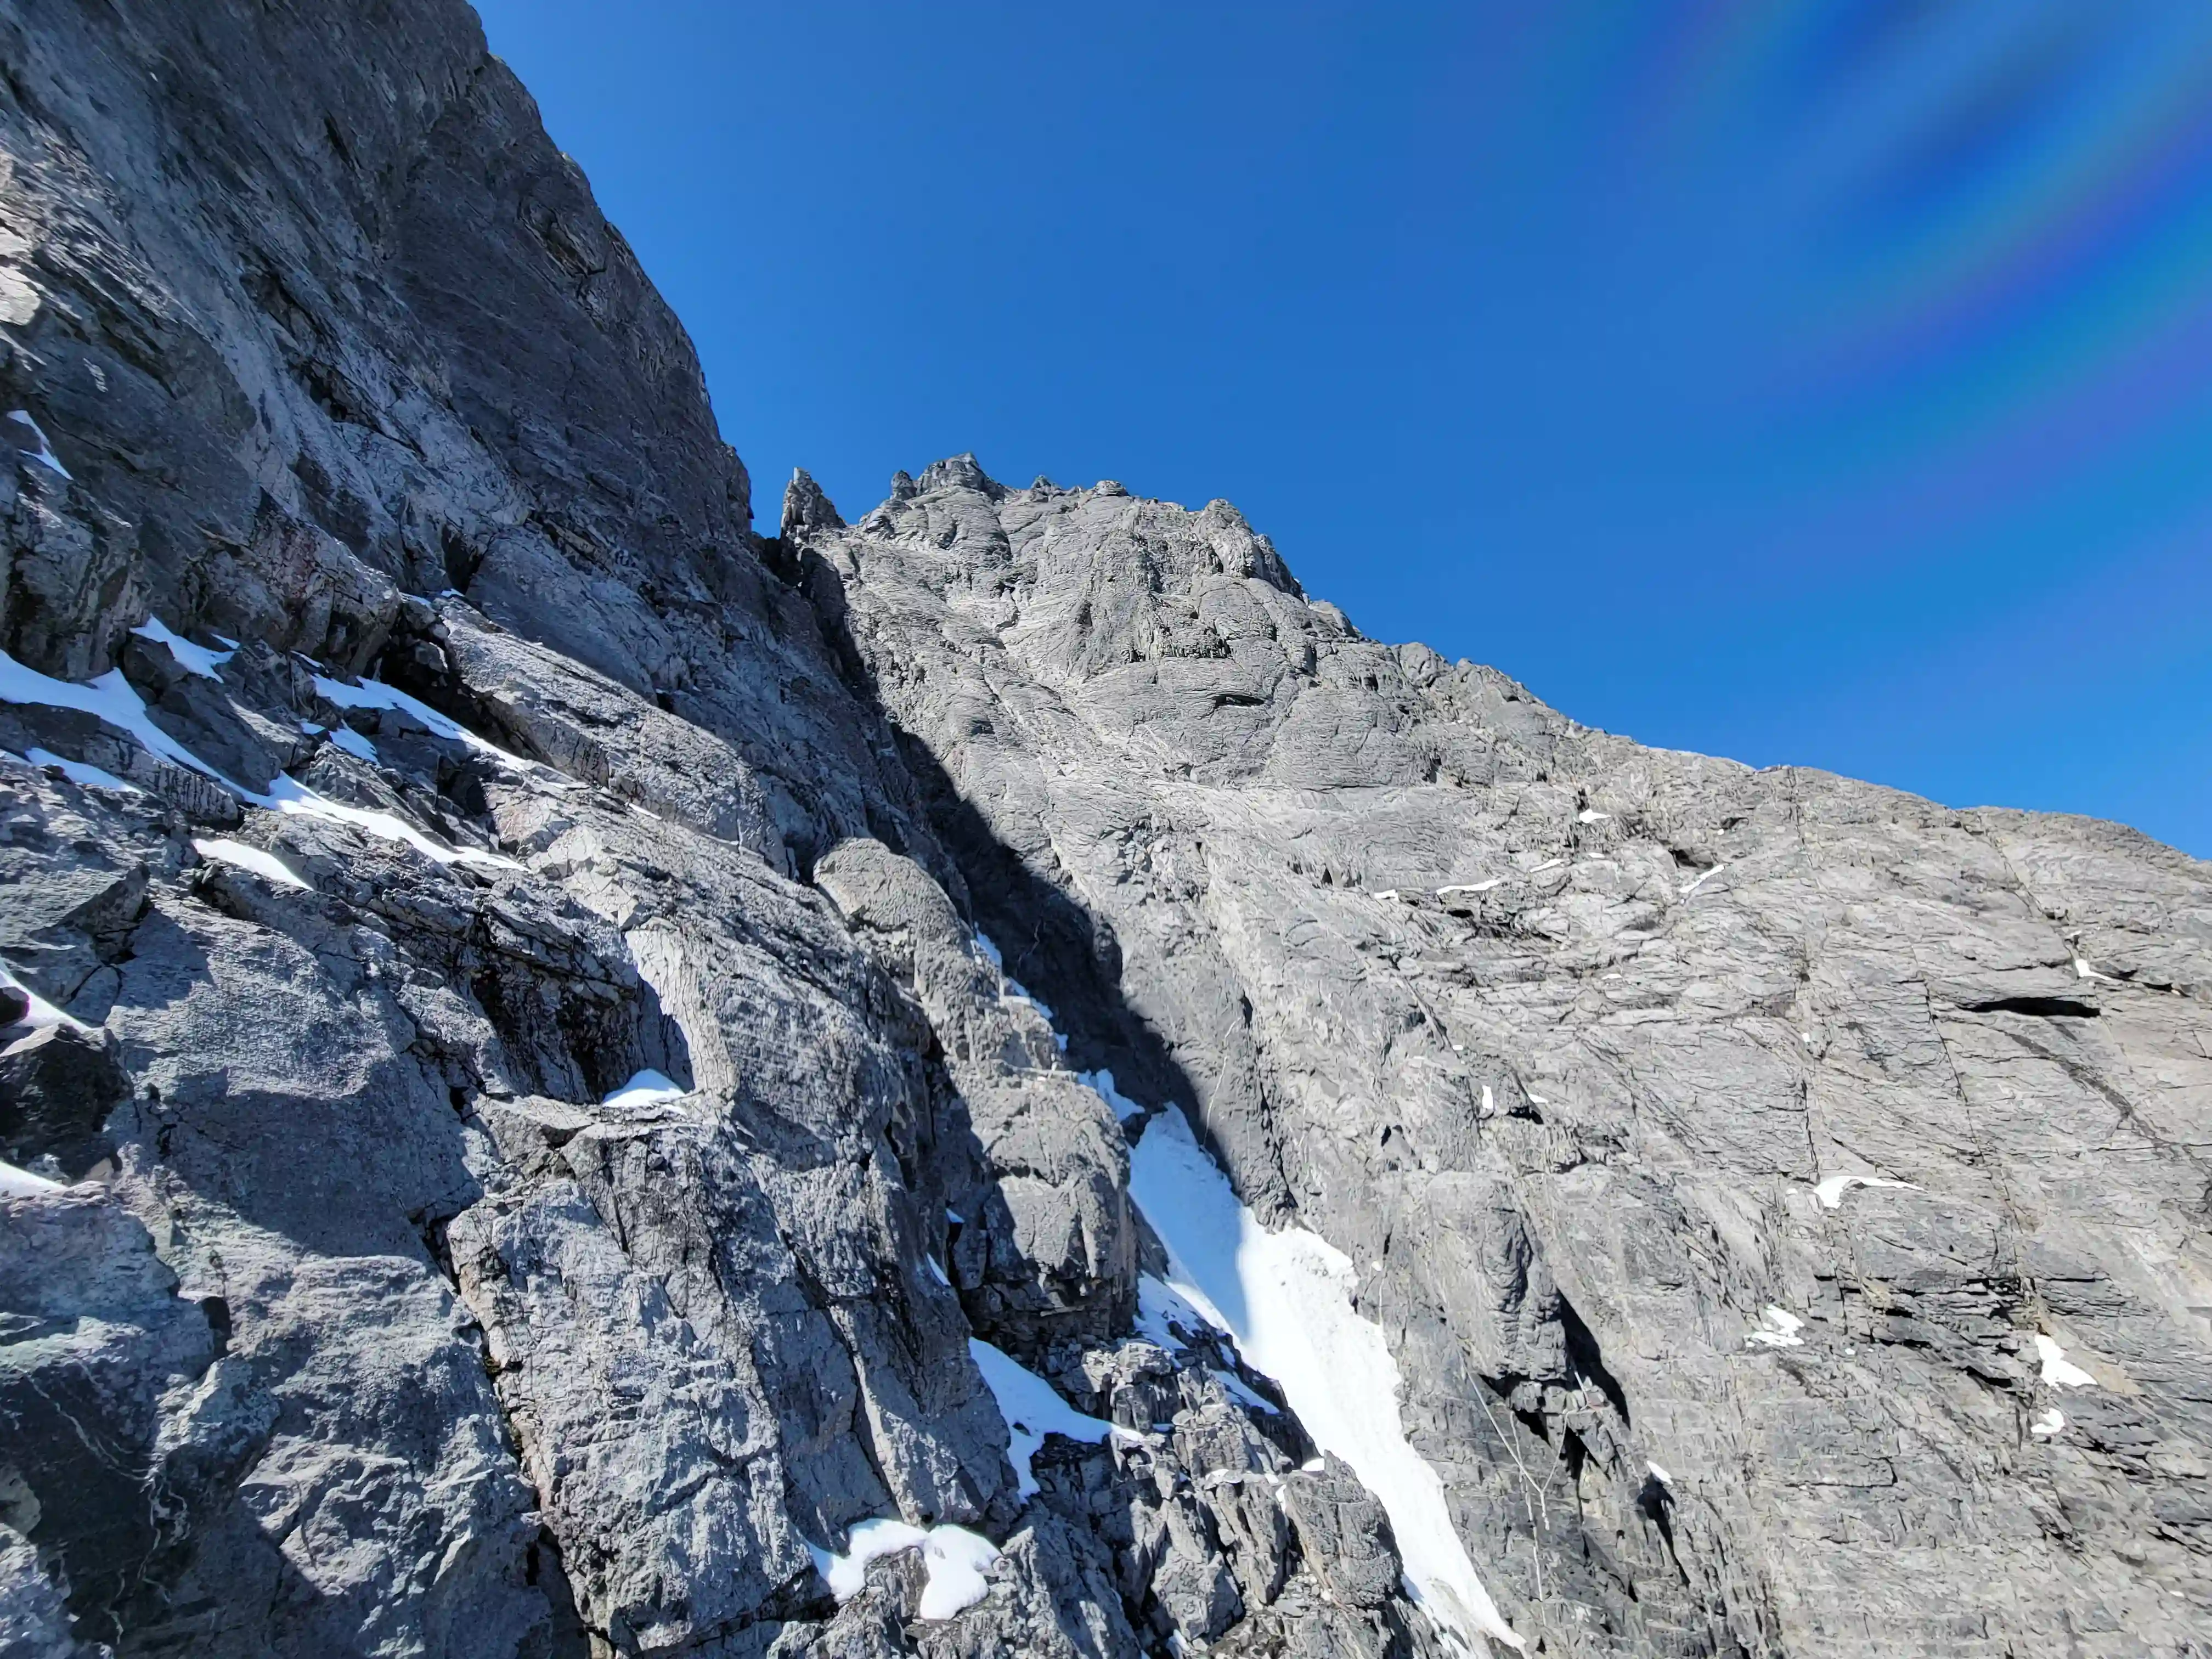
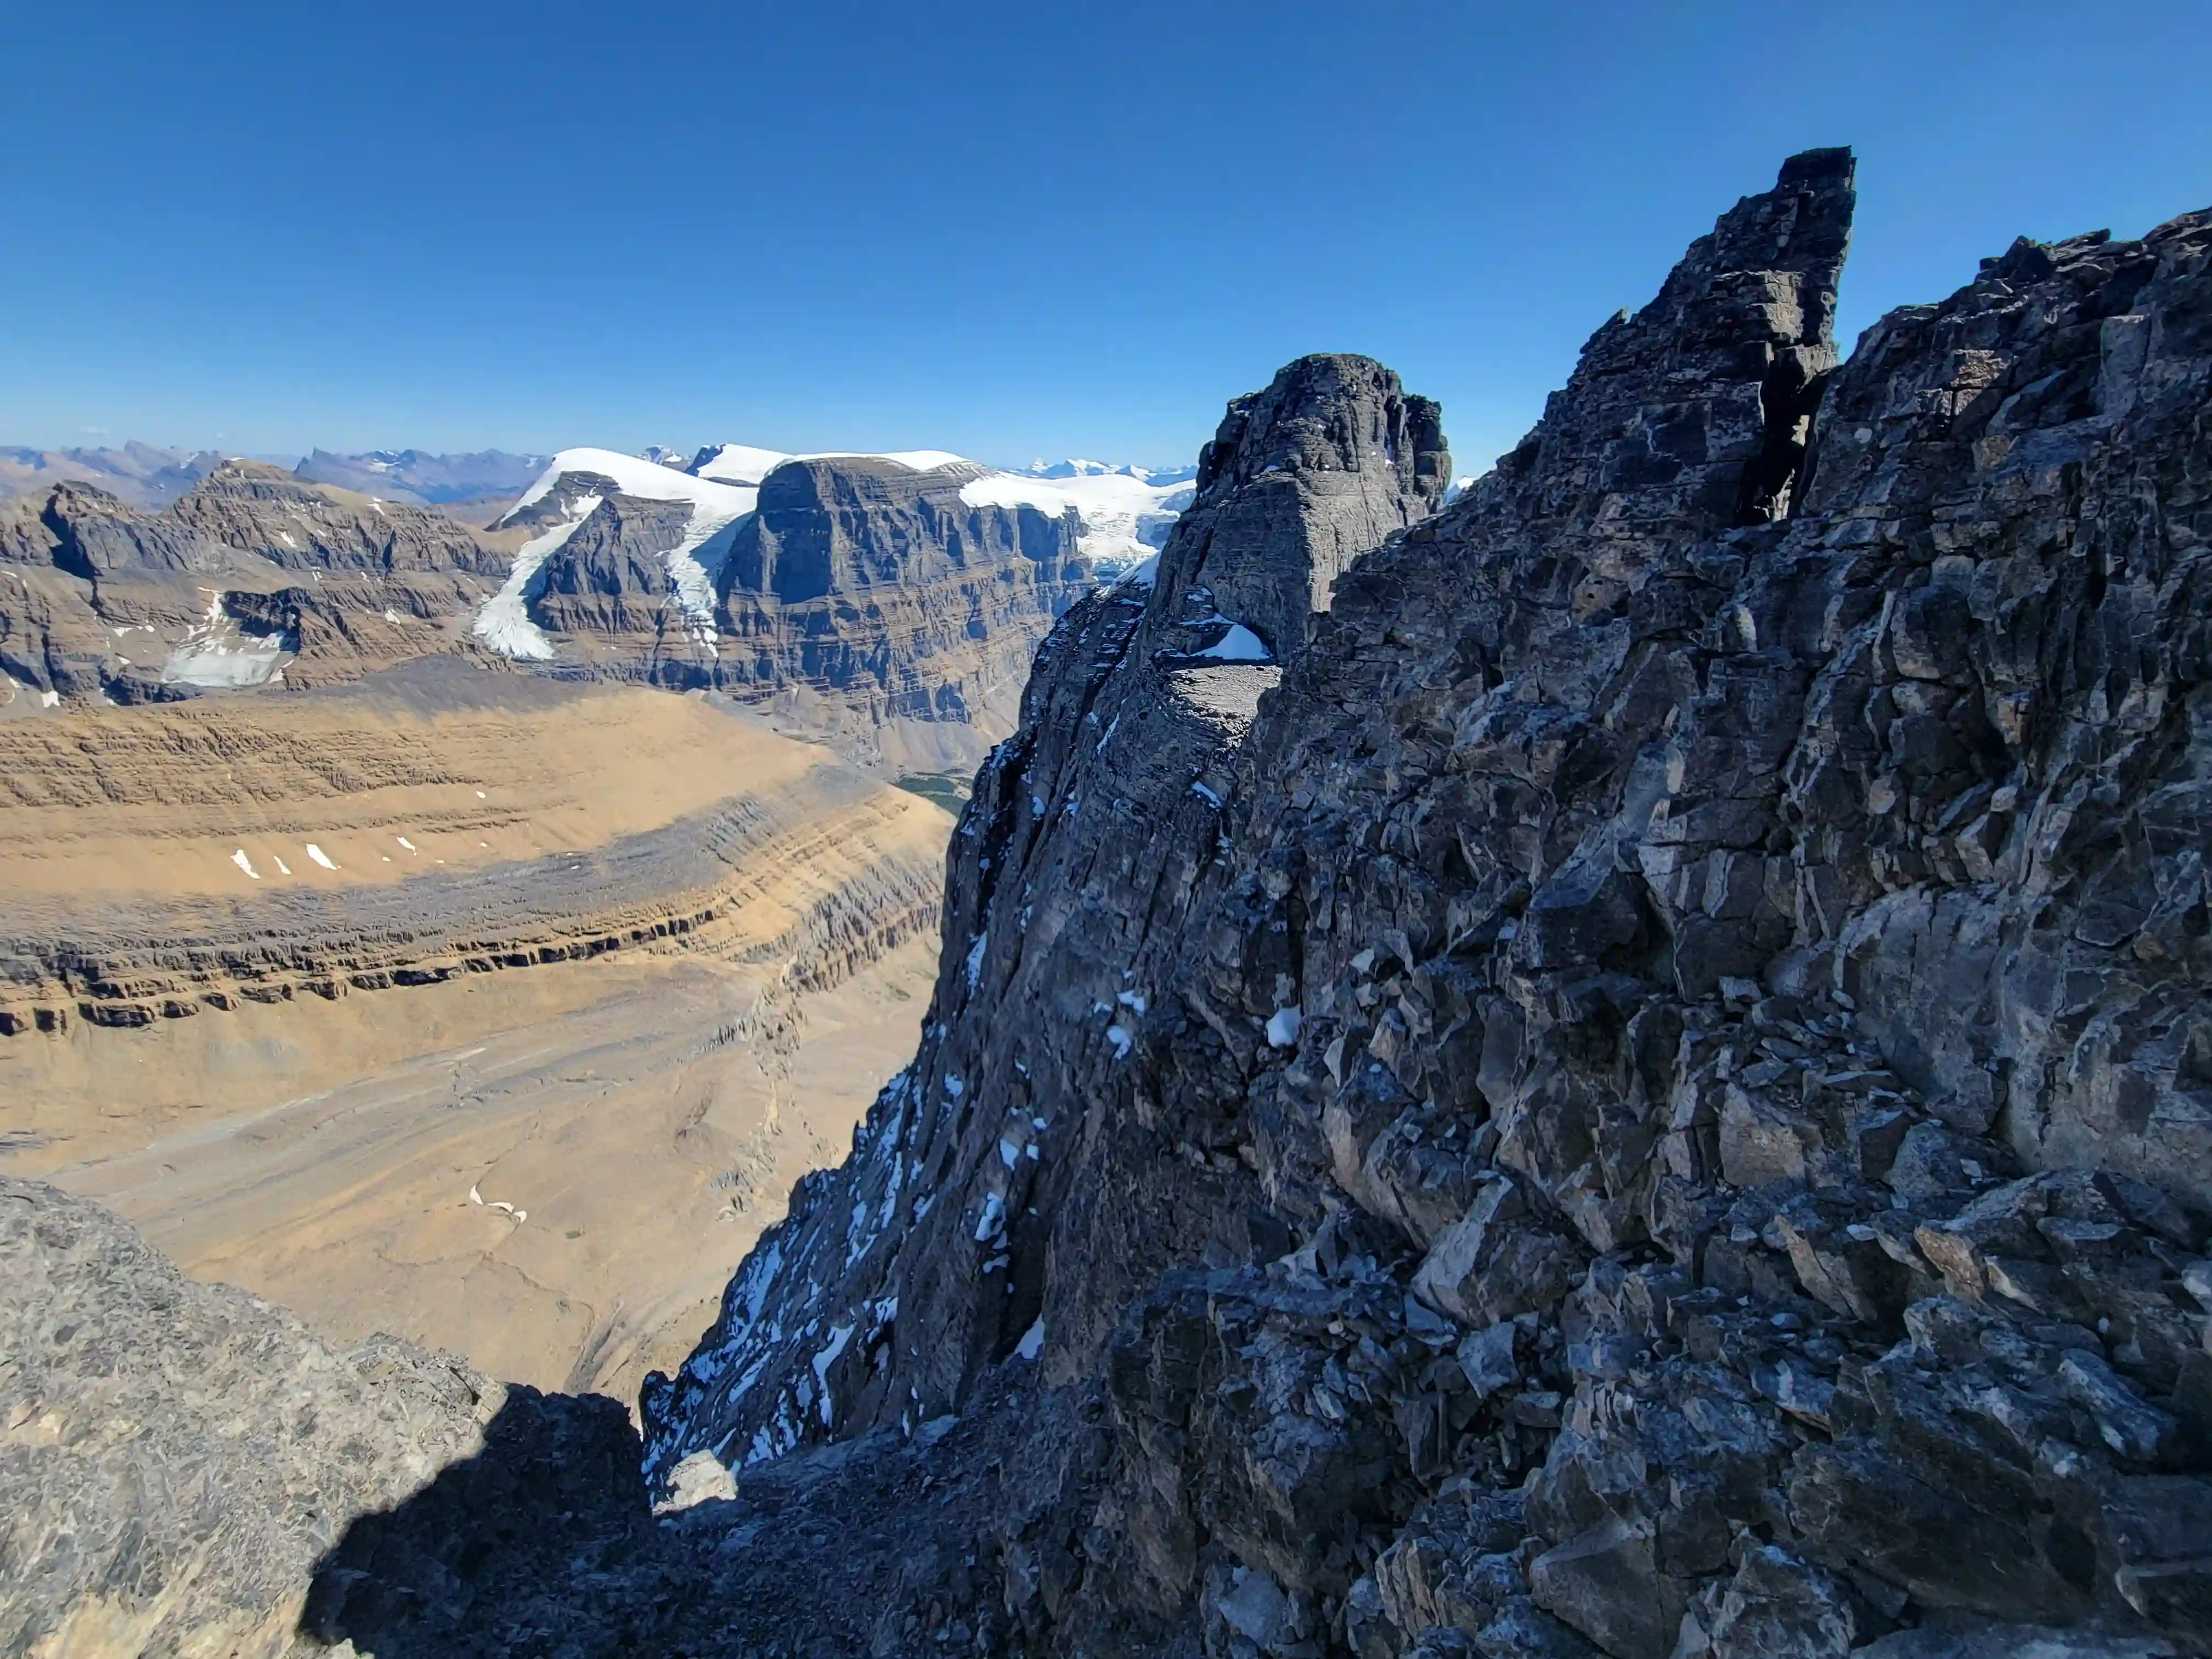
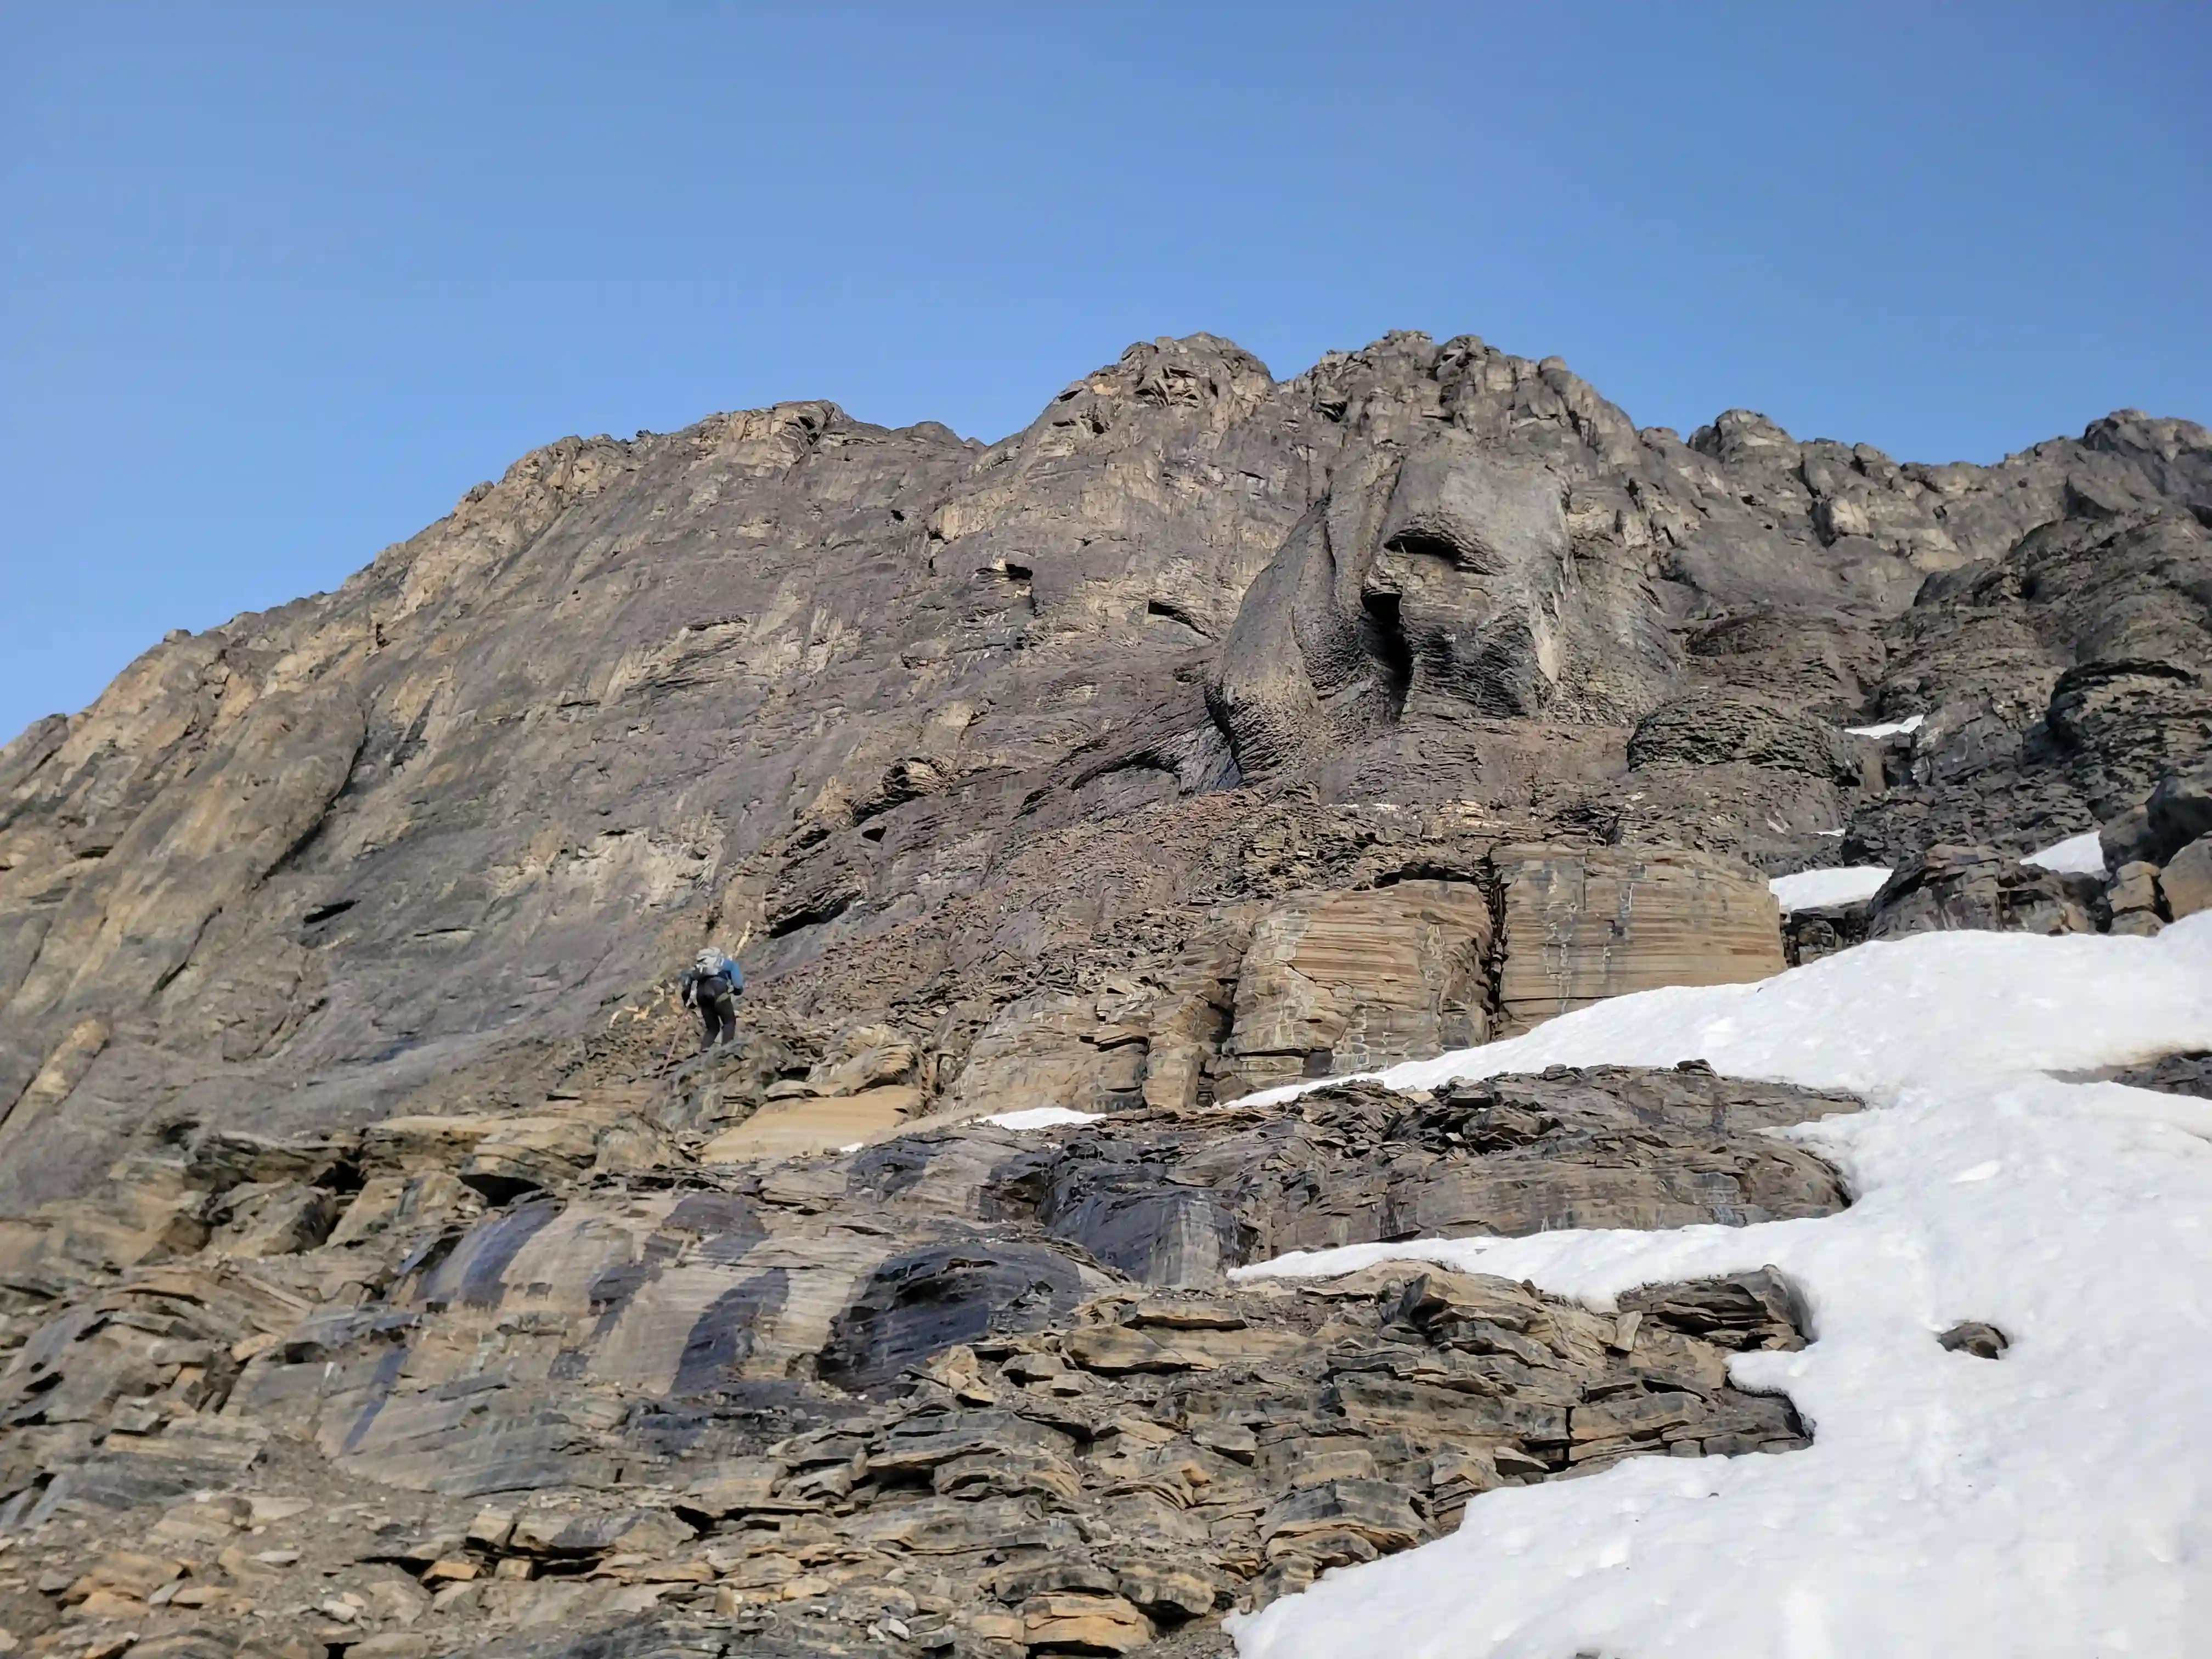
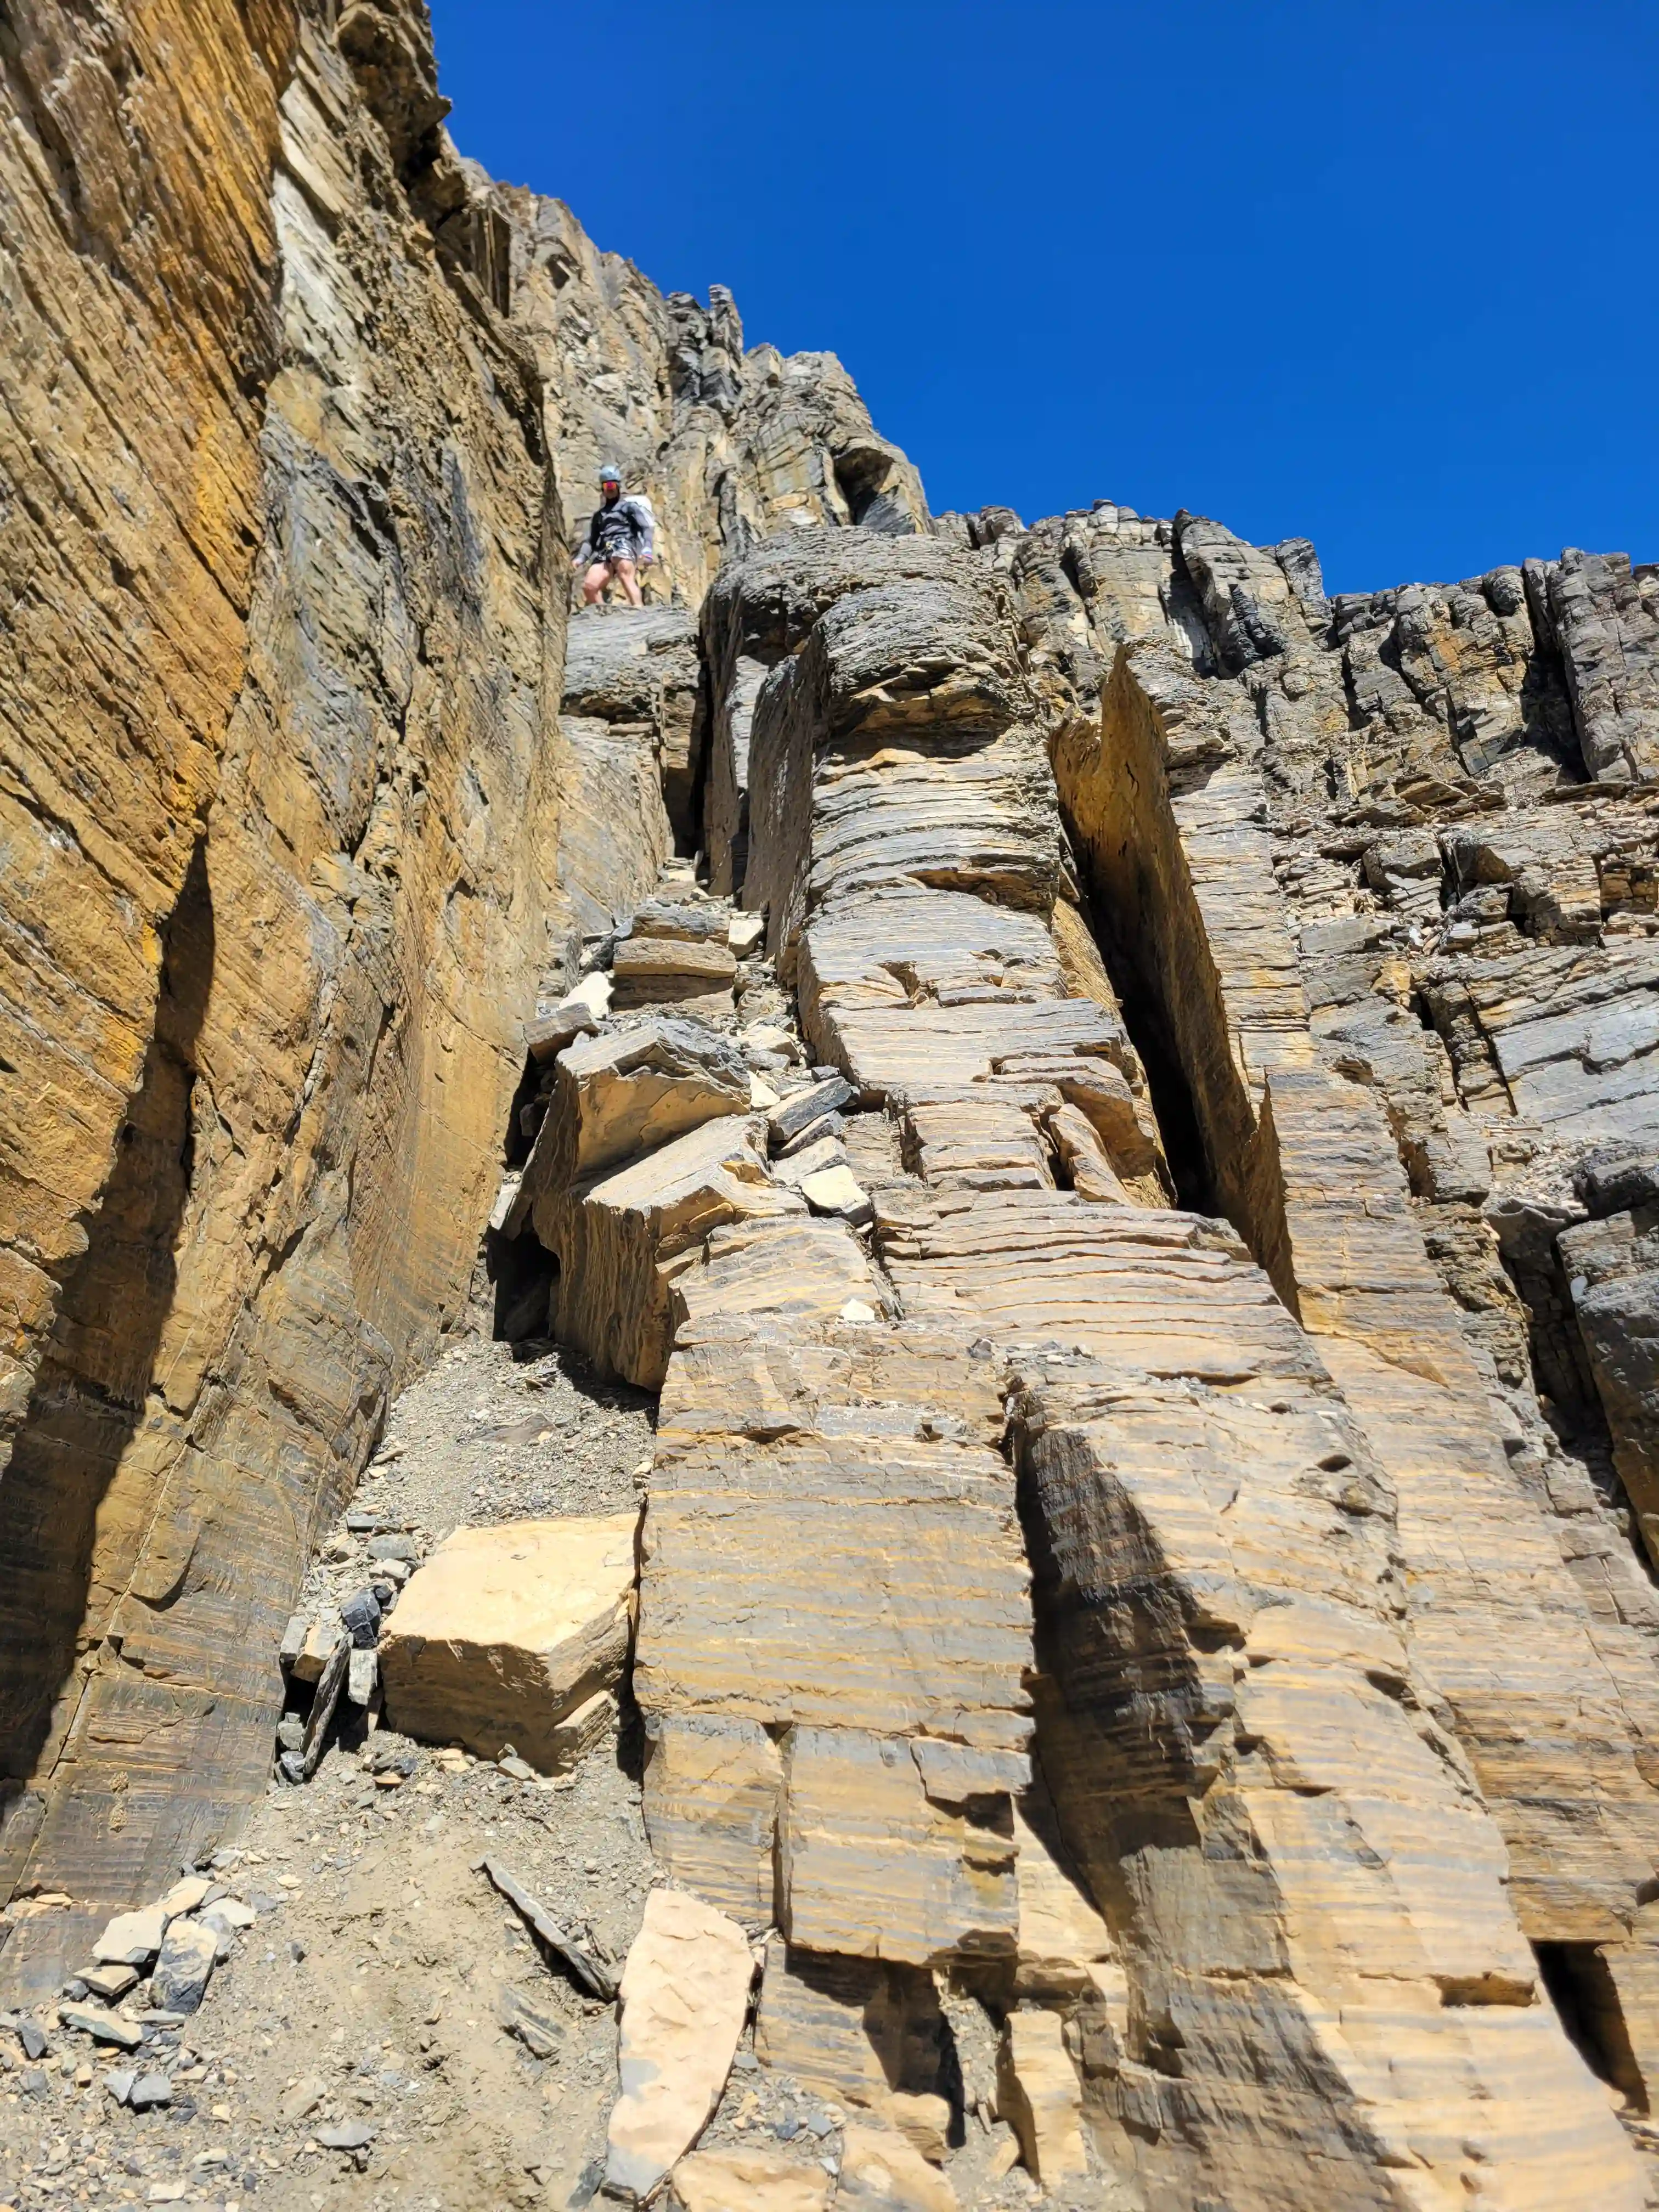
After descending from the Mount Alberta Hut and crossing the rock covered glacier and moraine terrain the ascent begins with a diagonal line climber's left below more visible glacier on Alberta's east face to reach the first of the ledge traverses. This ledge heads SW for a good 250m once it flattens out and stays below steep blocky terrain until reaching an obvious weakness where the subsequent scree / choss slope is visible with more cliffy features above and the notably darker upper mountain towering even higher.
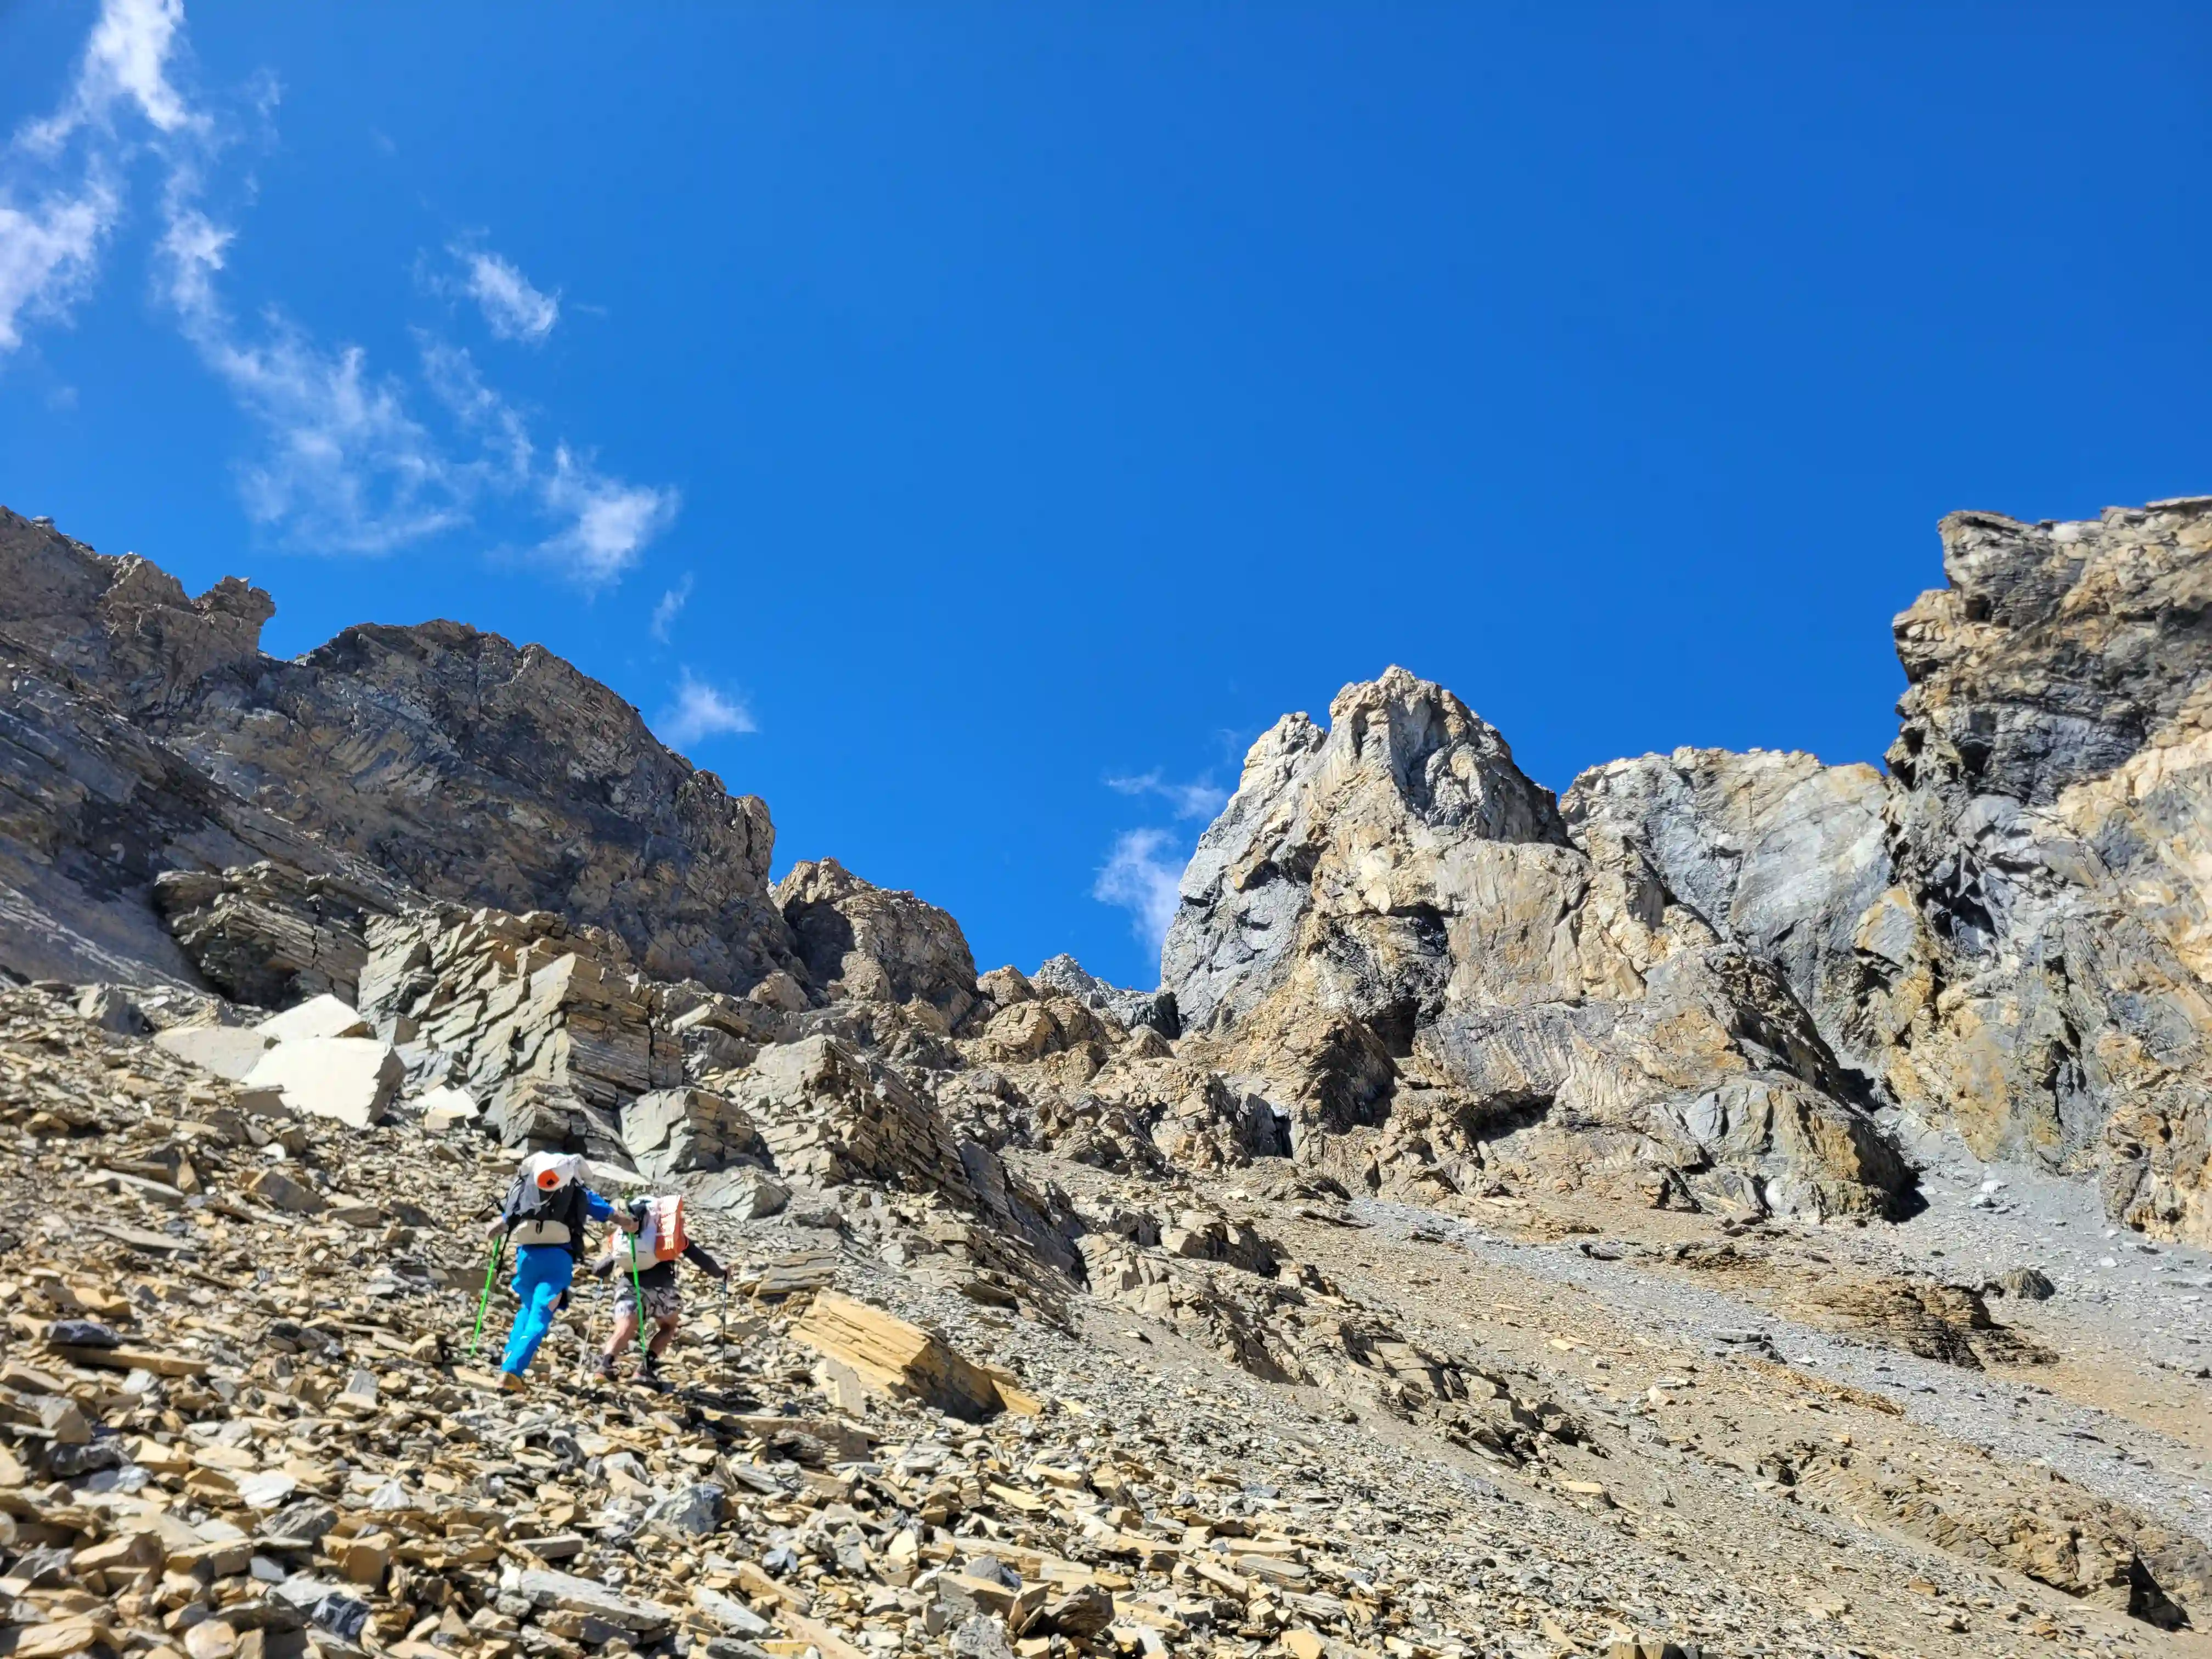
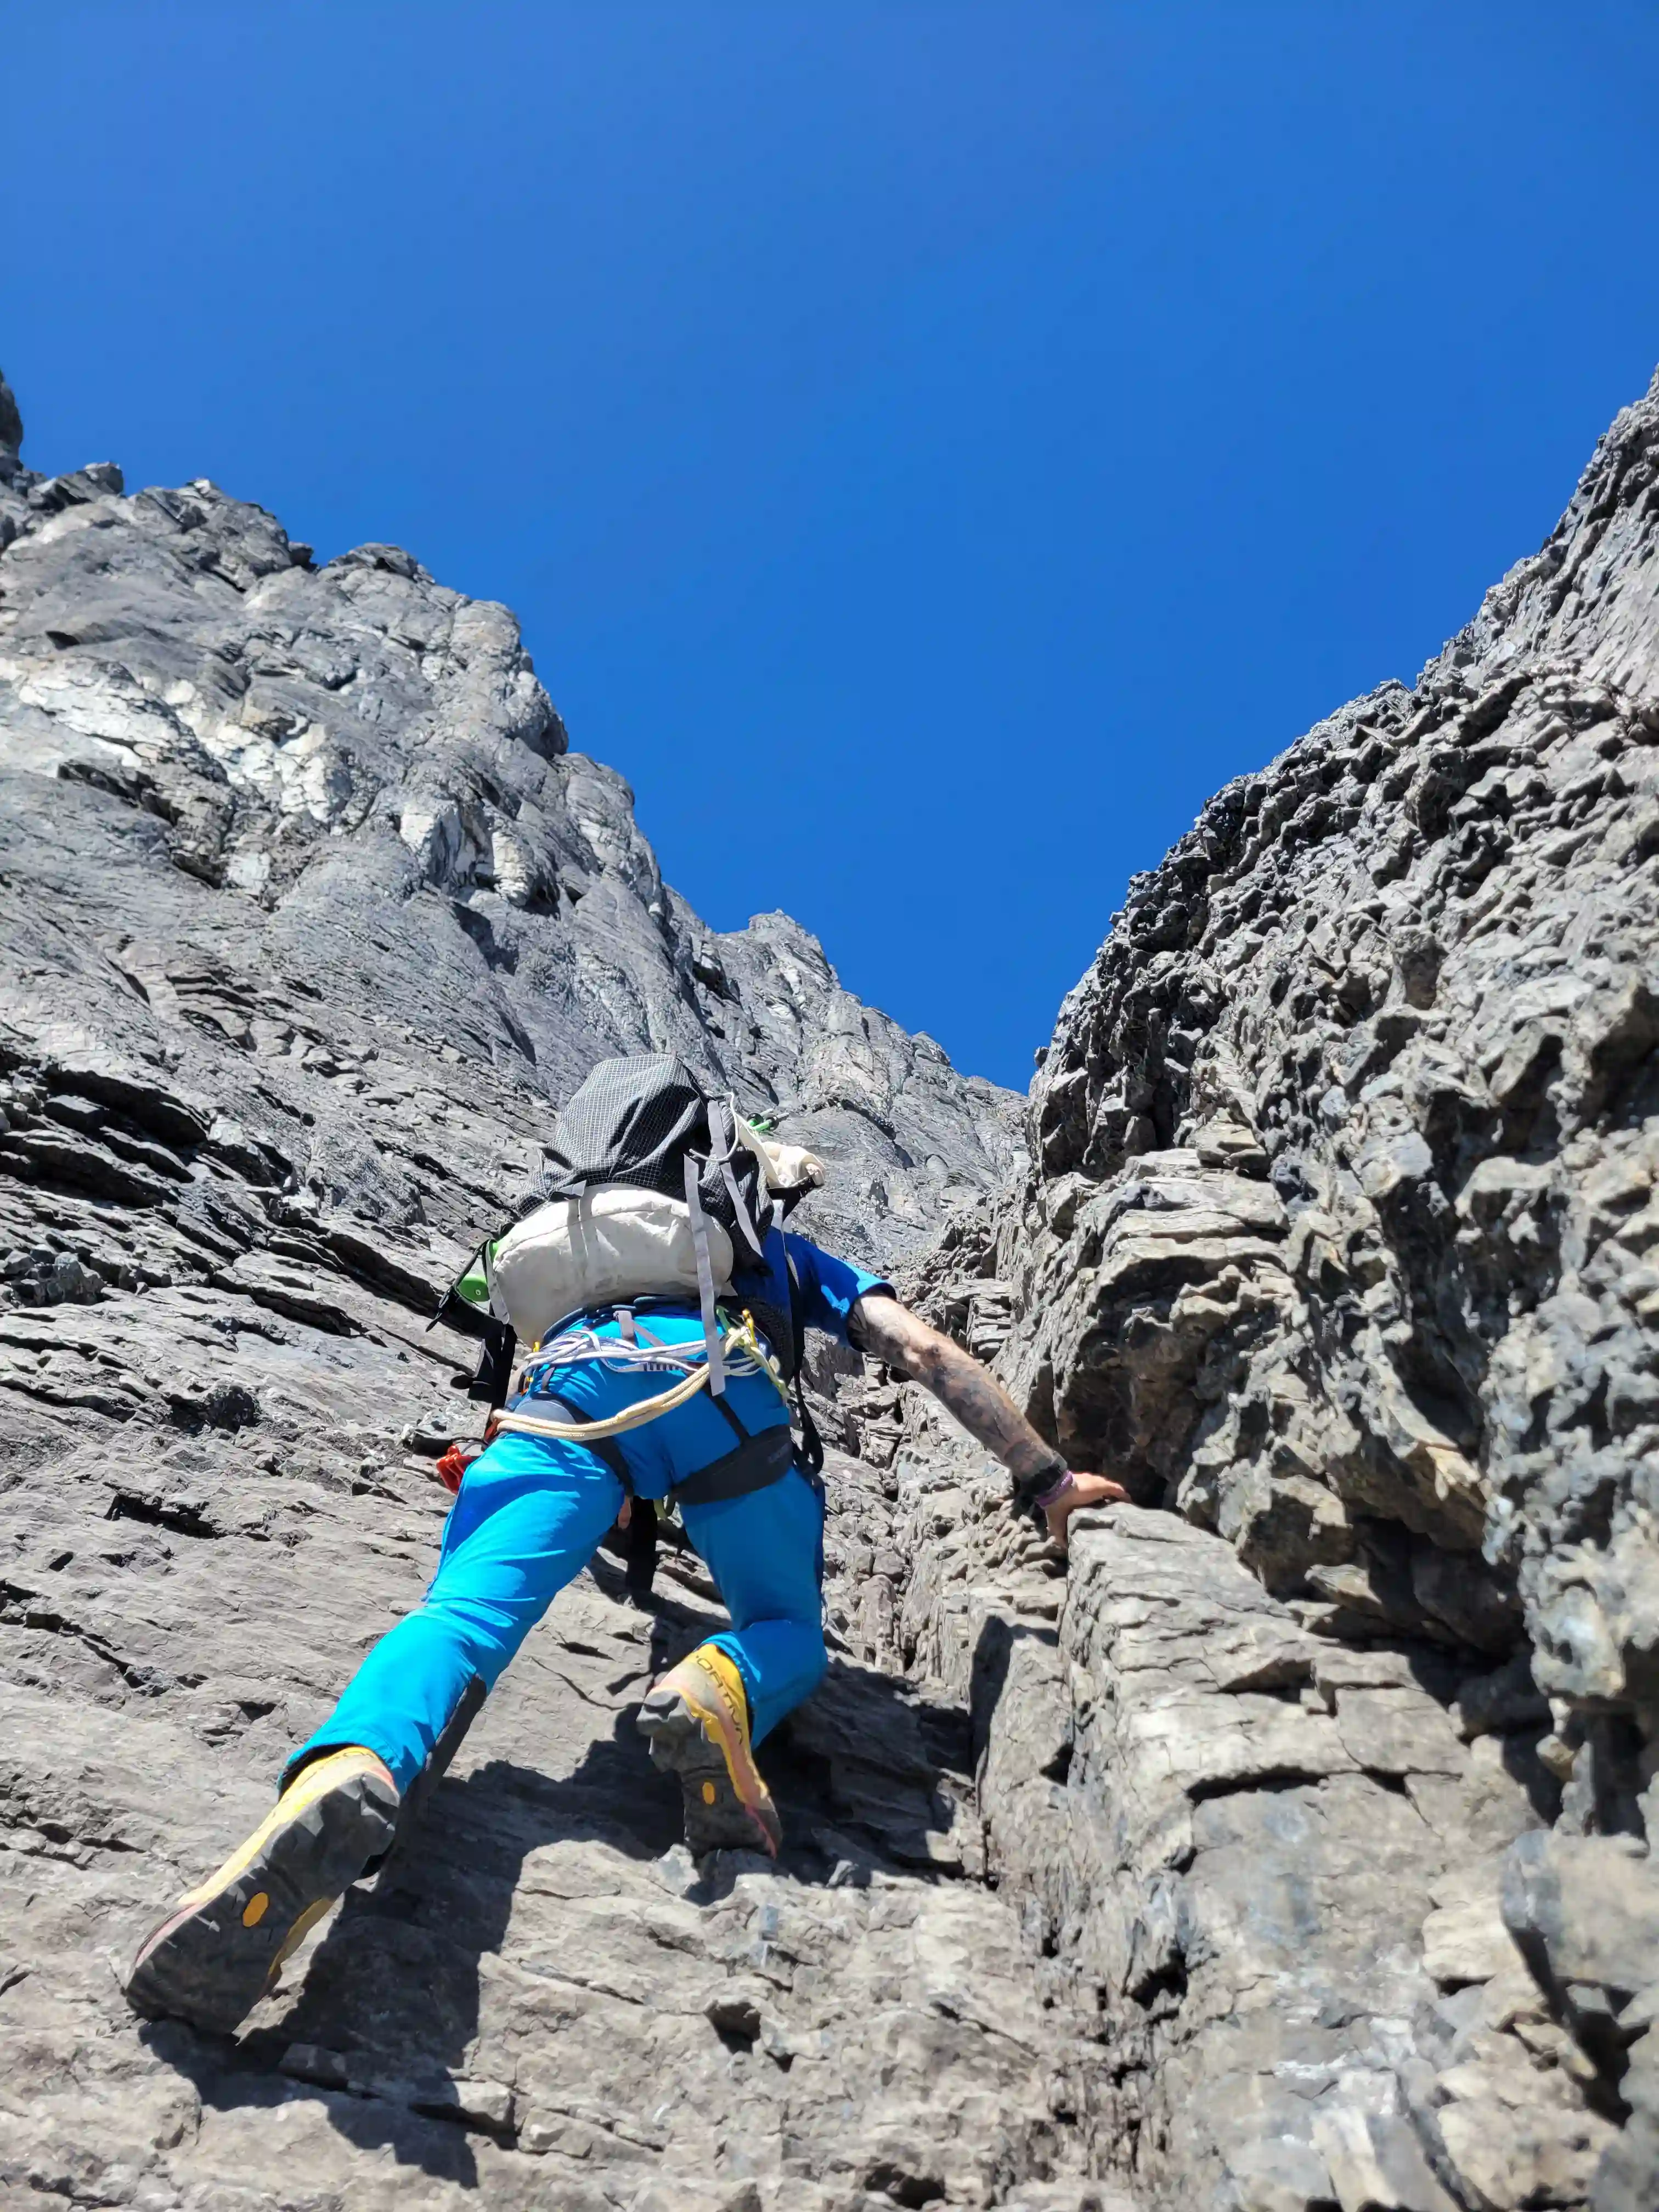
With a bit of climbing through technically easy terrain to follow the scree / choss slope is reached and lasts for a few hundred vertical meters before the next cliffy feature draws near and here the route heads climber's left a short ways until a climbable weakness is reached. This hands on section has numerous lines that could be taken and could also be avoided entirely with a longer detouring traverse to the left before returning on the following ledge above the band but the hands on lines go at 3rd class to at most very low 5th which should be manageable for anyone setting foot on Mount Alberta and planning to reach the summit.
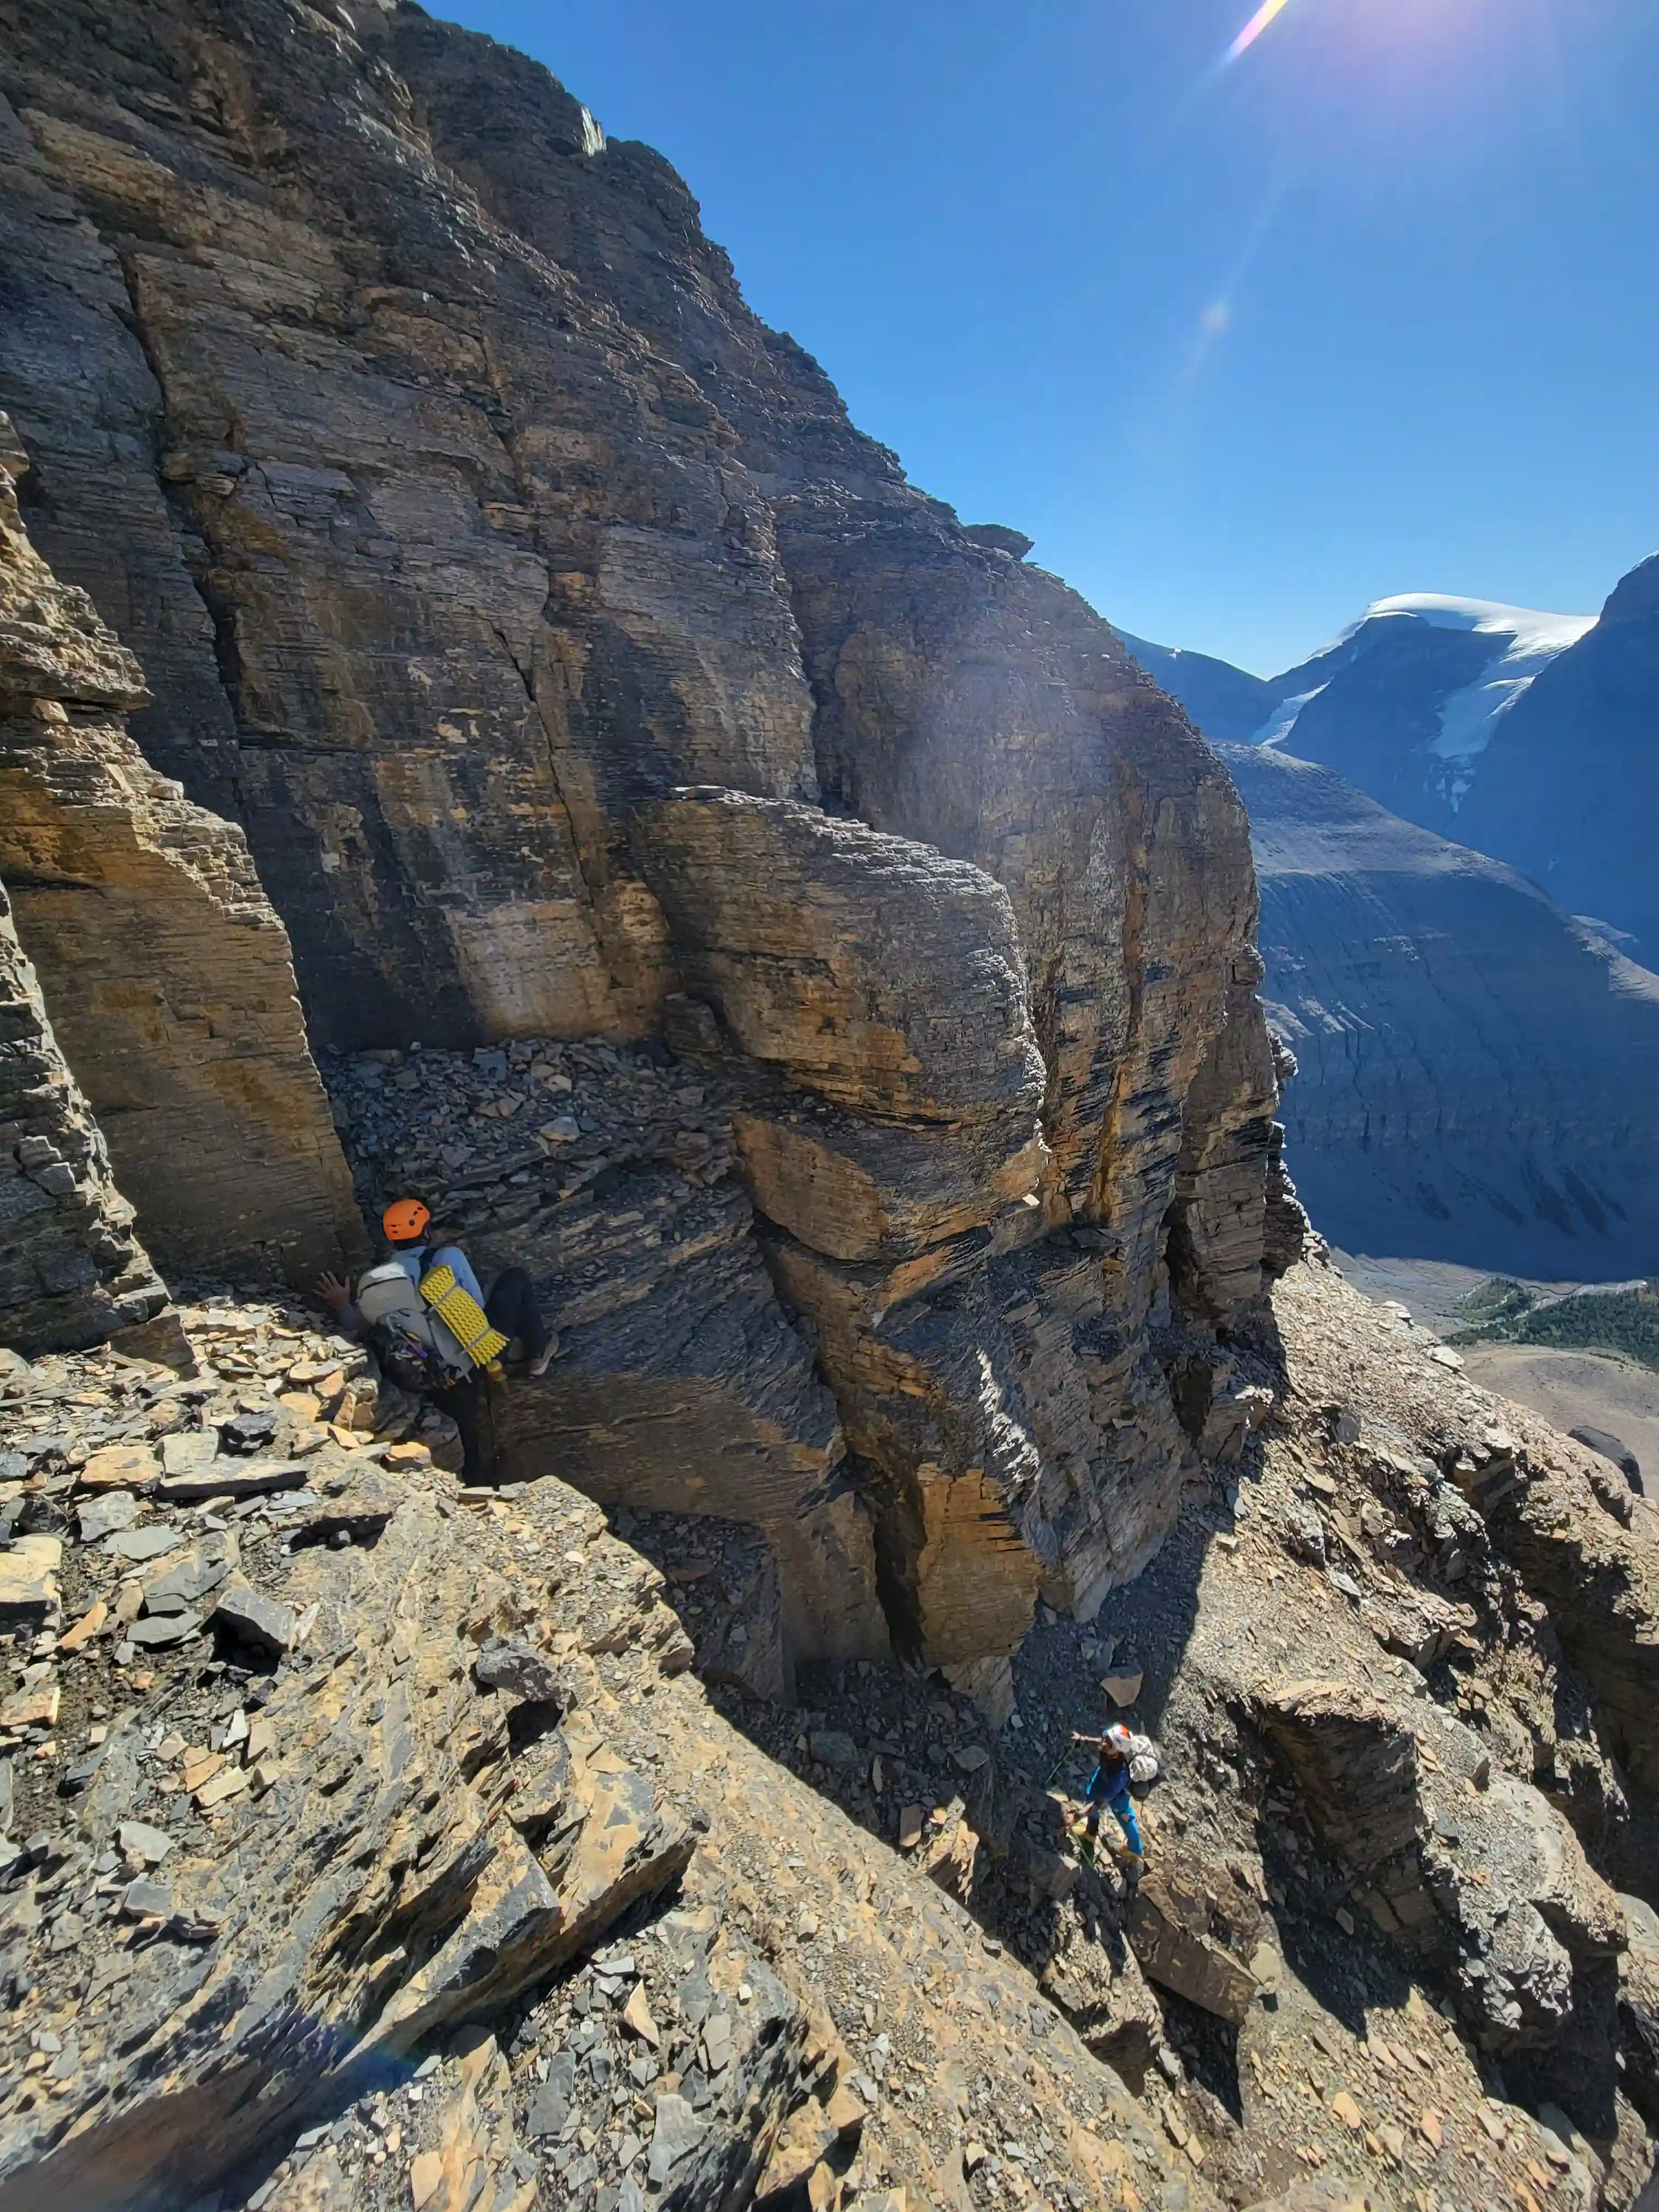
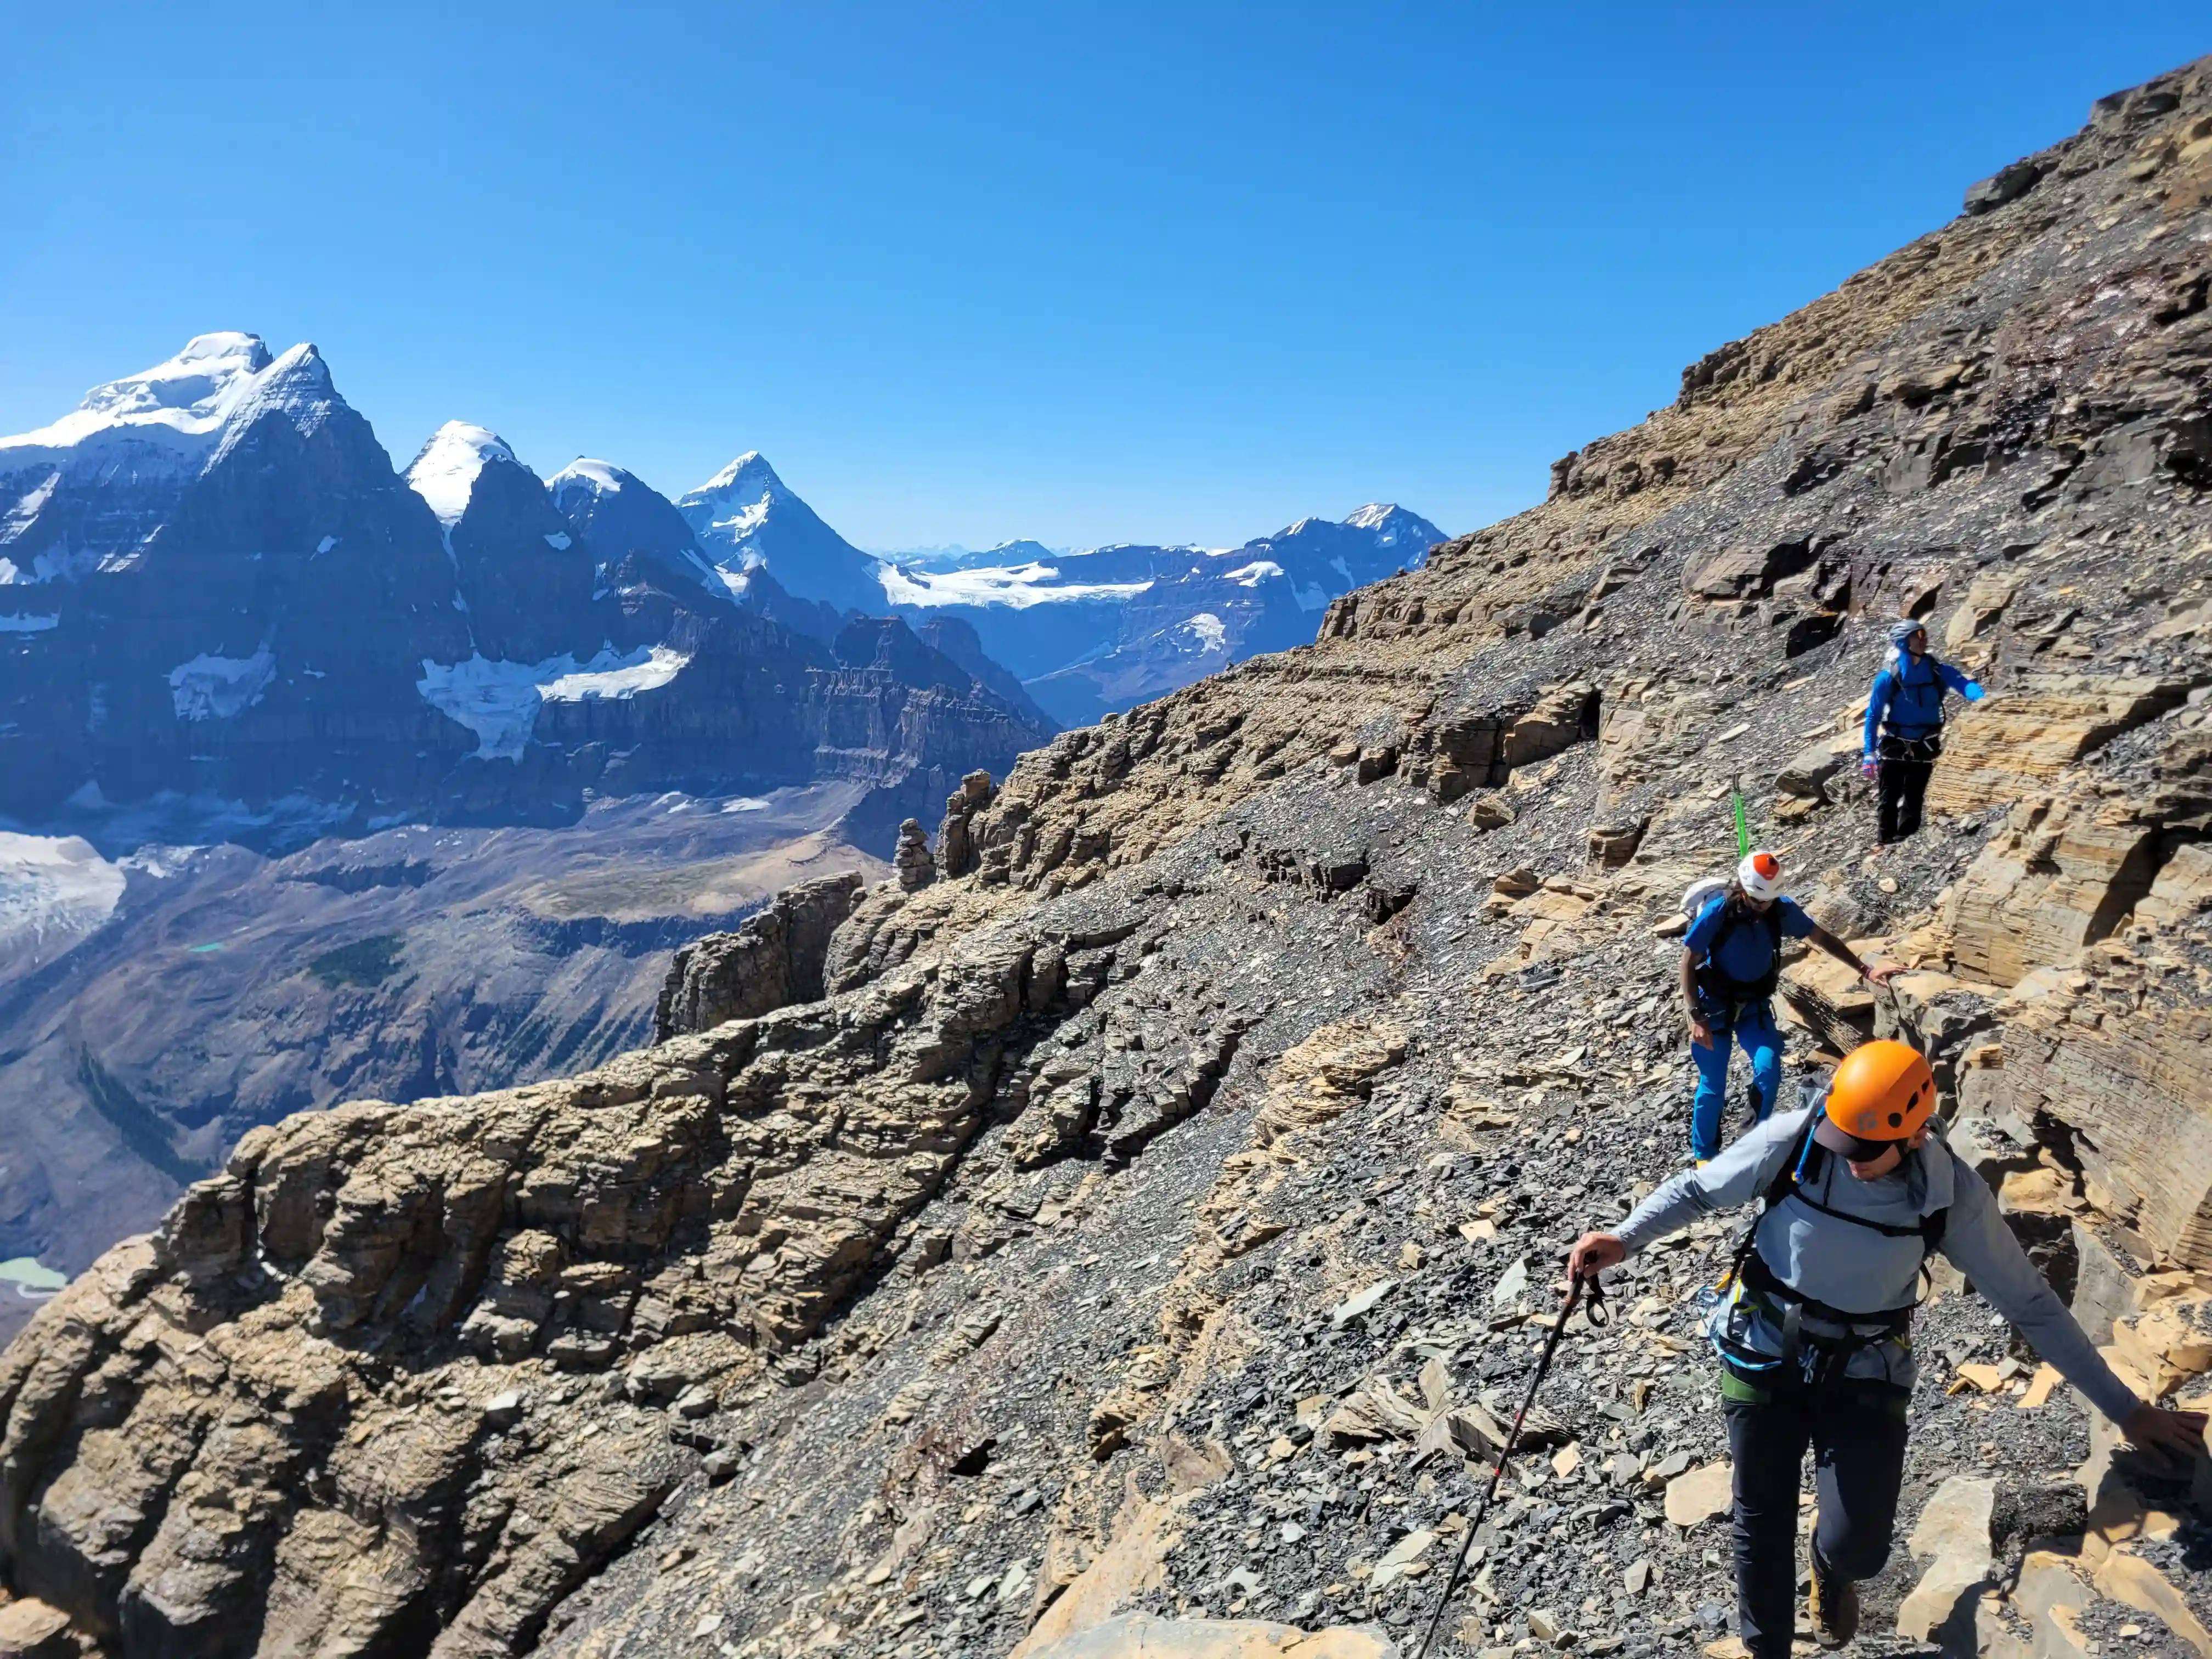
After working through this steeper section the second ledge traverse is reached and directly above the next cliffband feature is visible with the dark upper mountain behind. The traverse heads climber's right to the NE for about 200m, more if you bypass the previous hands on section, before rounding a corner where a bivi site is located and from here the route cuts back to the NW ascending a bowl feature between a couple of the southmost buttresses on the east face on 3rd-4th class terrain before heading directly west up the southmost buttress using low 5th class to reach the end of the lower half of the mountain. This final section is the crux of the lower portion of the mountain with the final bit of climbing gaining a notch and topping out on the summit side but there is tat present for those that want to protect it.
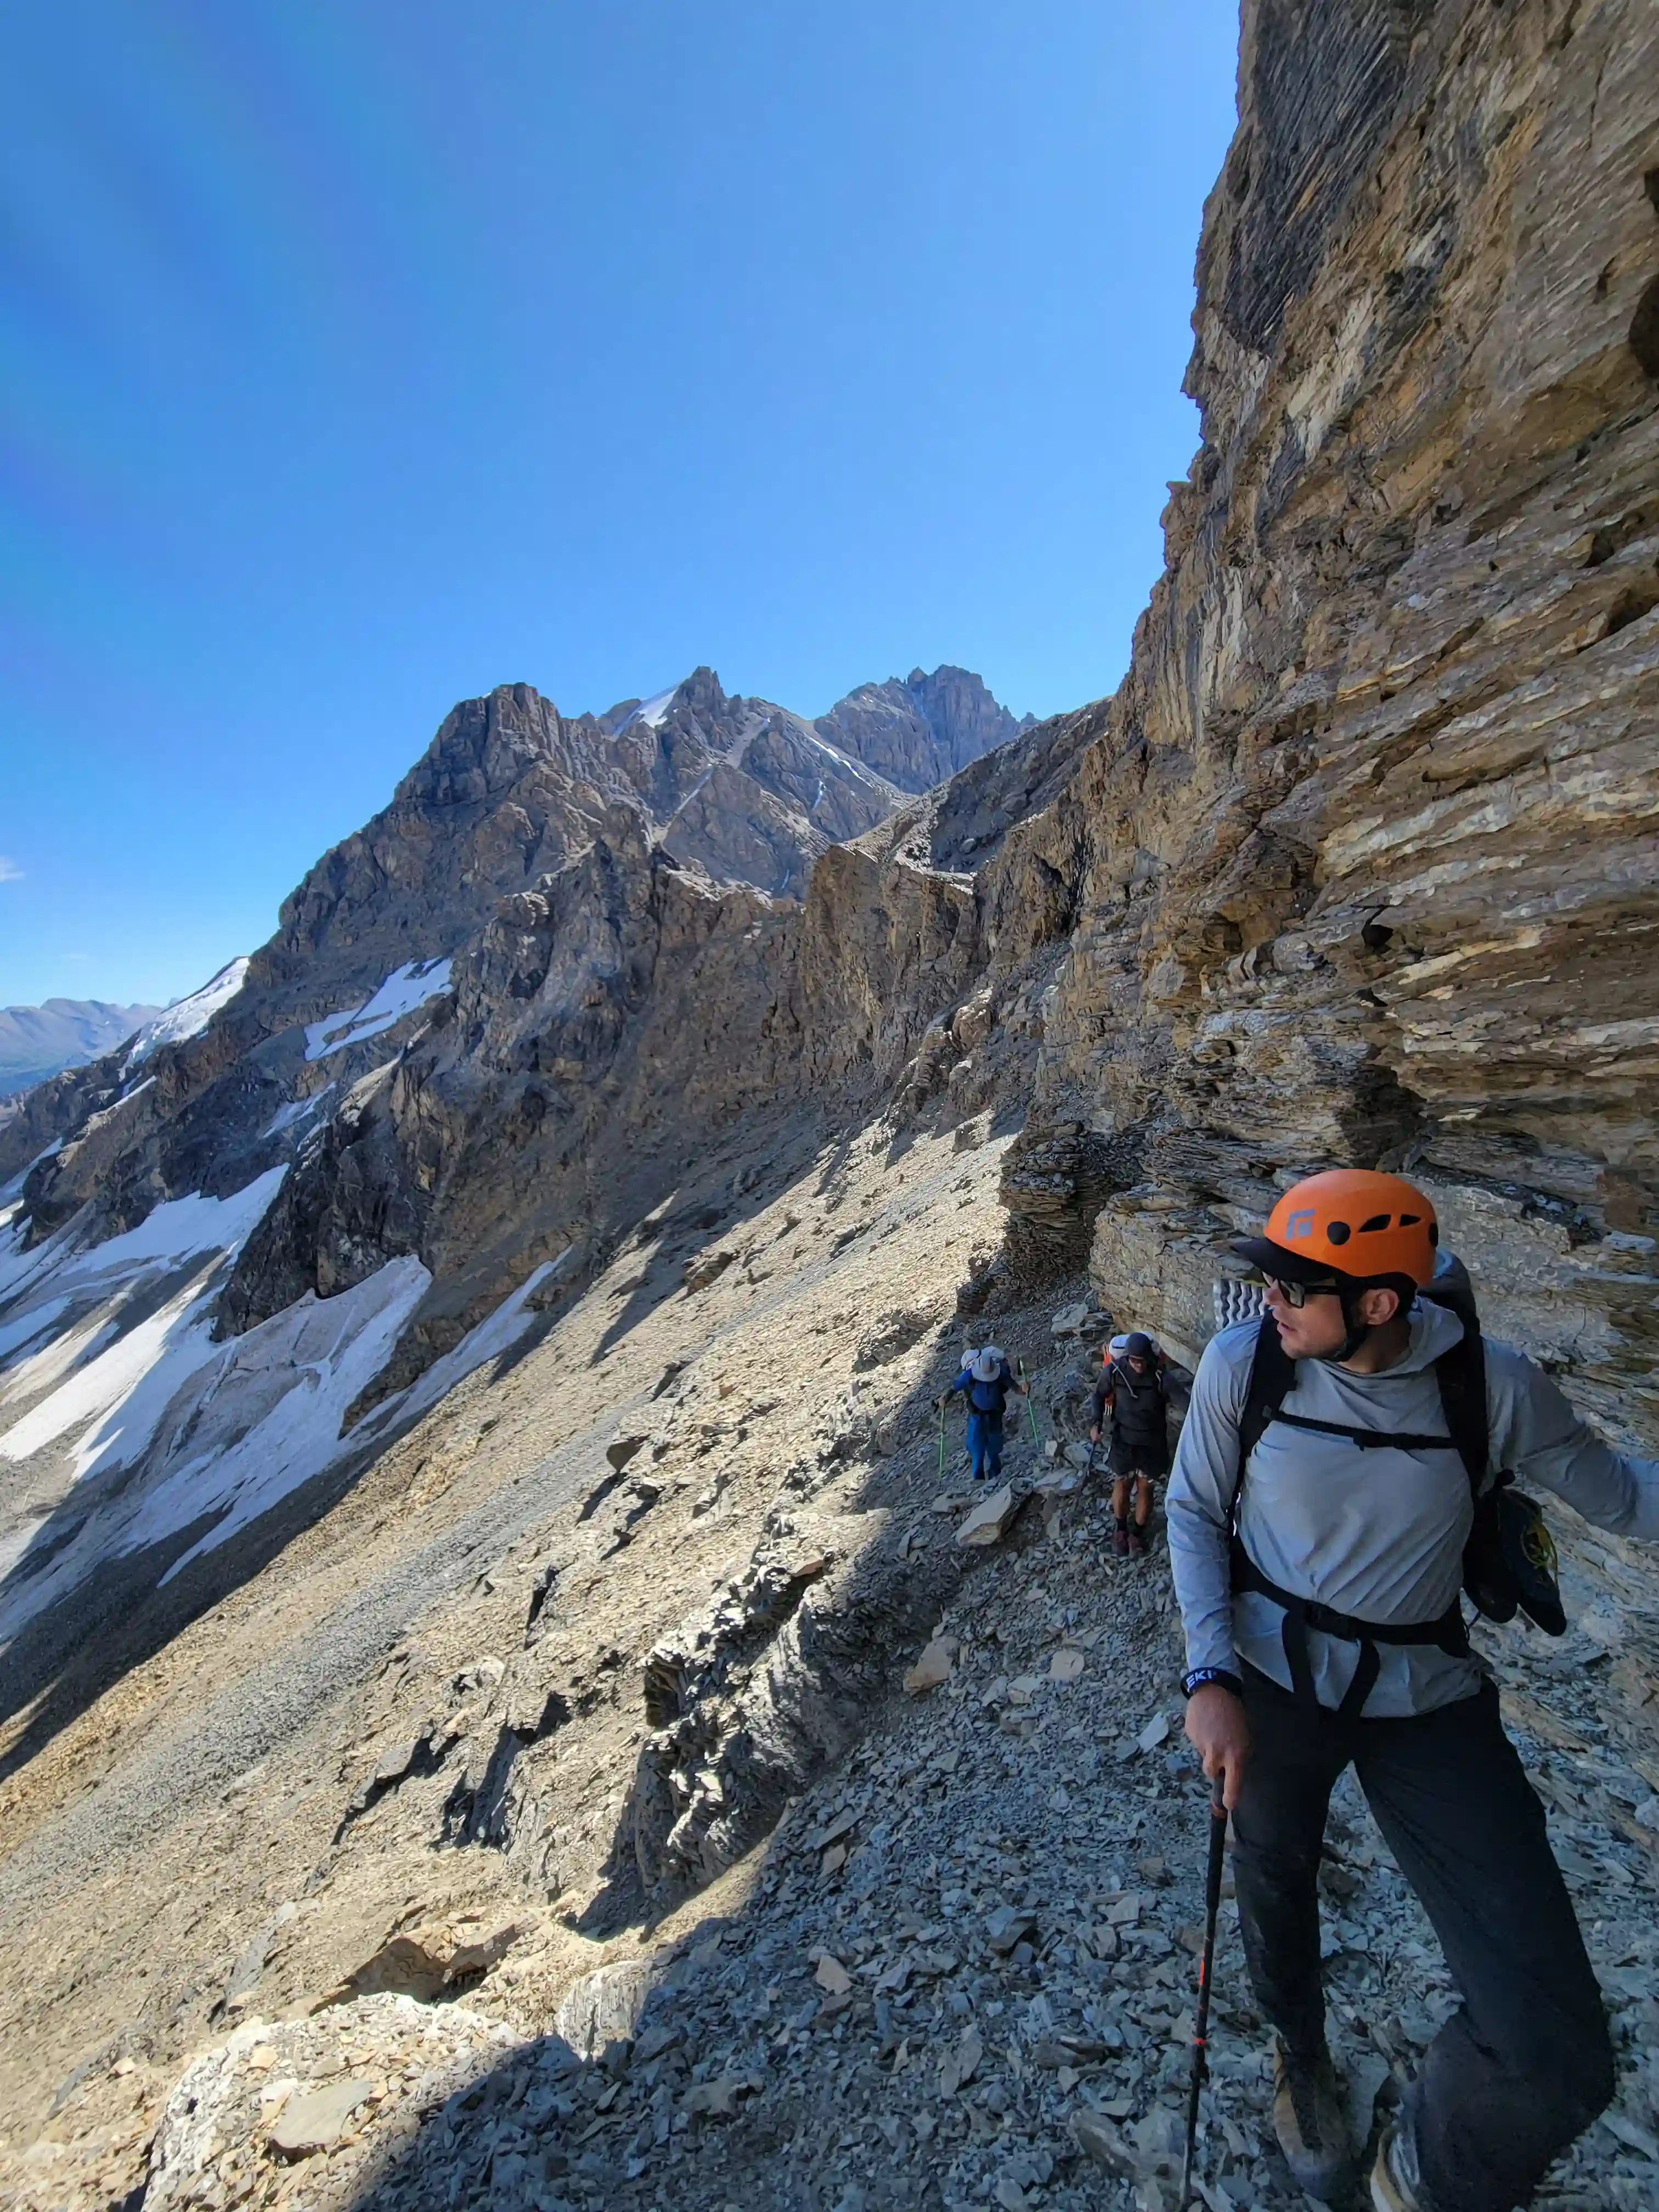
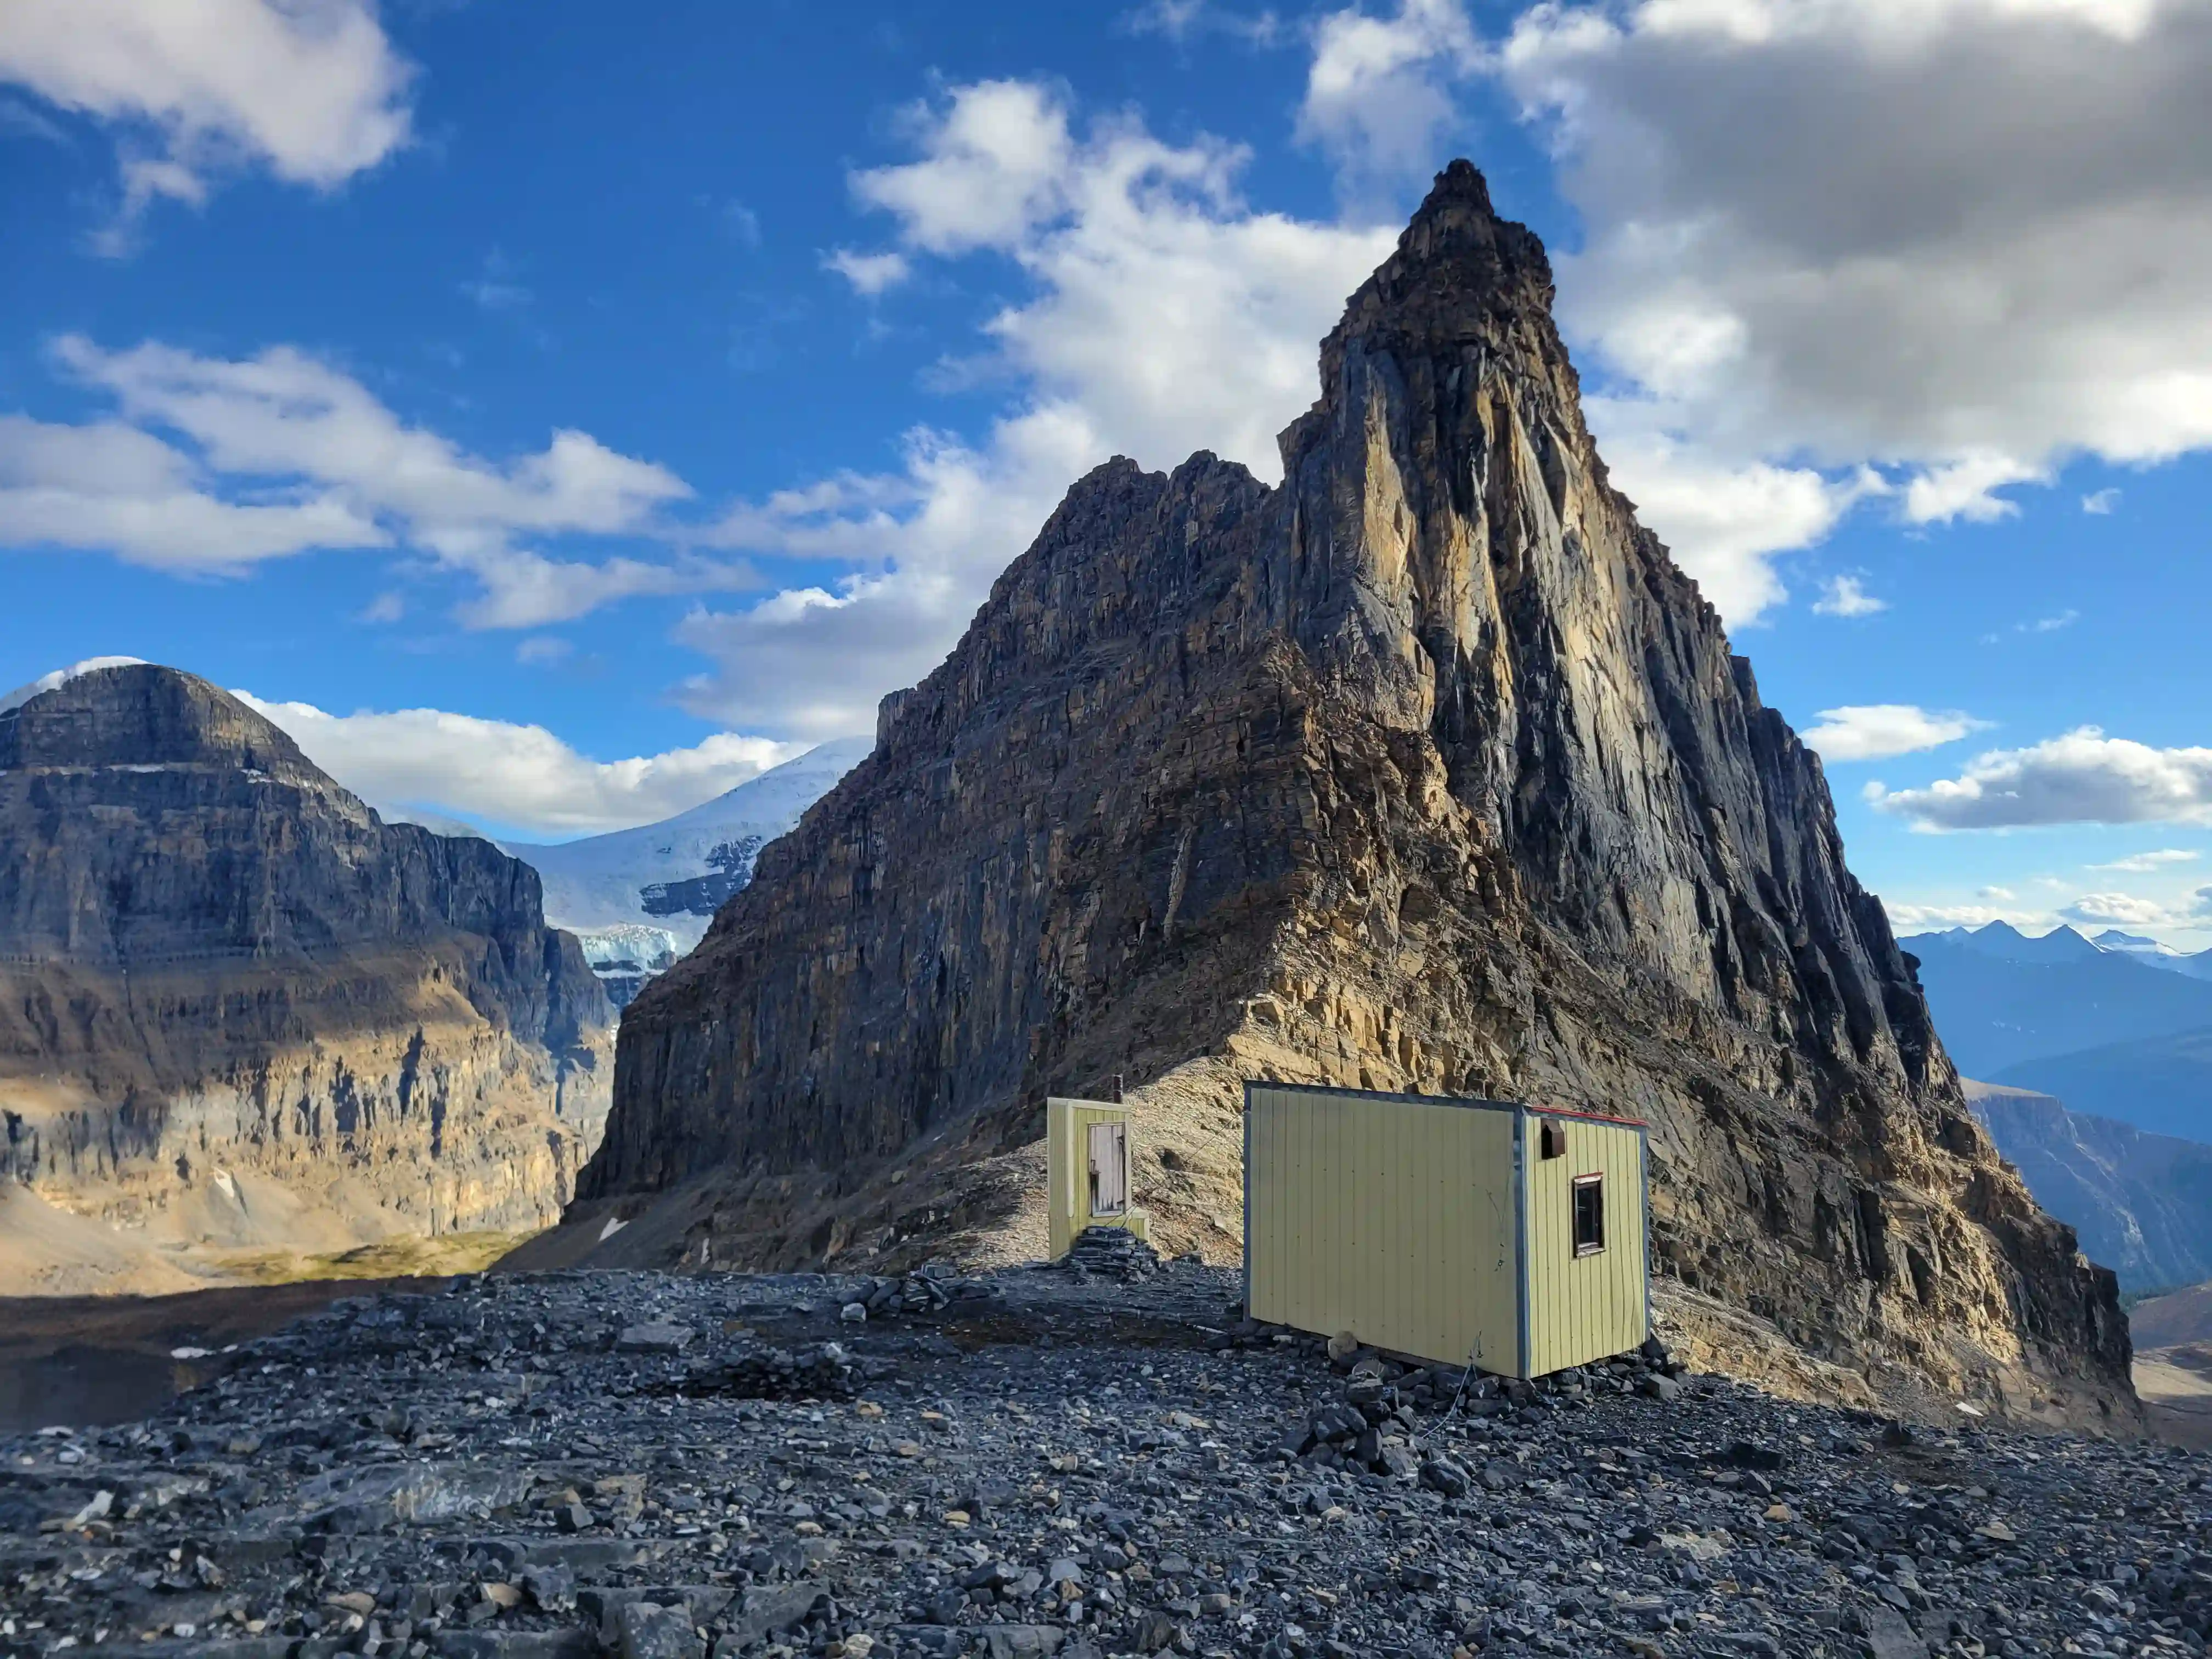
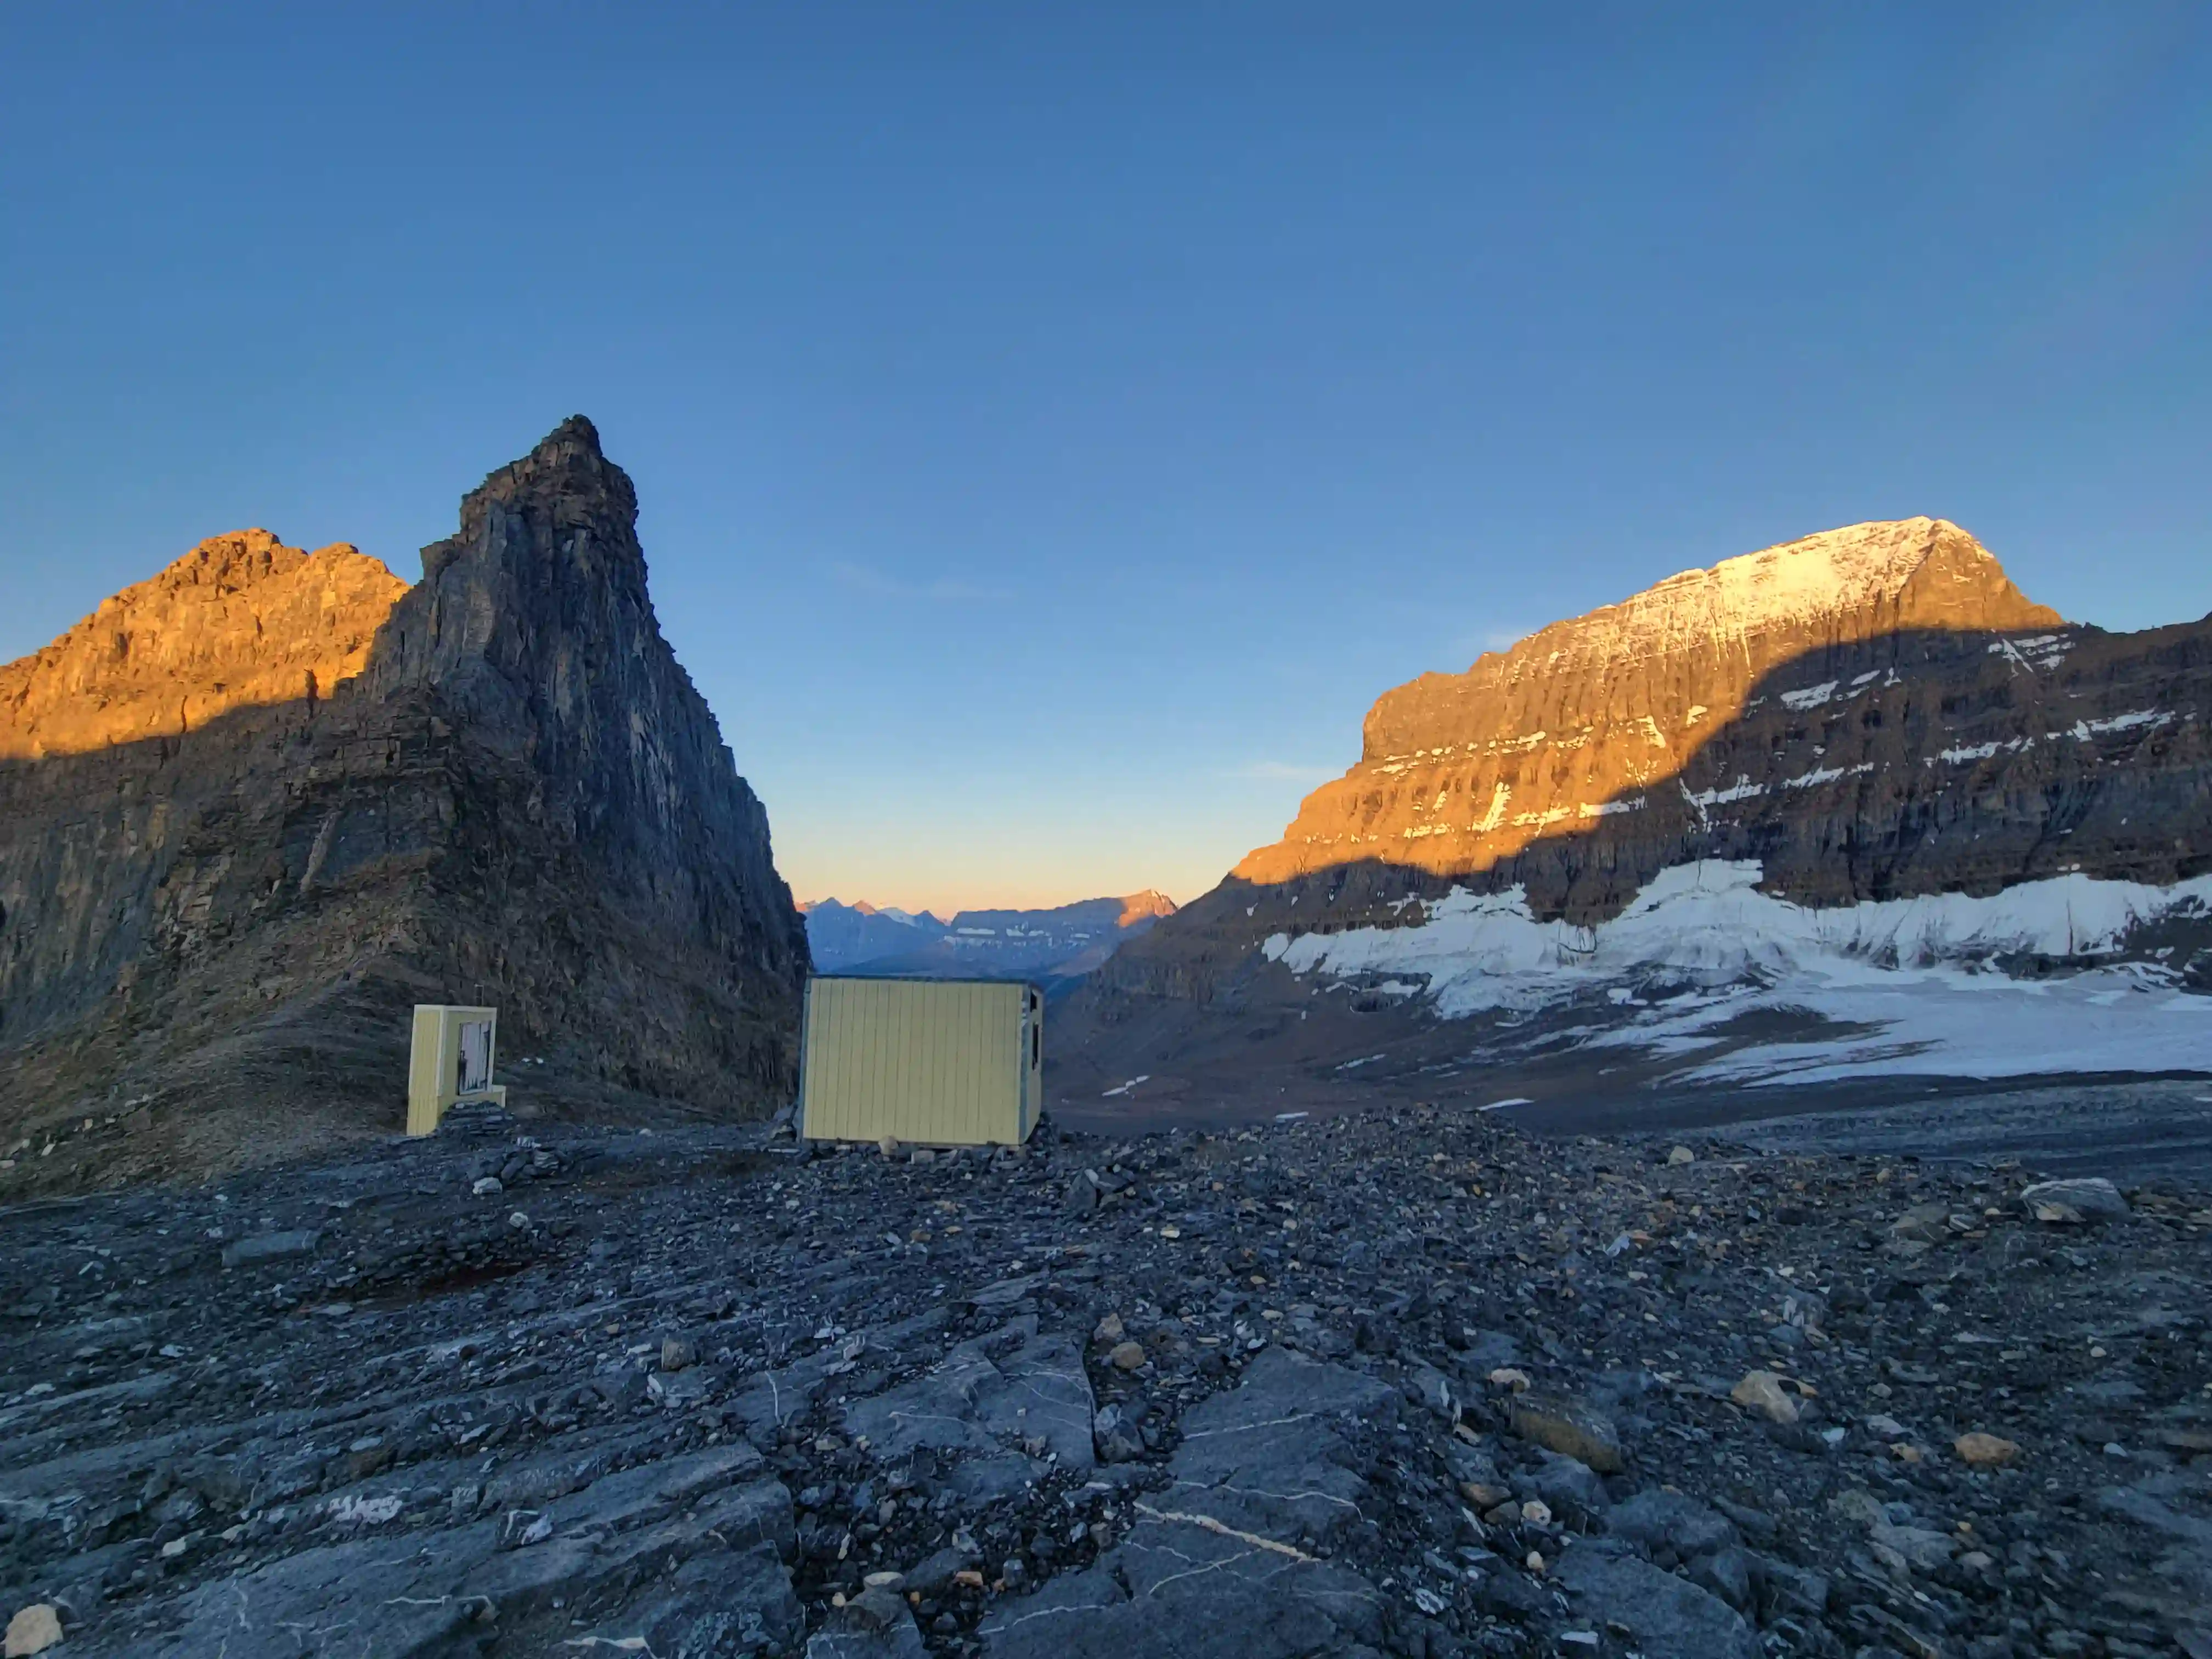
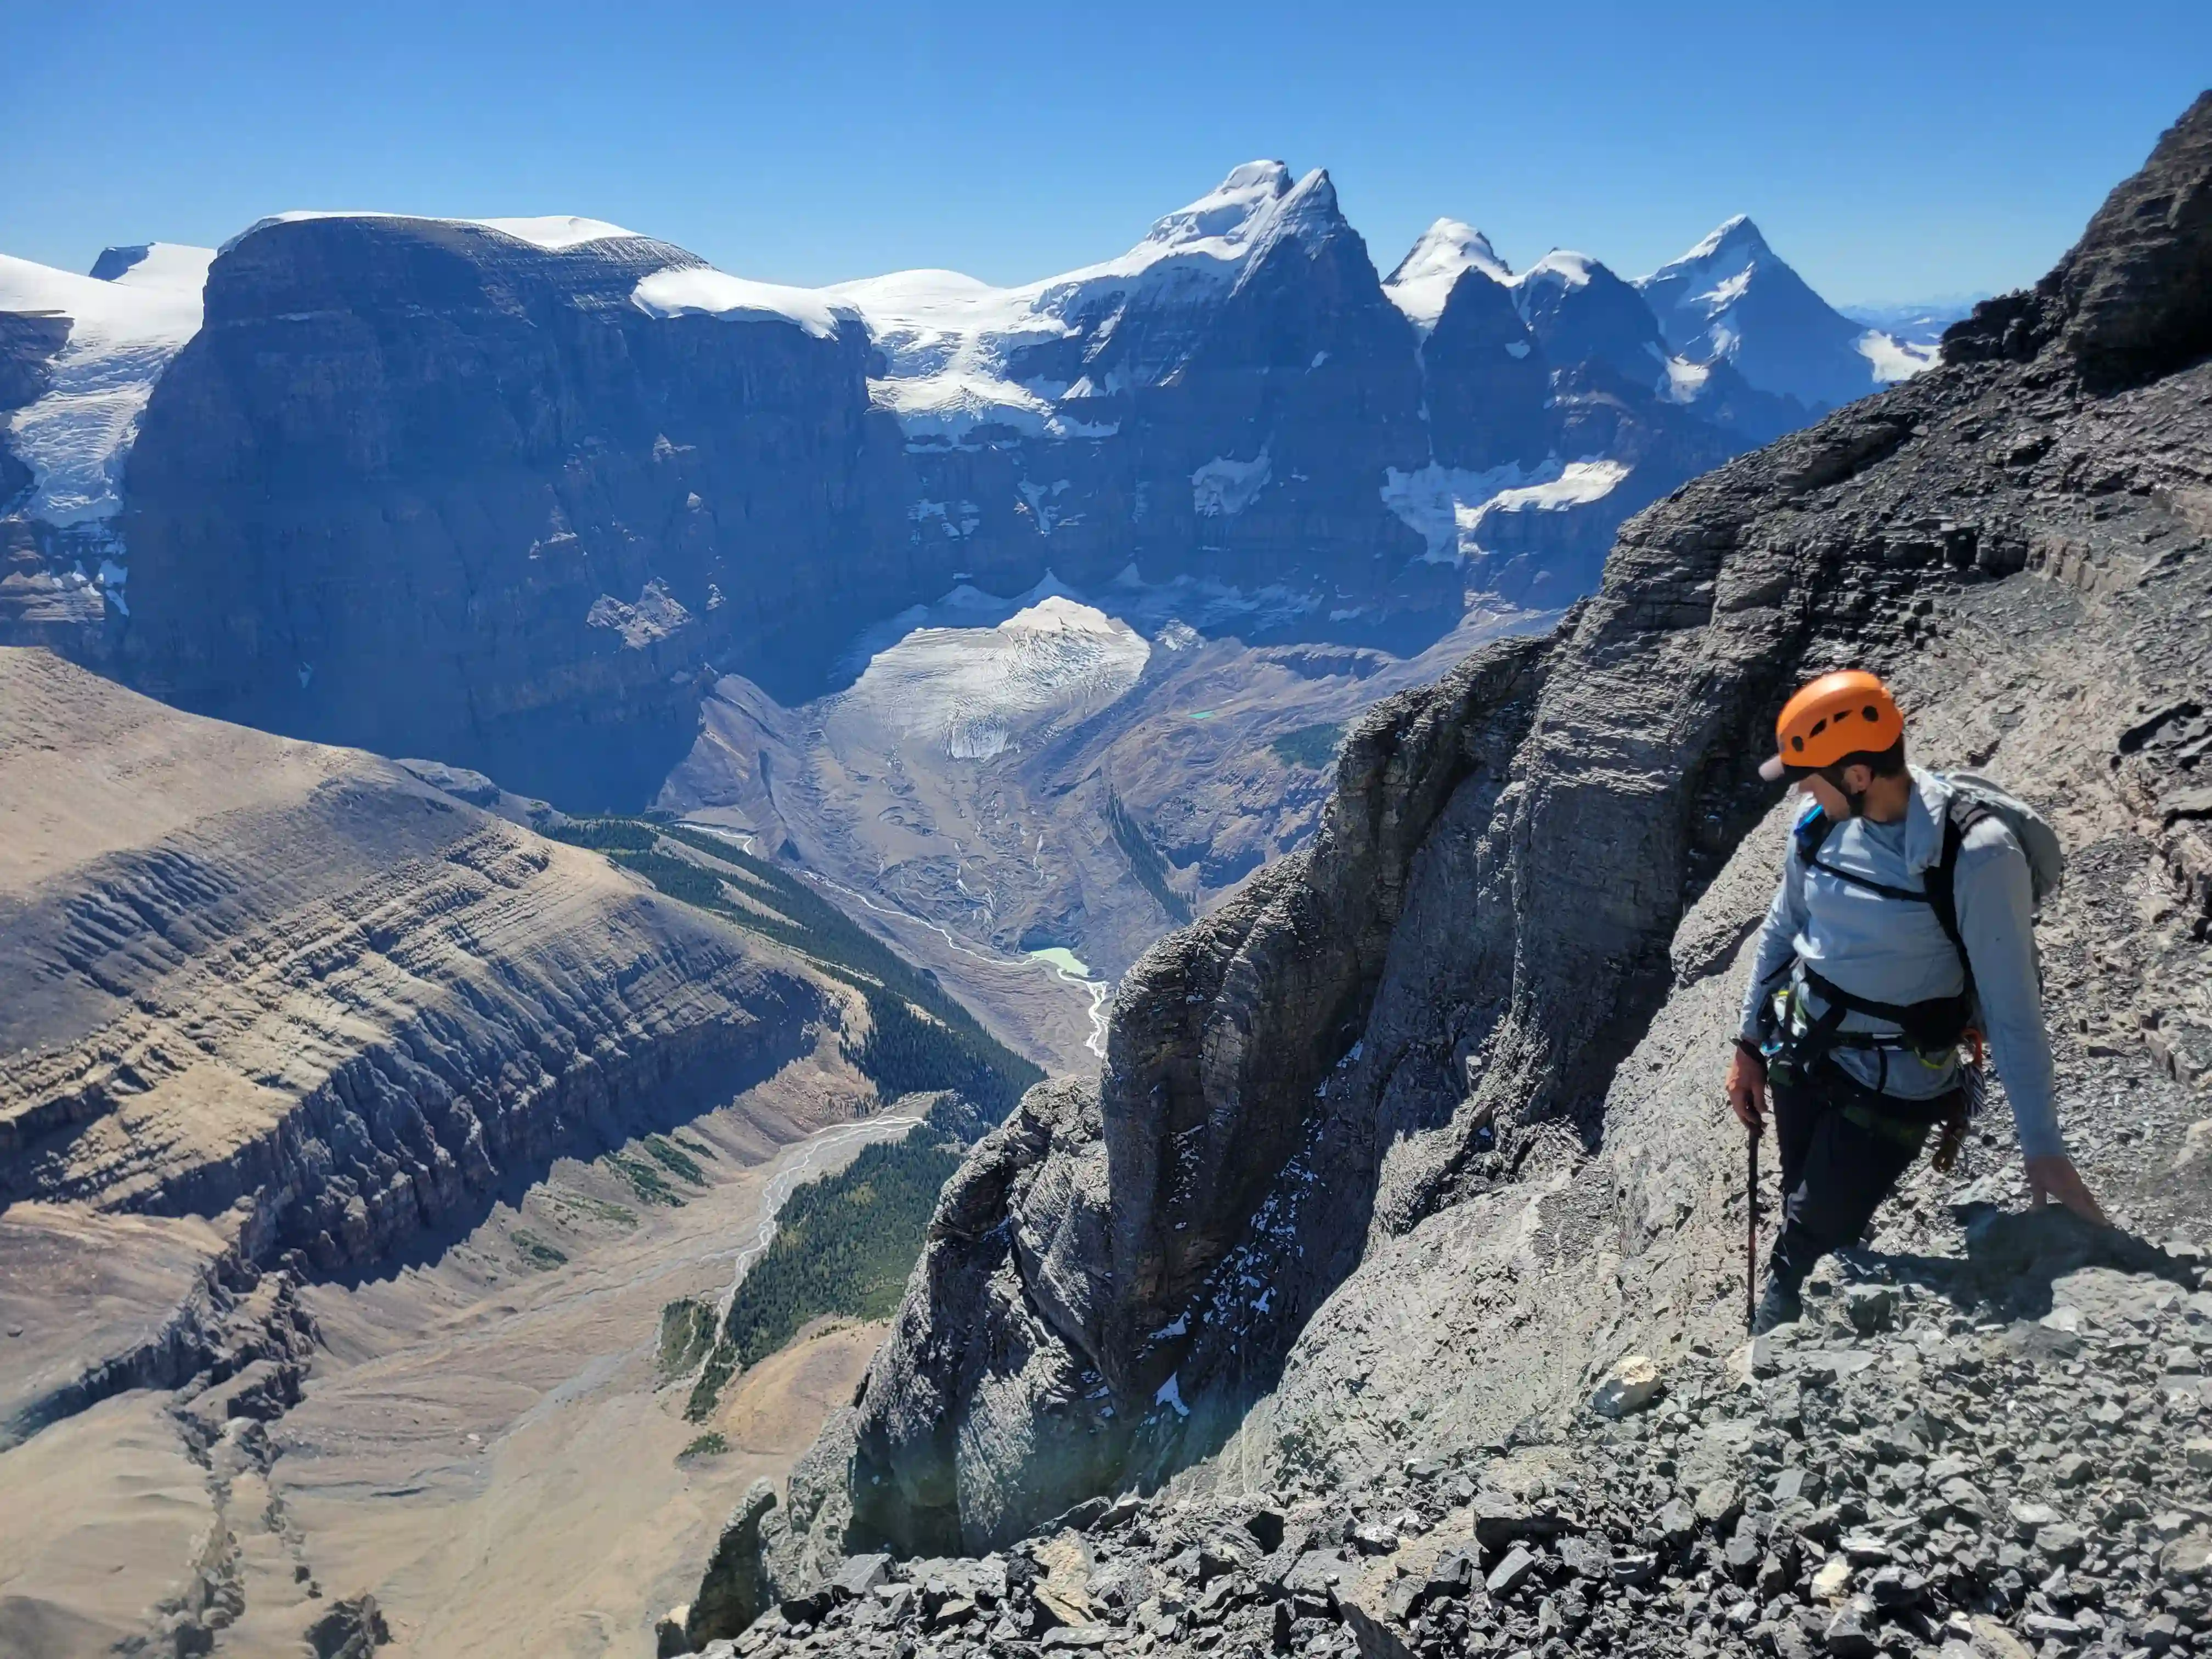
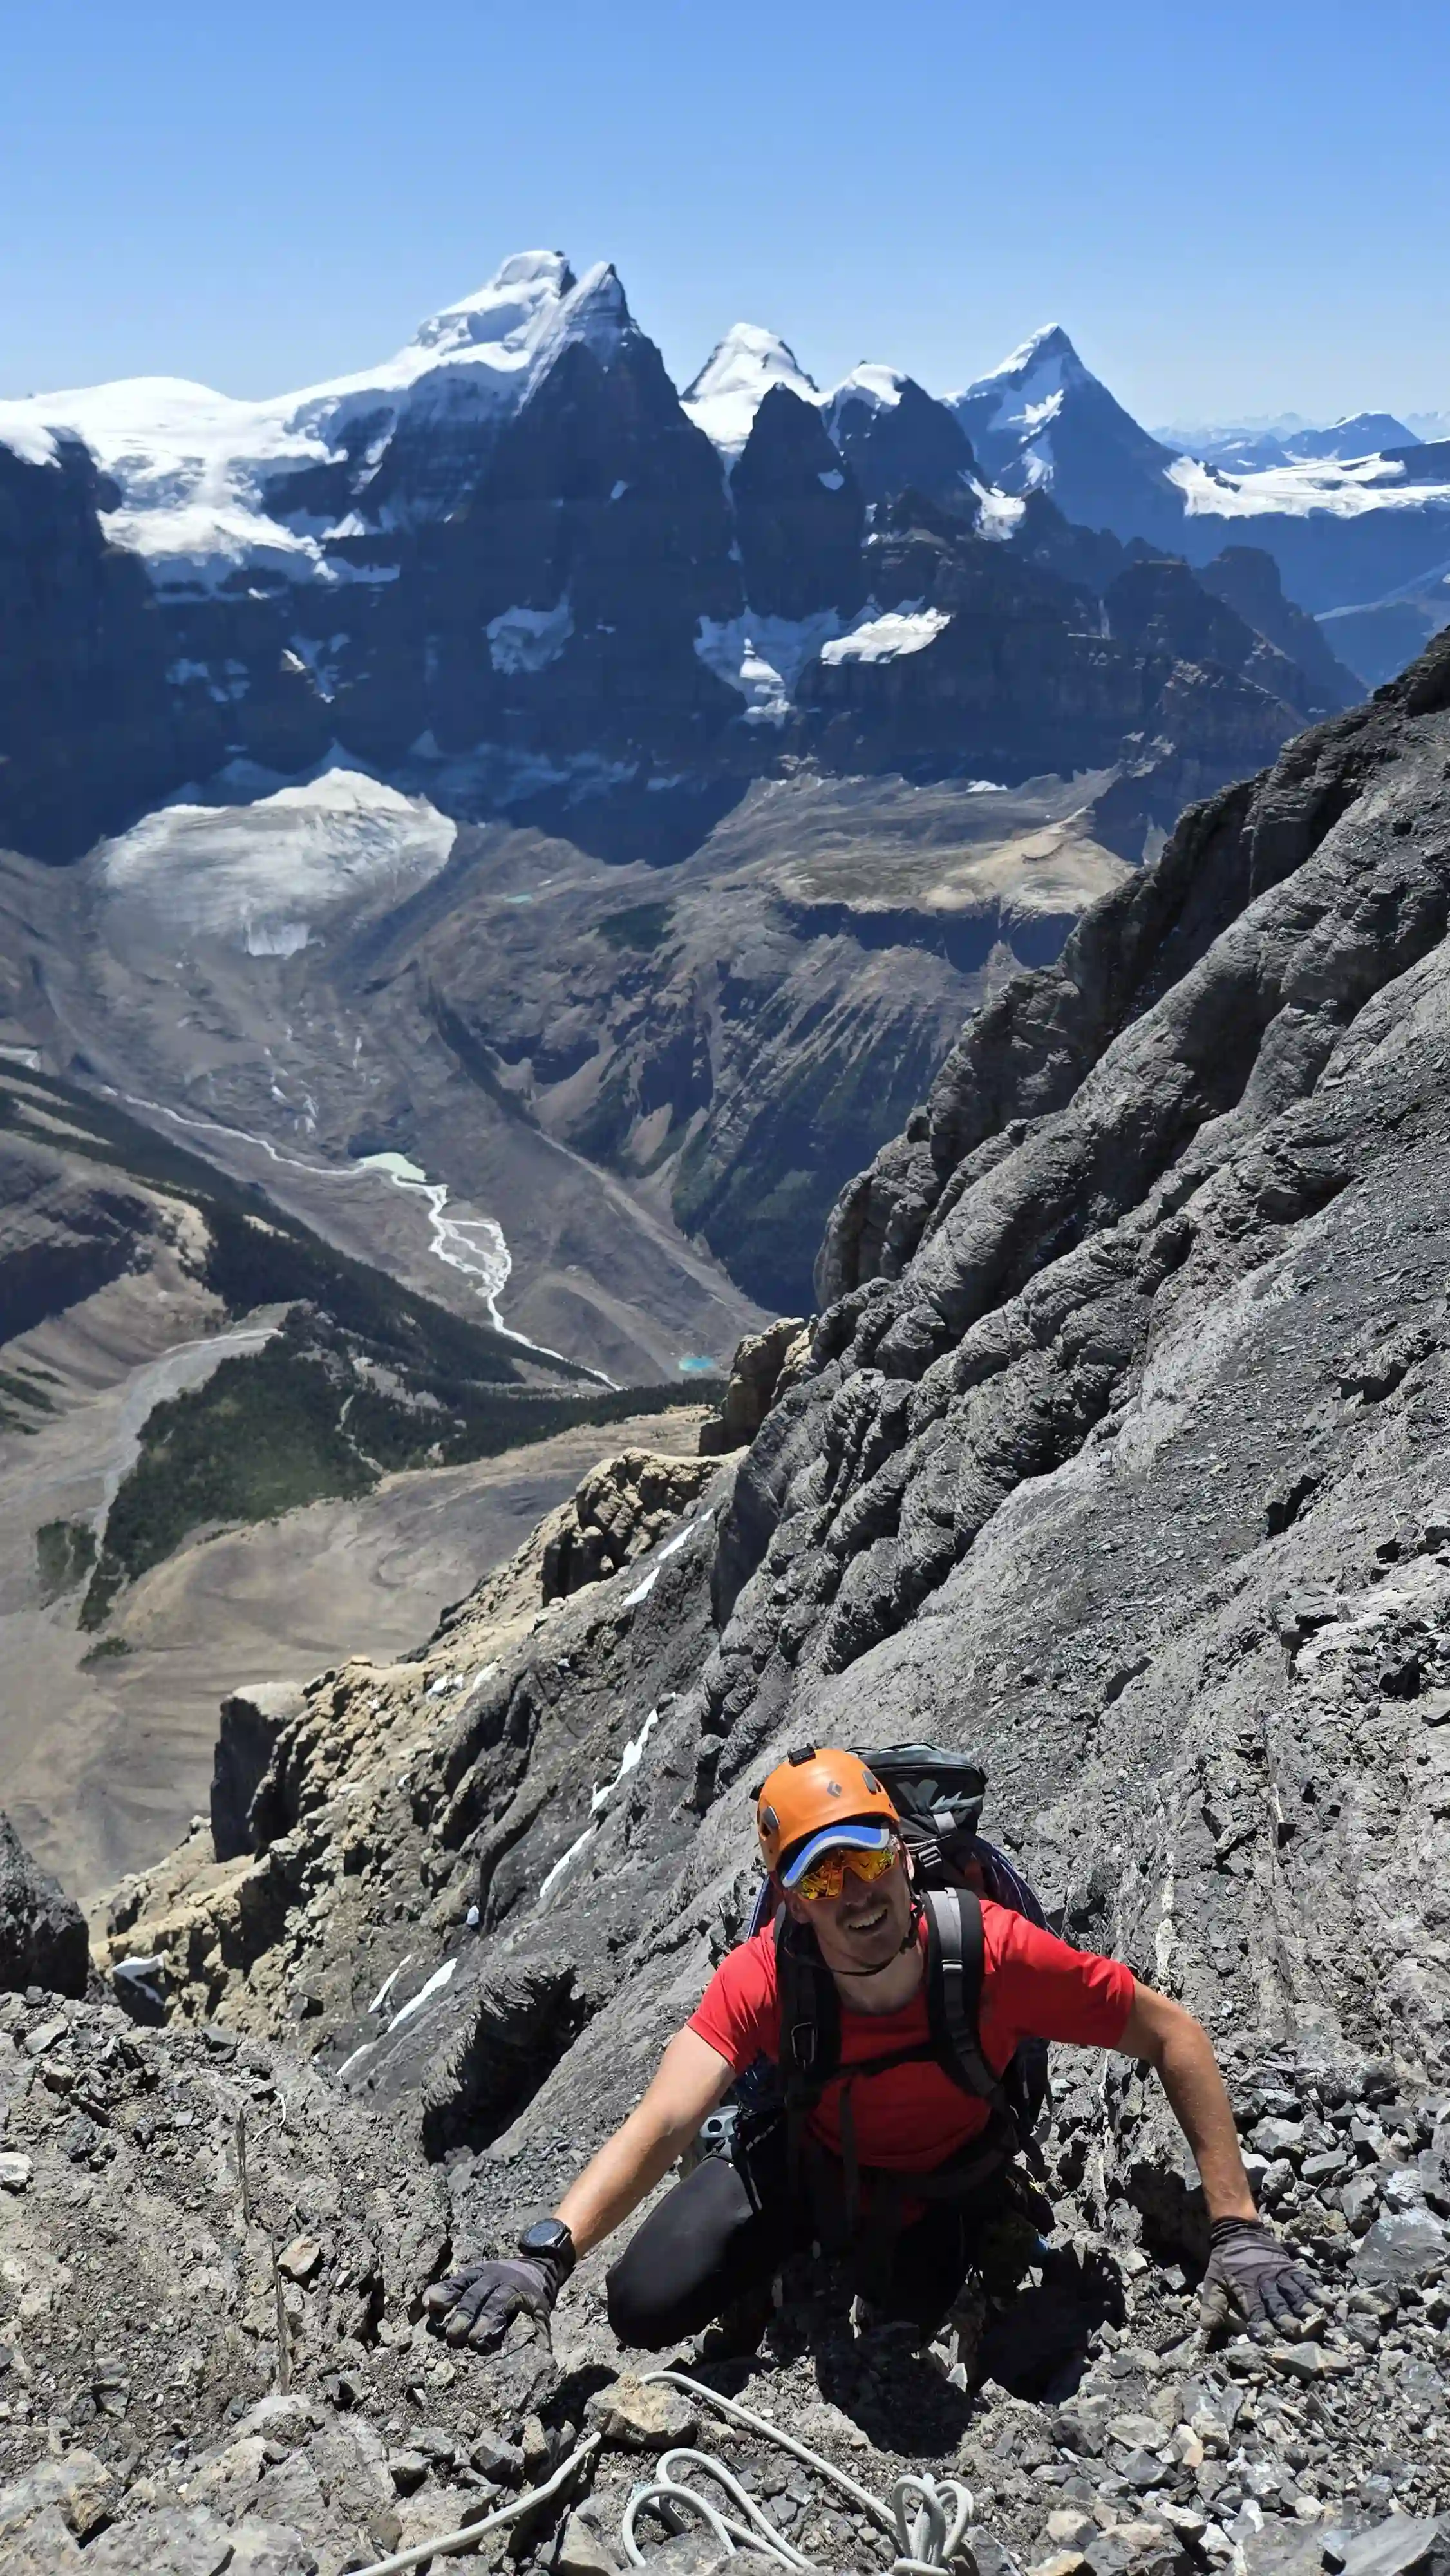
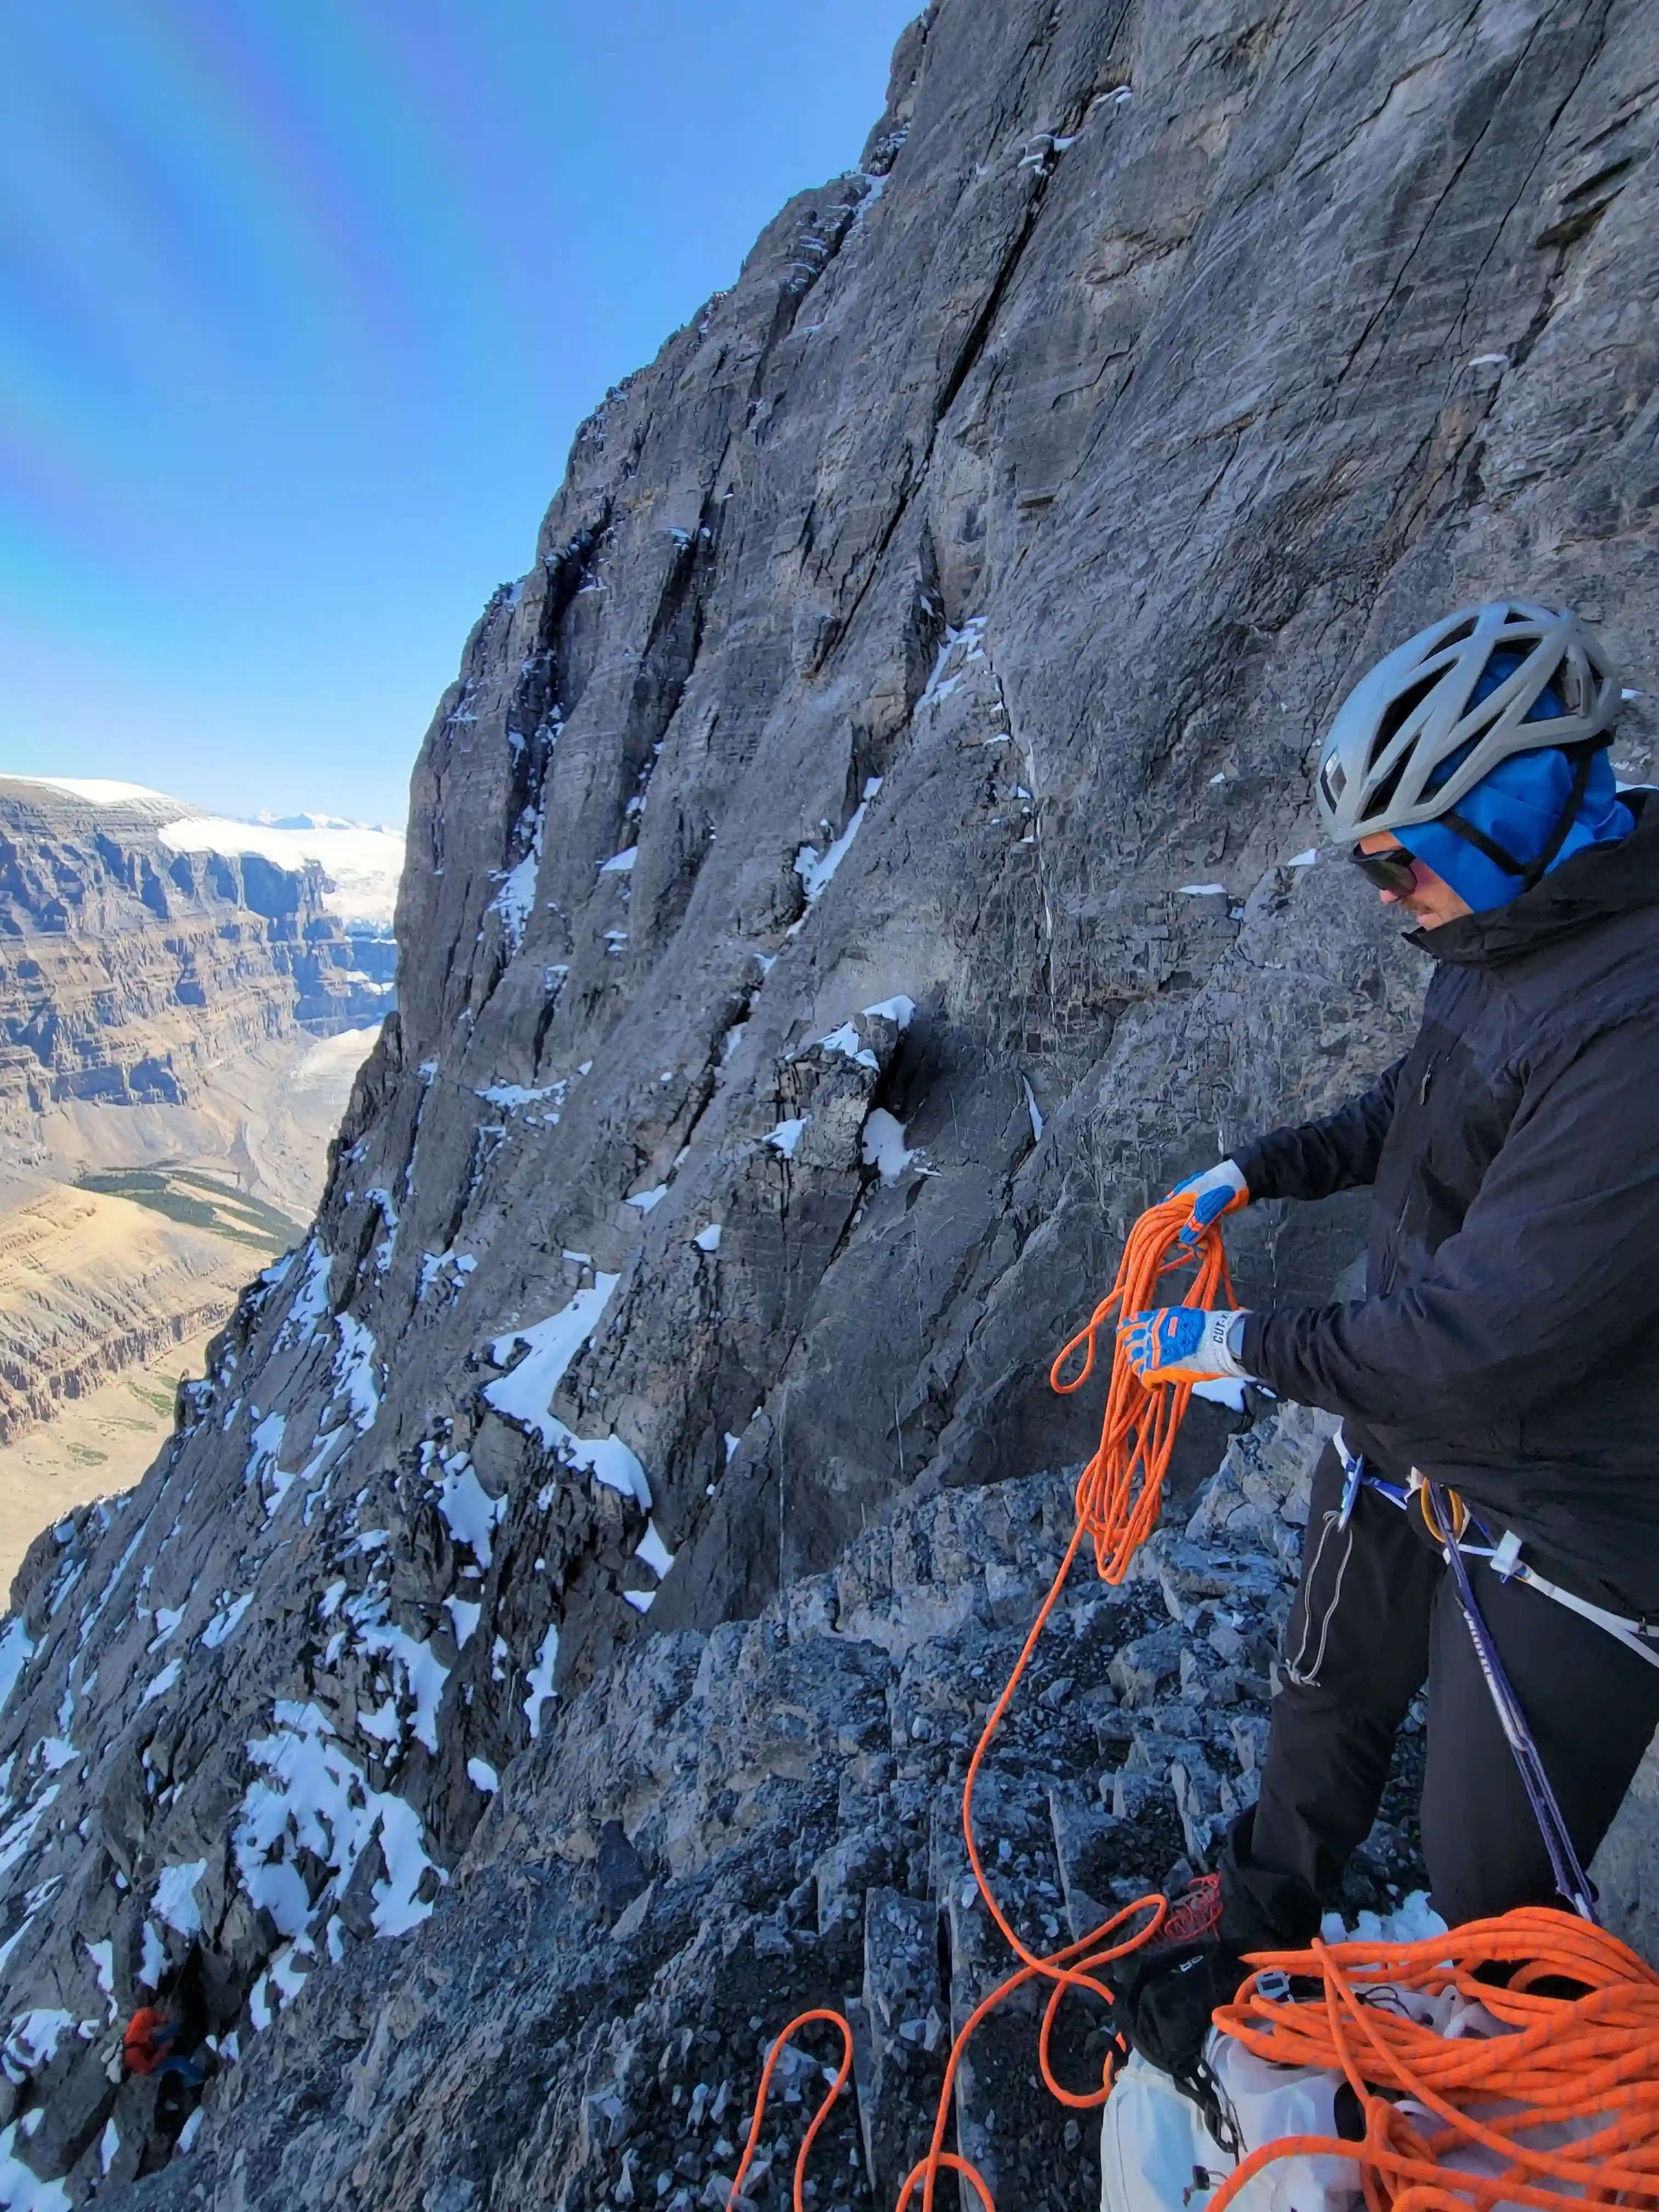
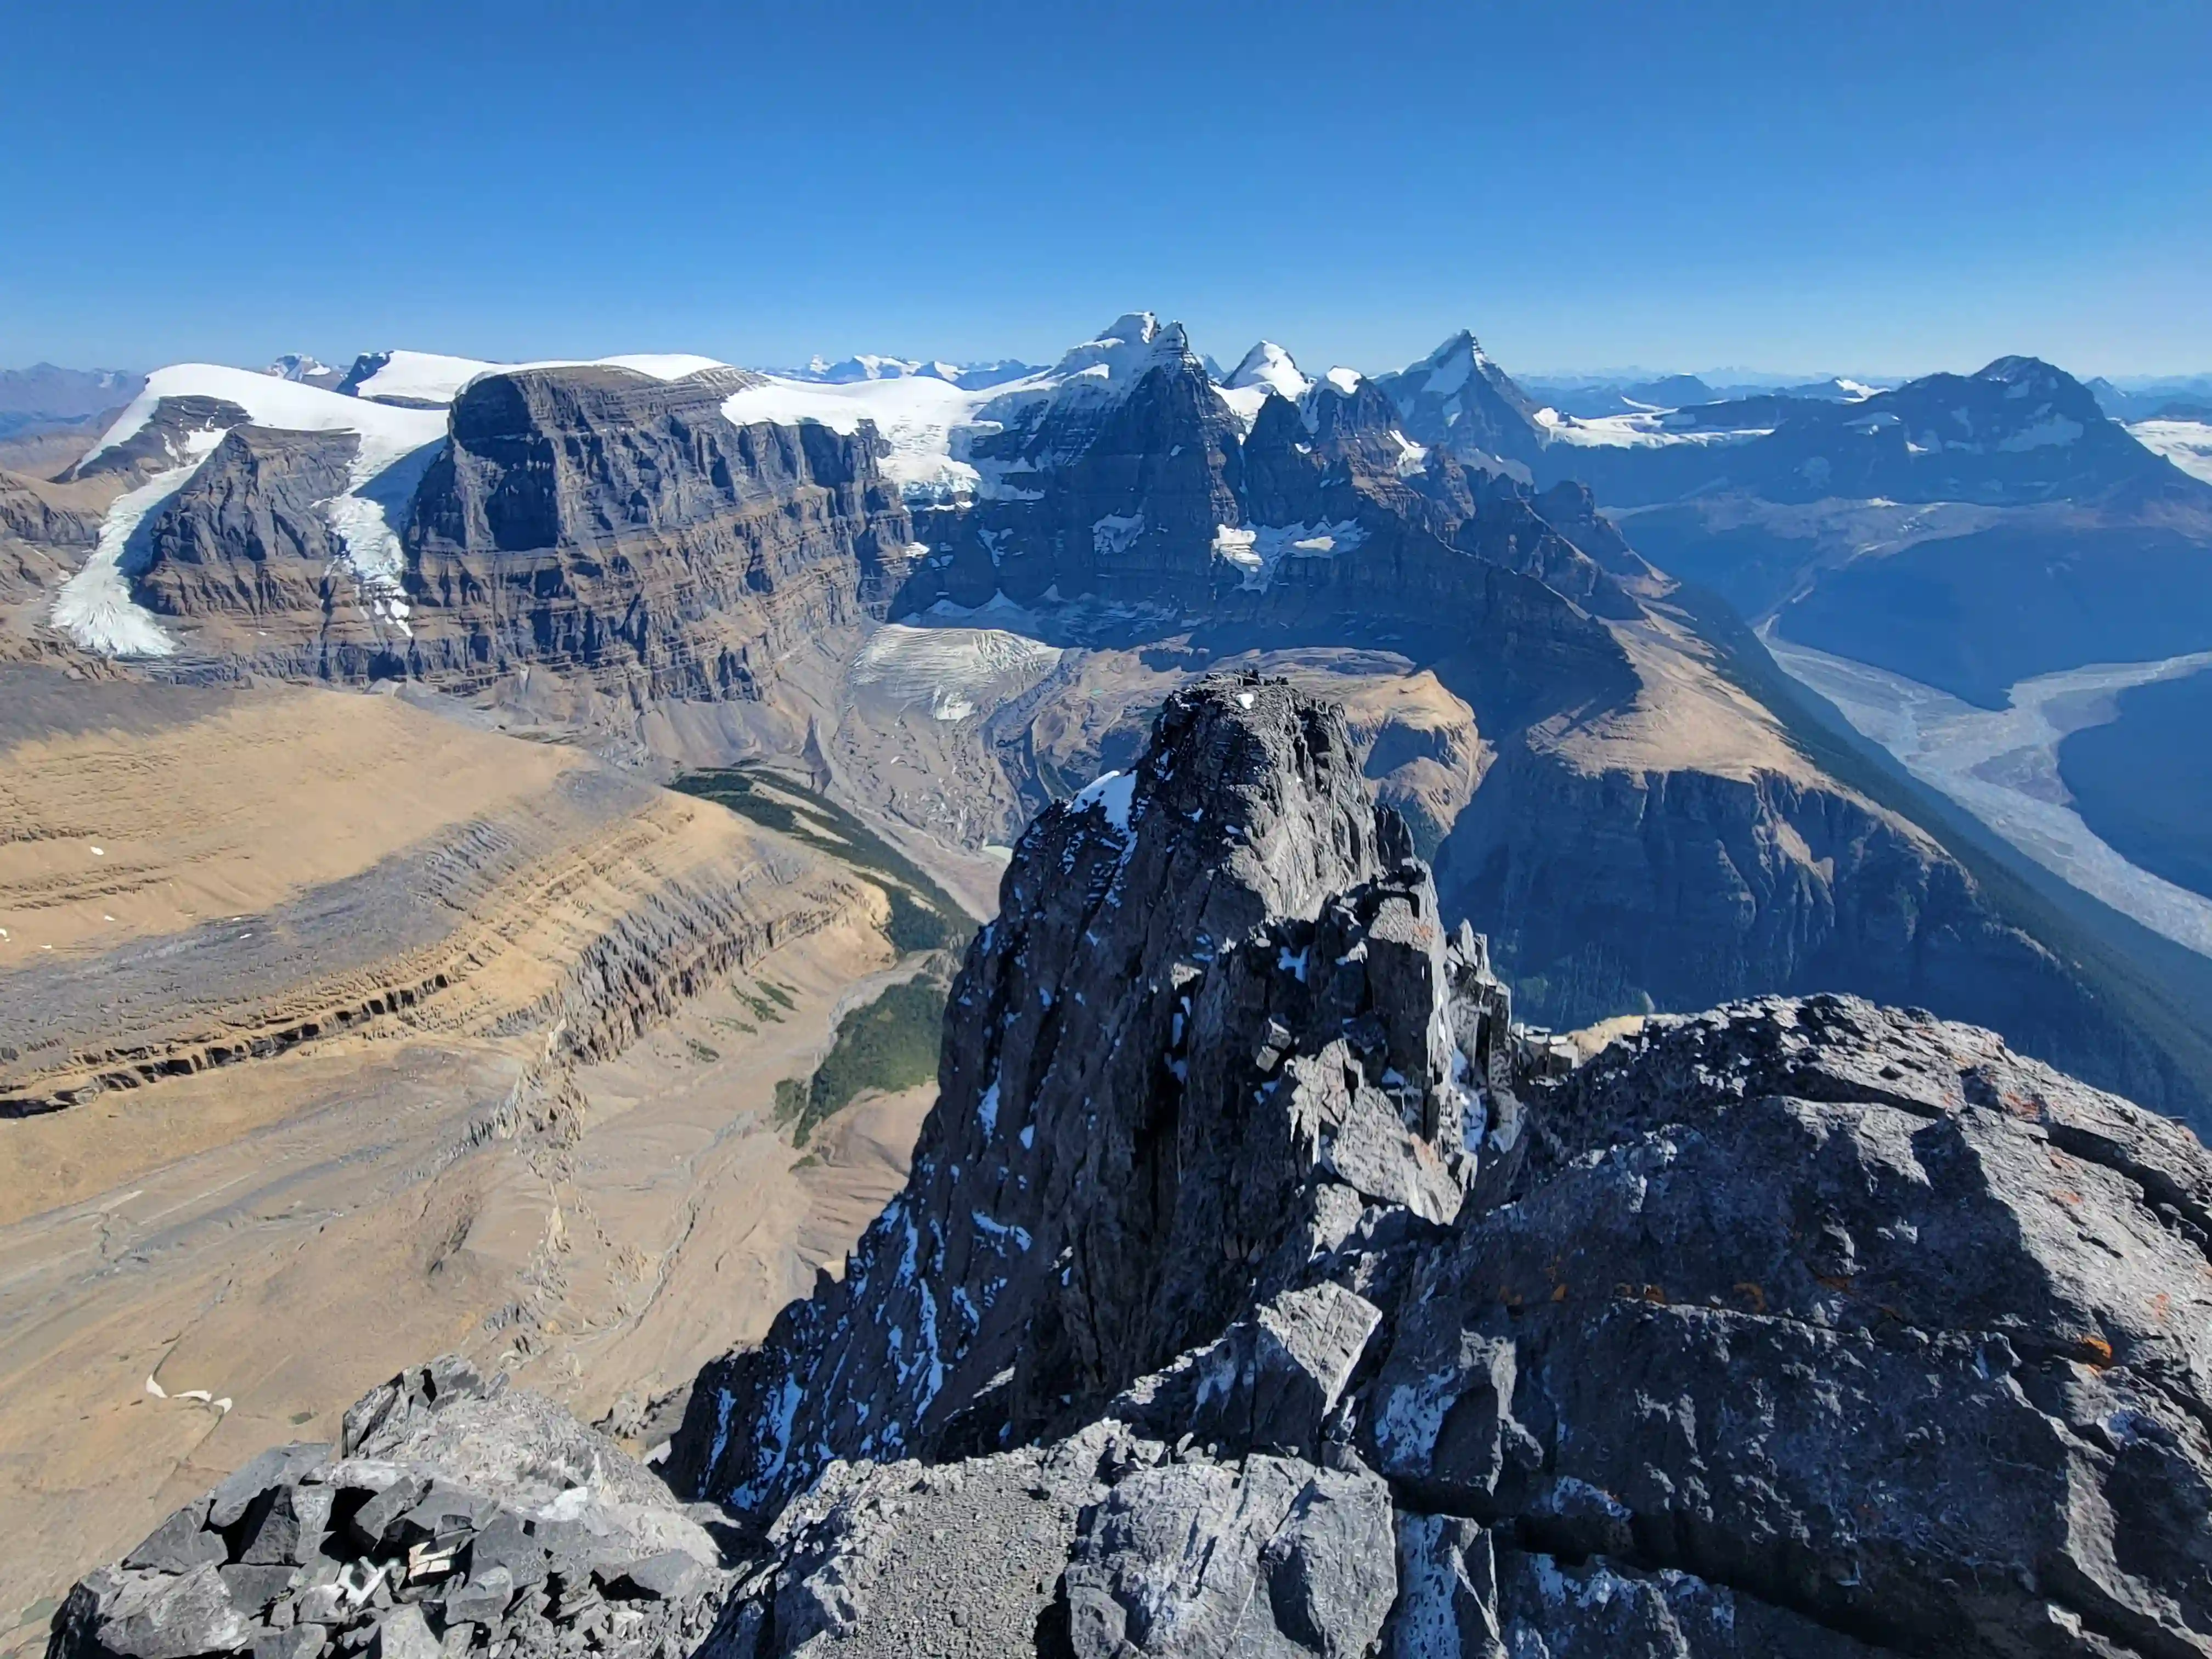
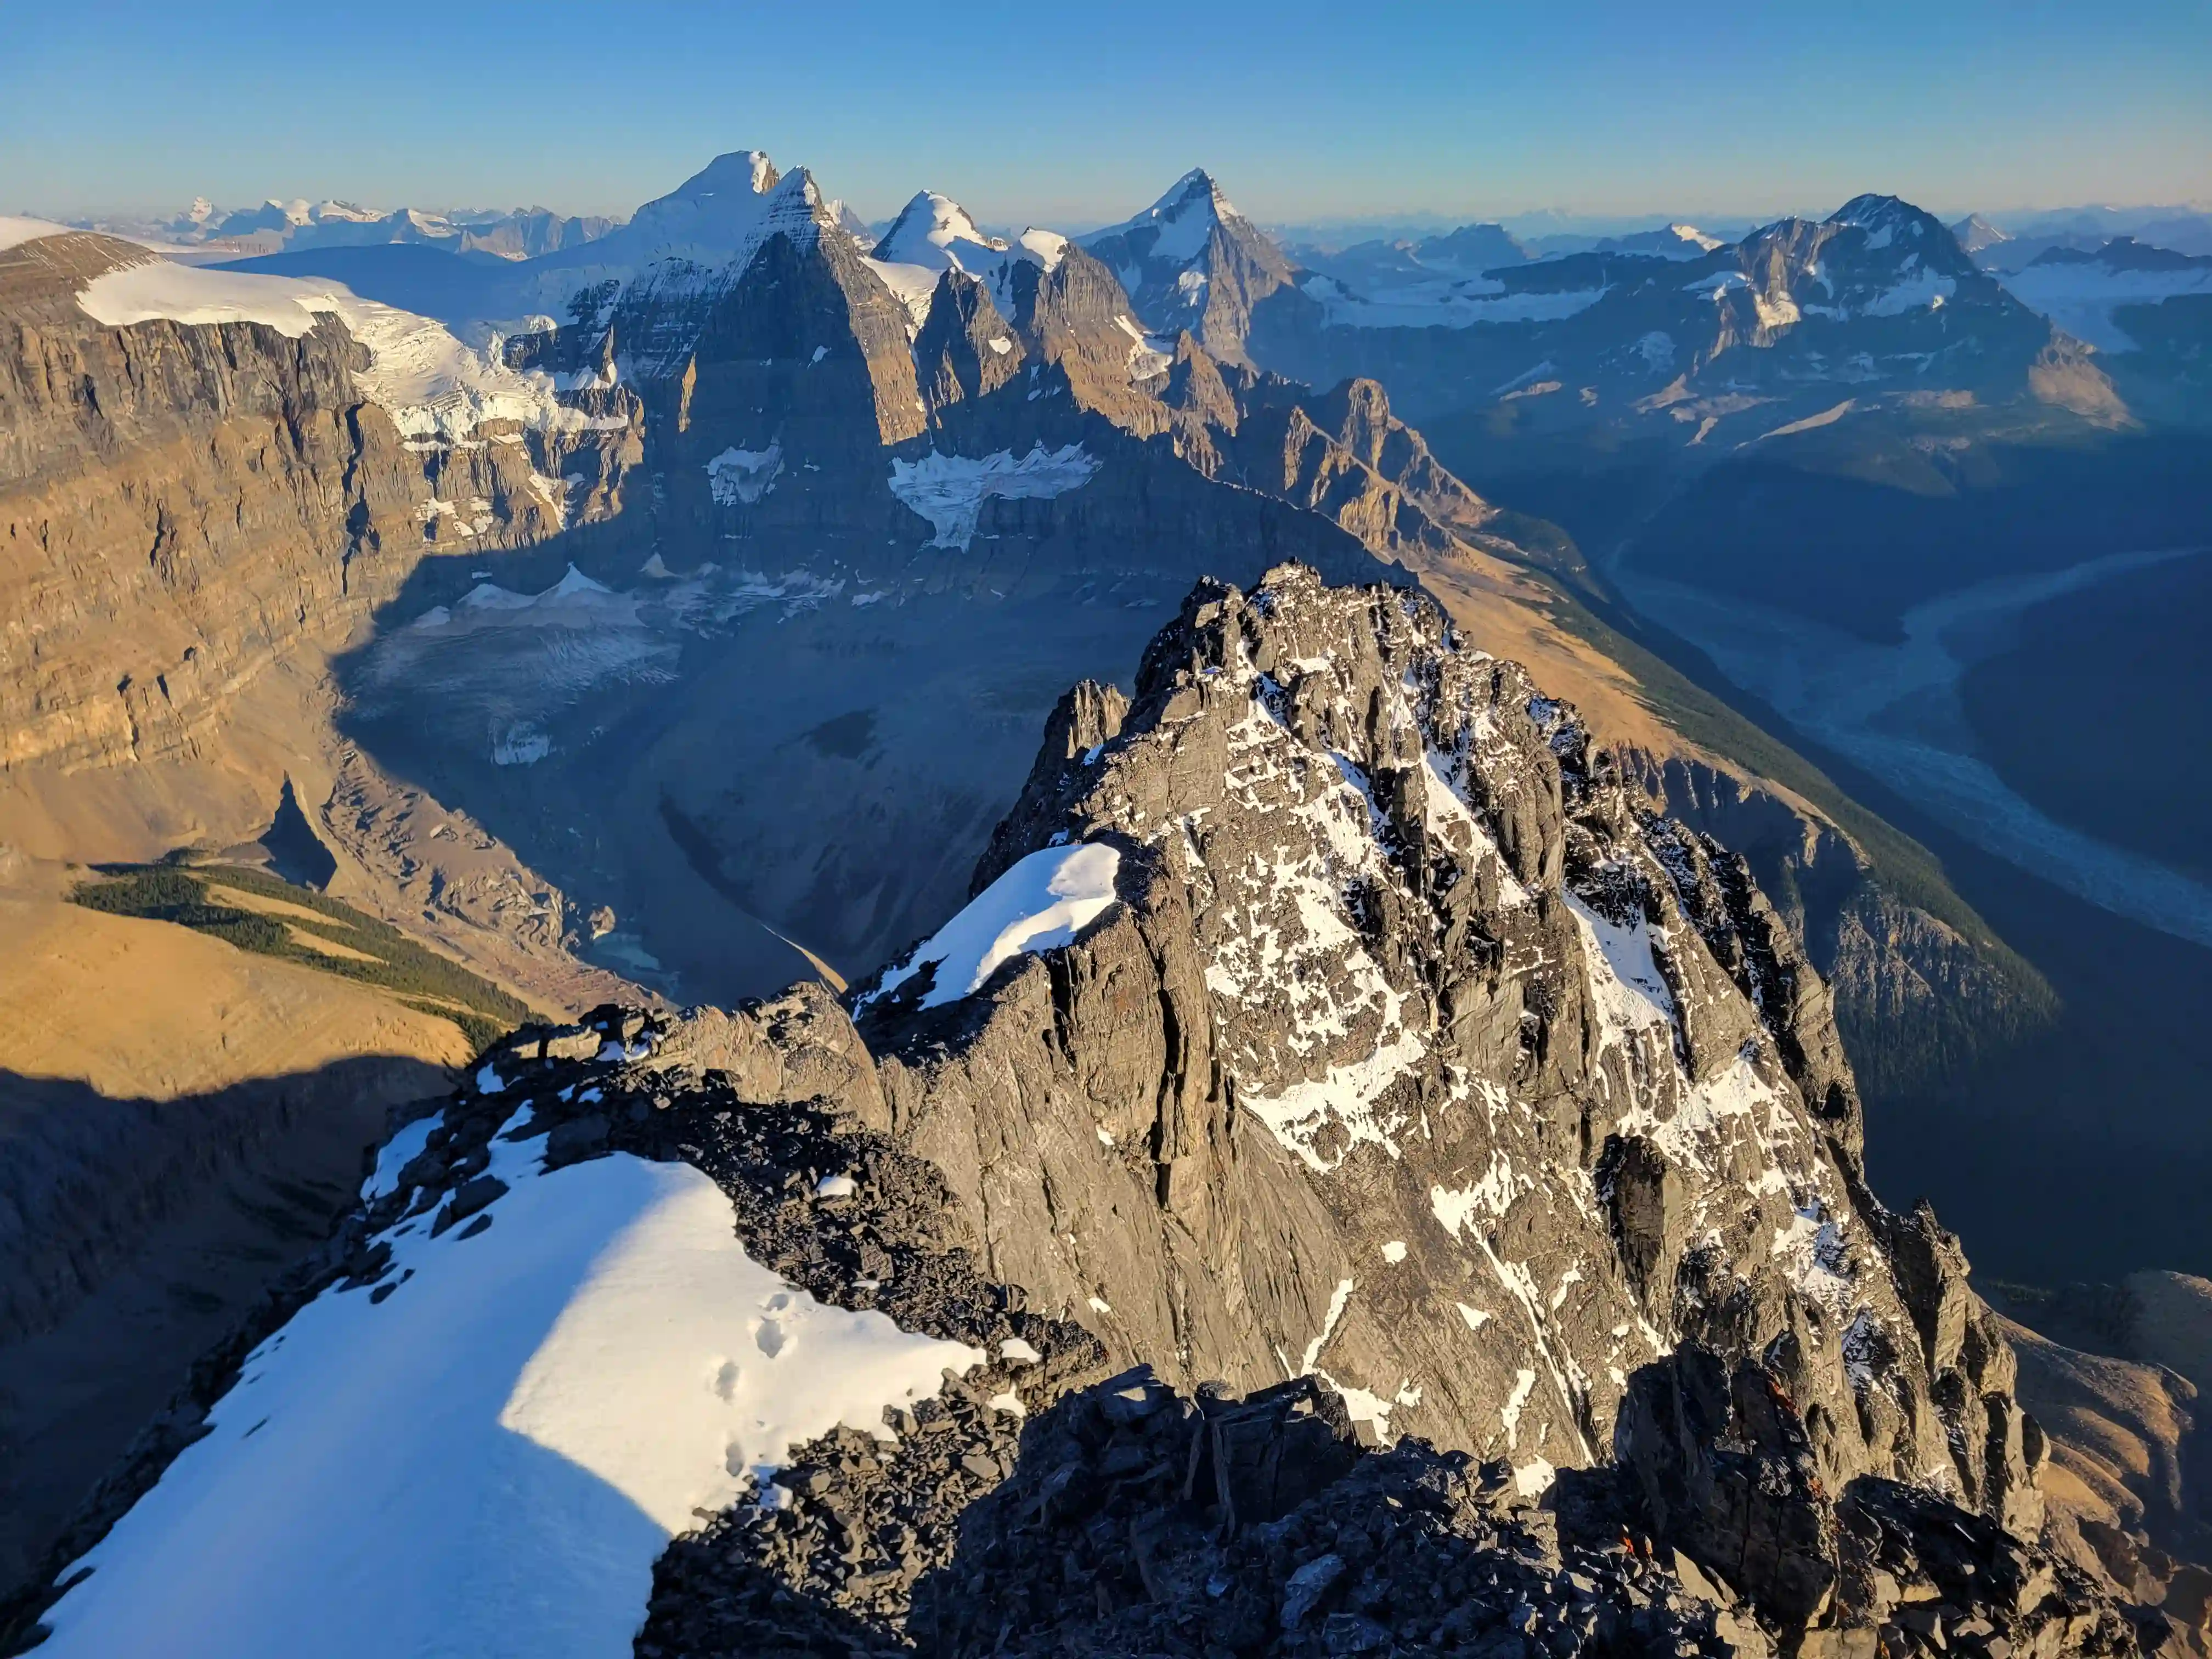
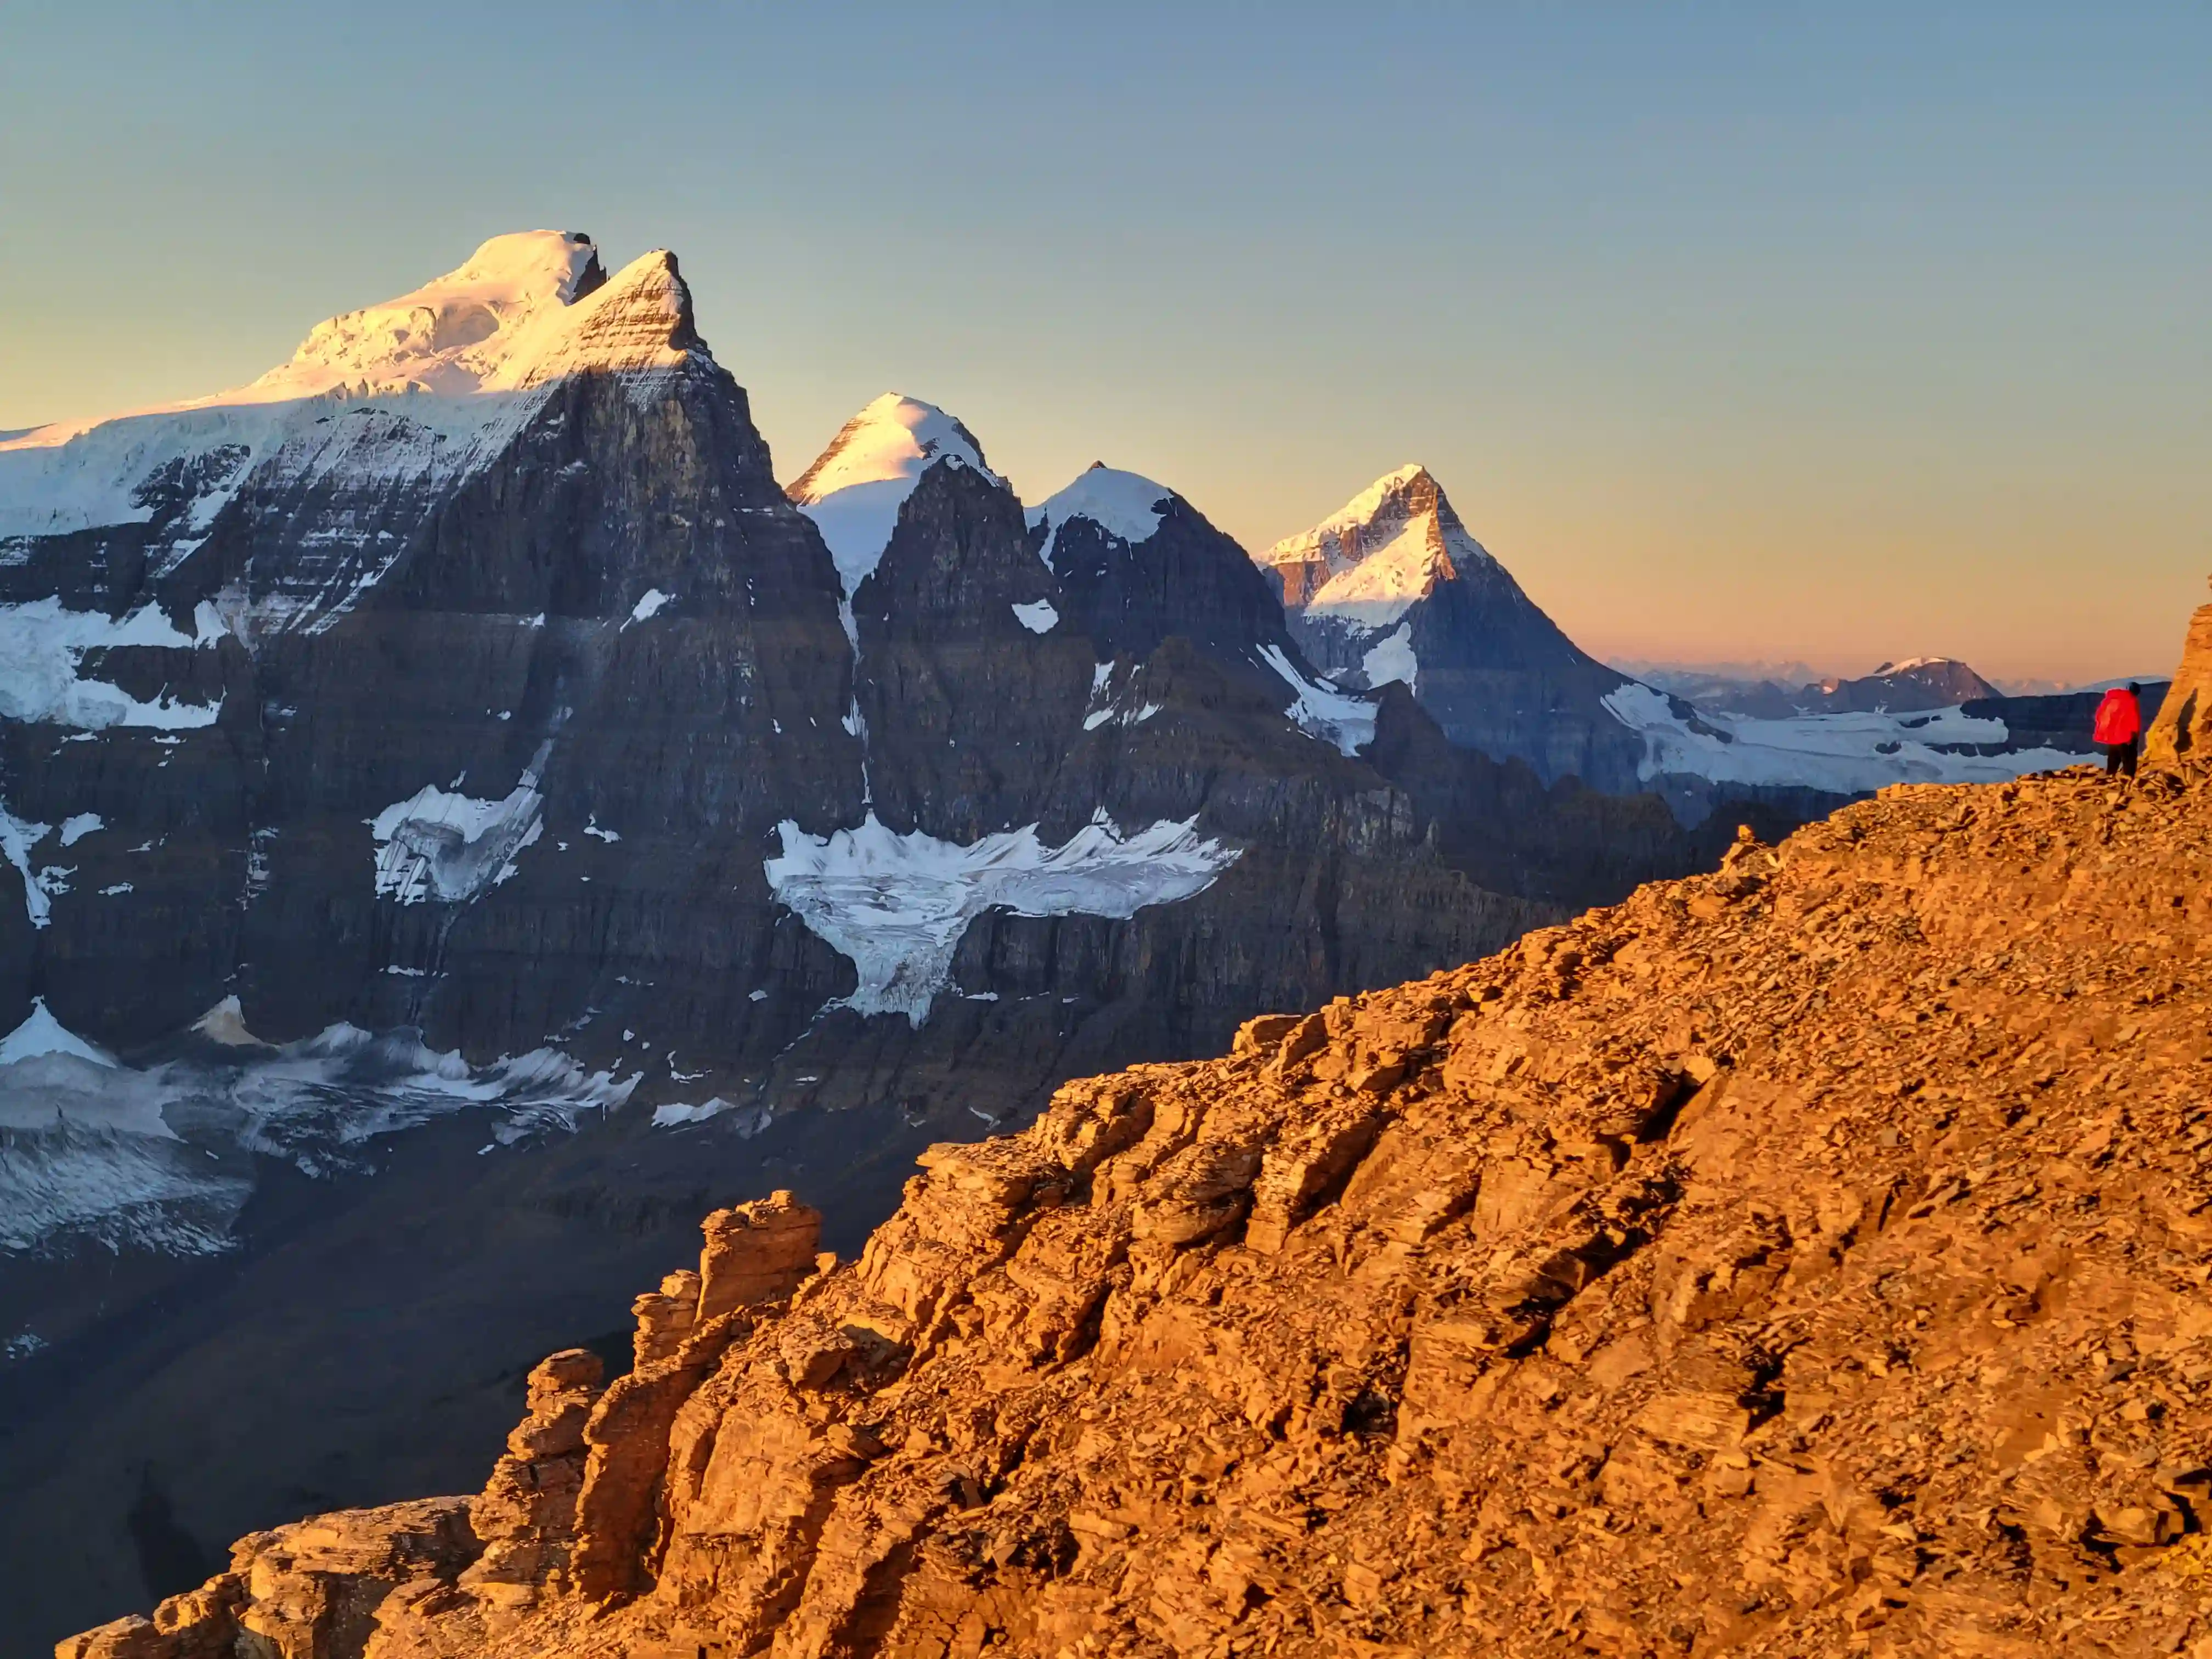
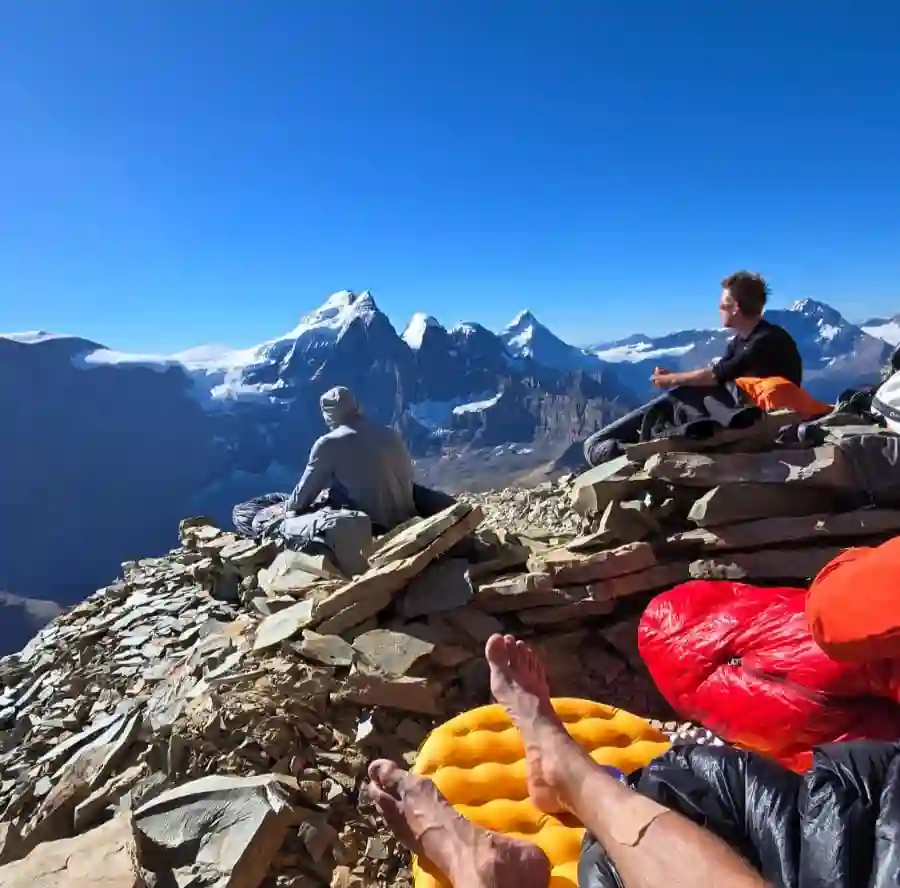
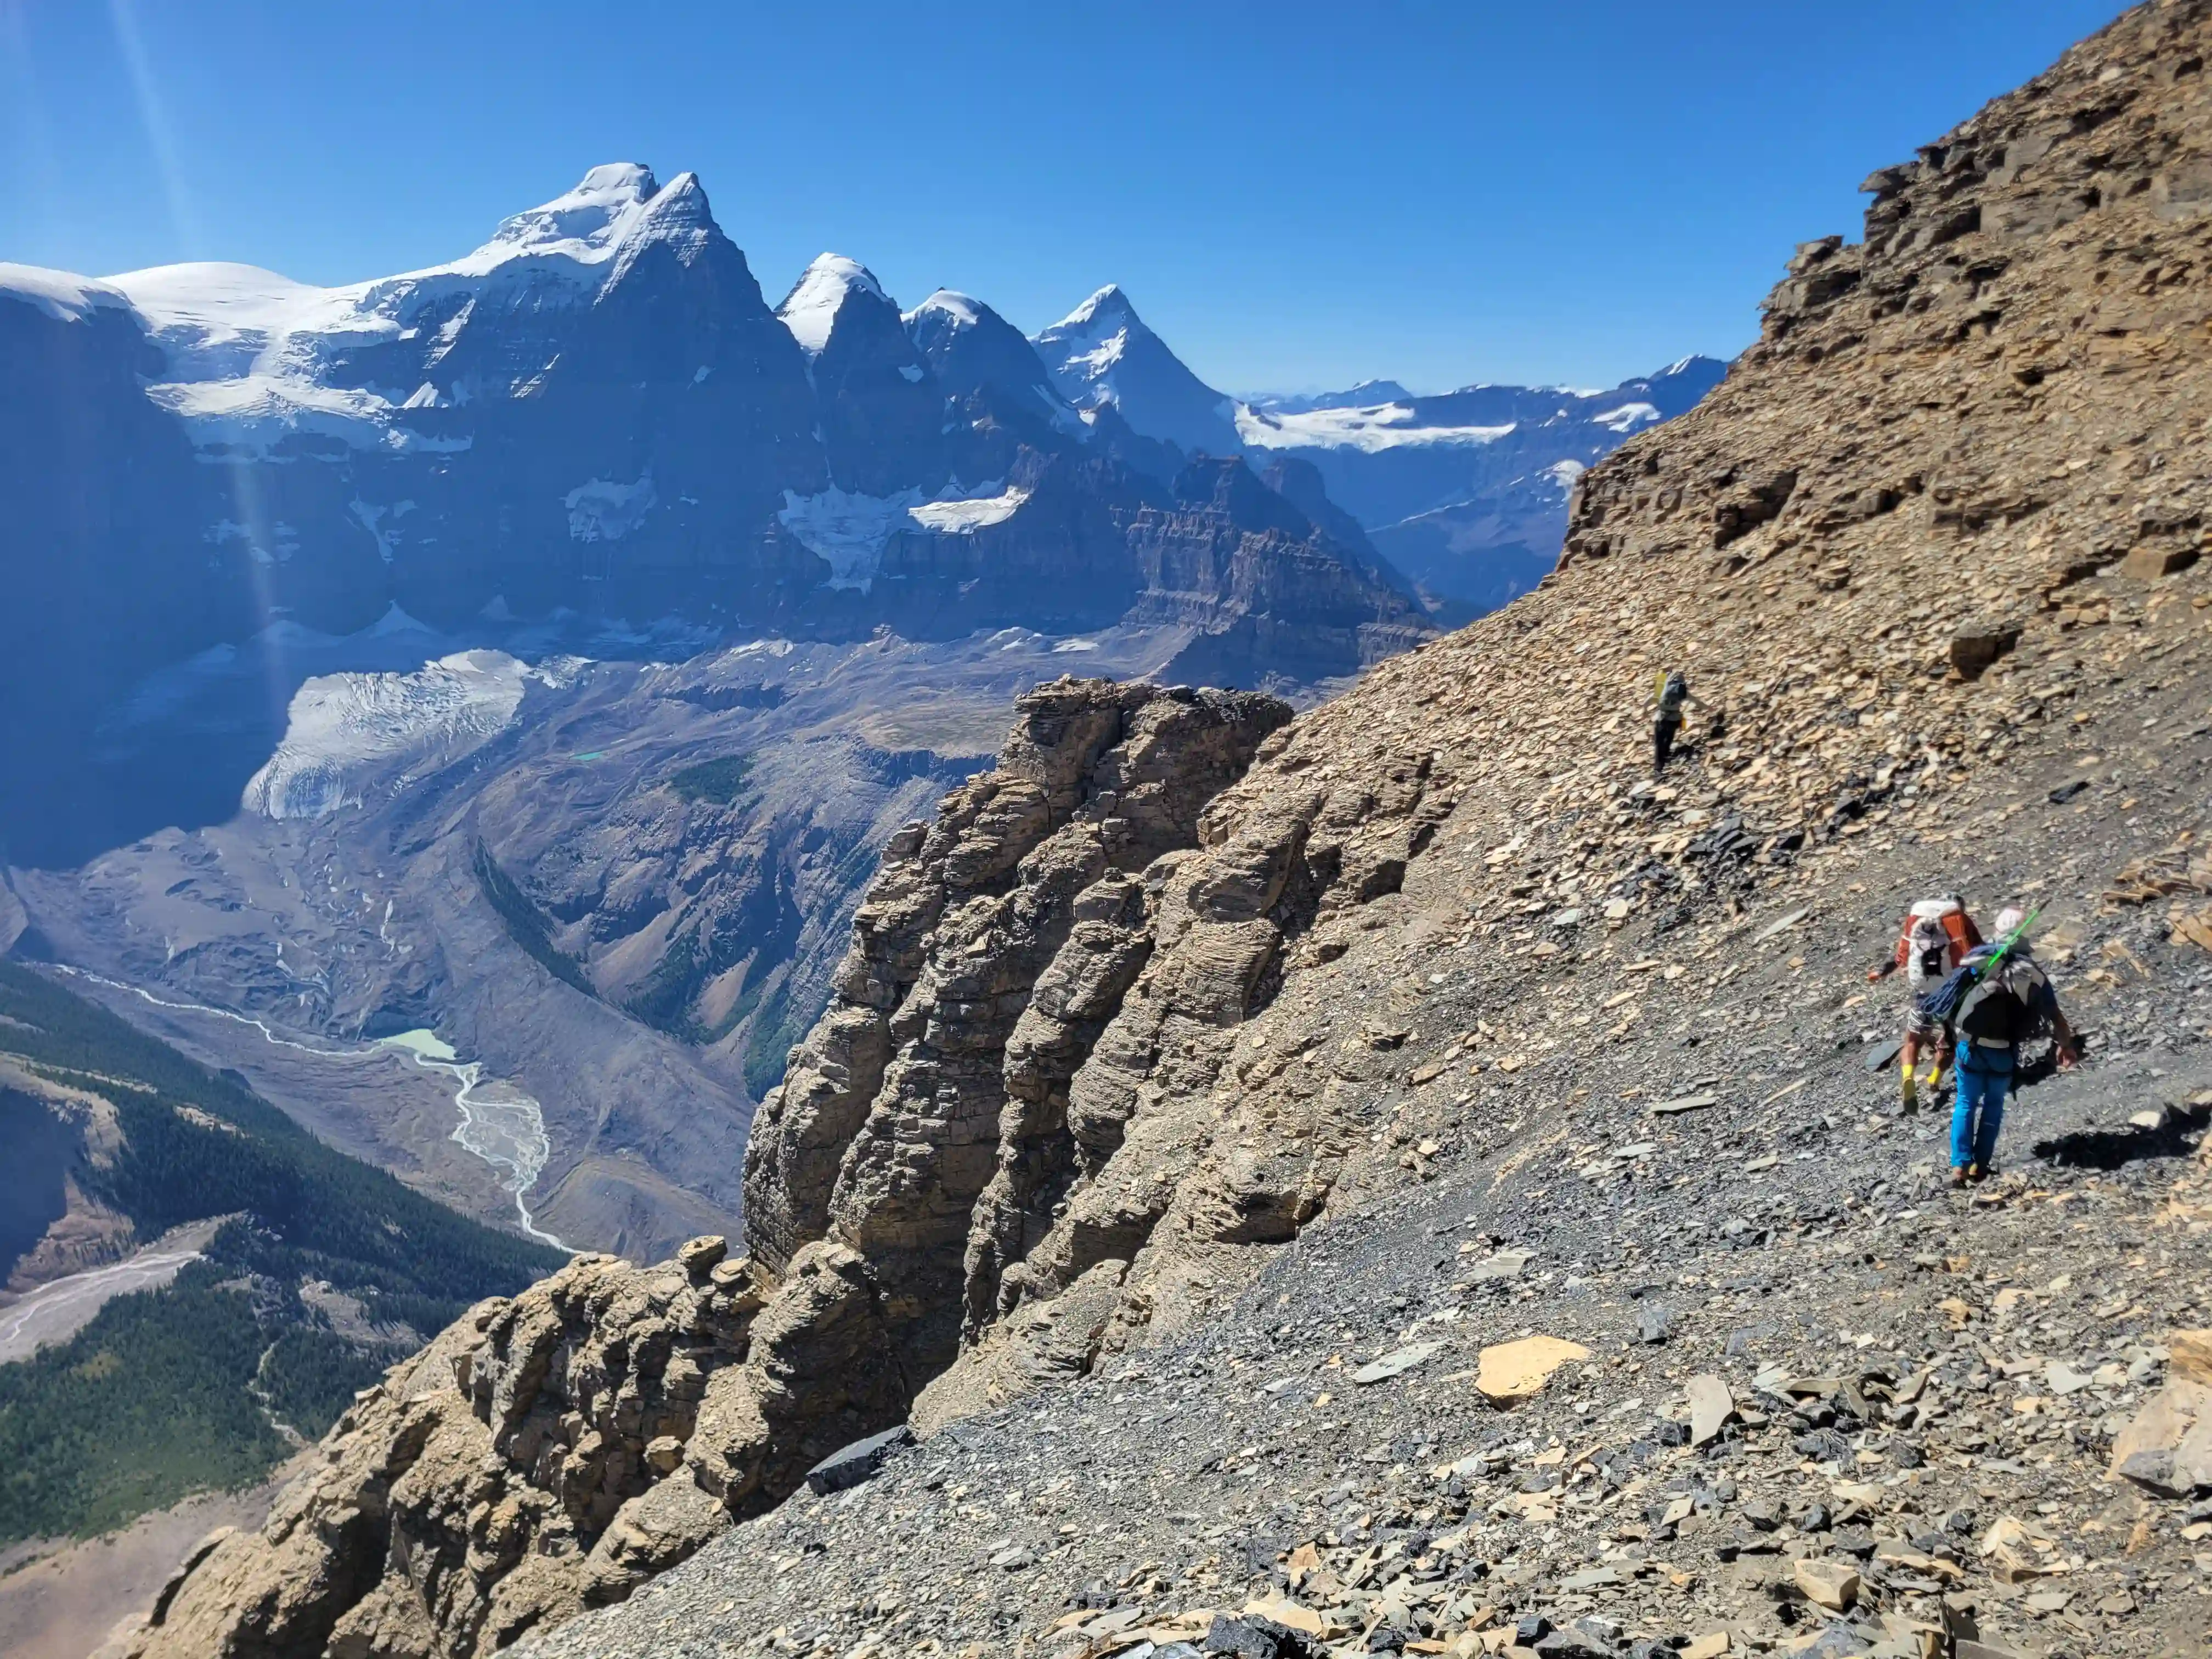
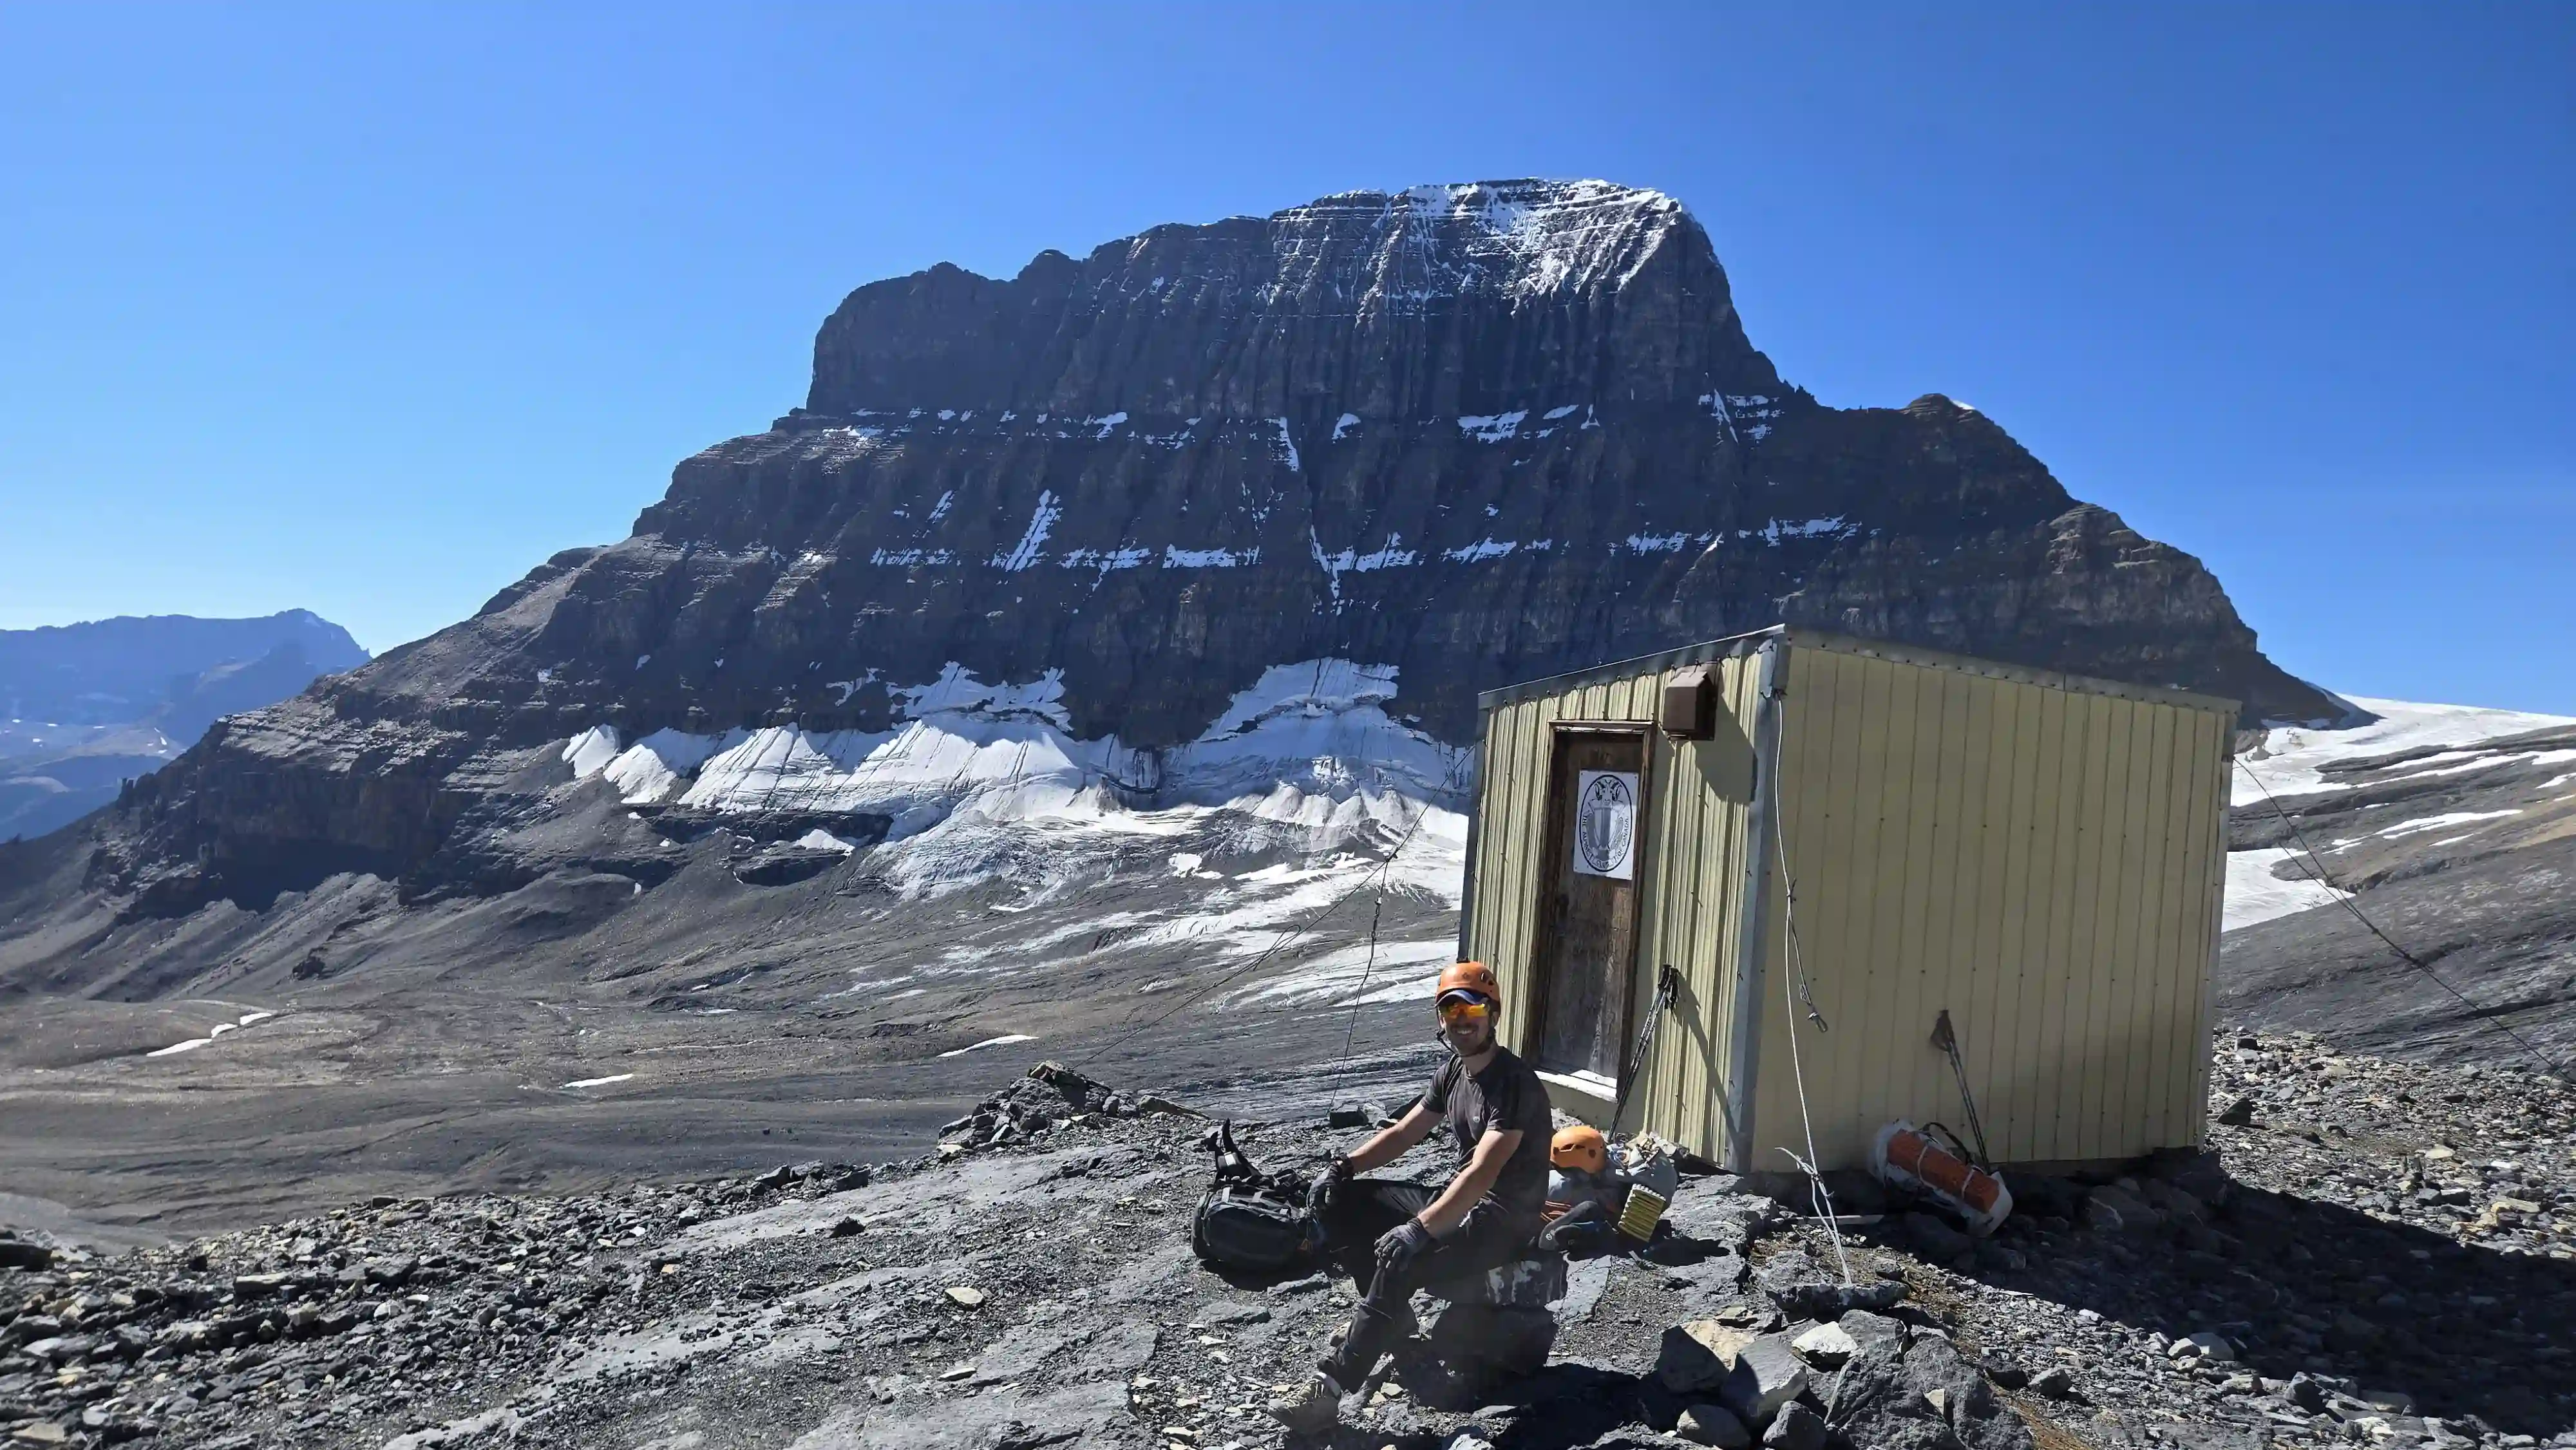
With the final crux step of the lower mountain done the third ledge reached is the most notable one on Mount Alberta, running all the way across the east face and marking a clear shift from the lower, less technical, and less steep half, to the upper, much tougher, and steeper portion of the mountain. Following this ledge 75m north from where the buttress feature tops out you reach the main bivi site located atop the second southmost buttress. The position is quite spectacular here with the upper mountain towering above and the black hole to the SE providing some of the best bivi views in the Canadian Rockies!
THE UPPER HALF:
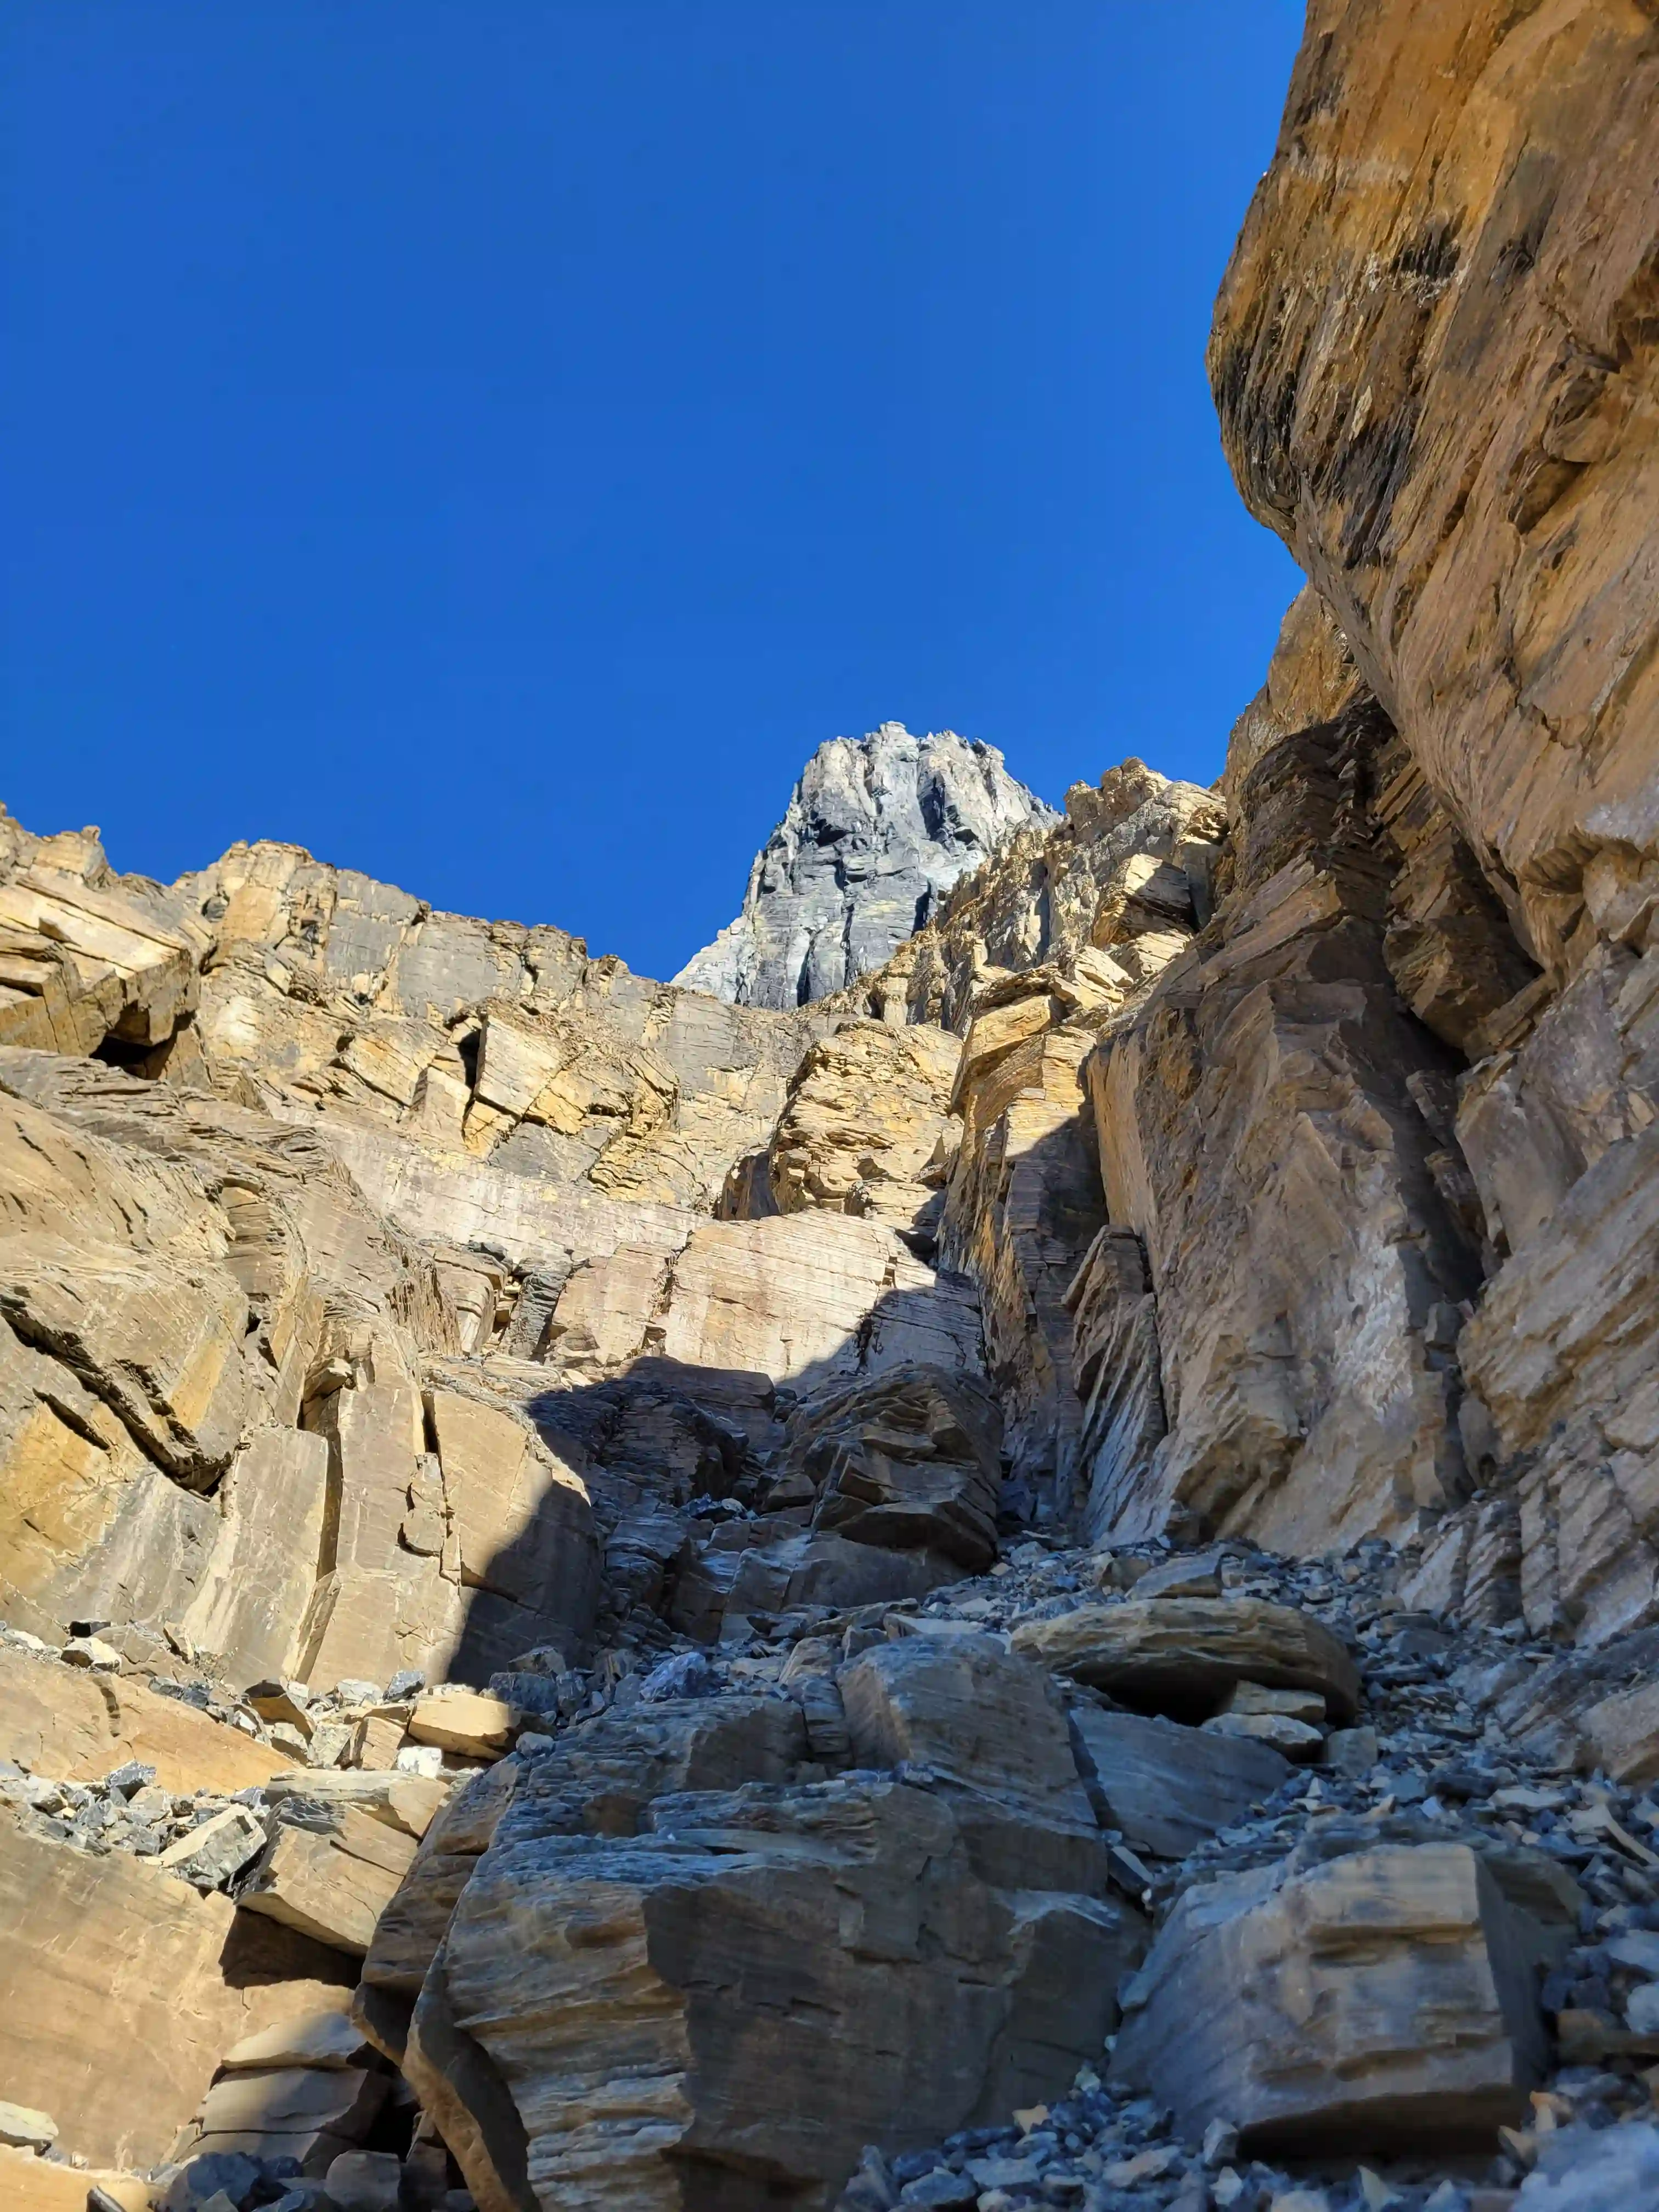
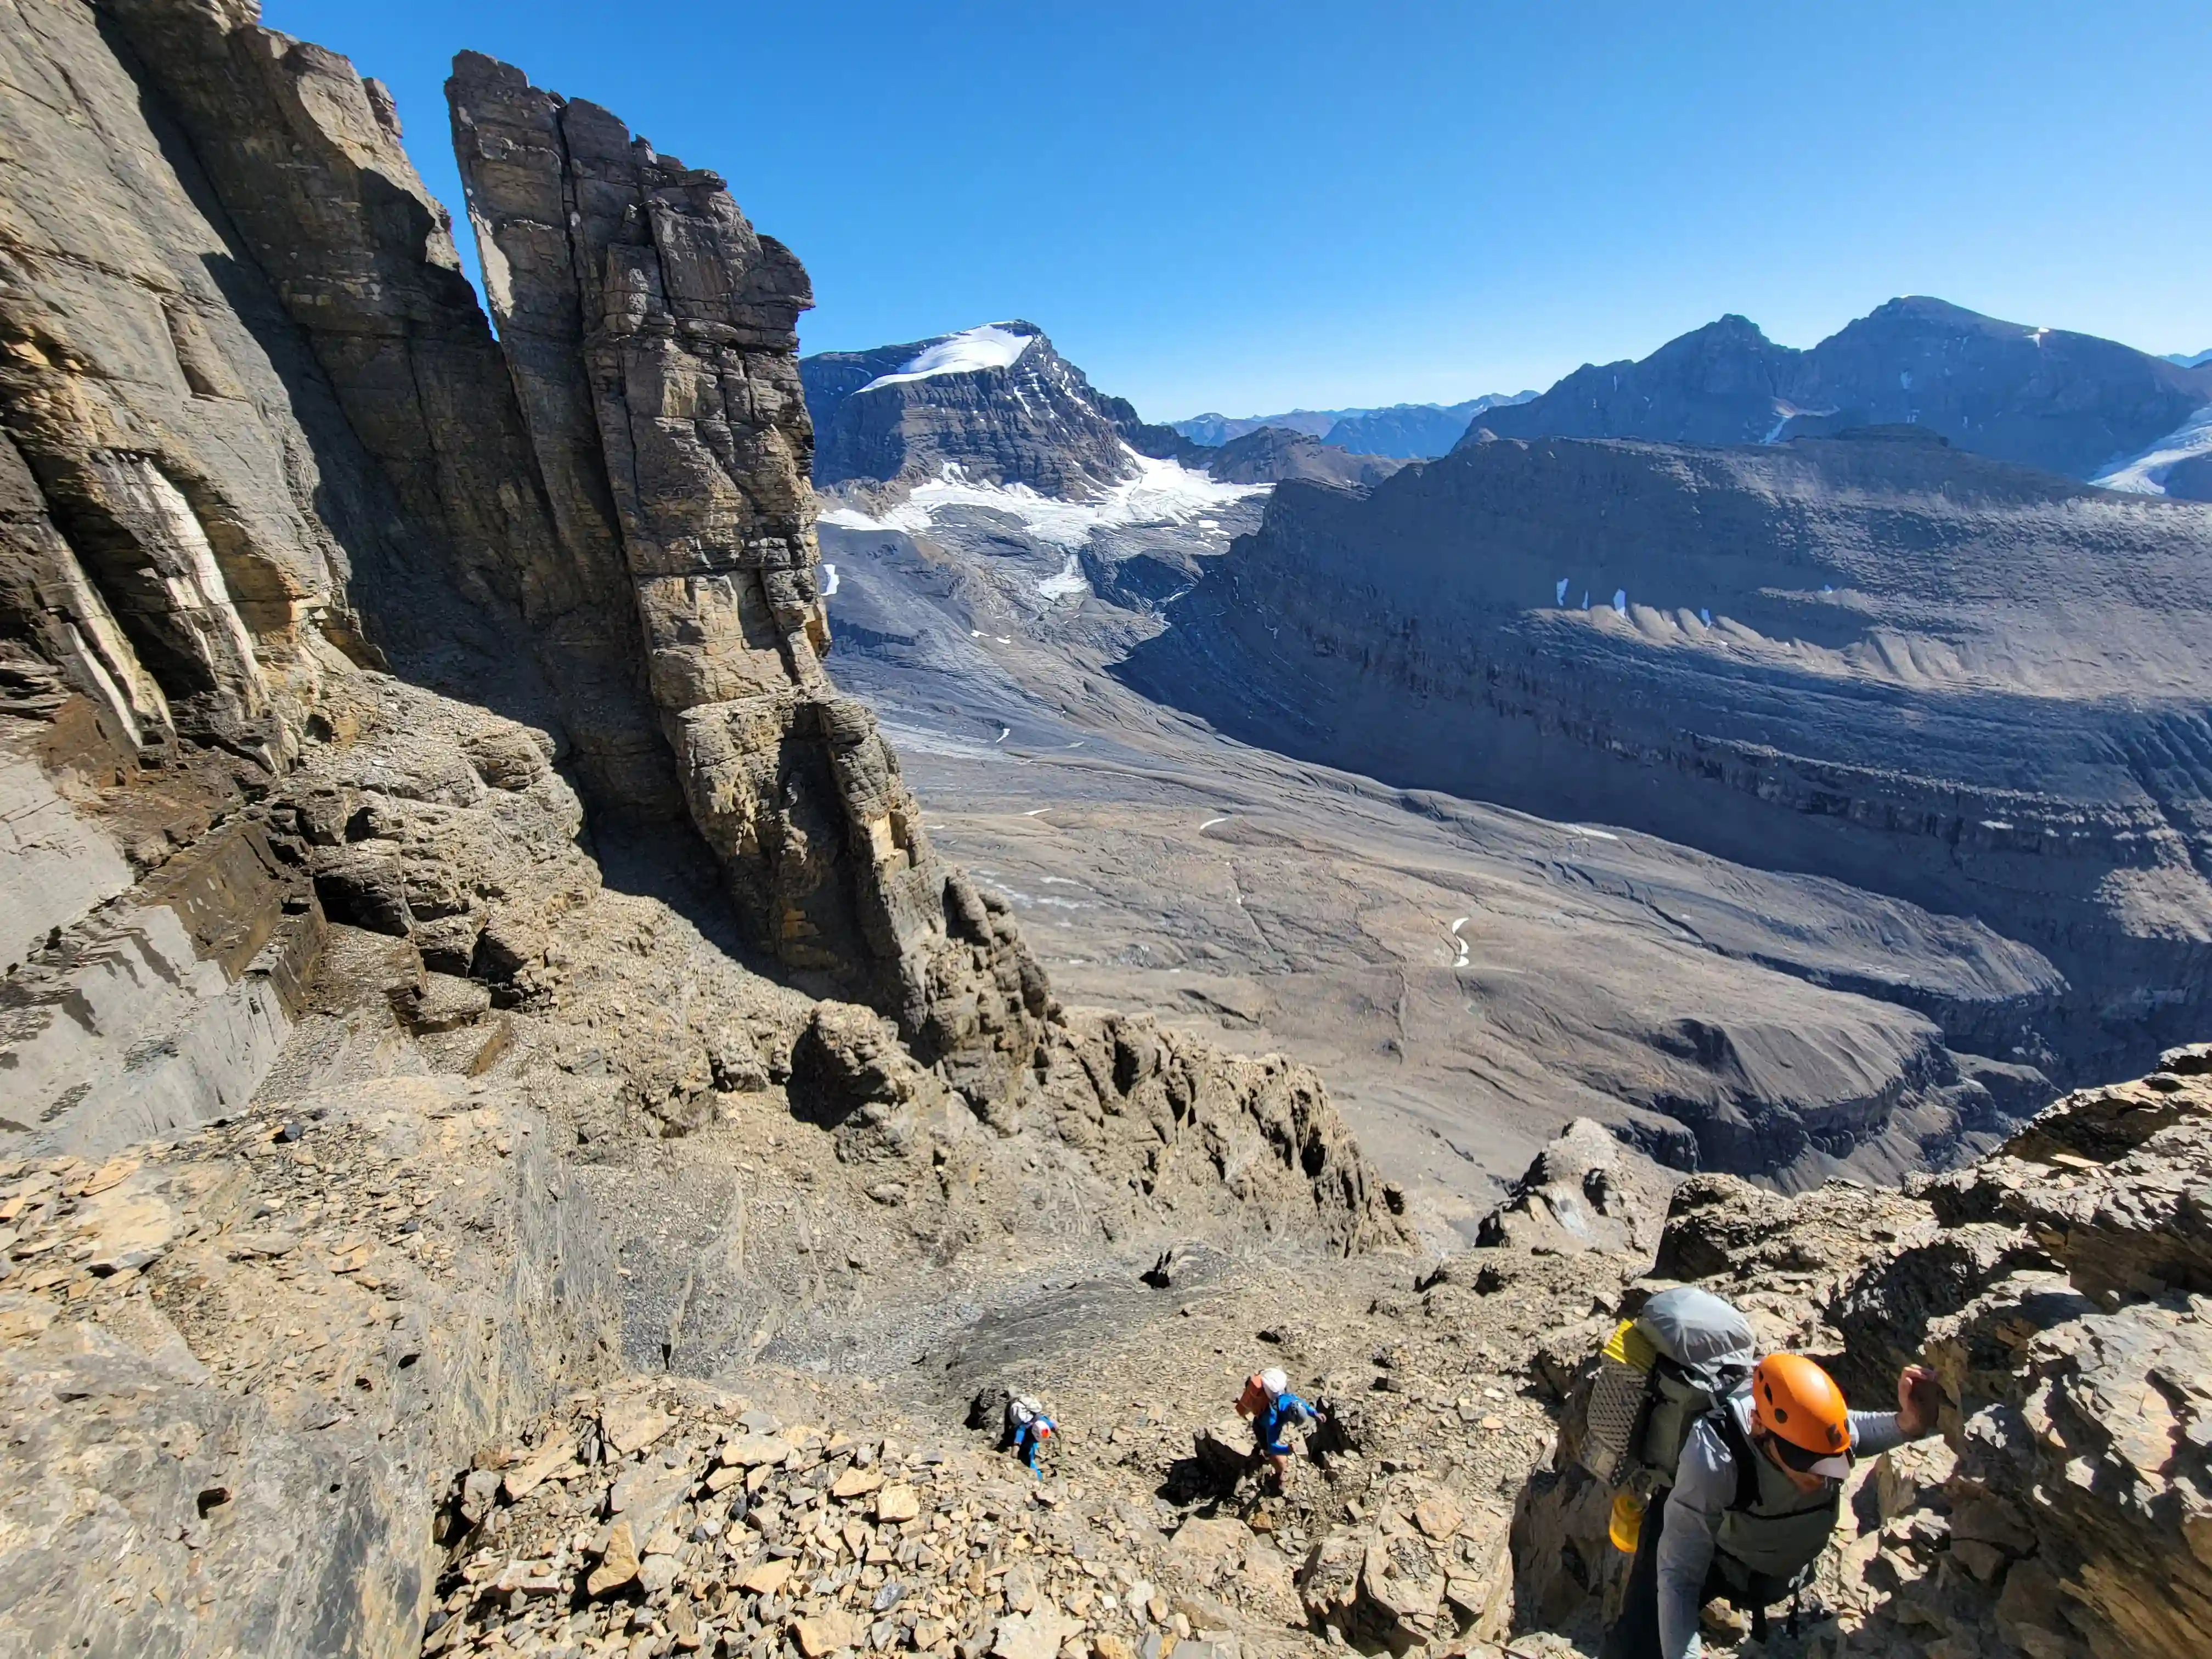
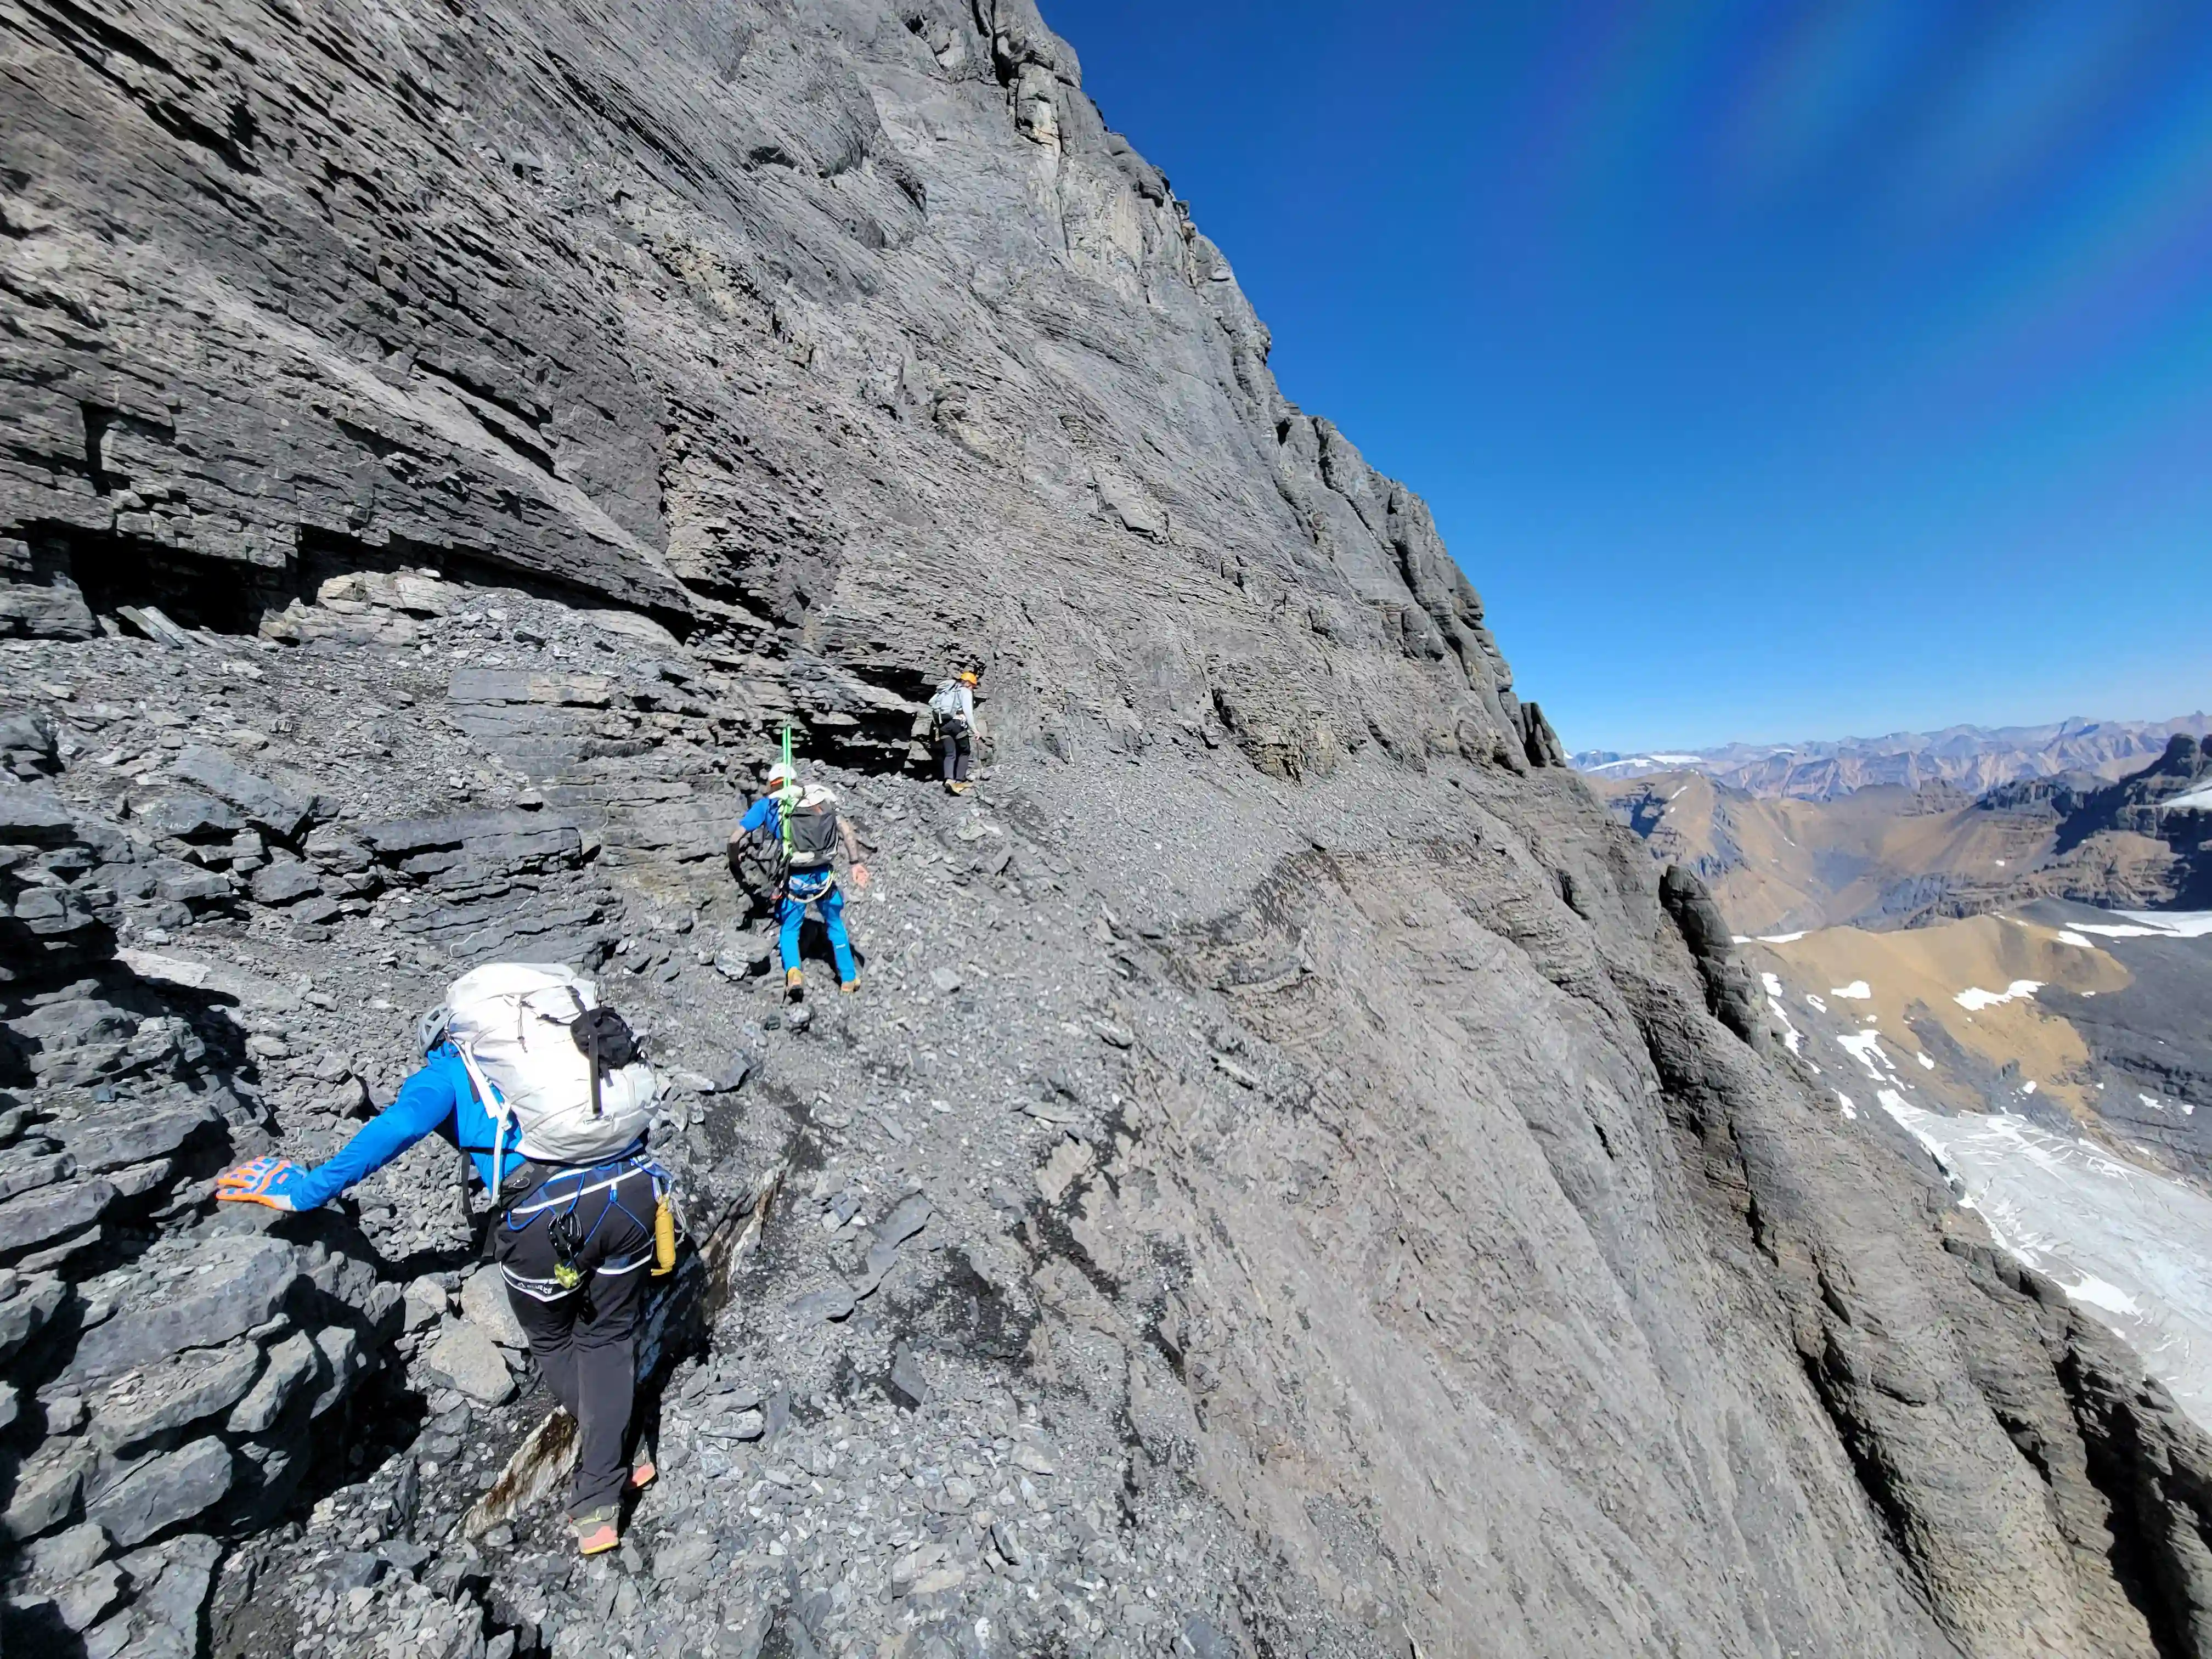
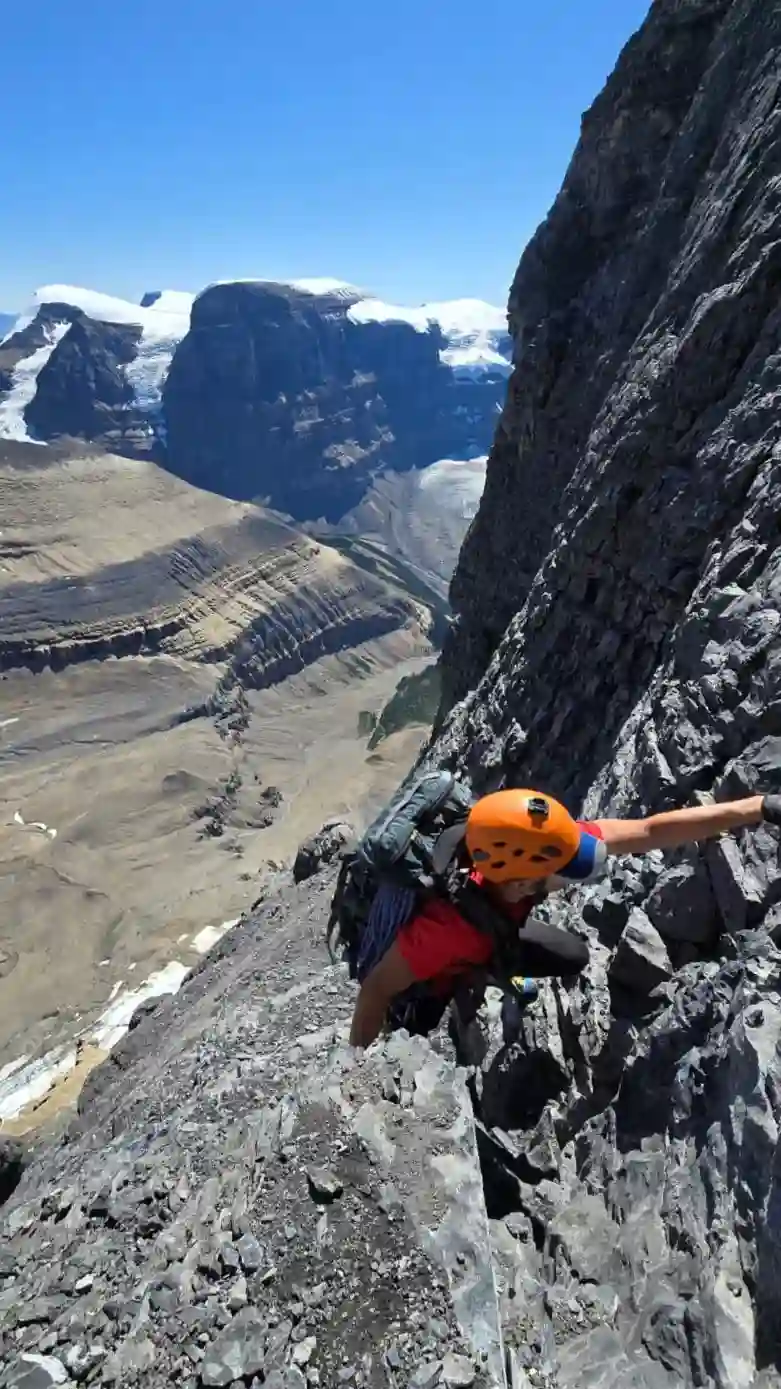
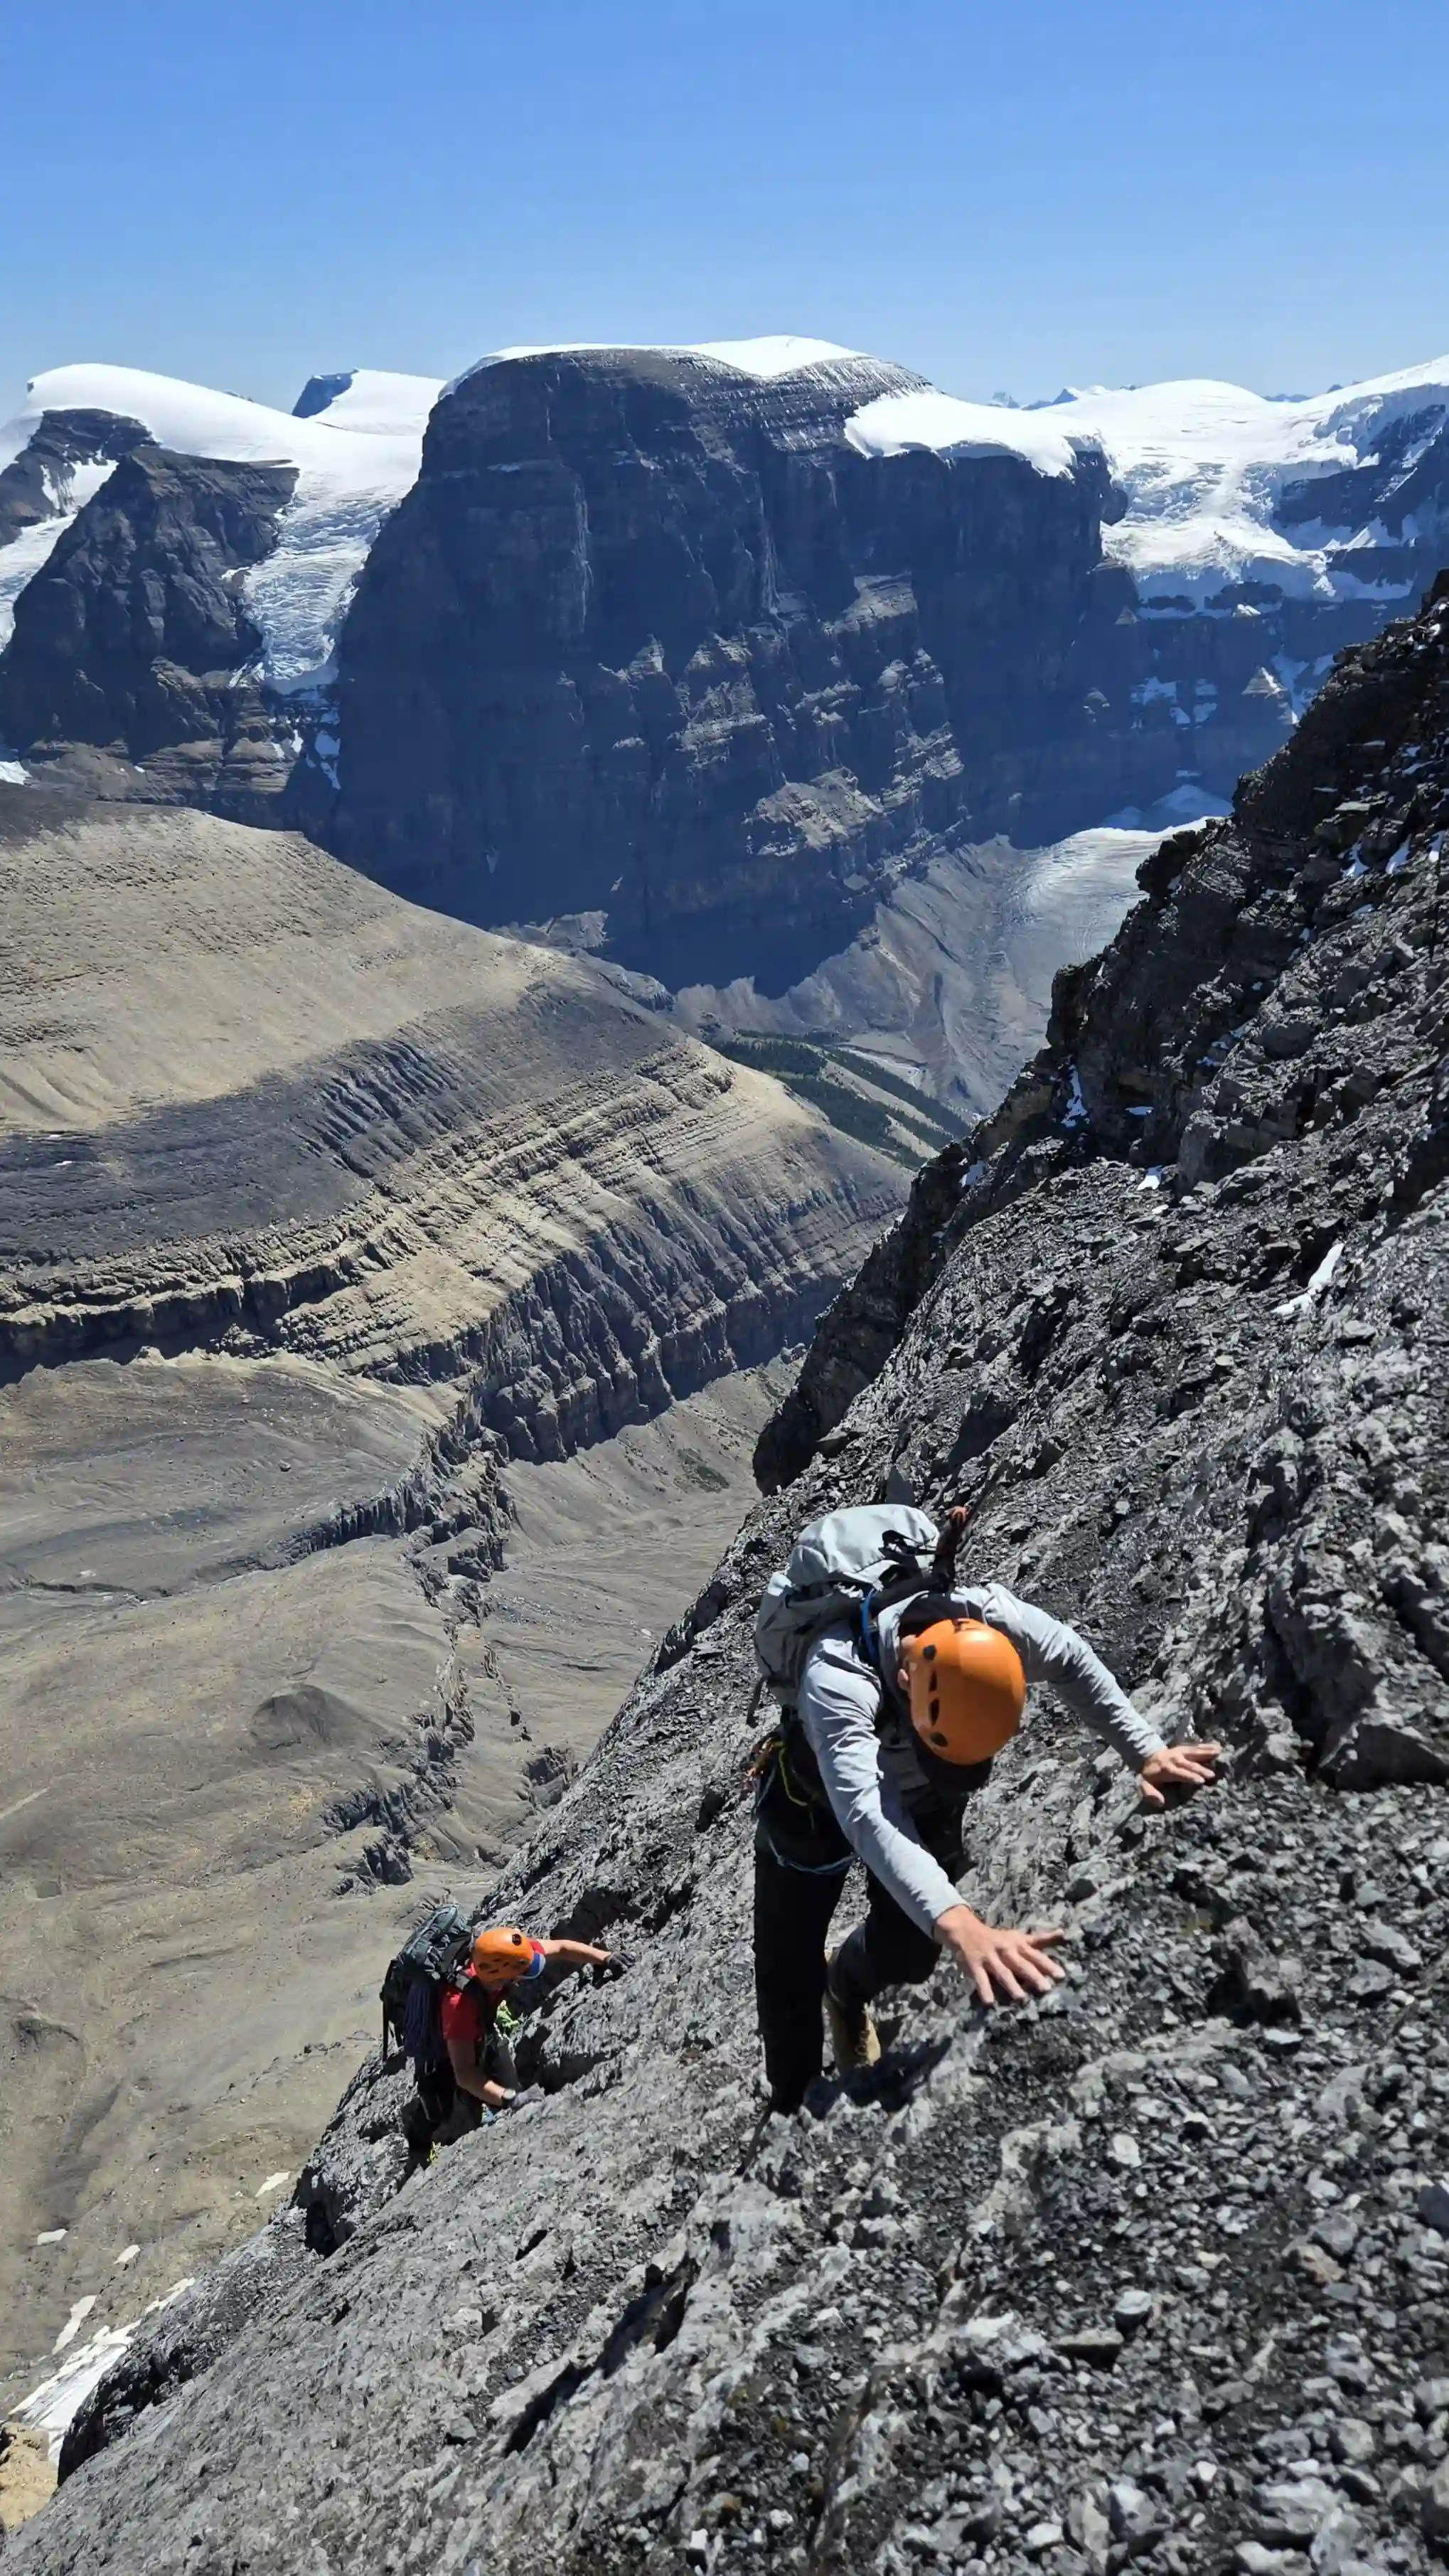
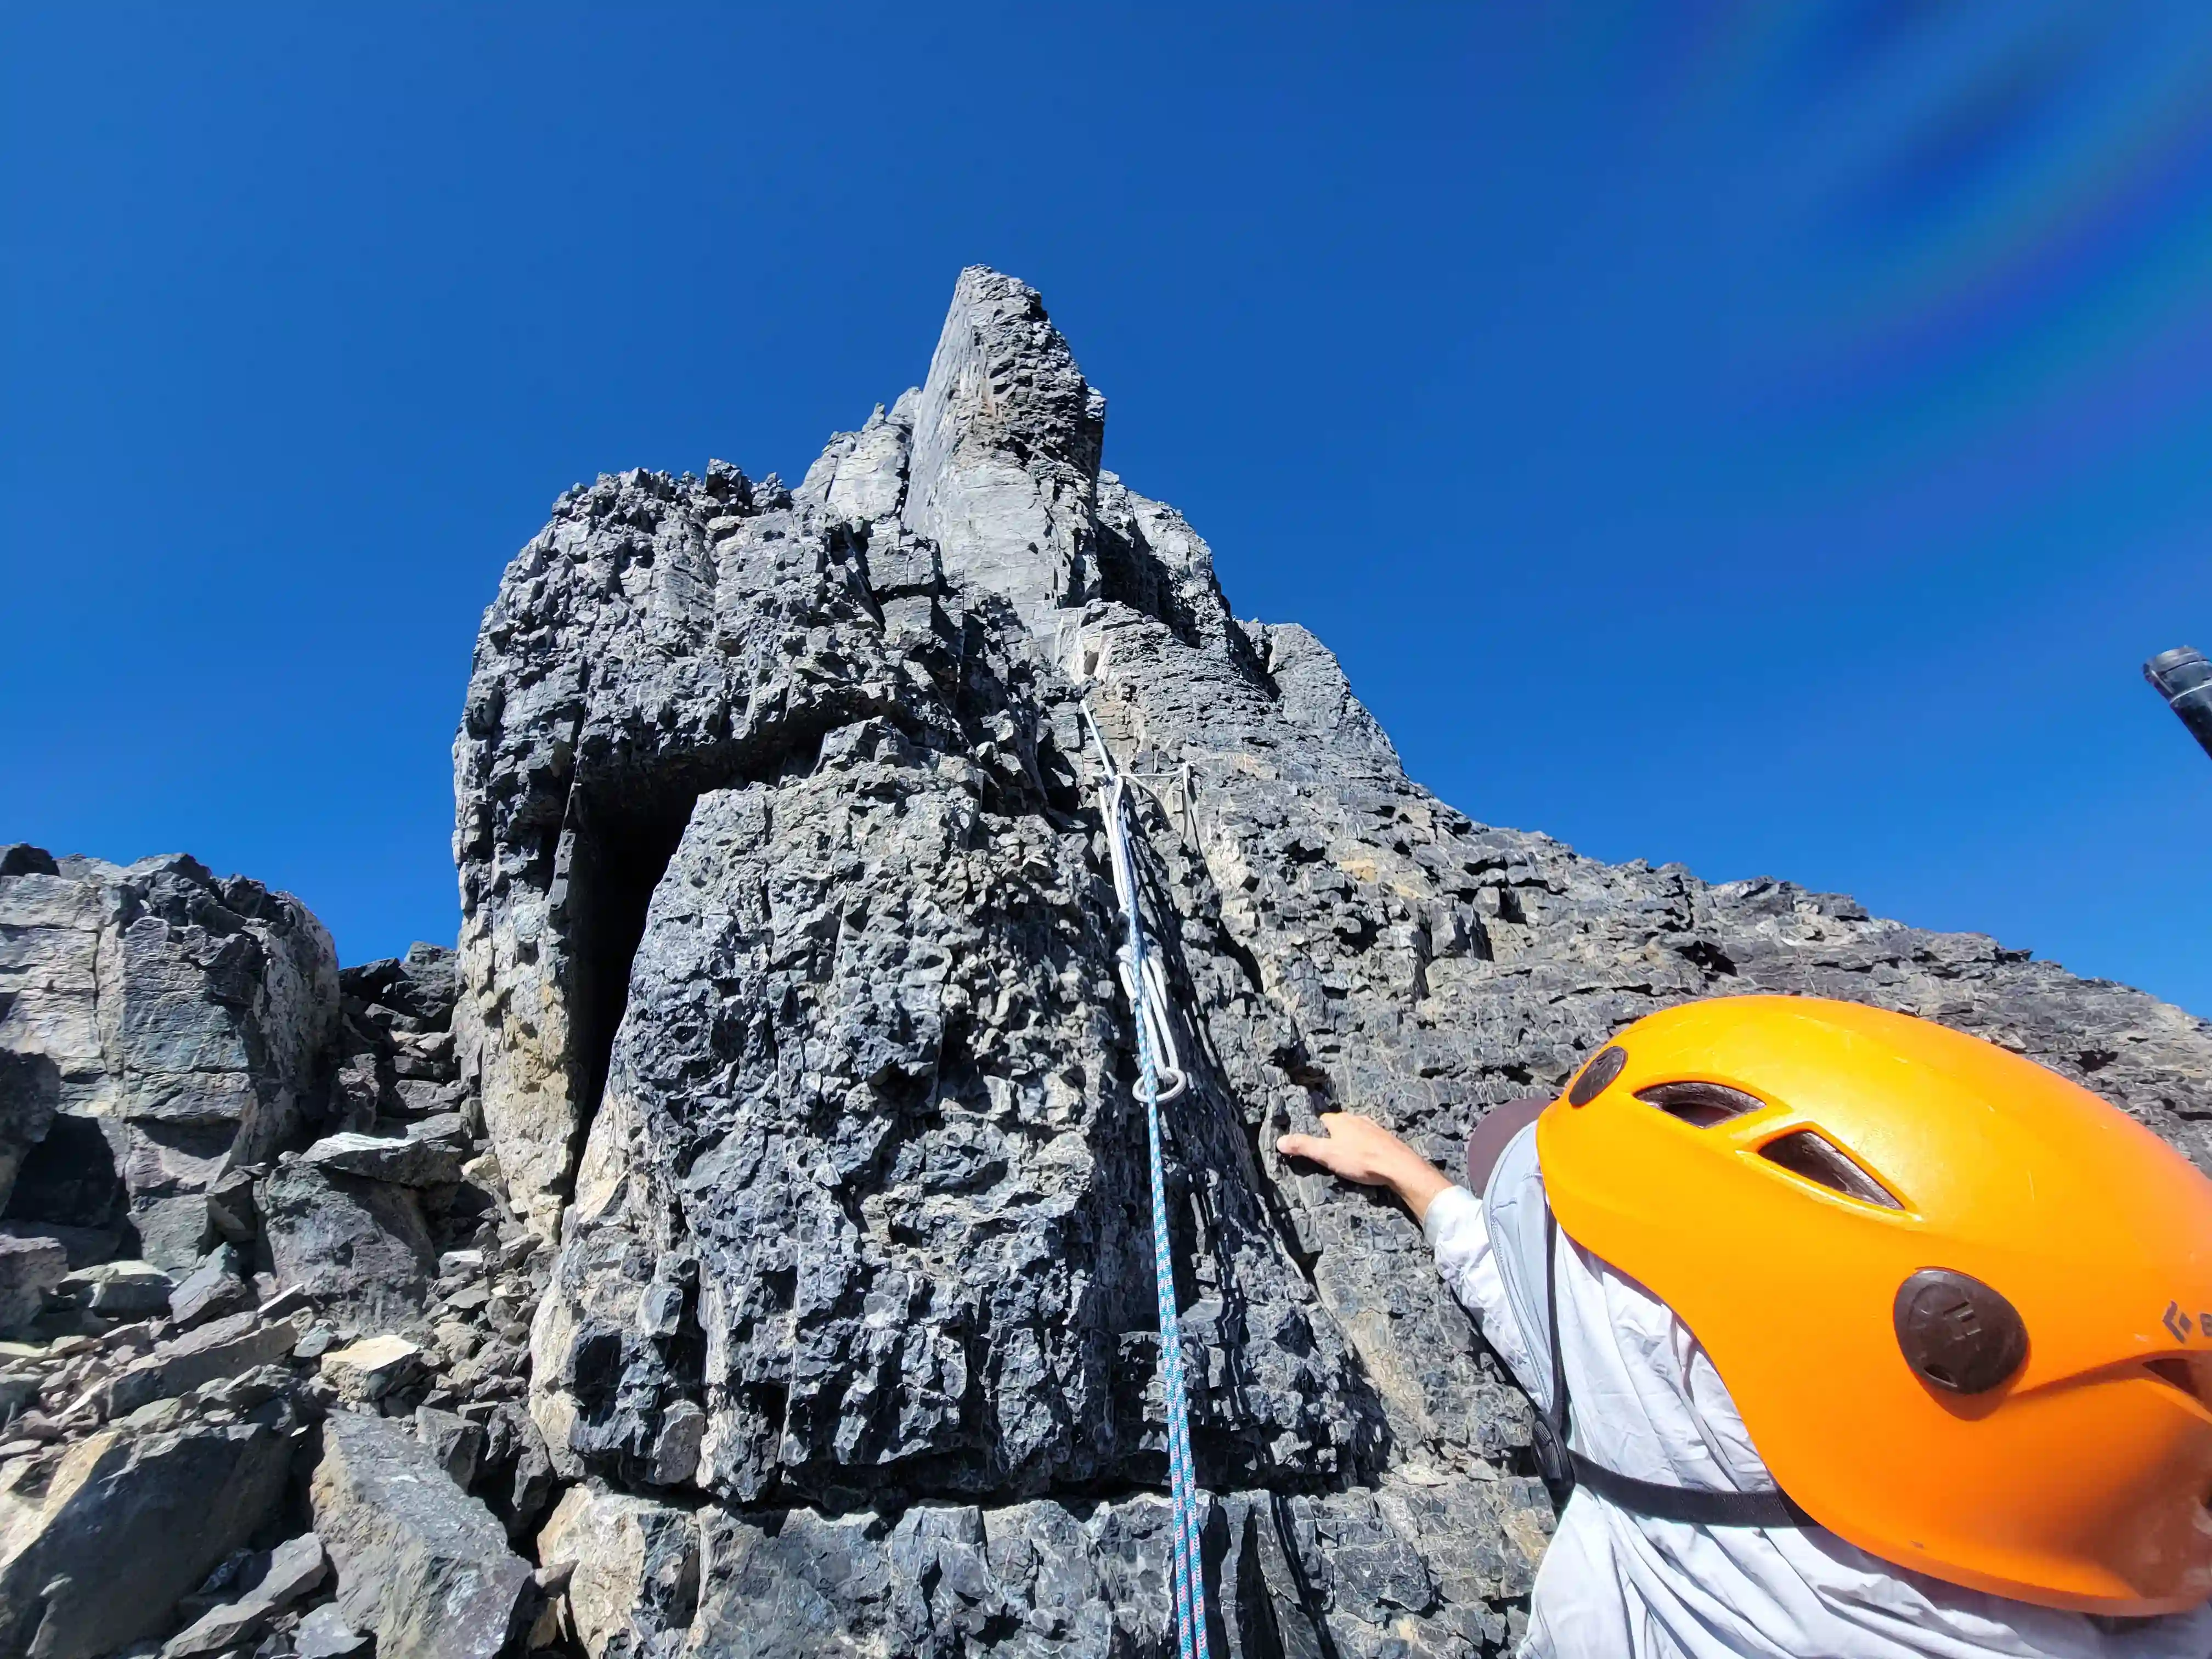
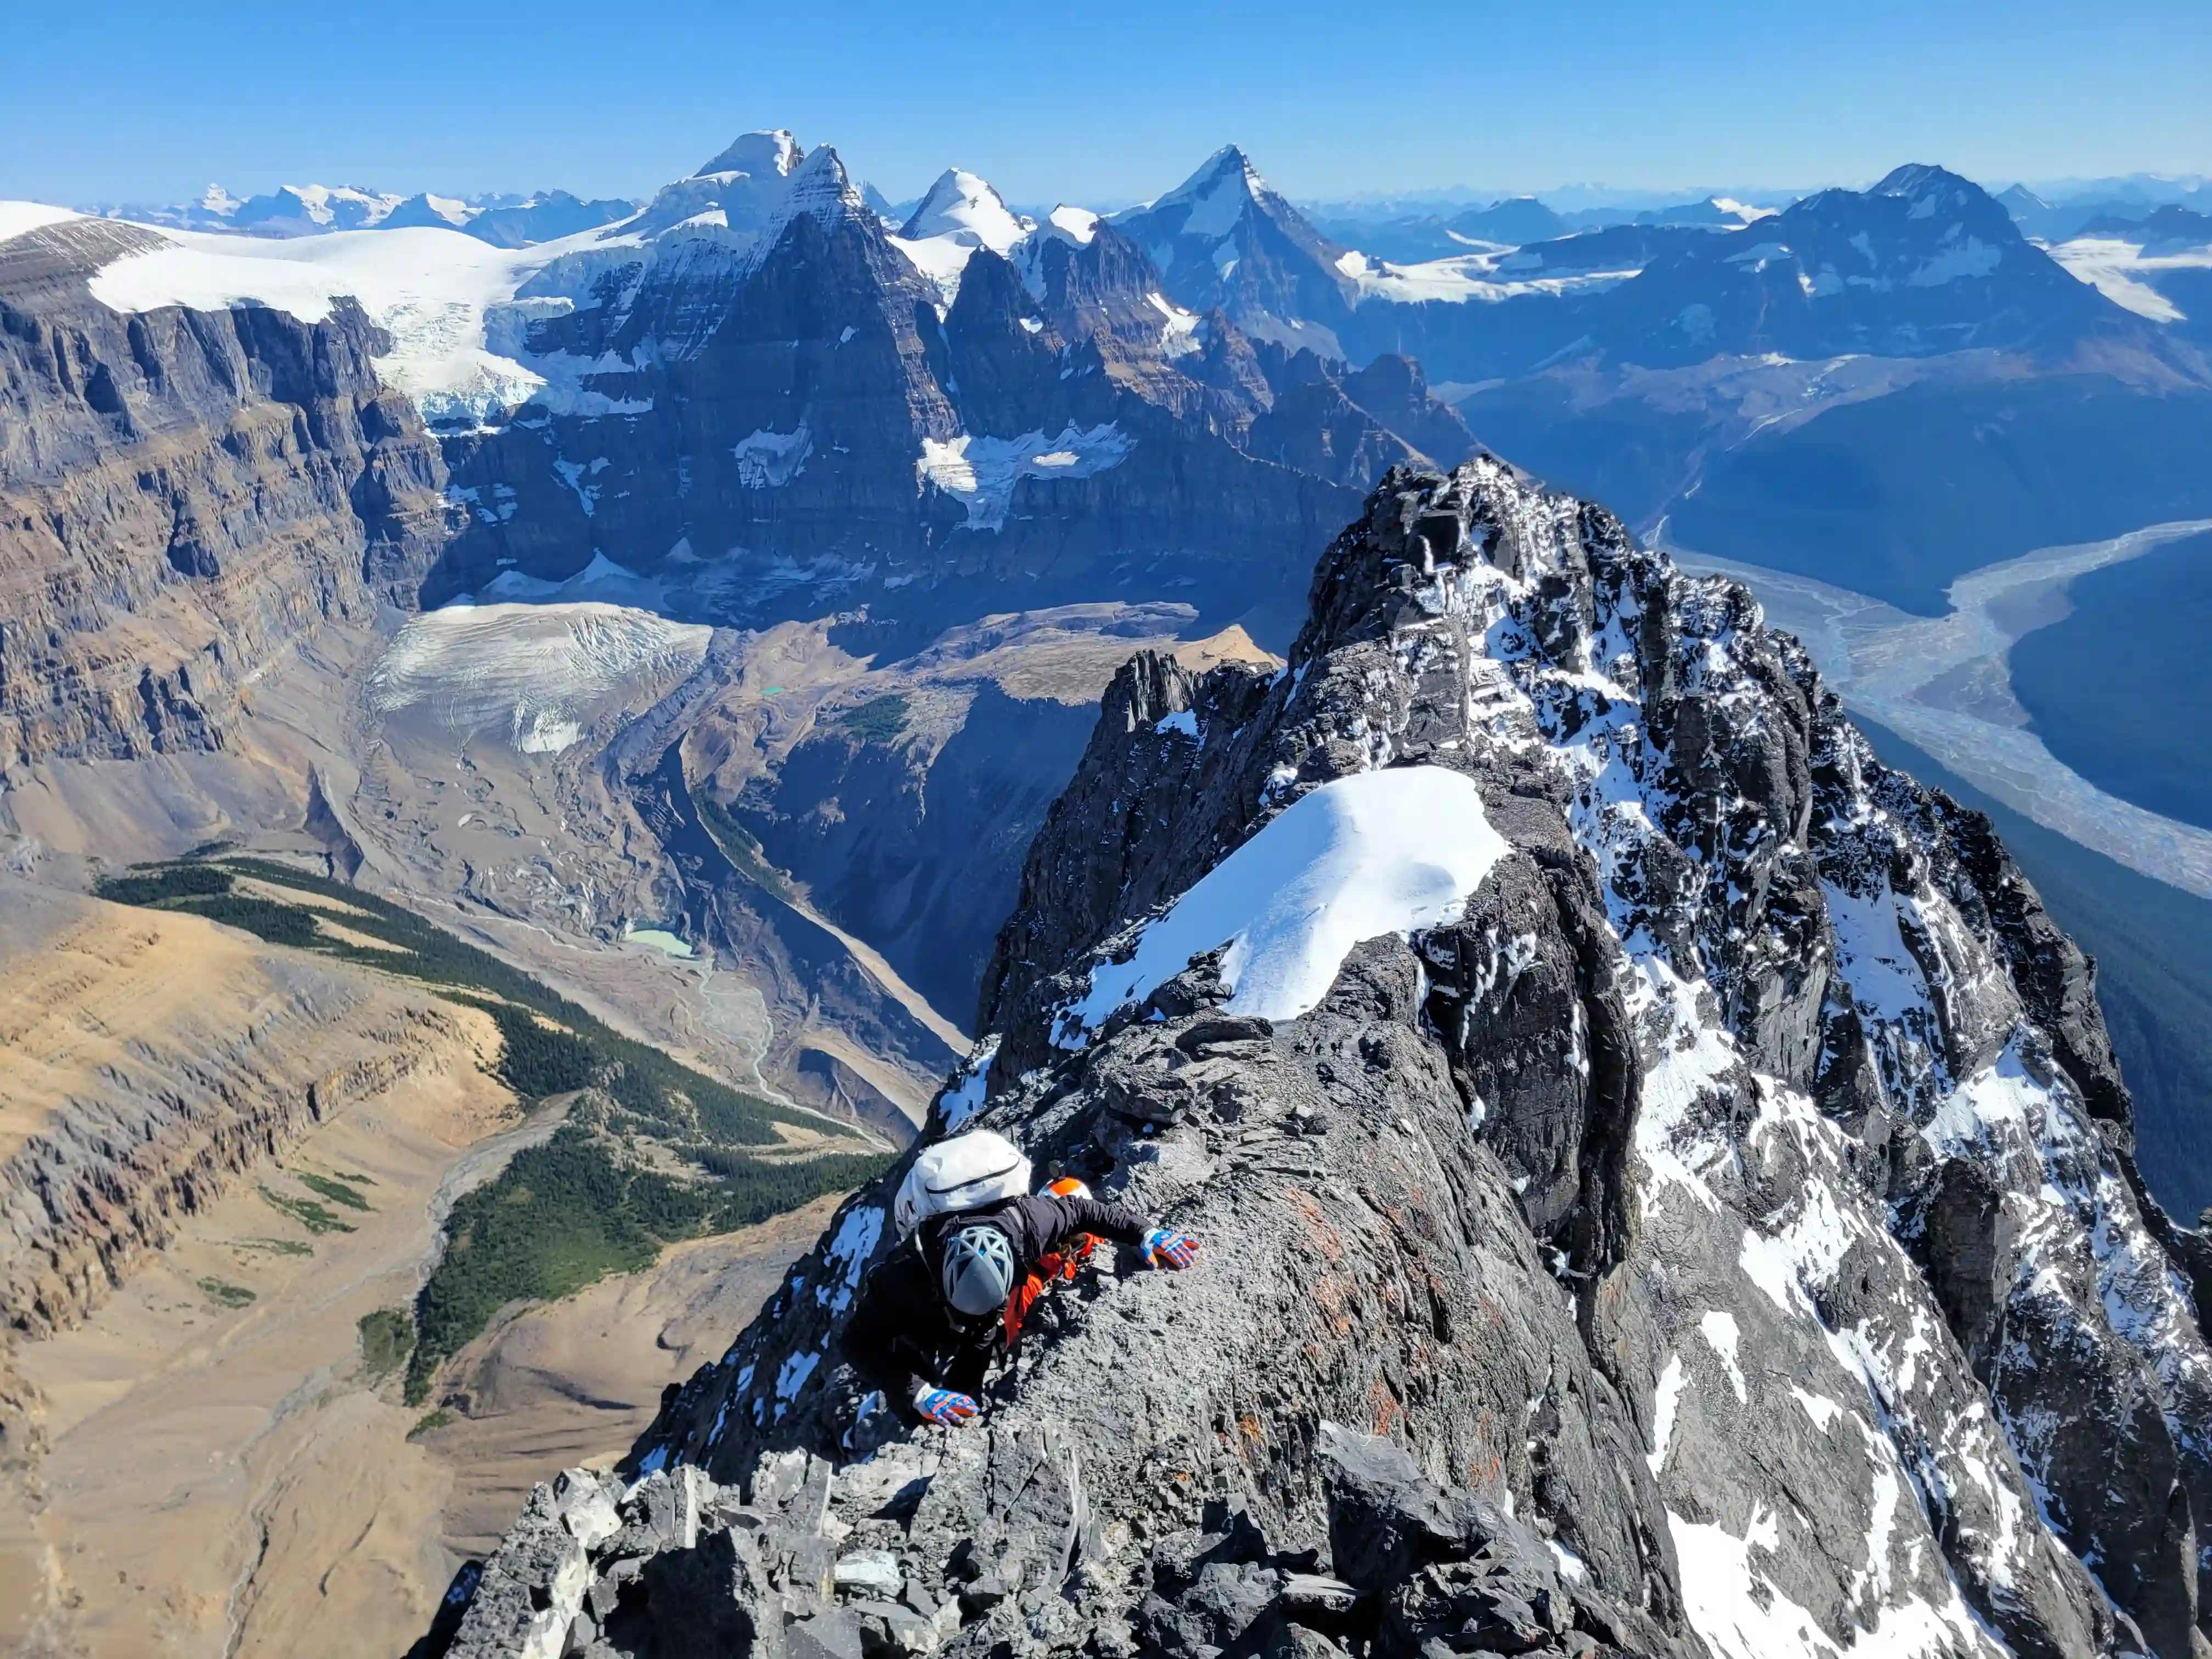
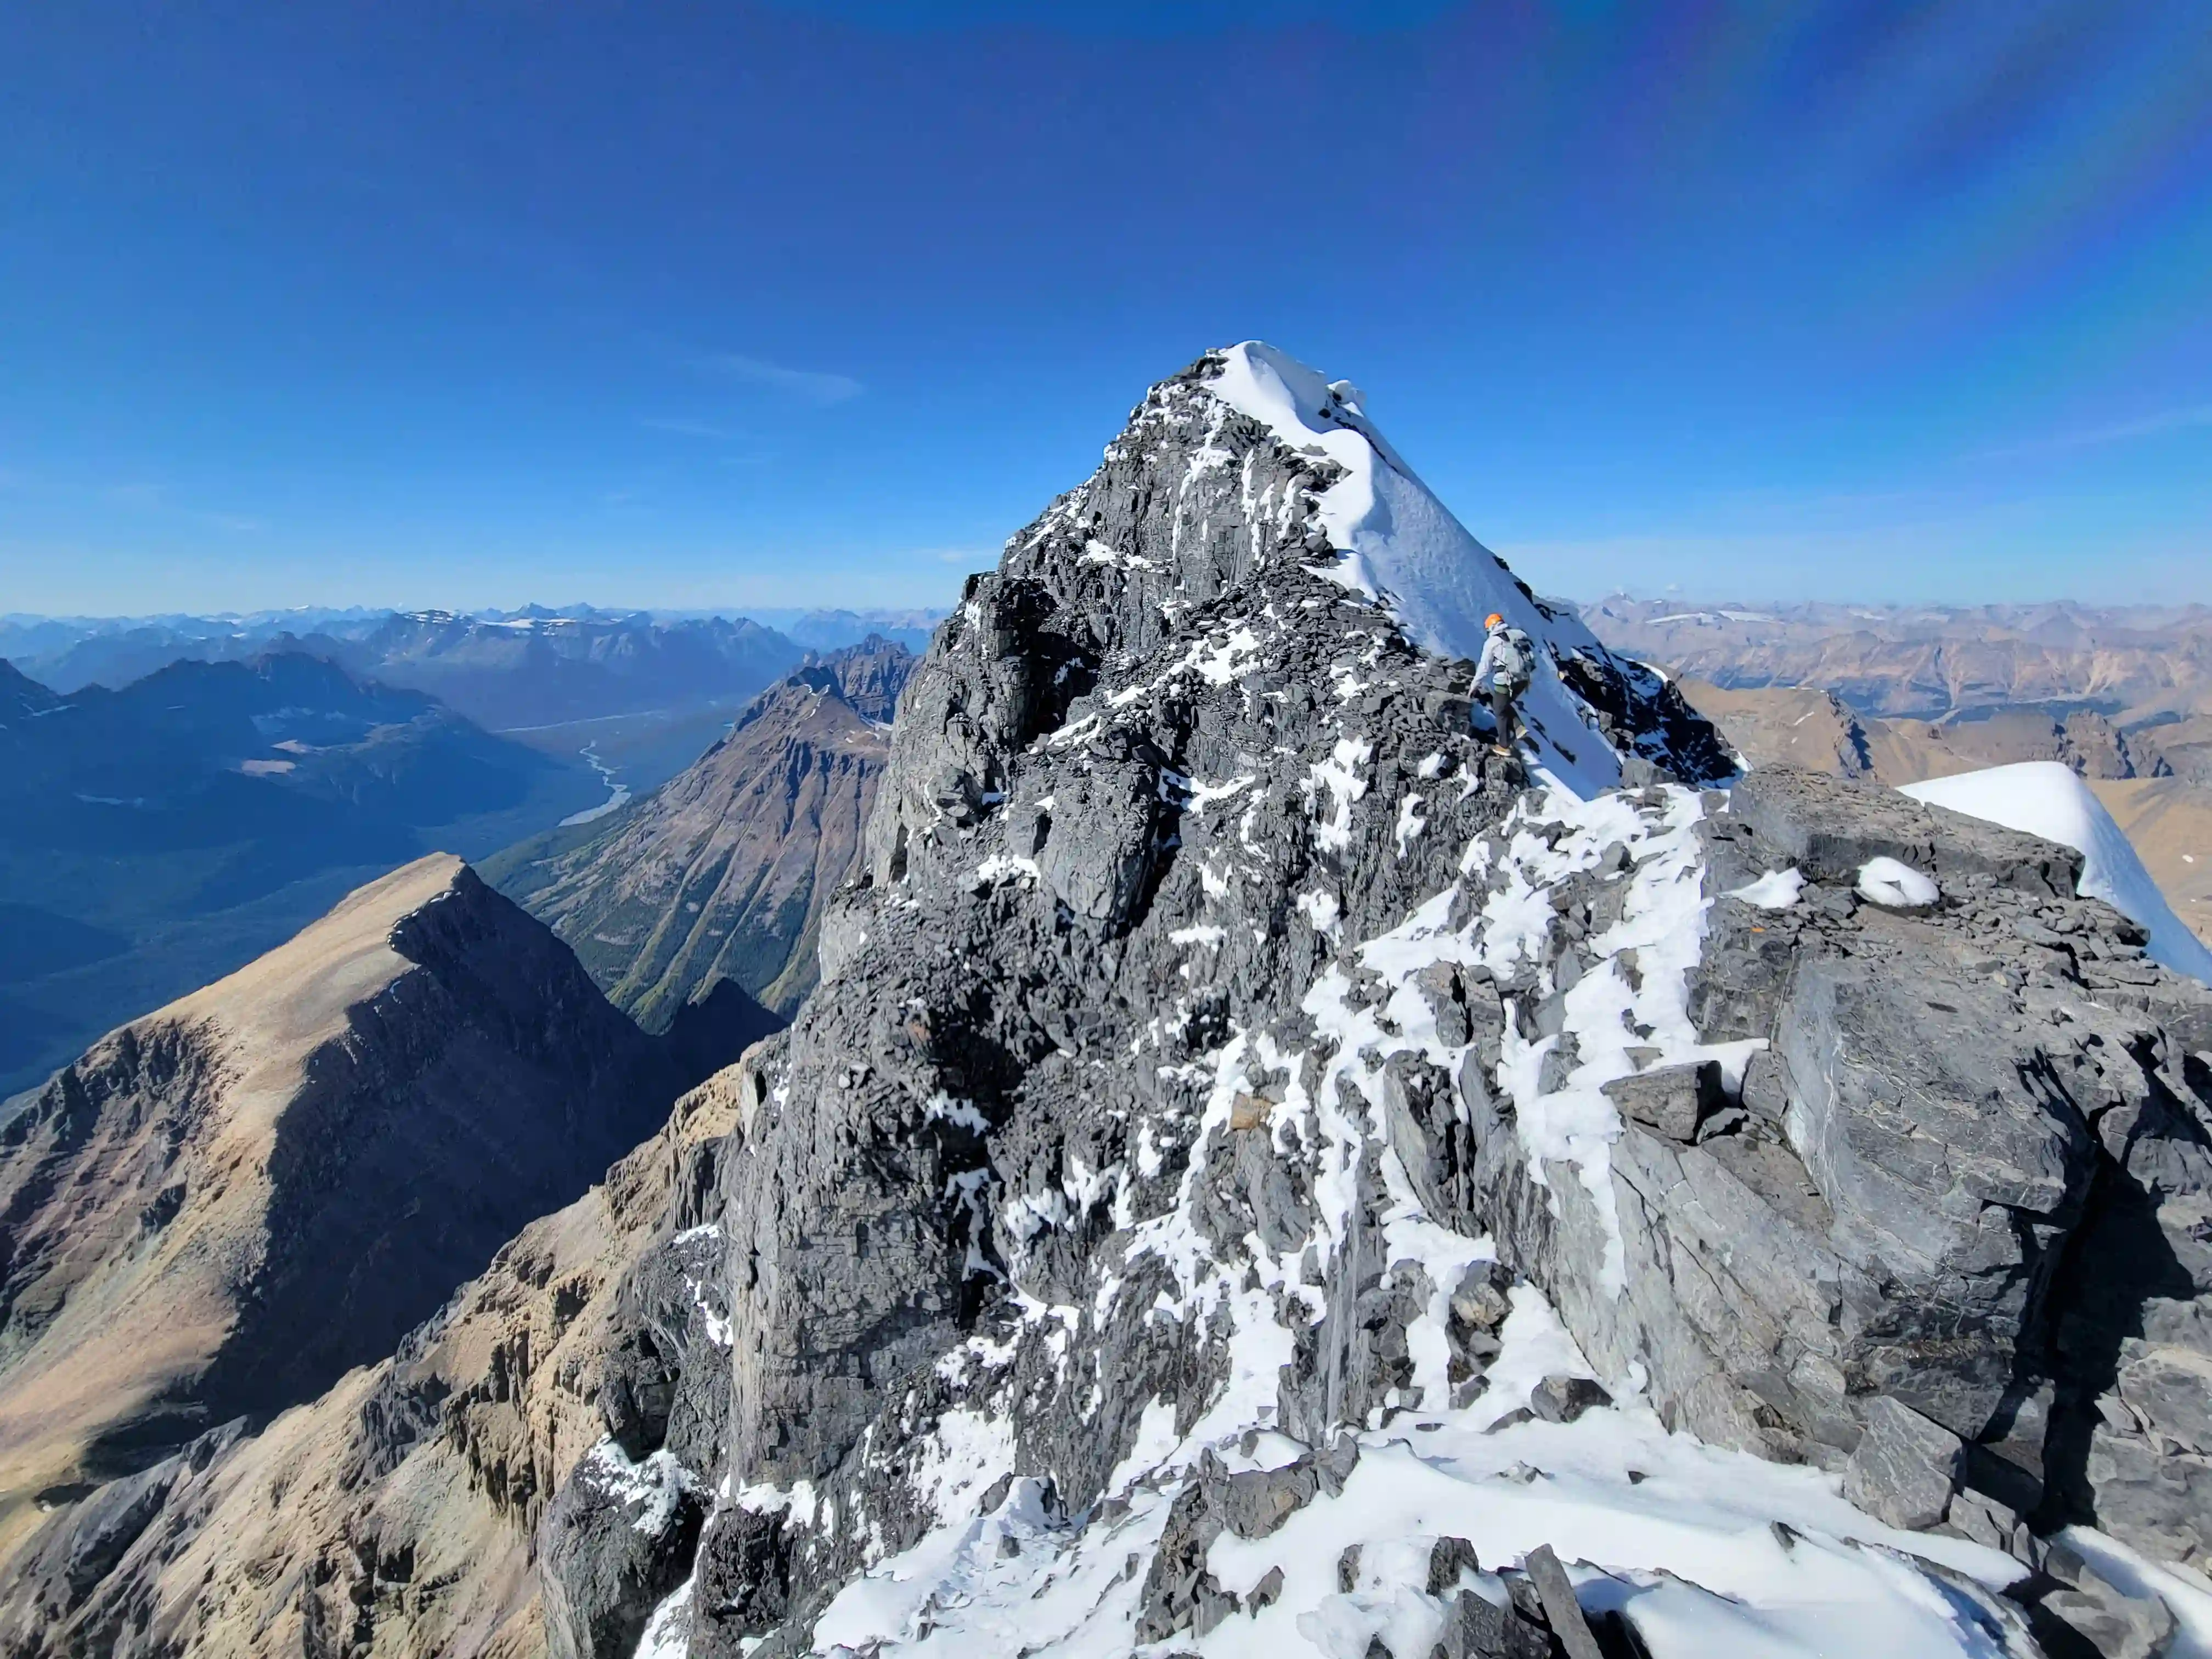
The upper half of Mount Alberta is where the mountain earns its reputation. From the bivi site the third ledge traverse continues for 150m north to where the proper climbing begins. At this point the "elephant asses" feature is easily visible and with a bit of steep scree and choss ascending the more solid rock begins climber's right of it up an obvious groove / chimney. The elephant asses portion of the ascent is 2-3 pitches long and leads to the 4th and final ledge traverse and while it isn't as technically difficult as the climbing following the final traverse, it still involves exposed and sustained 5.4.
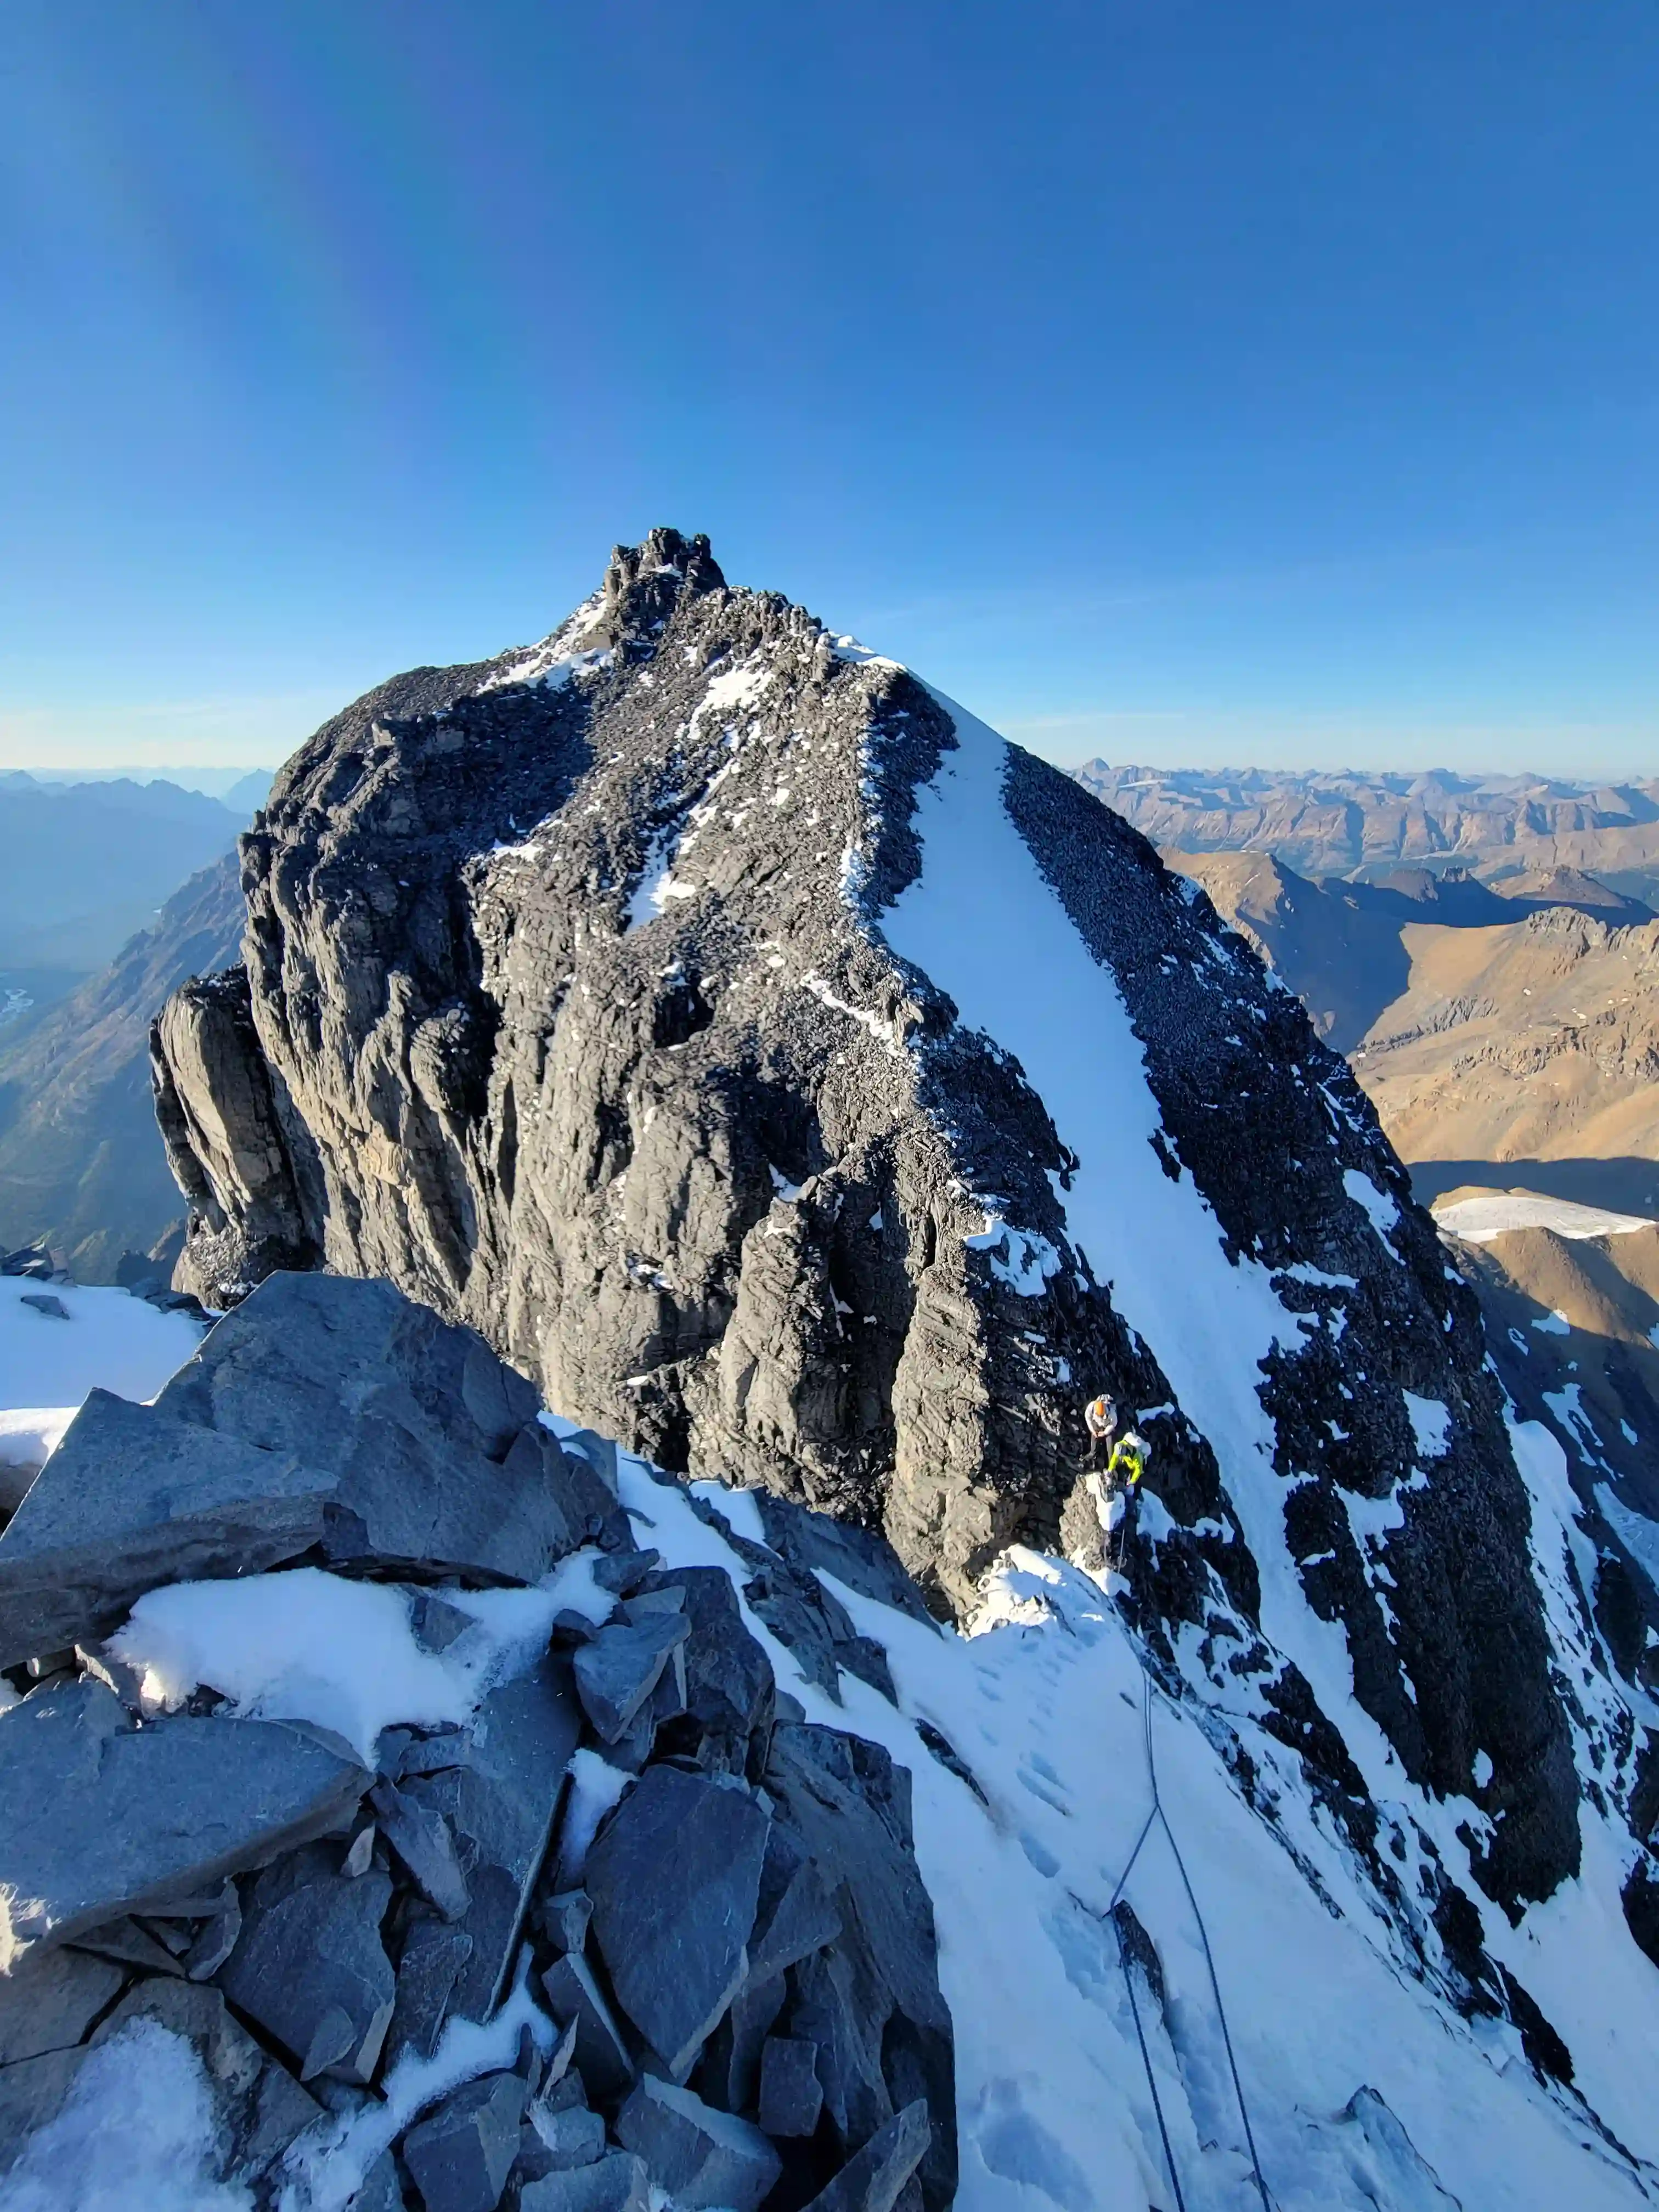
After topping out on the elephant asses portion of the climb the ascent gets real with the final and most exposed ledge traverse heading north for about 120m before tougher and much more sustained climbing begins. A buttress feature at the far end of the ledge with a small visible plateau at the top is the where the hands on terrain continues and with a few stiff moves to top out on this feature the main gully used by the Japanese route is visible to climber's right and is followed until you reach the ridge.
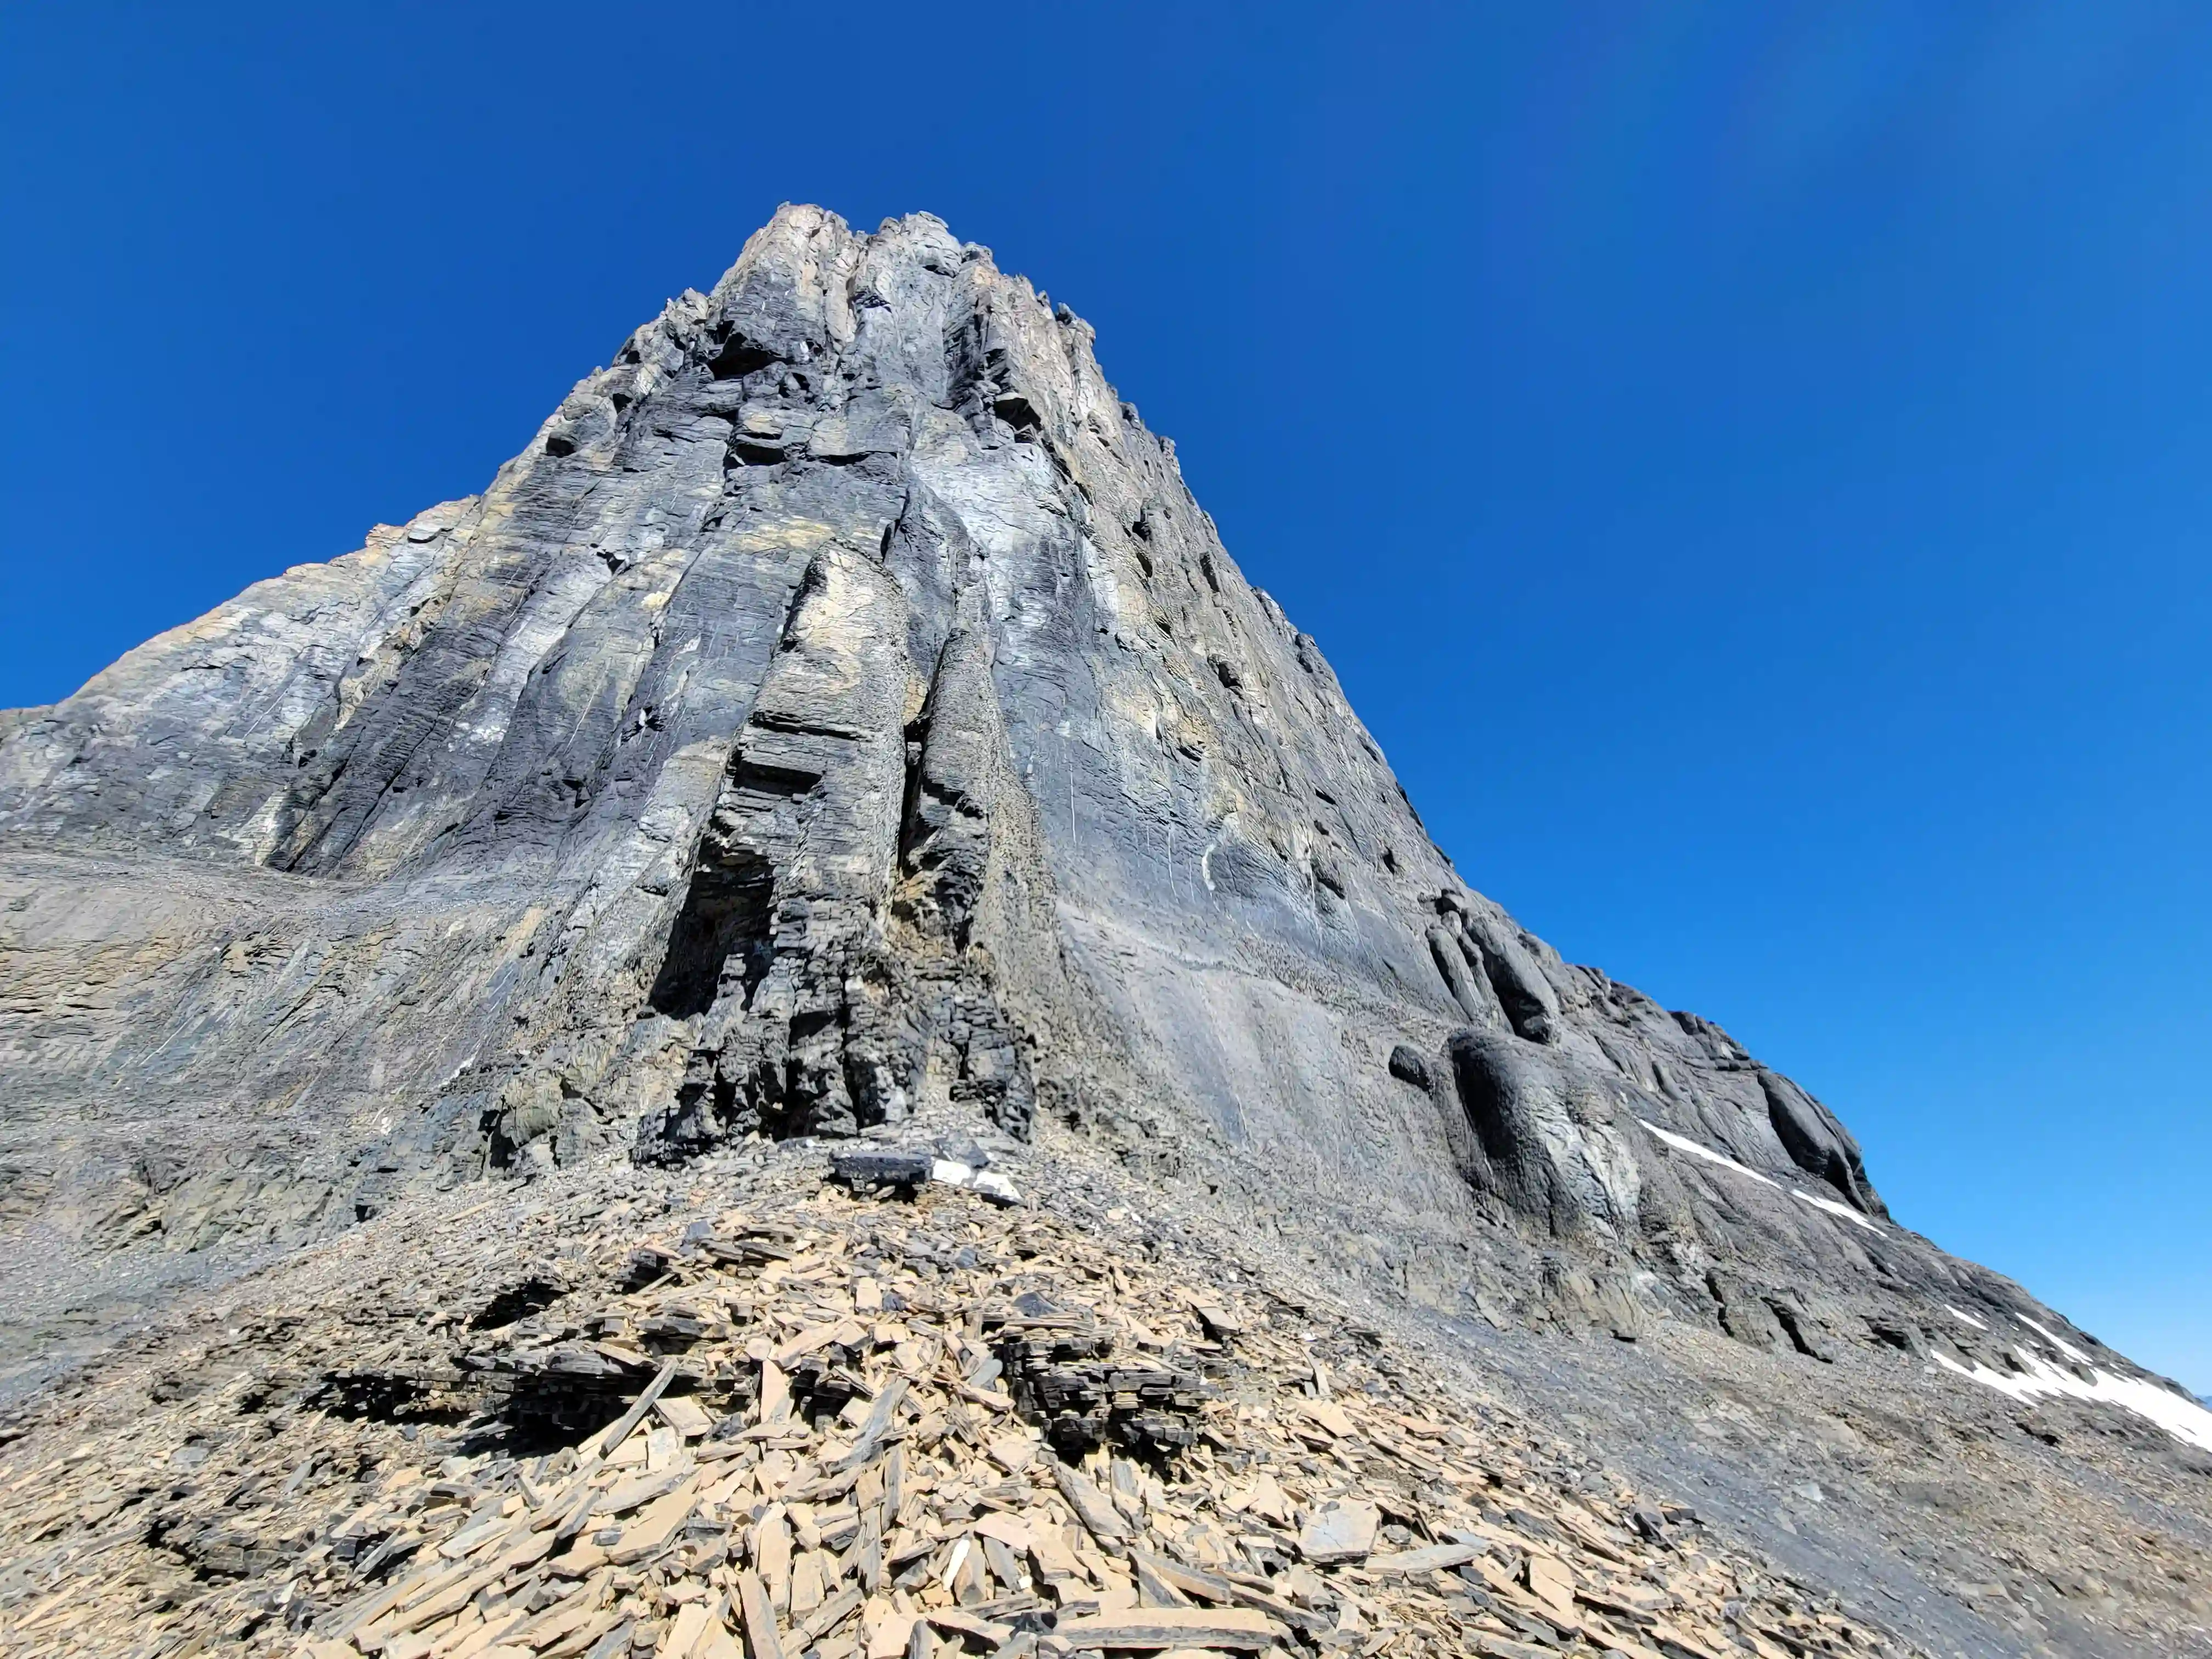
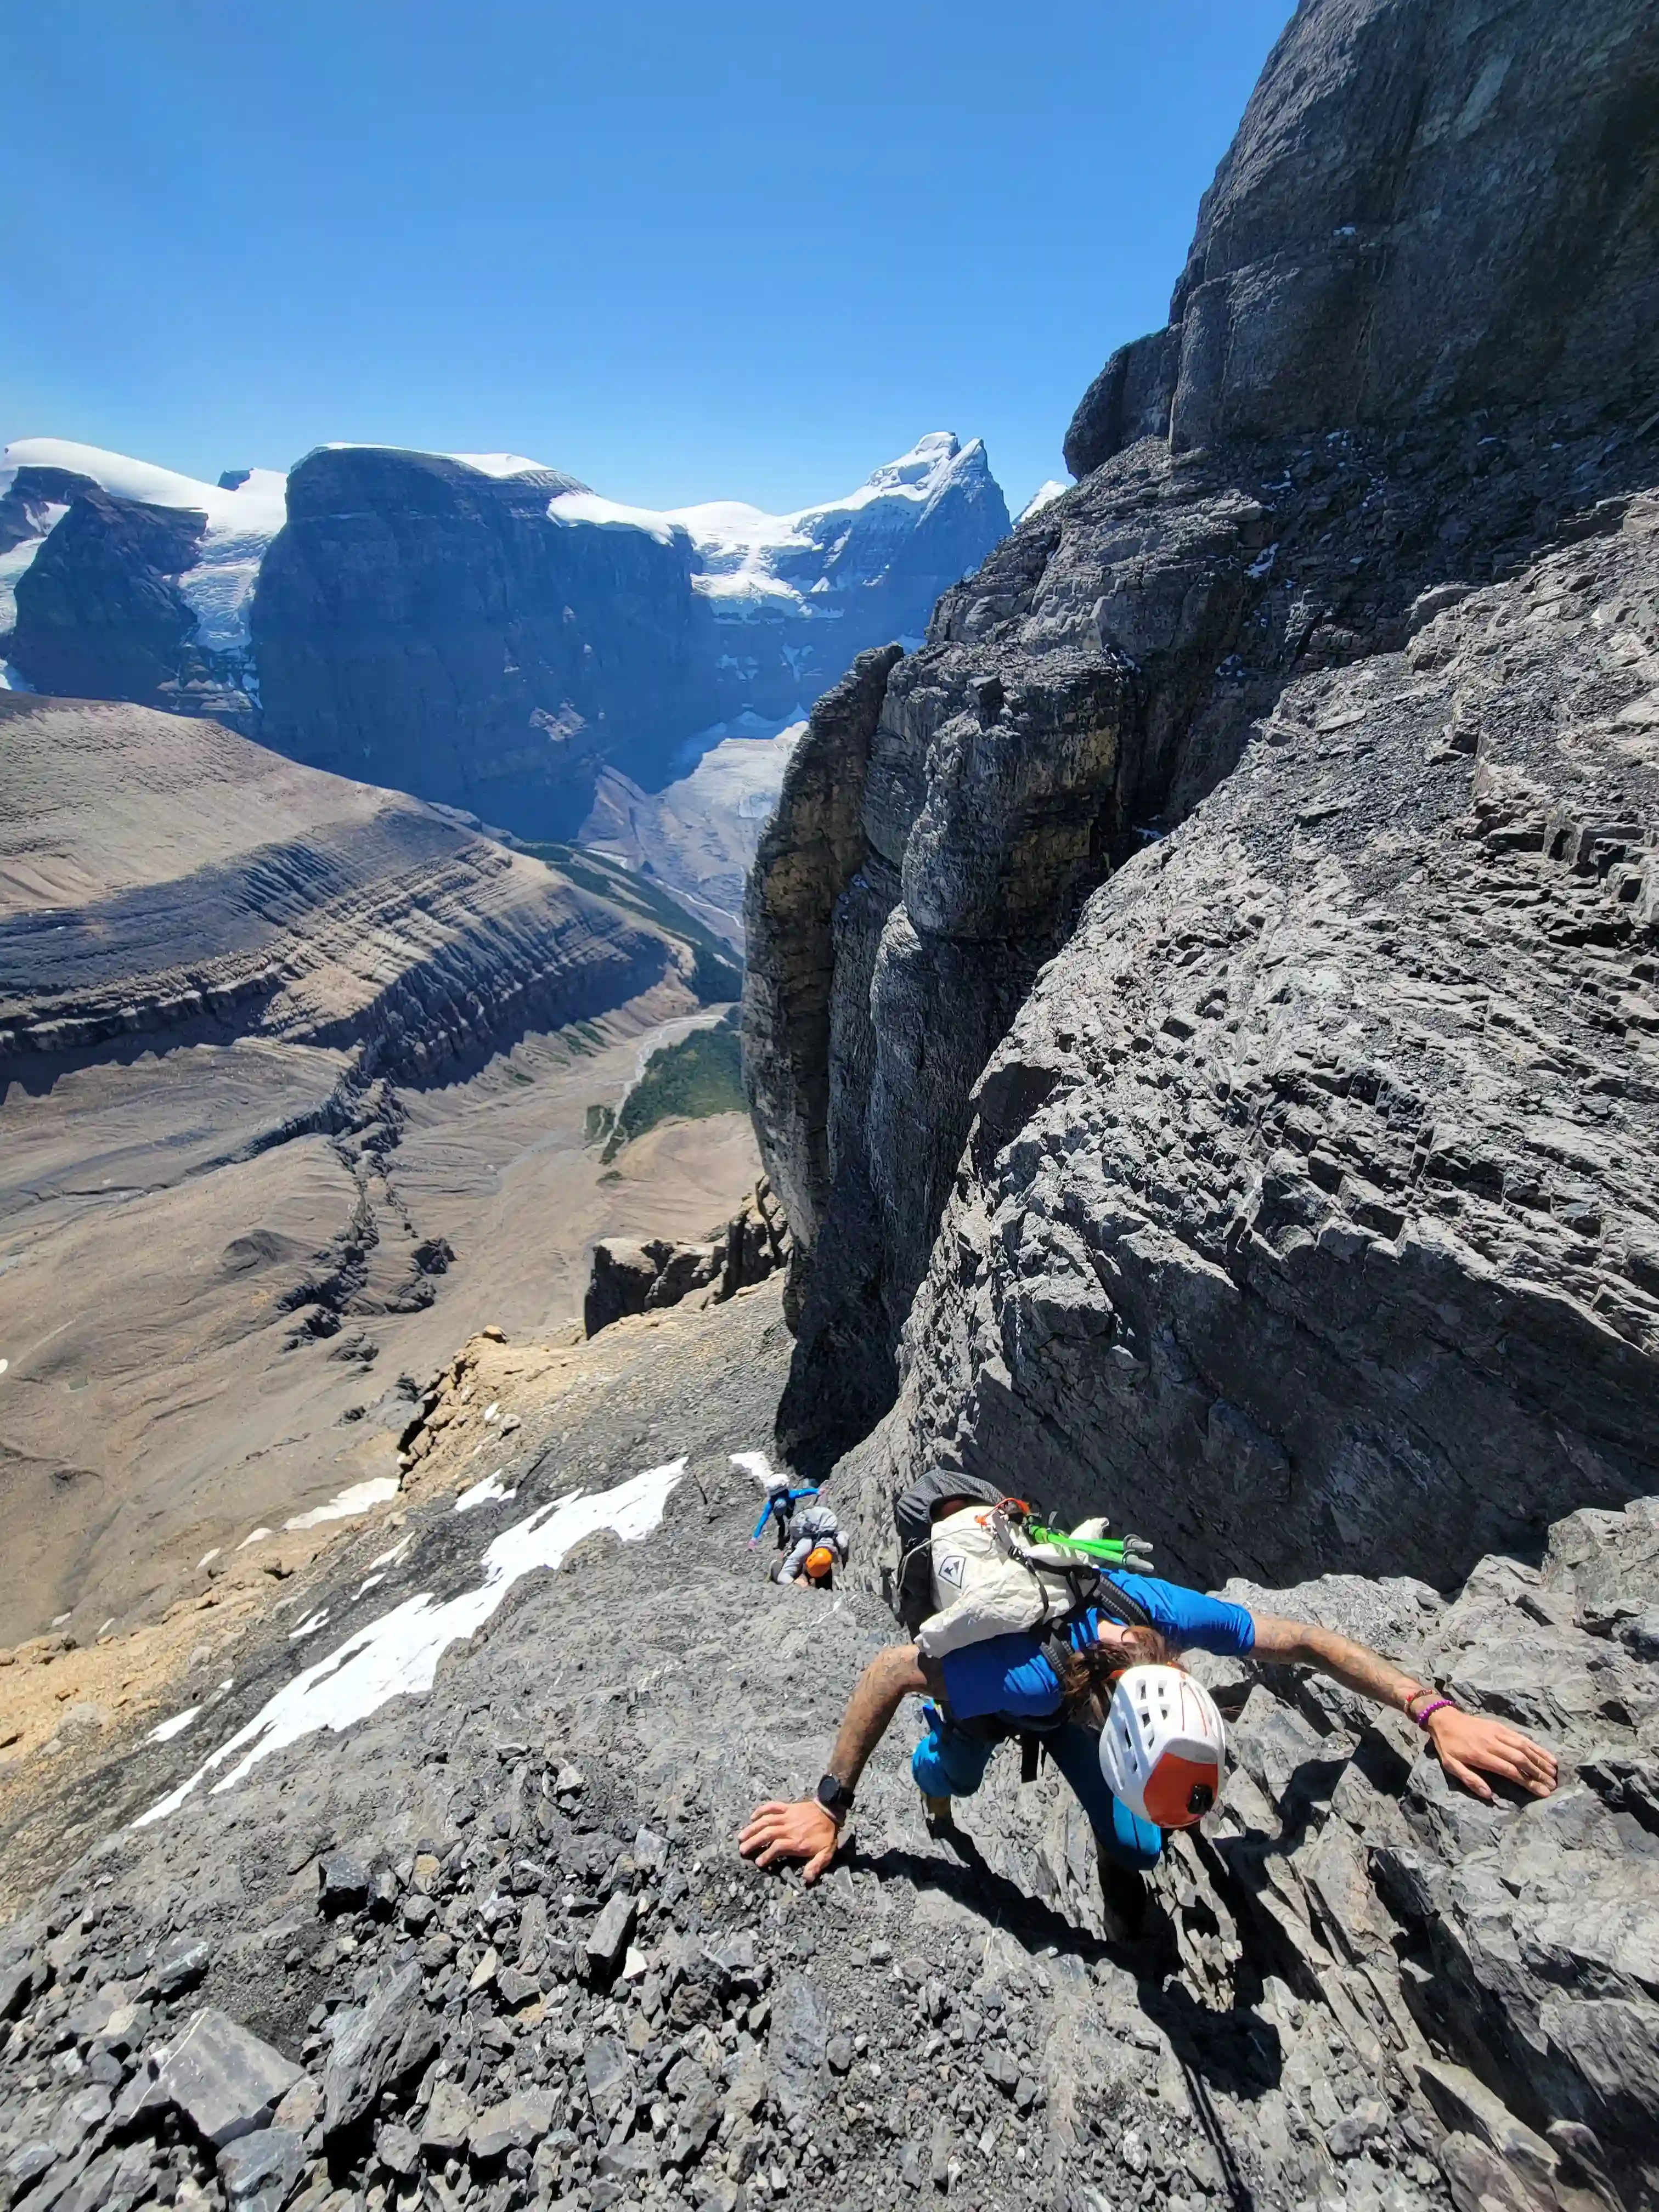
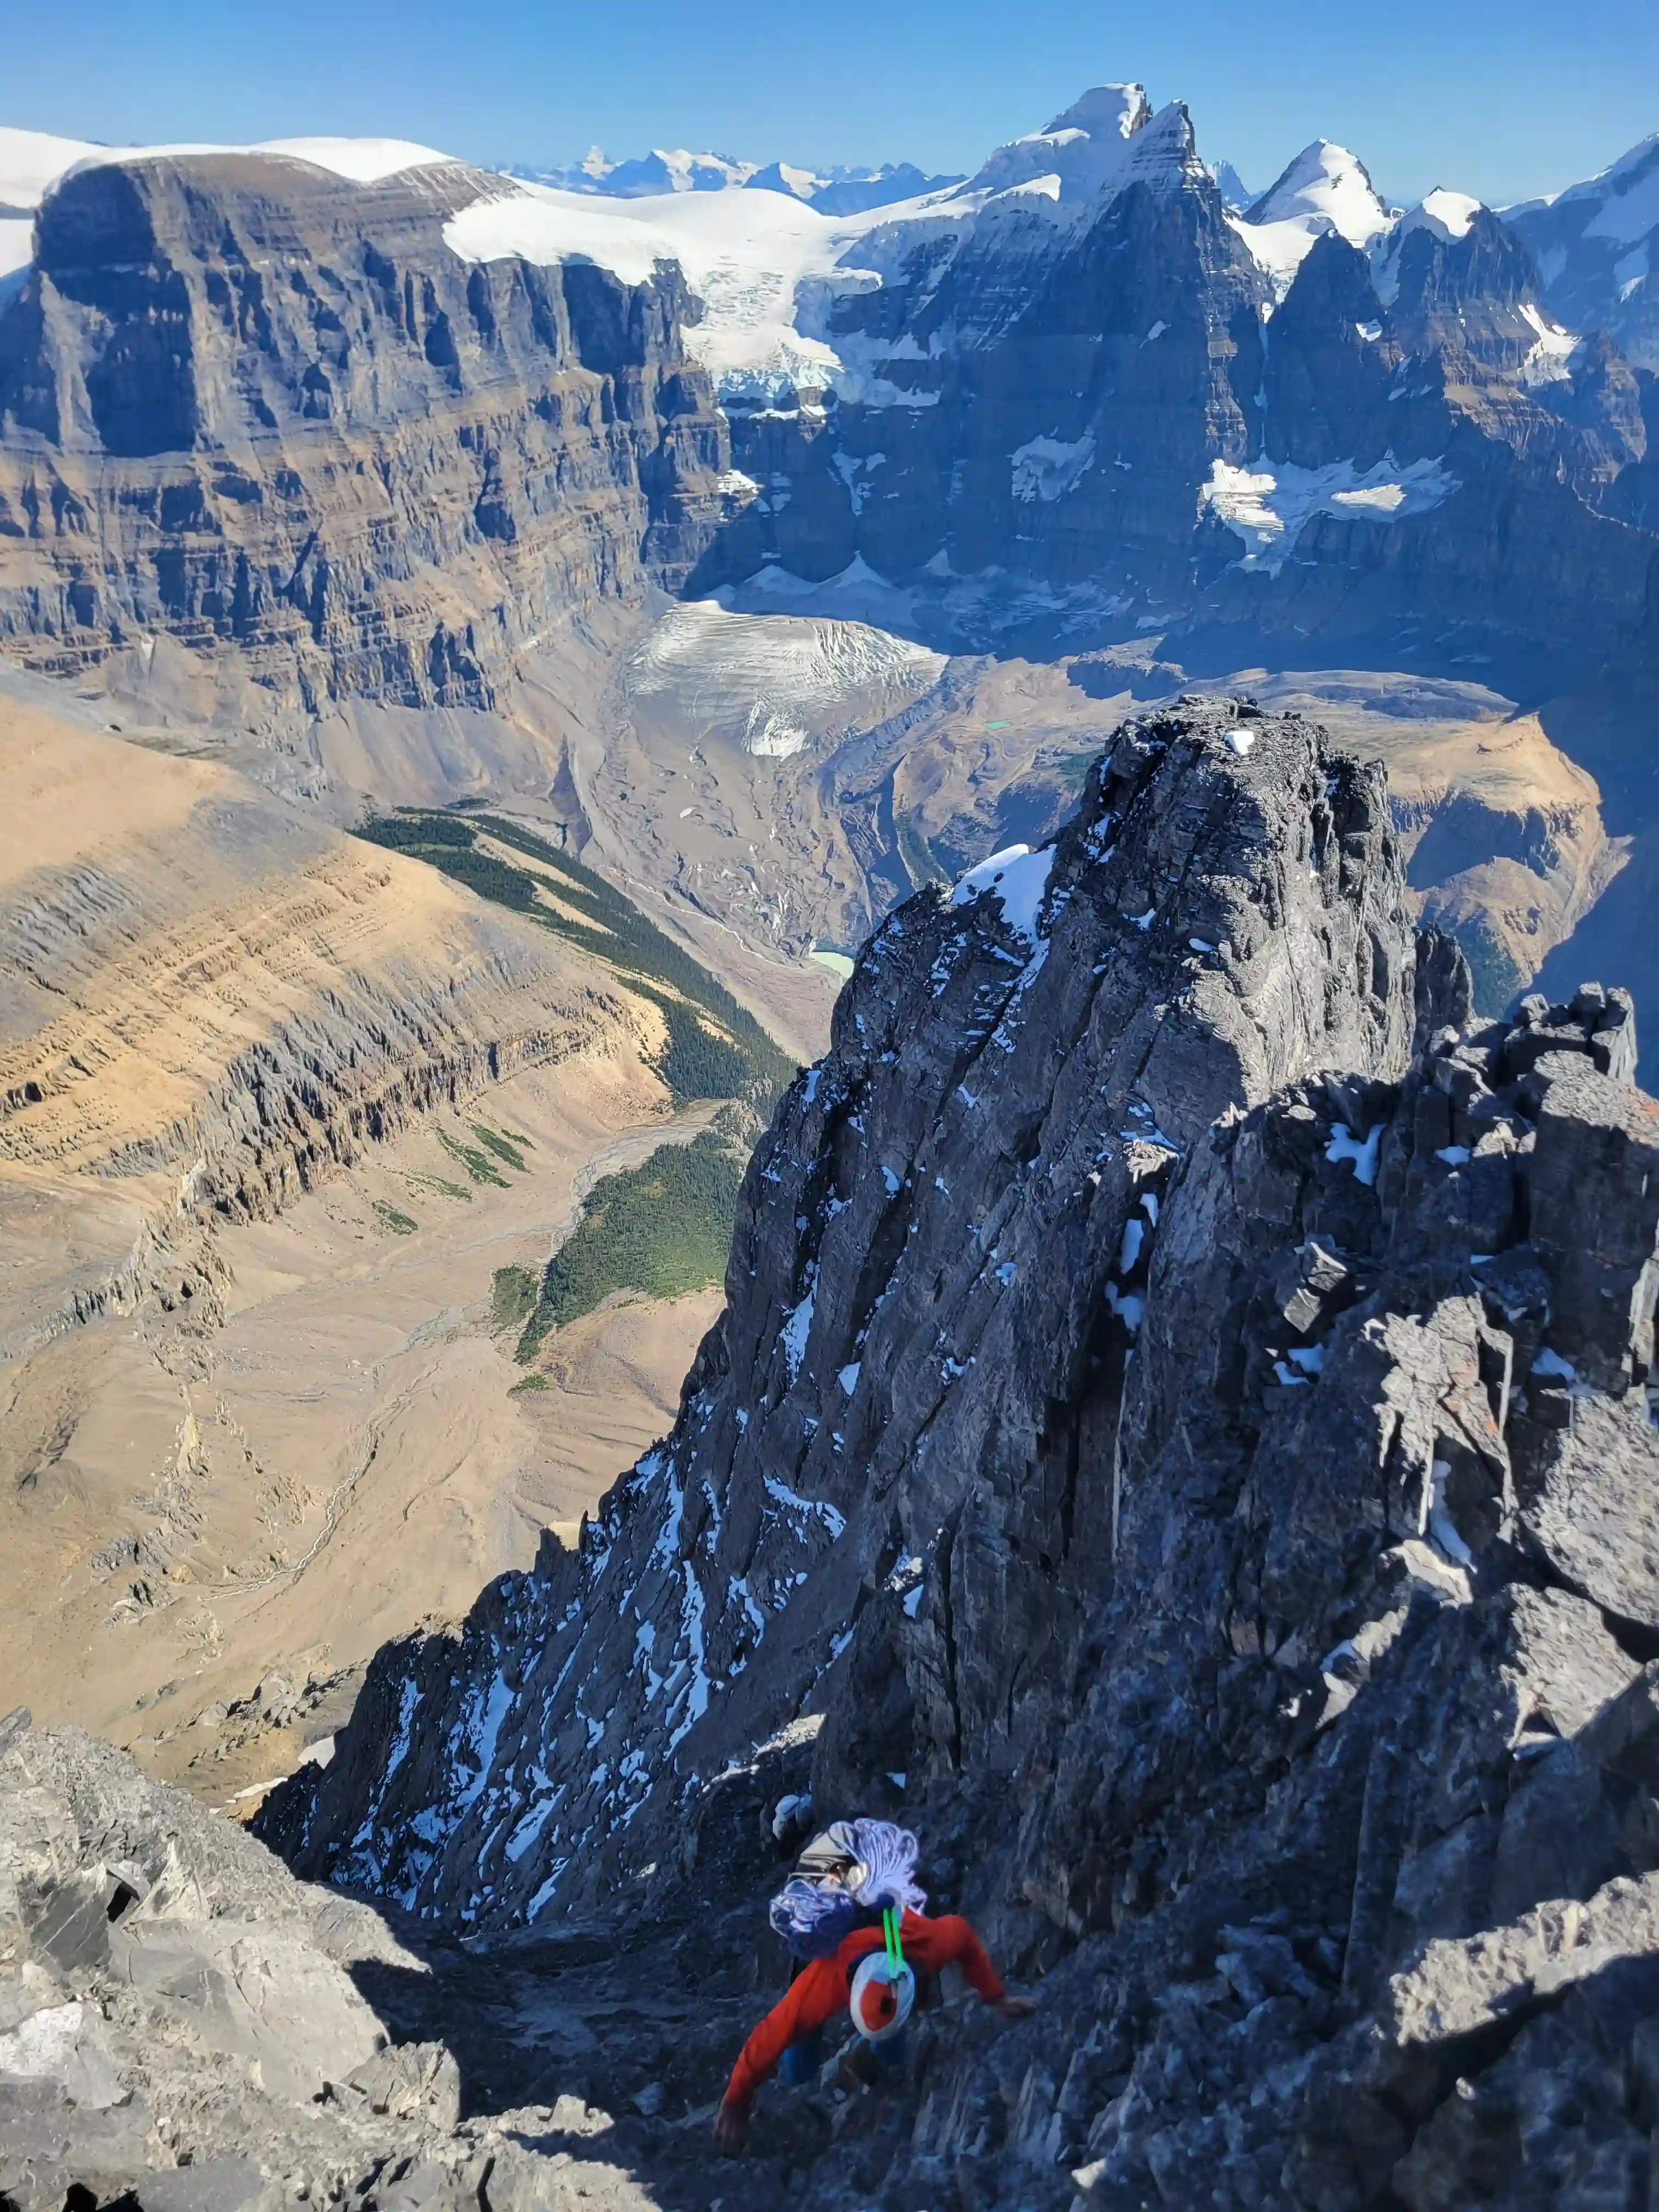
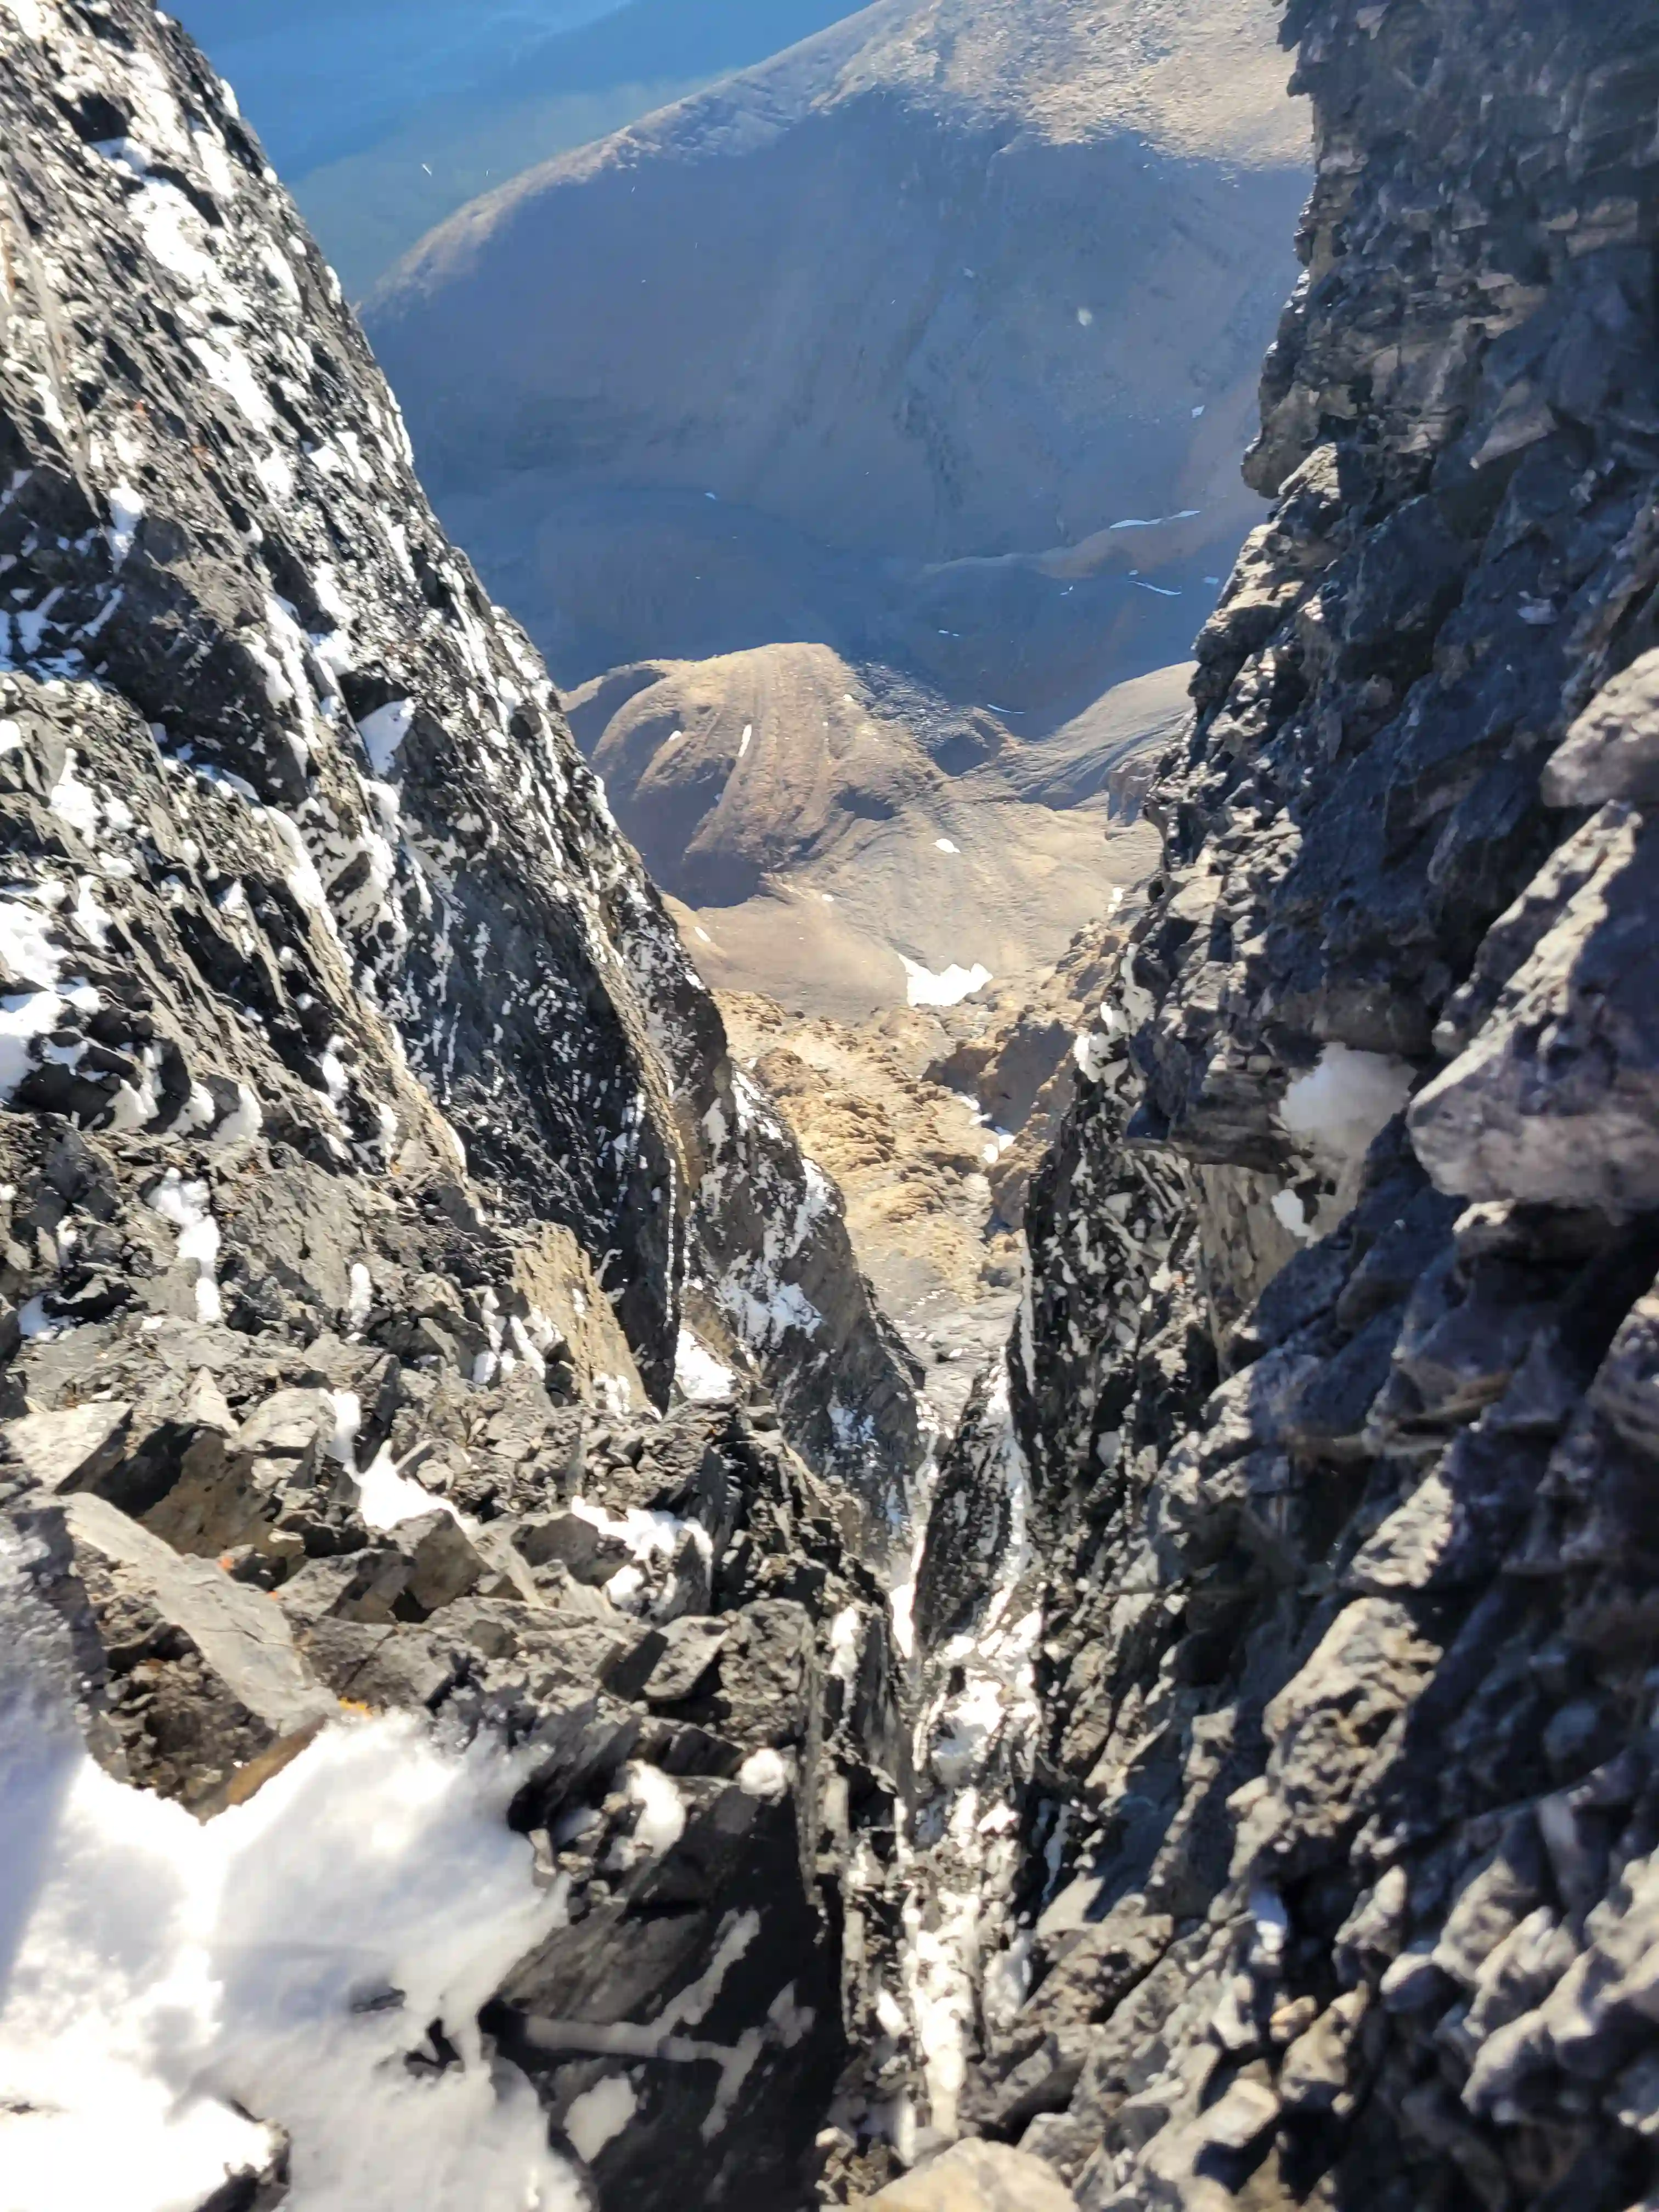
The subsequent section is where the terrain gets a lot more slabby and is definitely the crux portion of the ascent, route finding skills through this portion are critical. Tat is relatively frequent here as most parties portect a good chunk of the upper mountain and this also means you can take breaks on the way up by clipping to the anchors along the way, a welcome reprieve from the sustained technical climbing. At first this main gully feature is kept at right and the climbing is done on the left of it taking the easiest option available. This continues for a few pitches worth of climbing until the cross-over / shooting gallery pitch is reached where the route crosses to the climber's right side of the gully and heads into the stiffest climbing on route. This section is aptly named as anything that falls down the east face in the general area above gets funnelled into the gully so having your head on a swivel is critical here but that can be said about the upper half of this mountain in general. A short pitch of 5.6-5.7 gets through the crux following the cross-over pitch, and a few more exposed pitches at easing grades follow until the route tops out on the ridge.
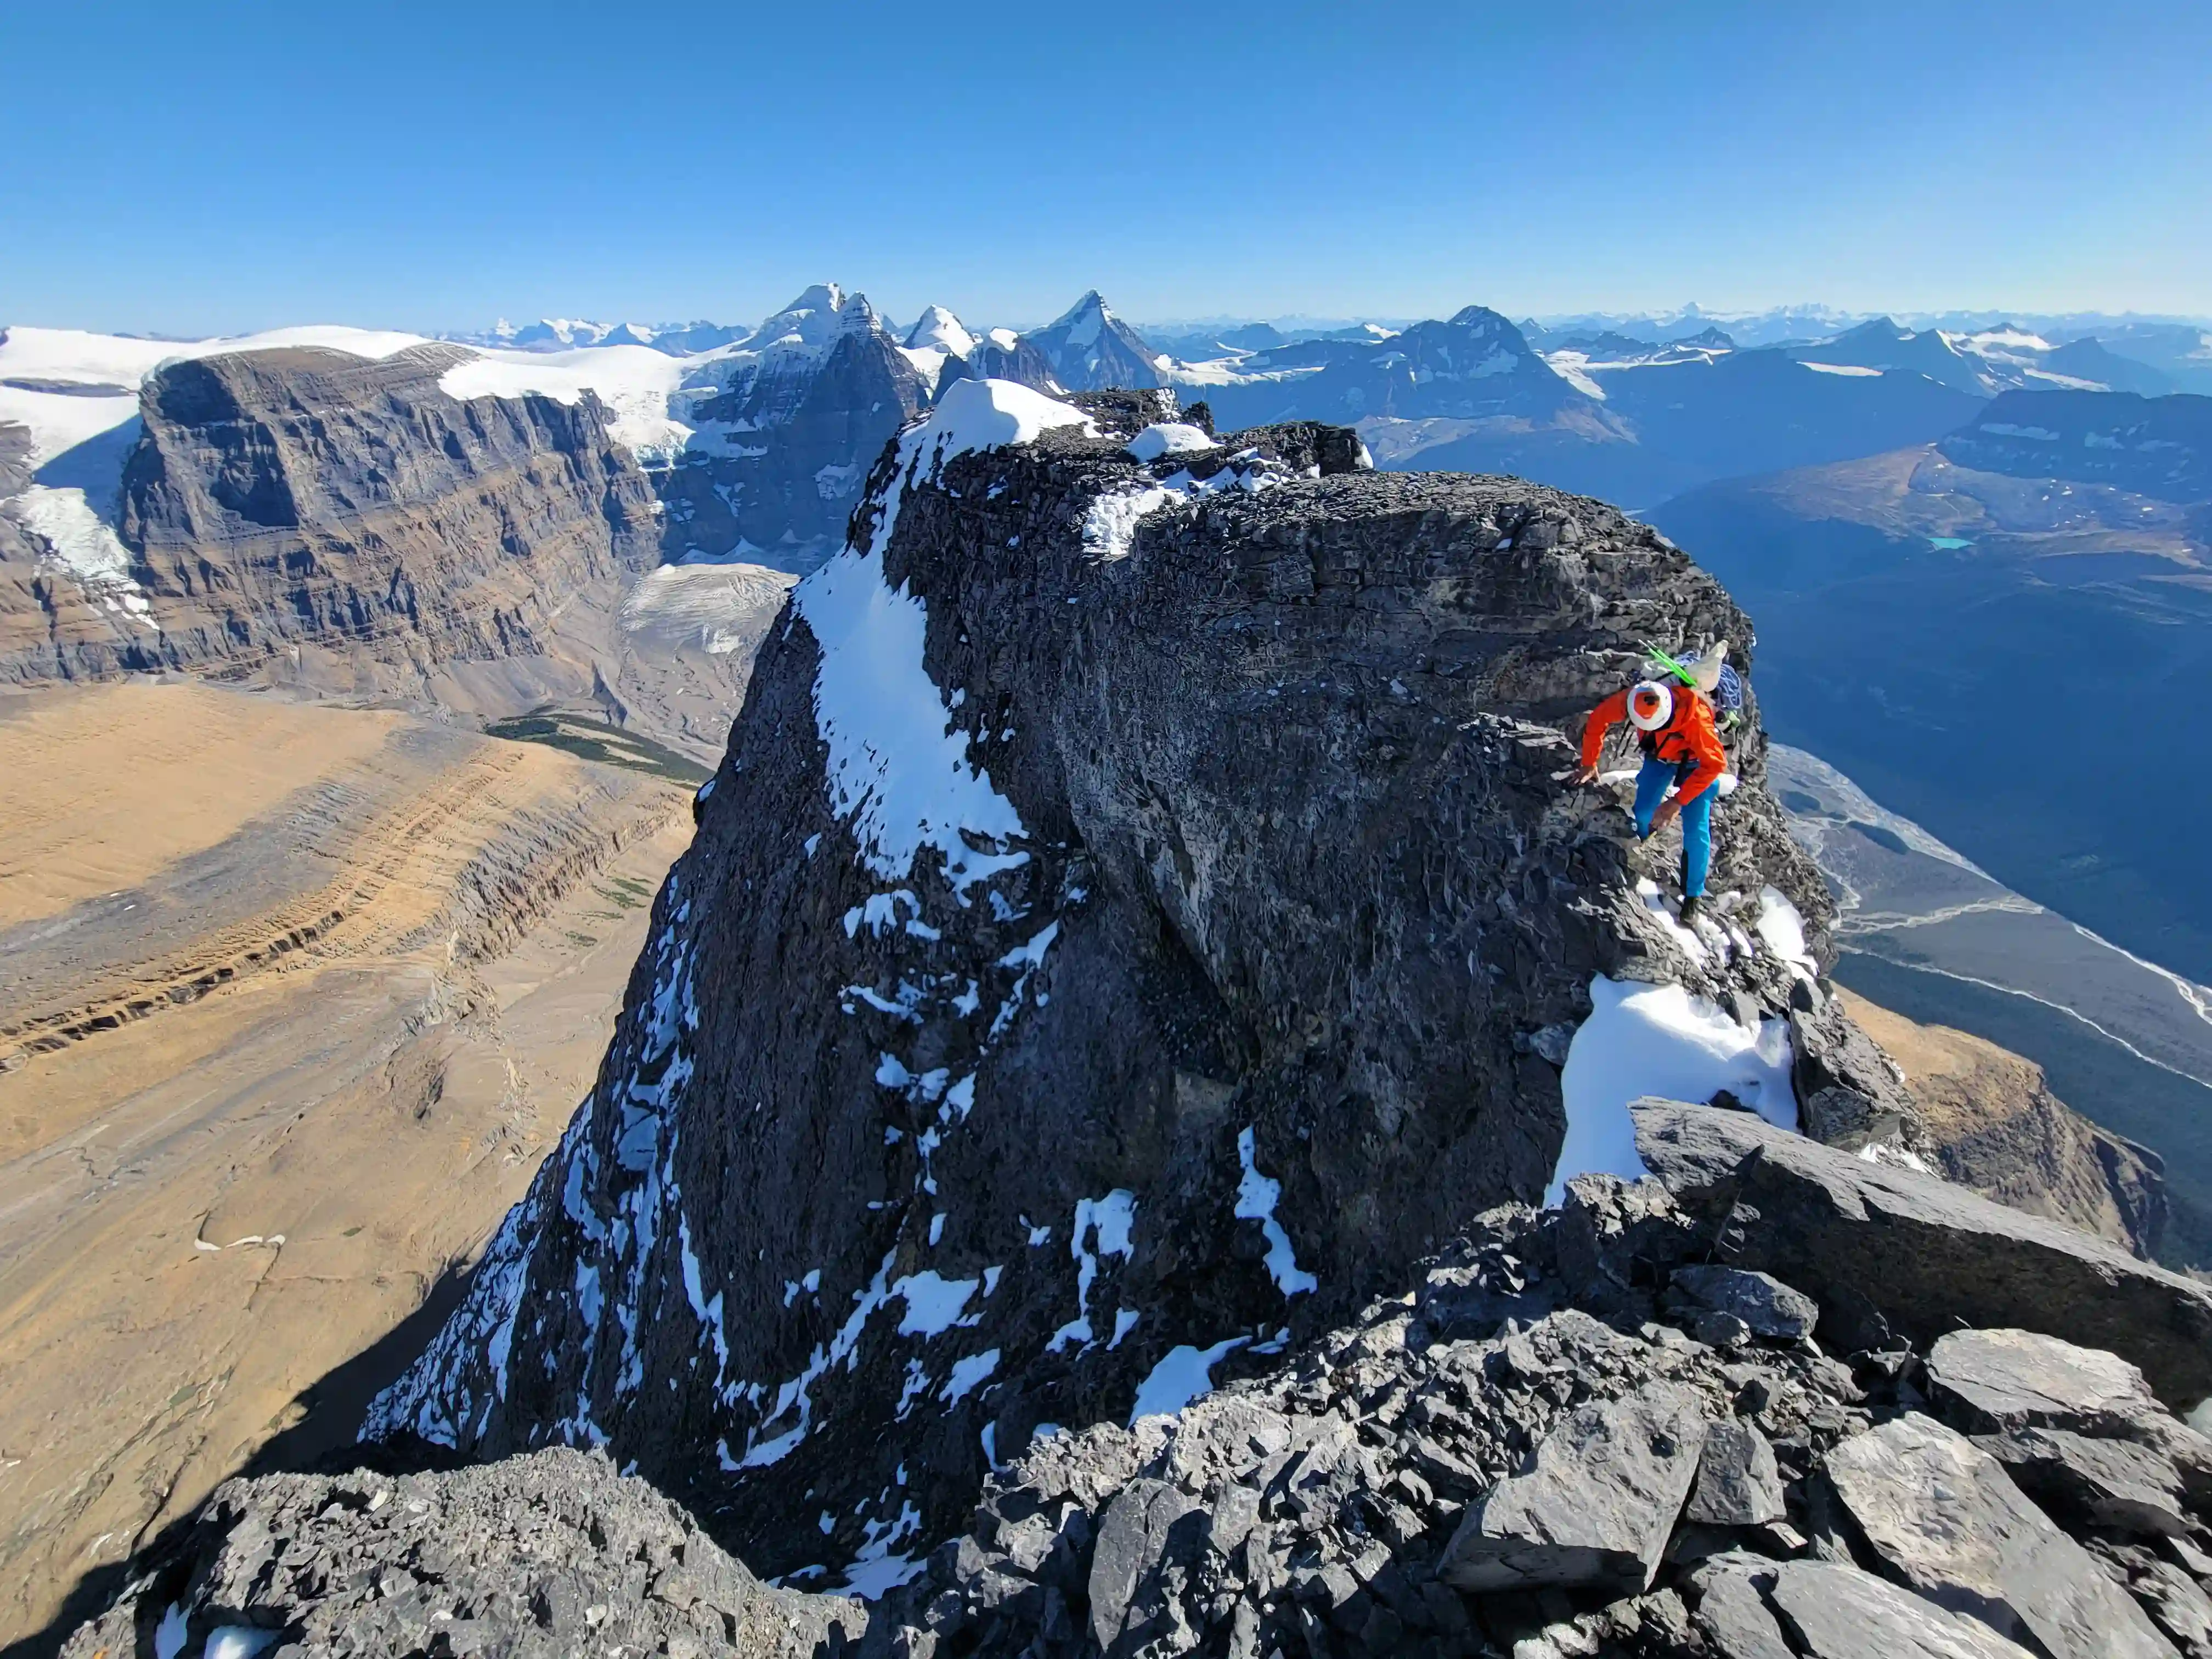
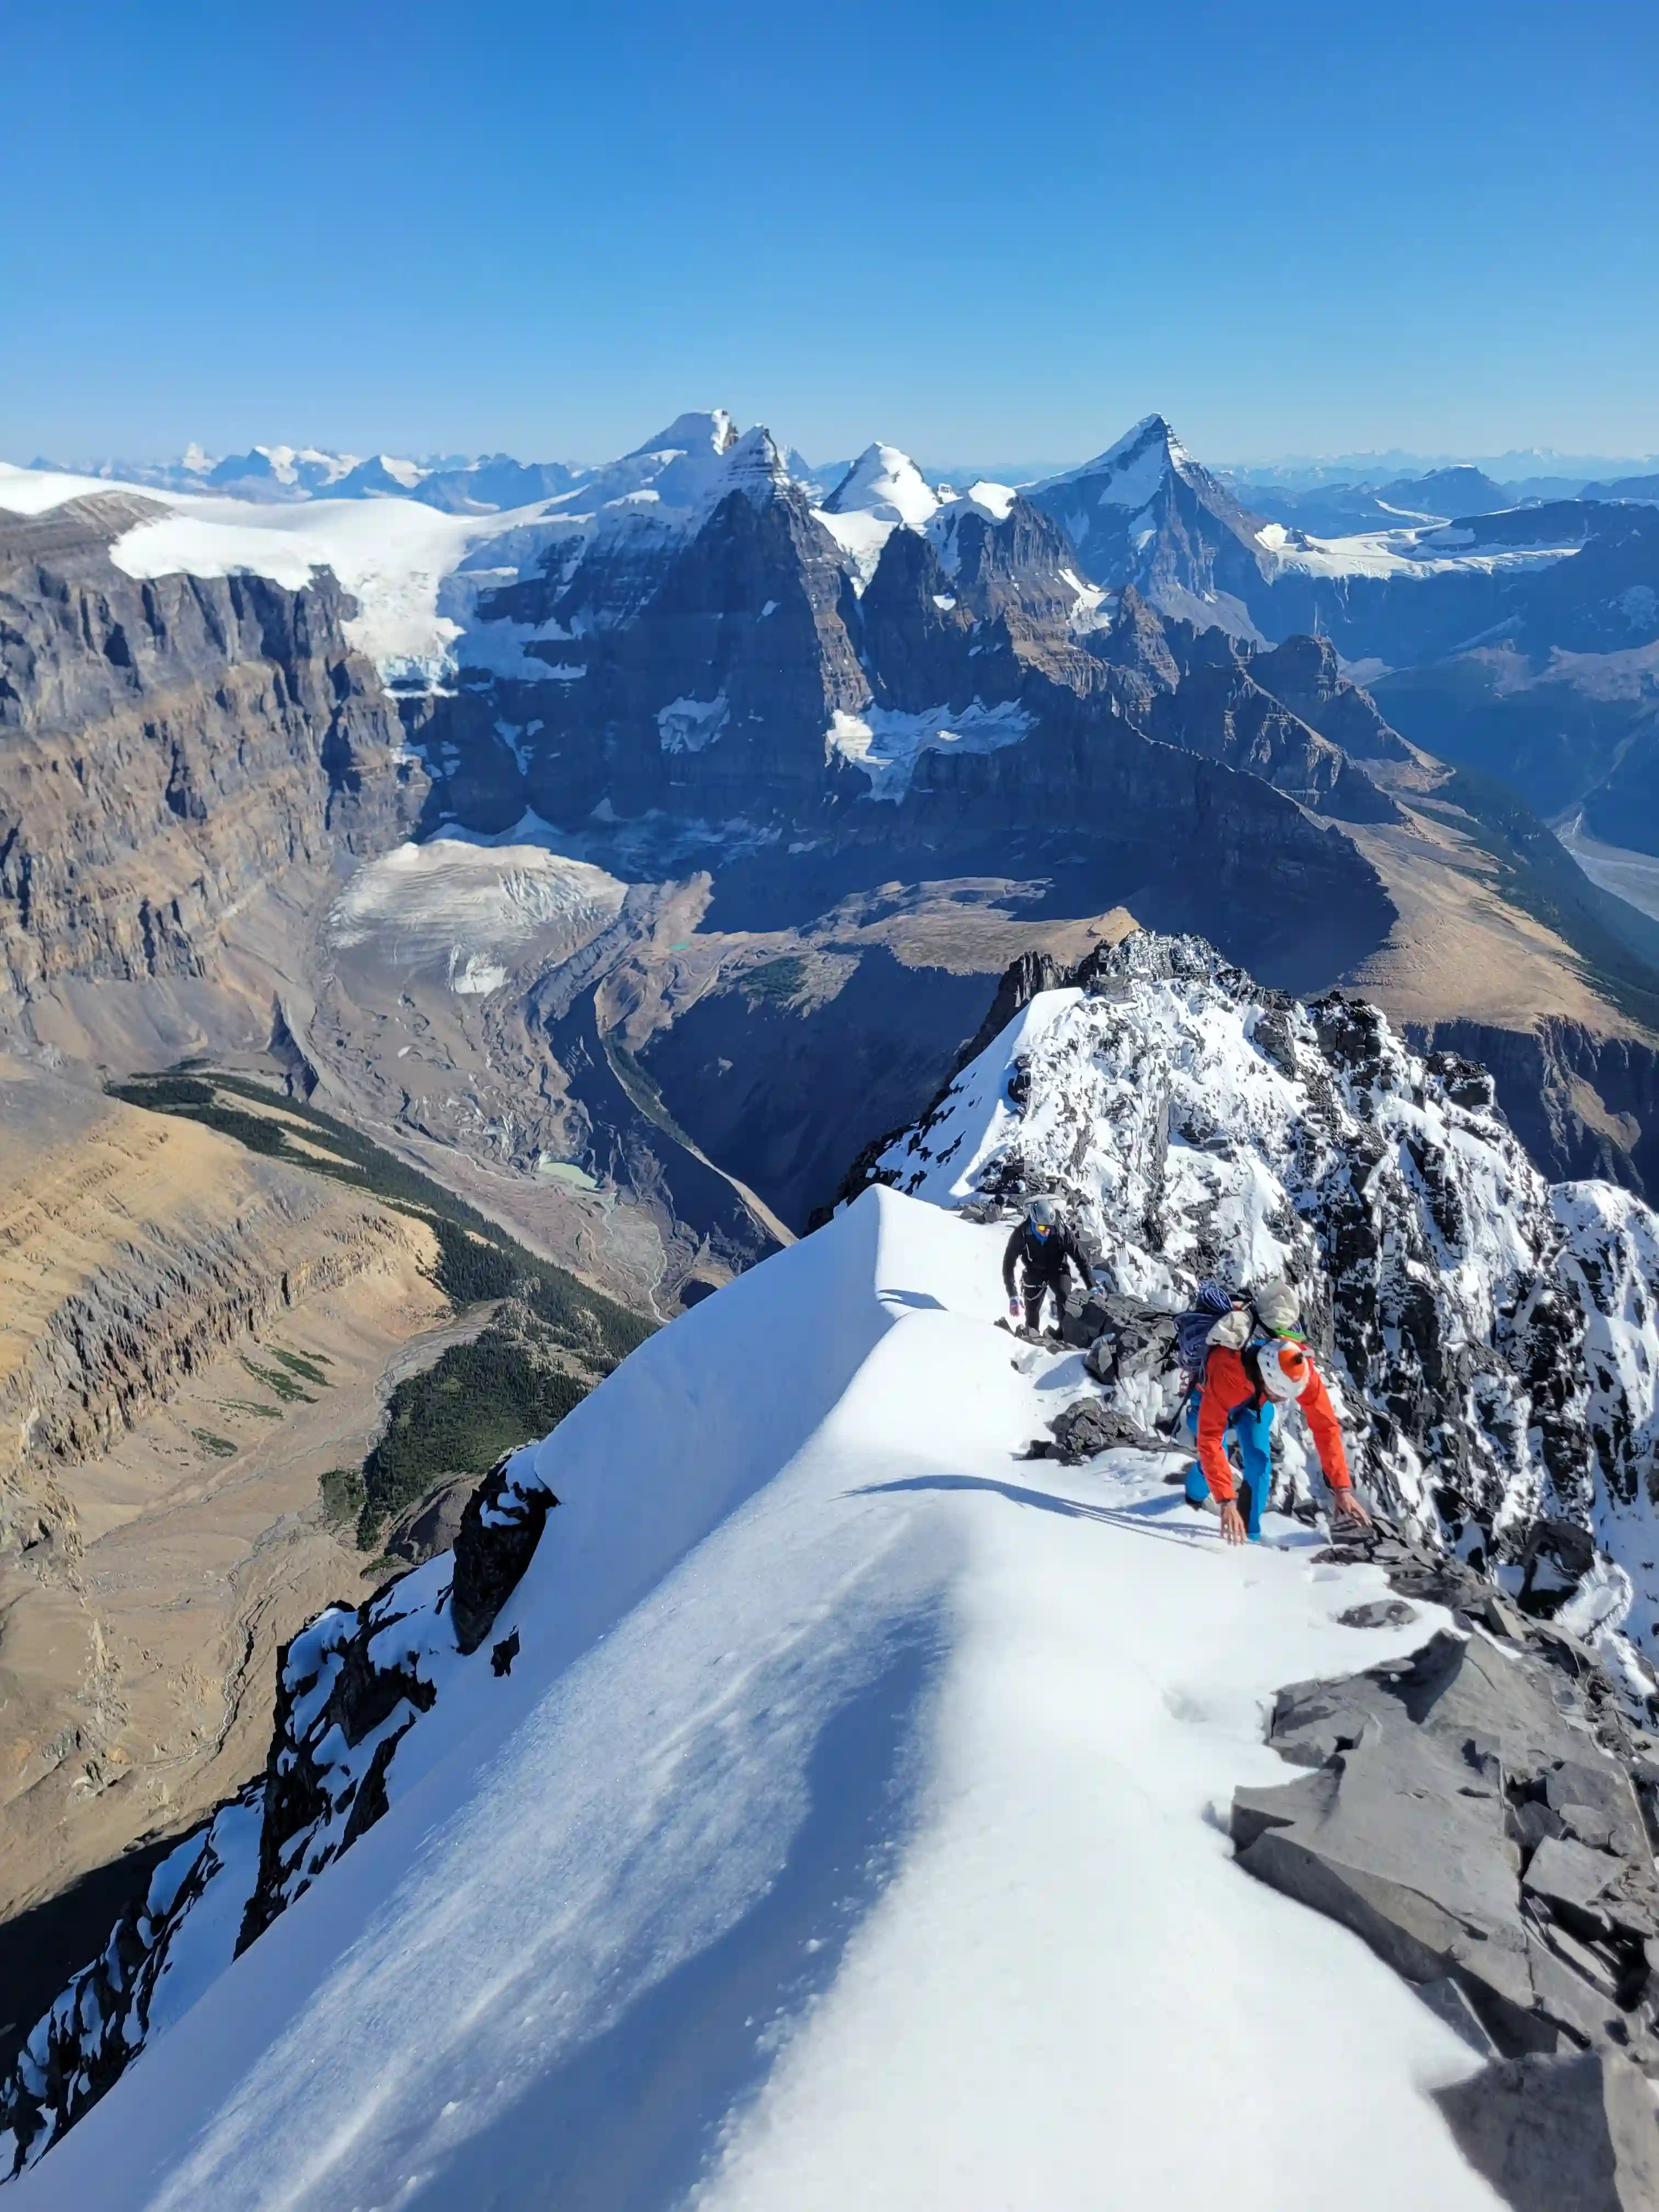
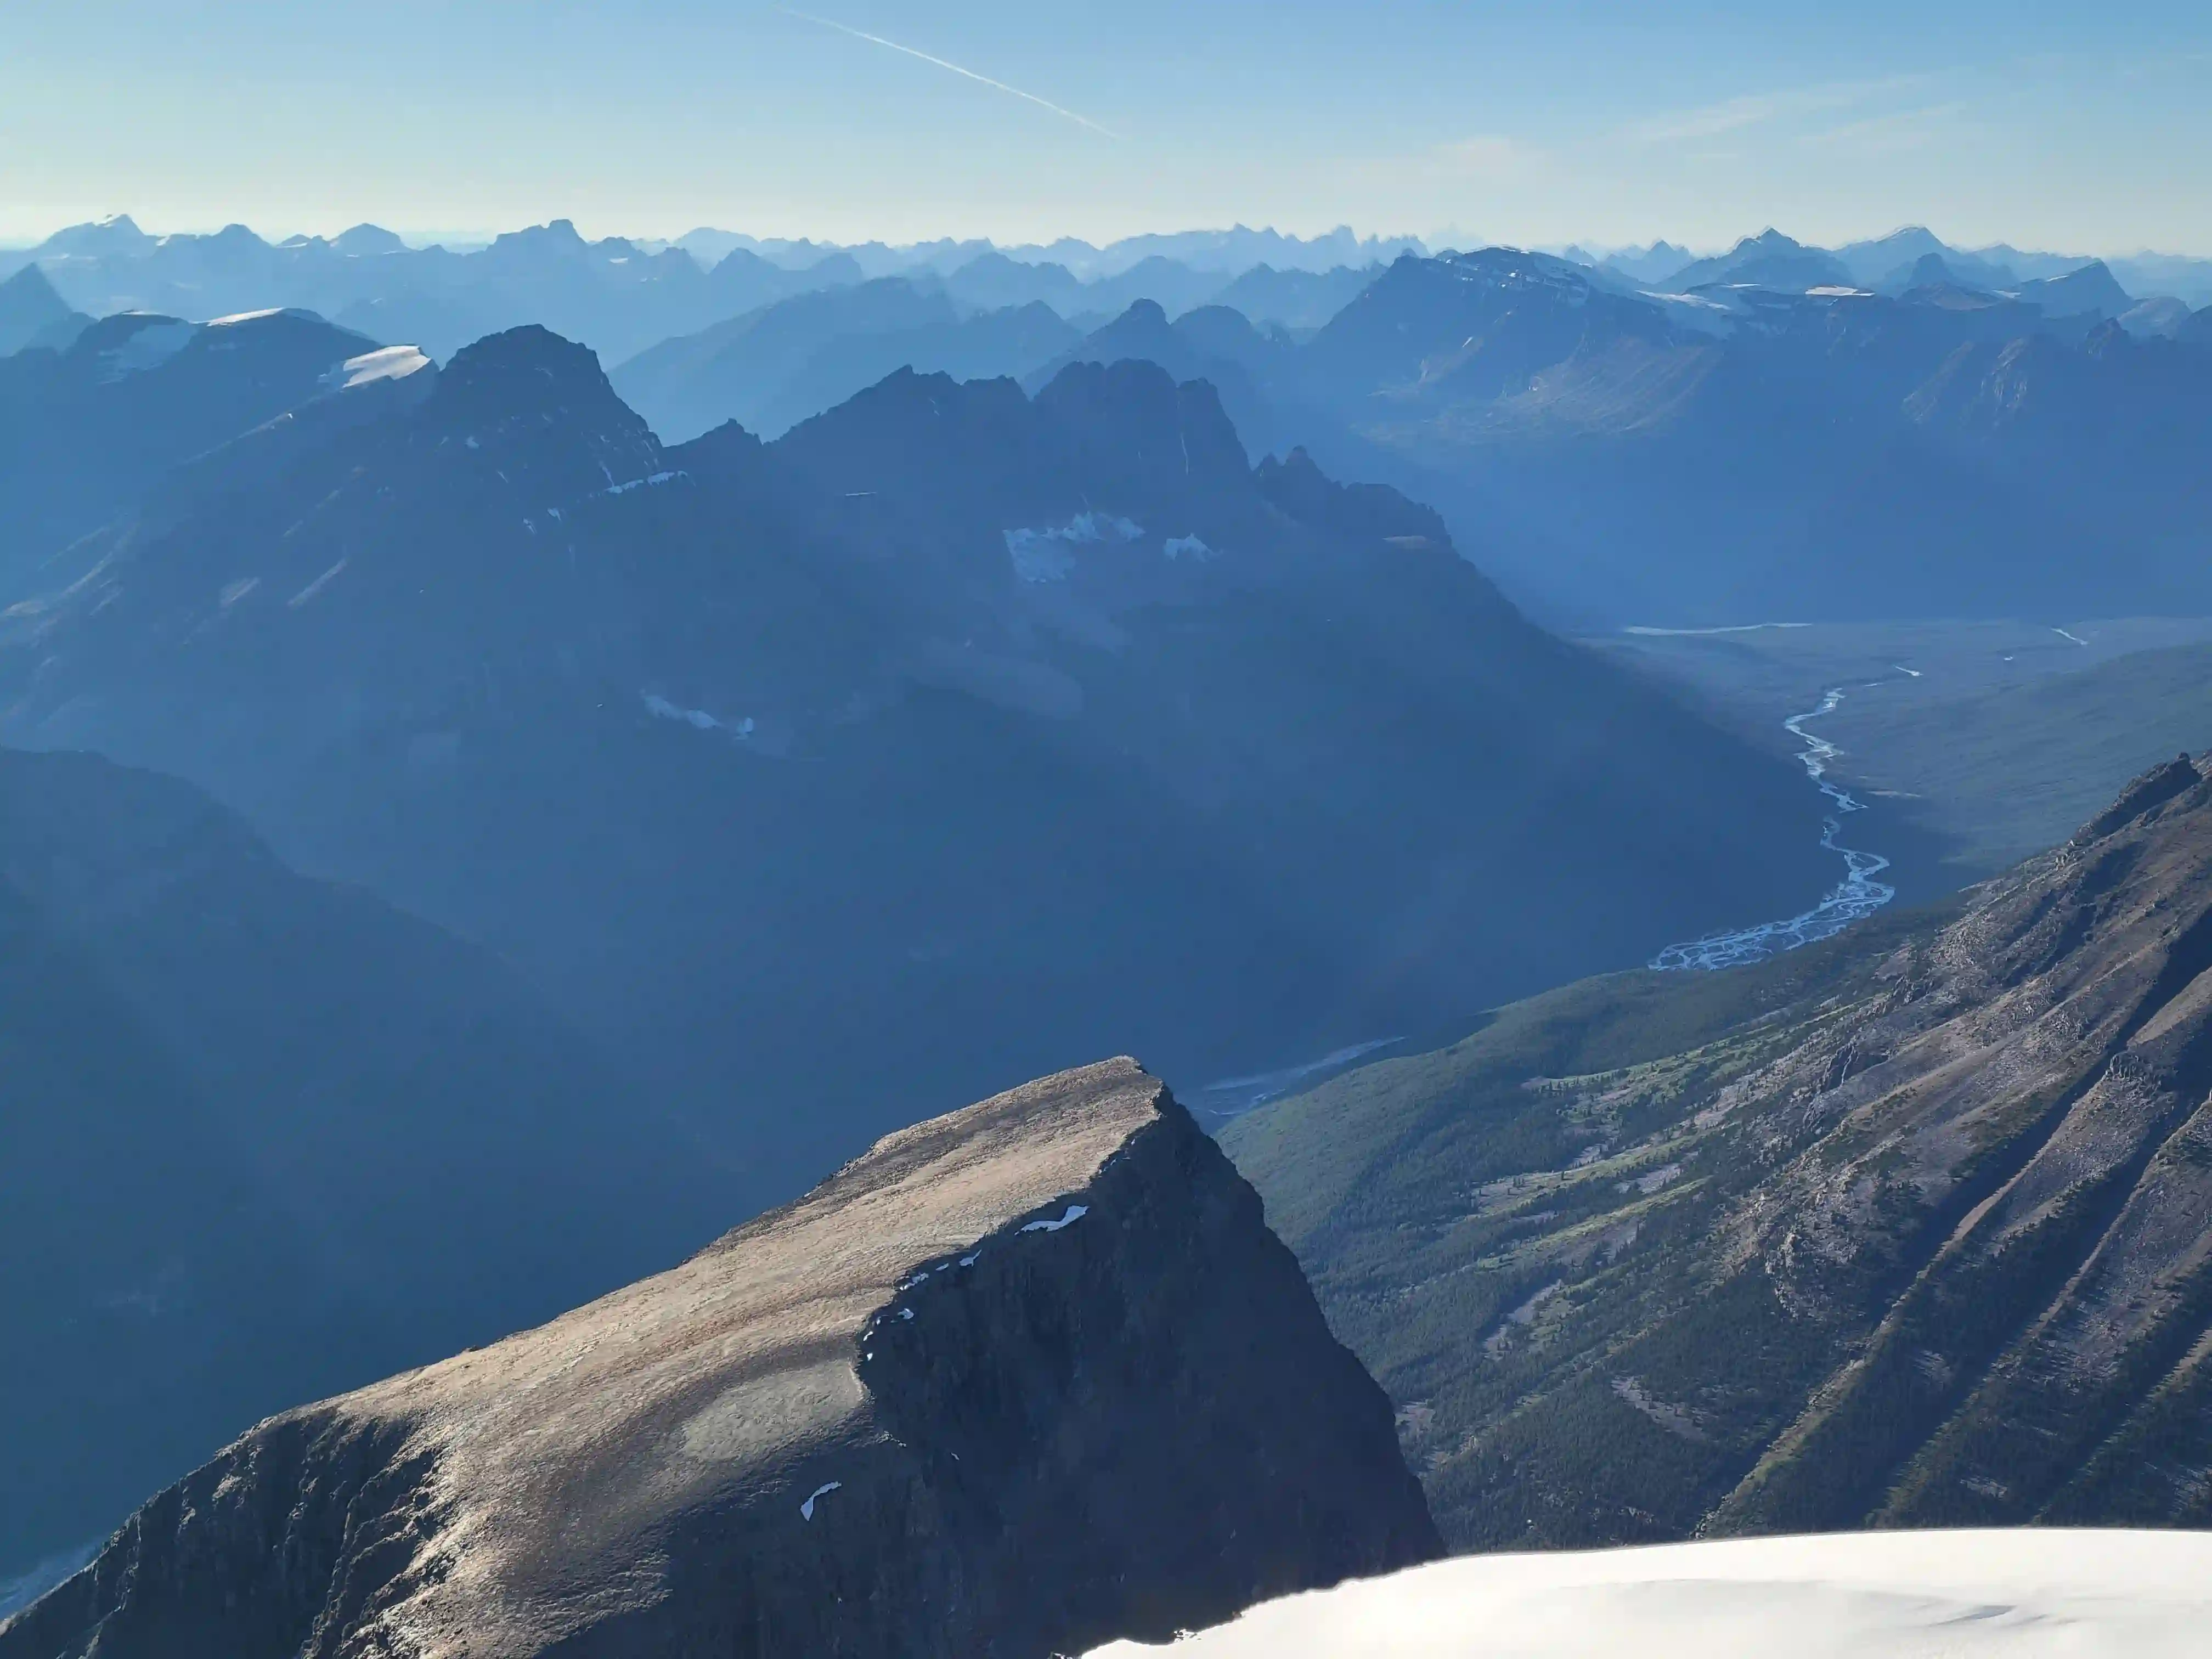
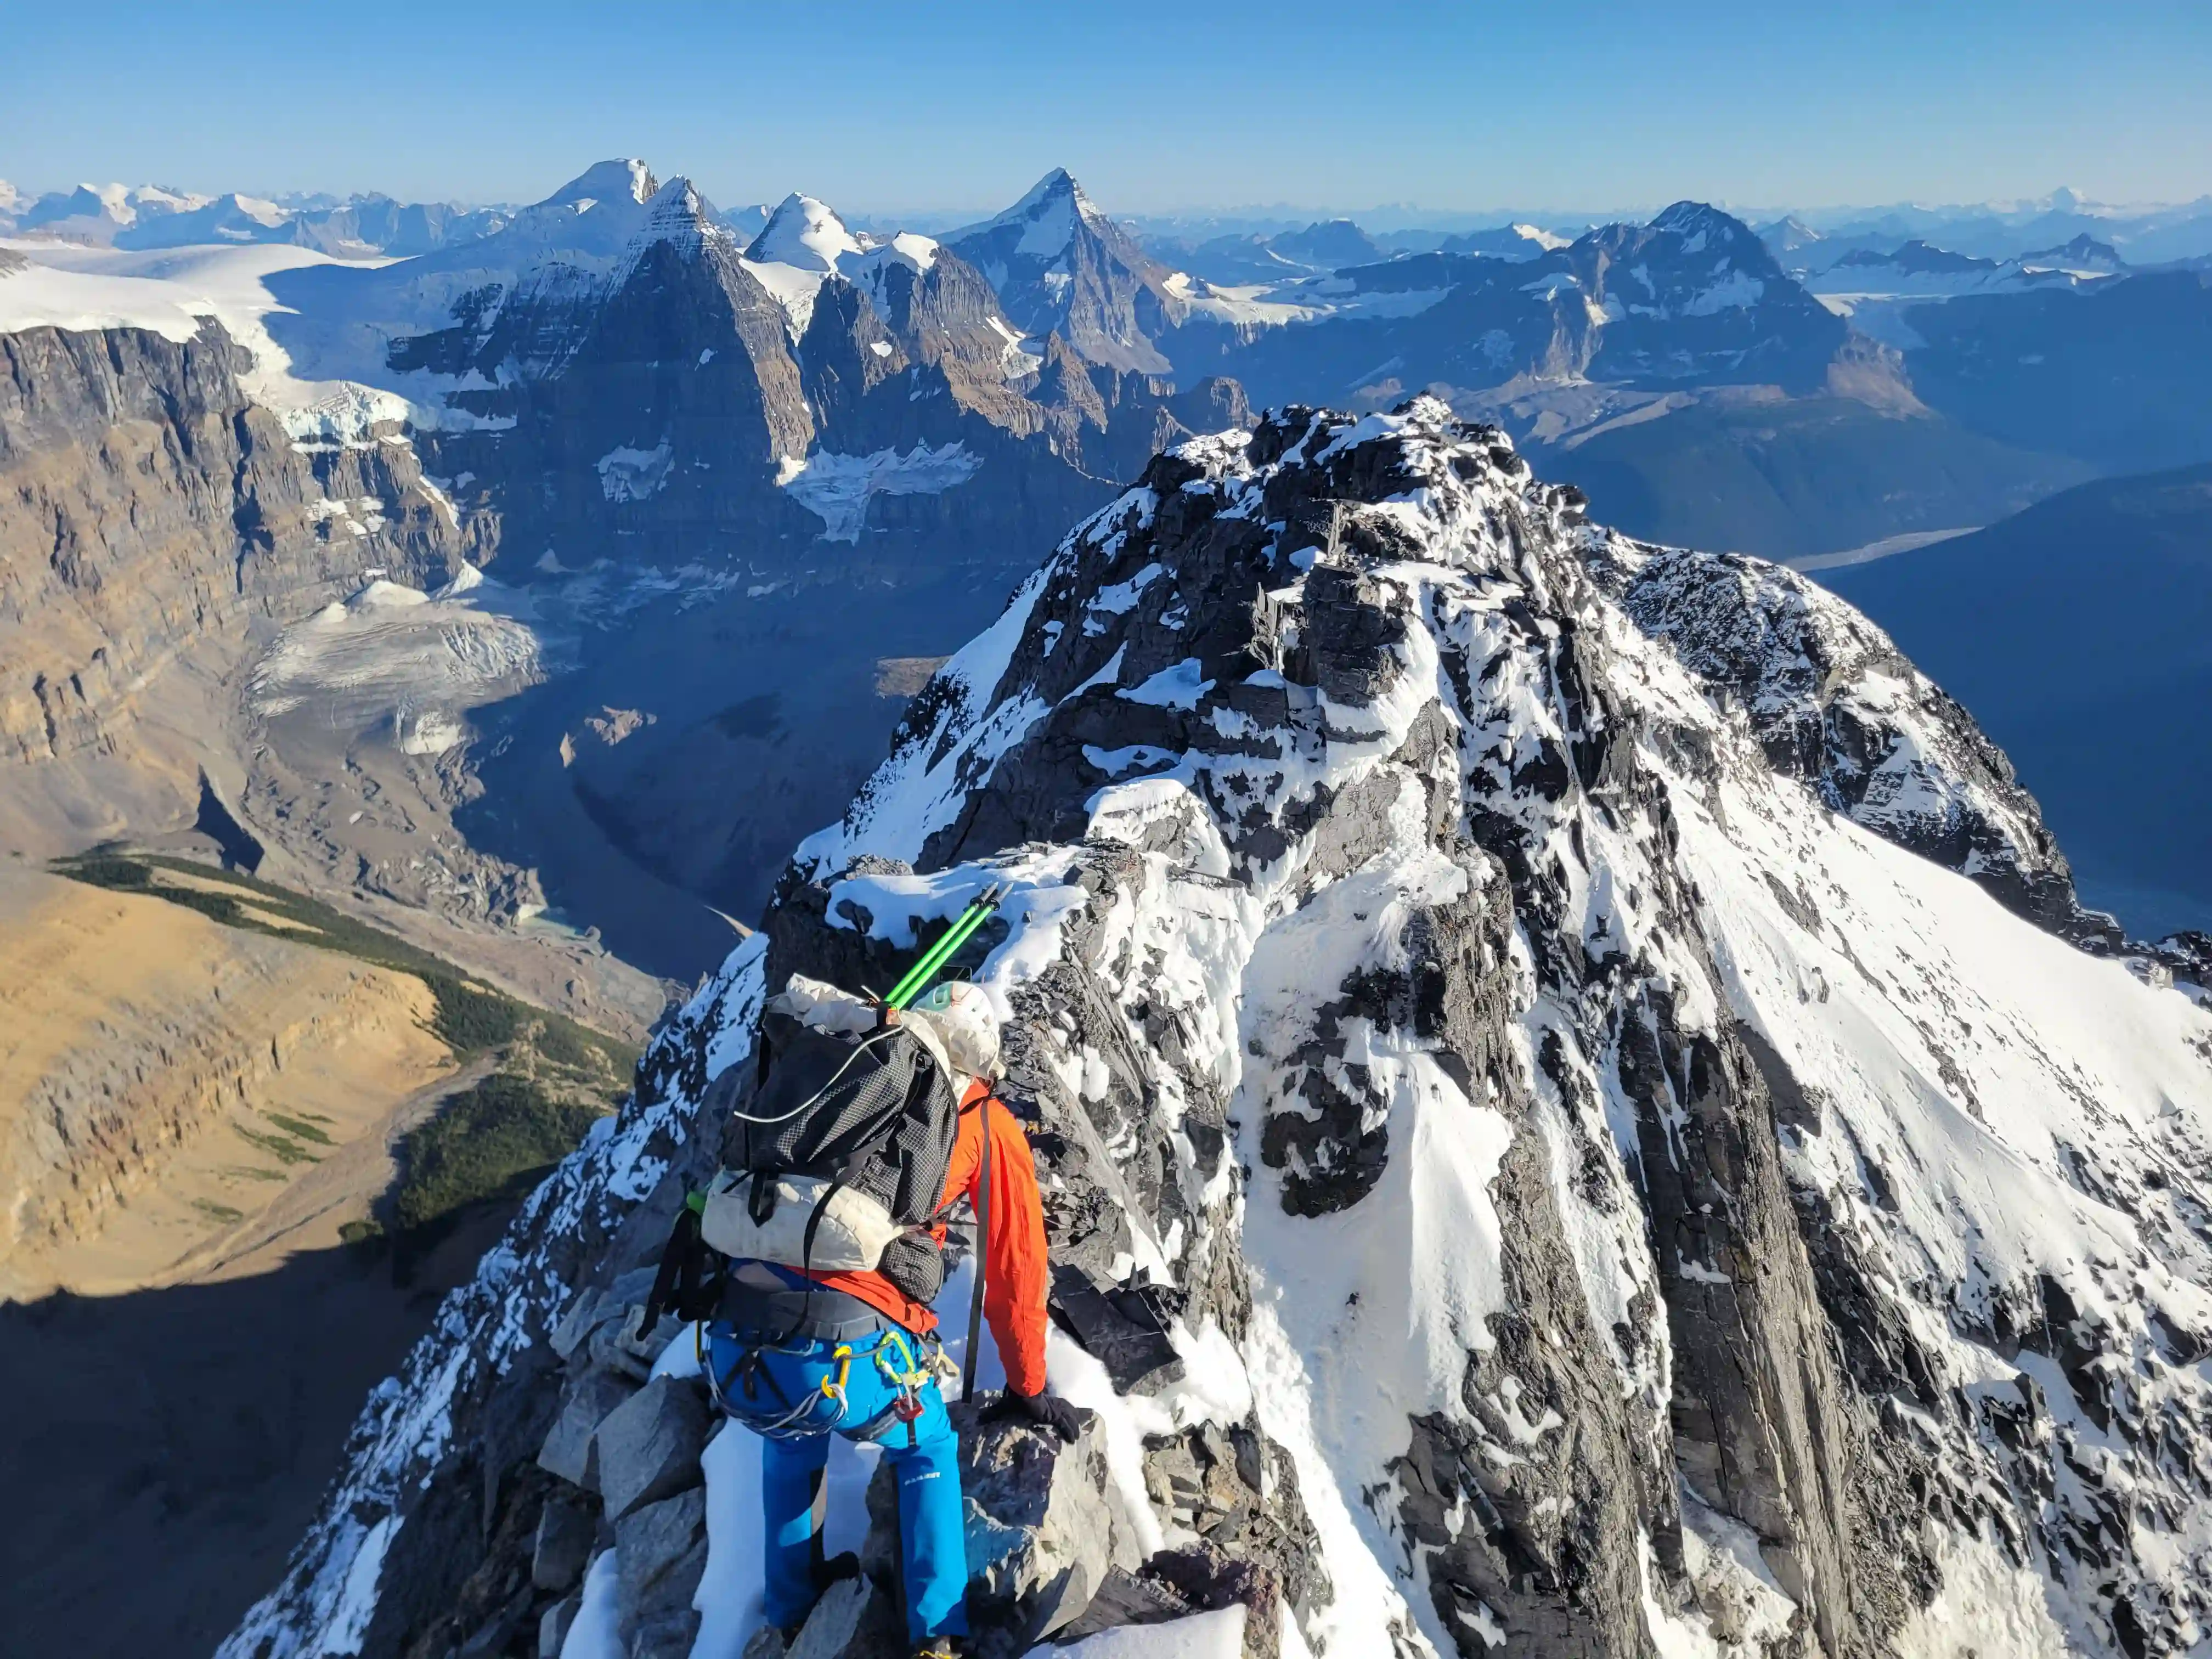
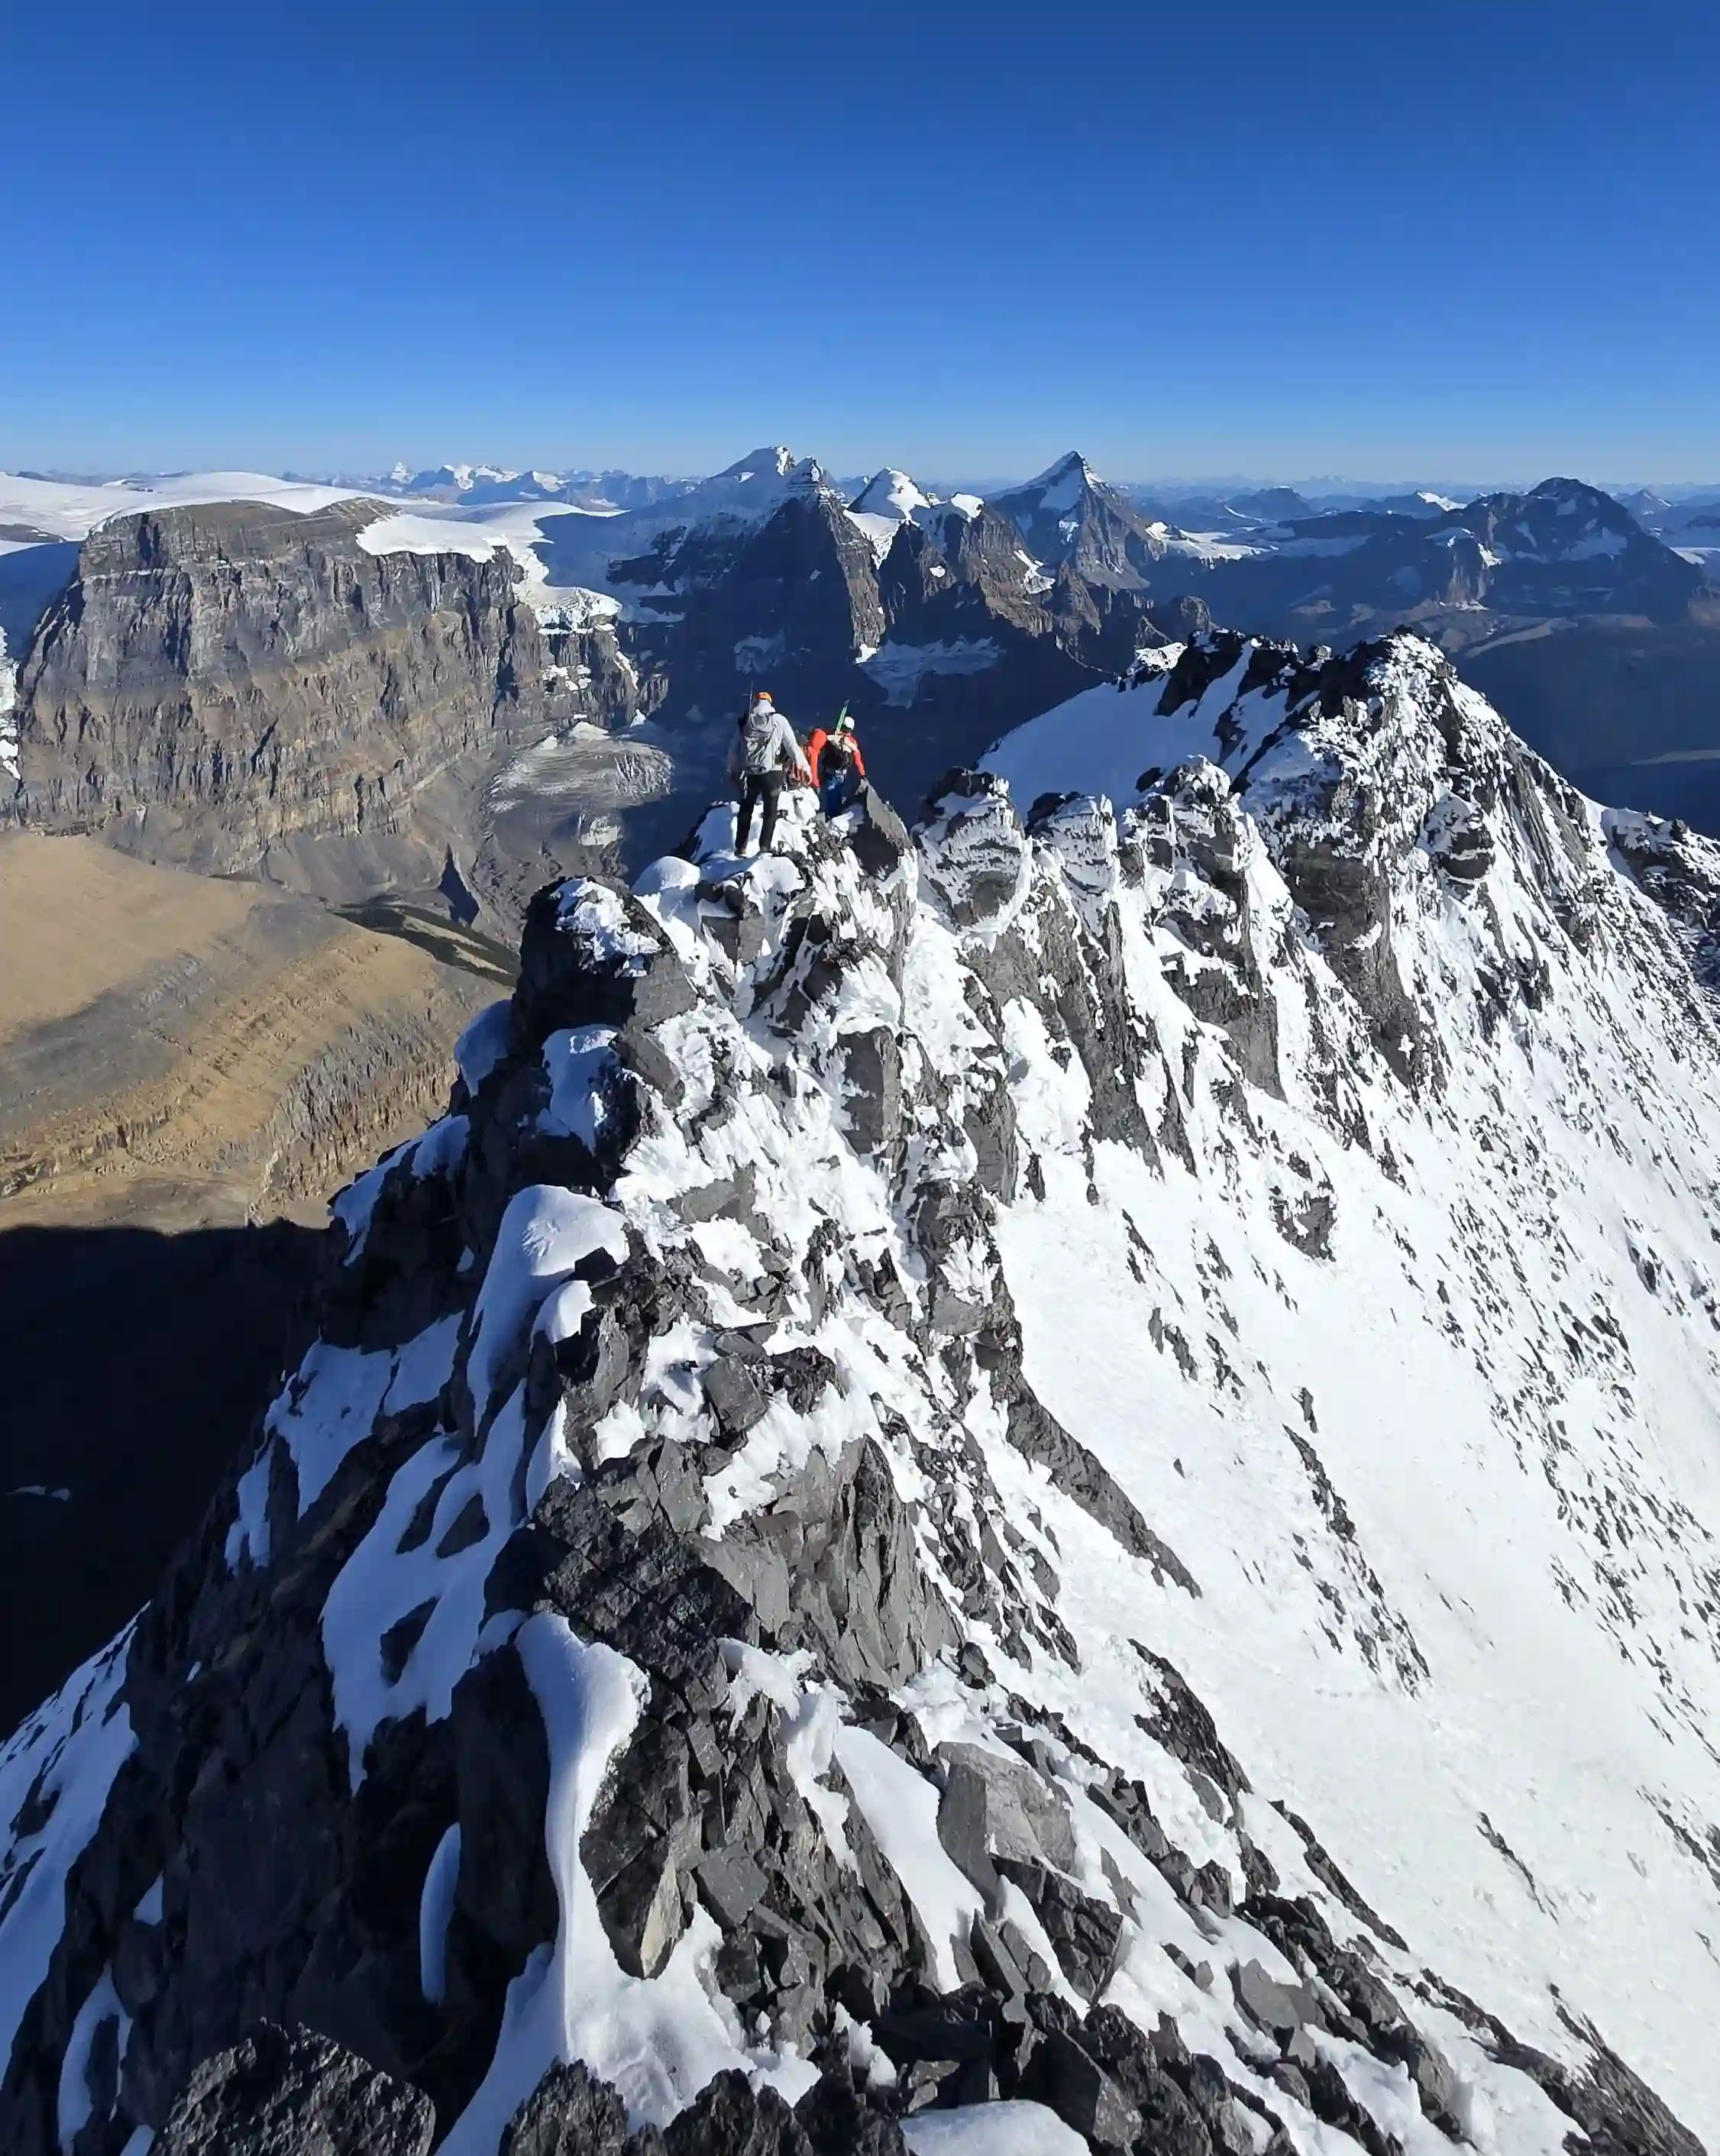
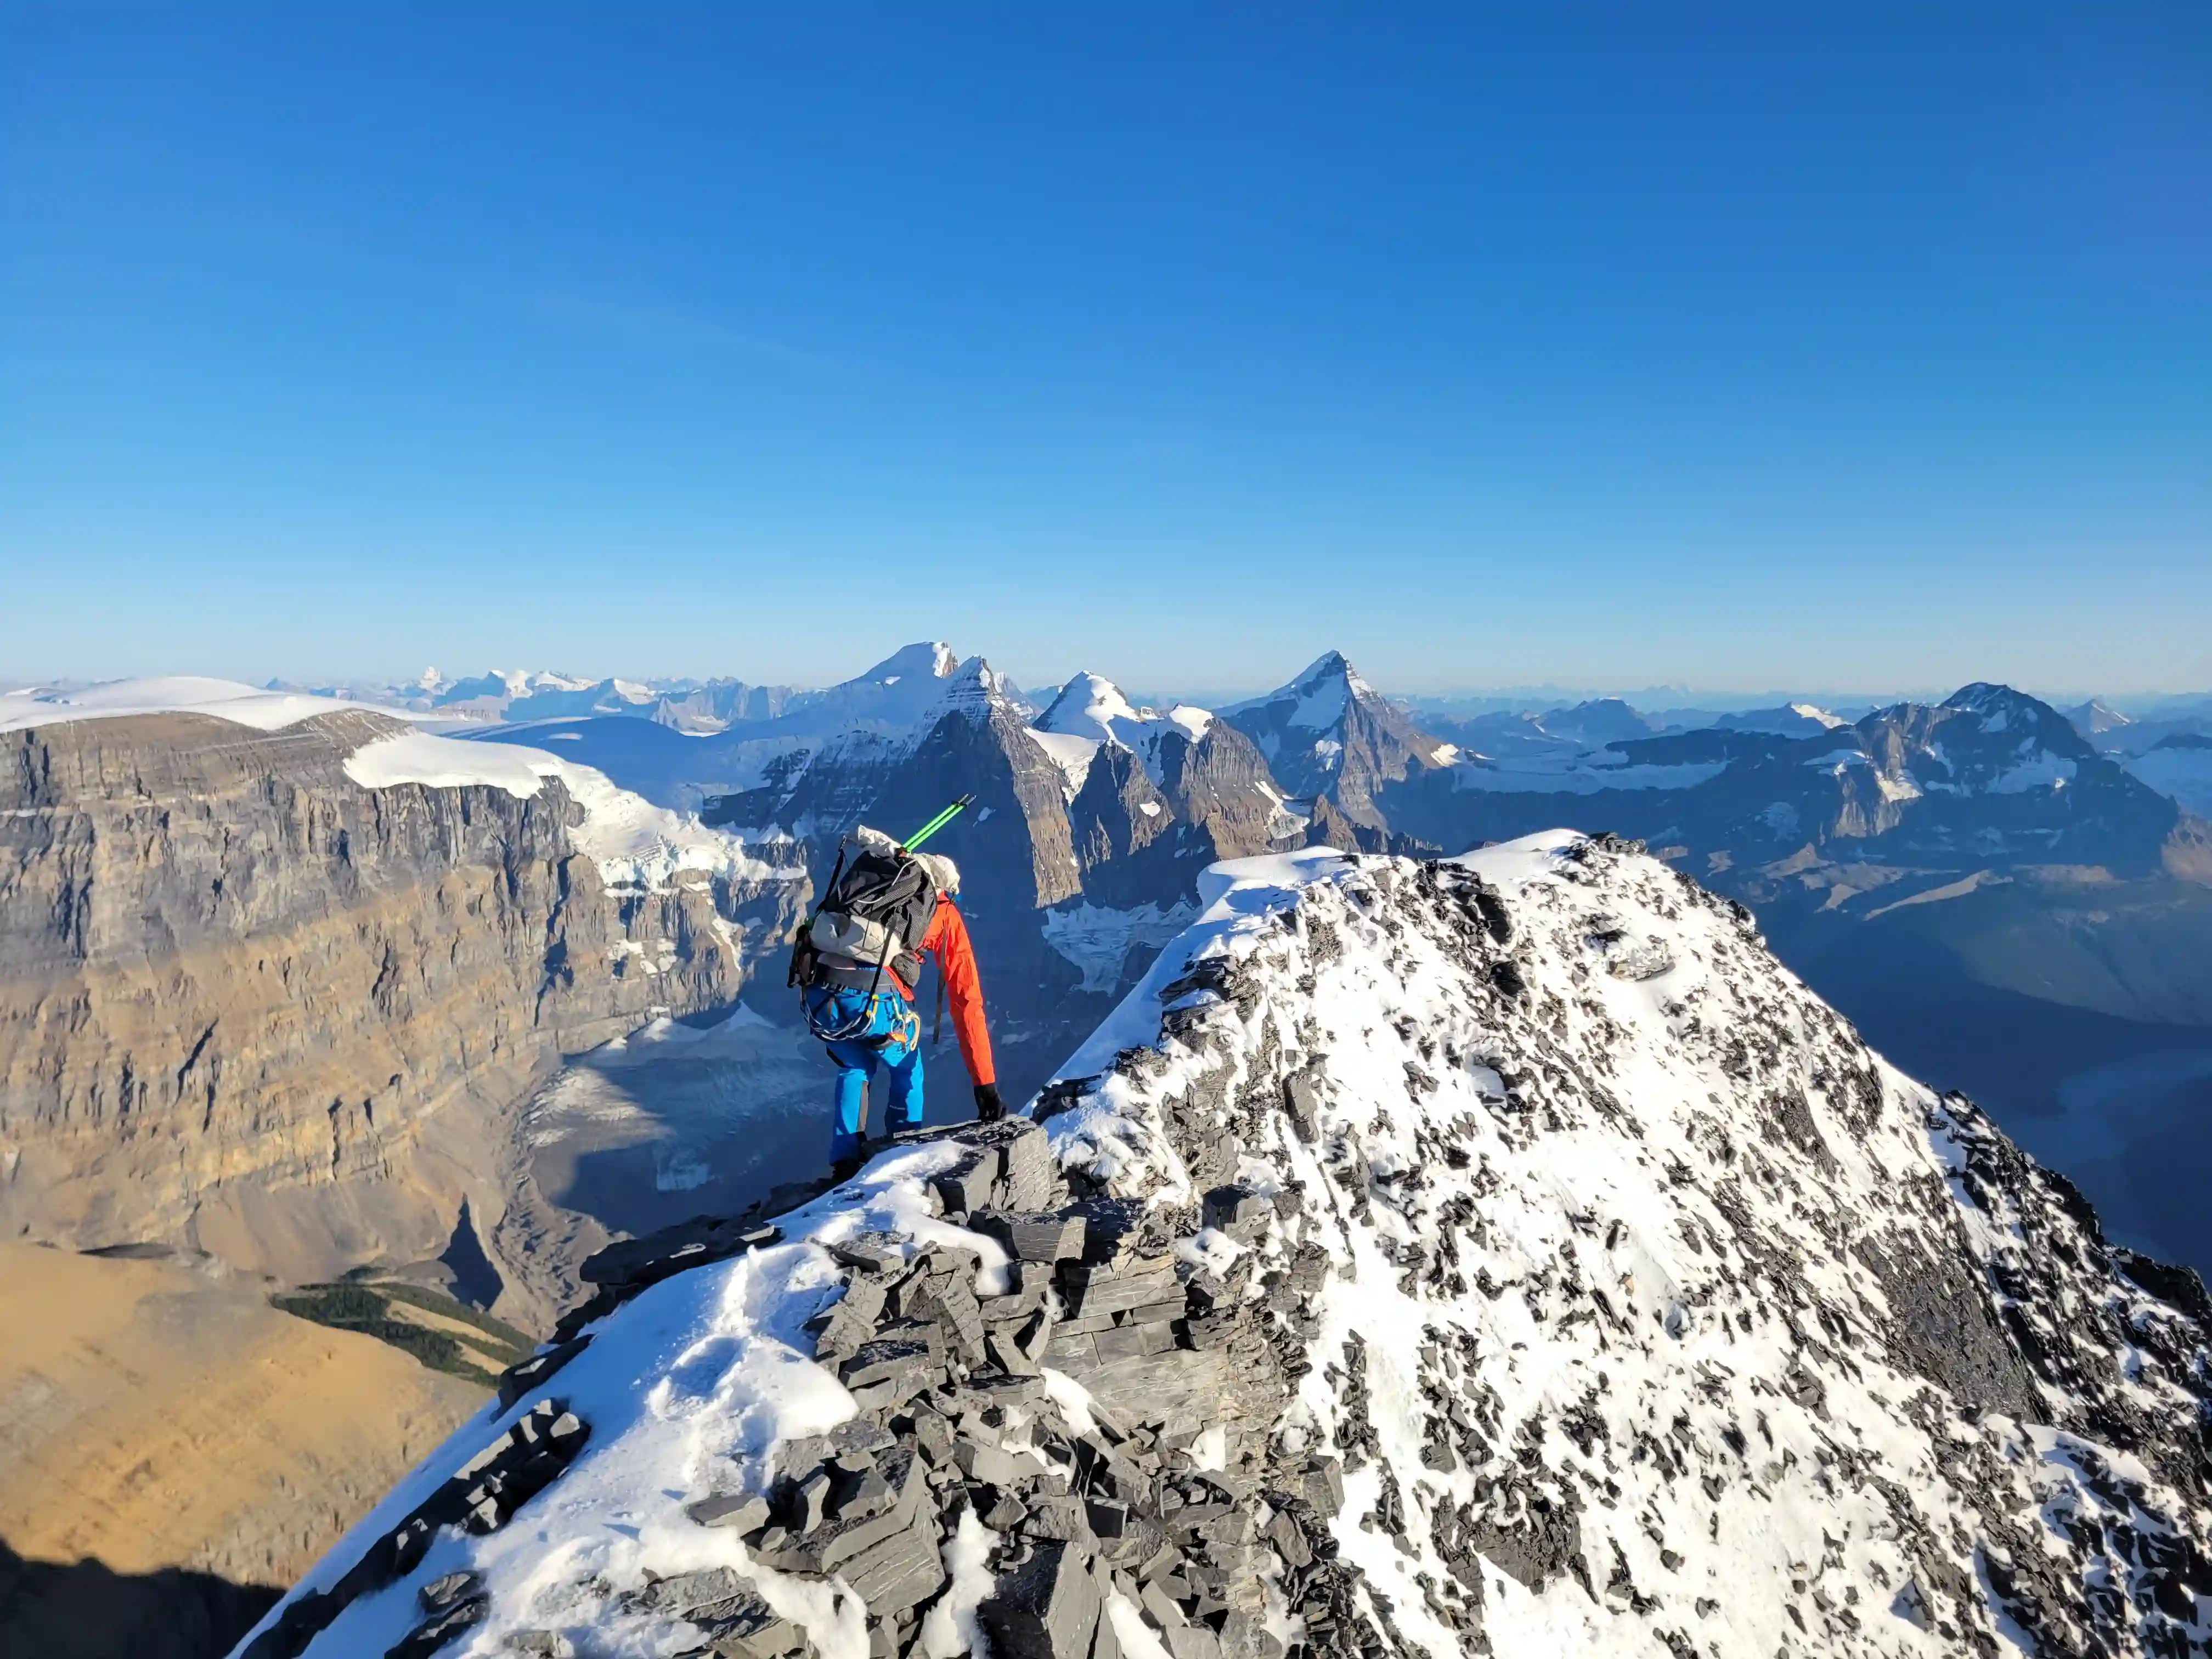
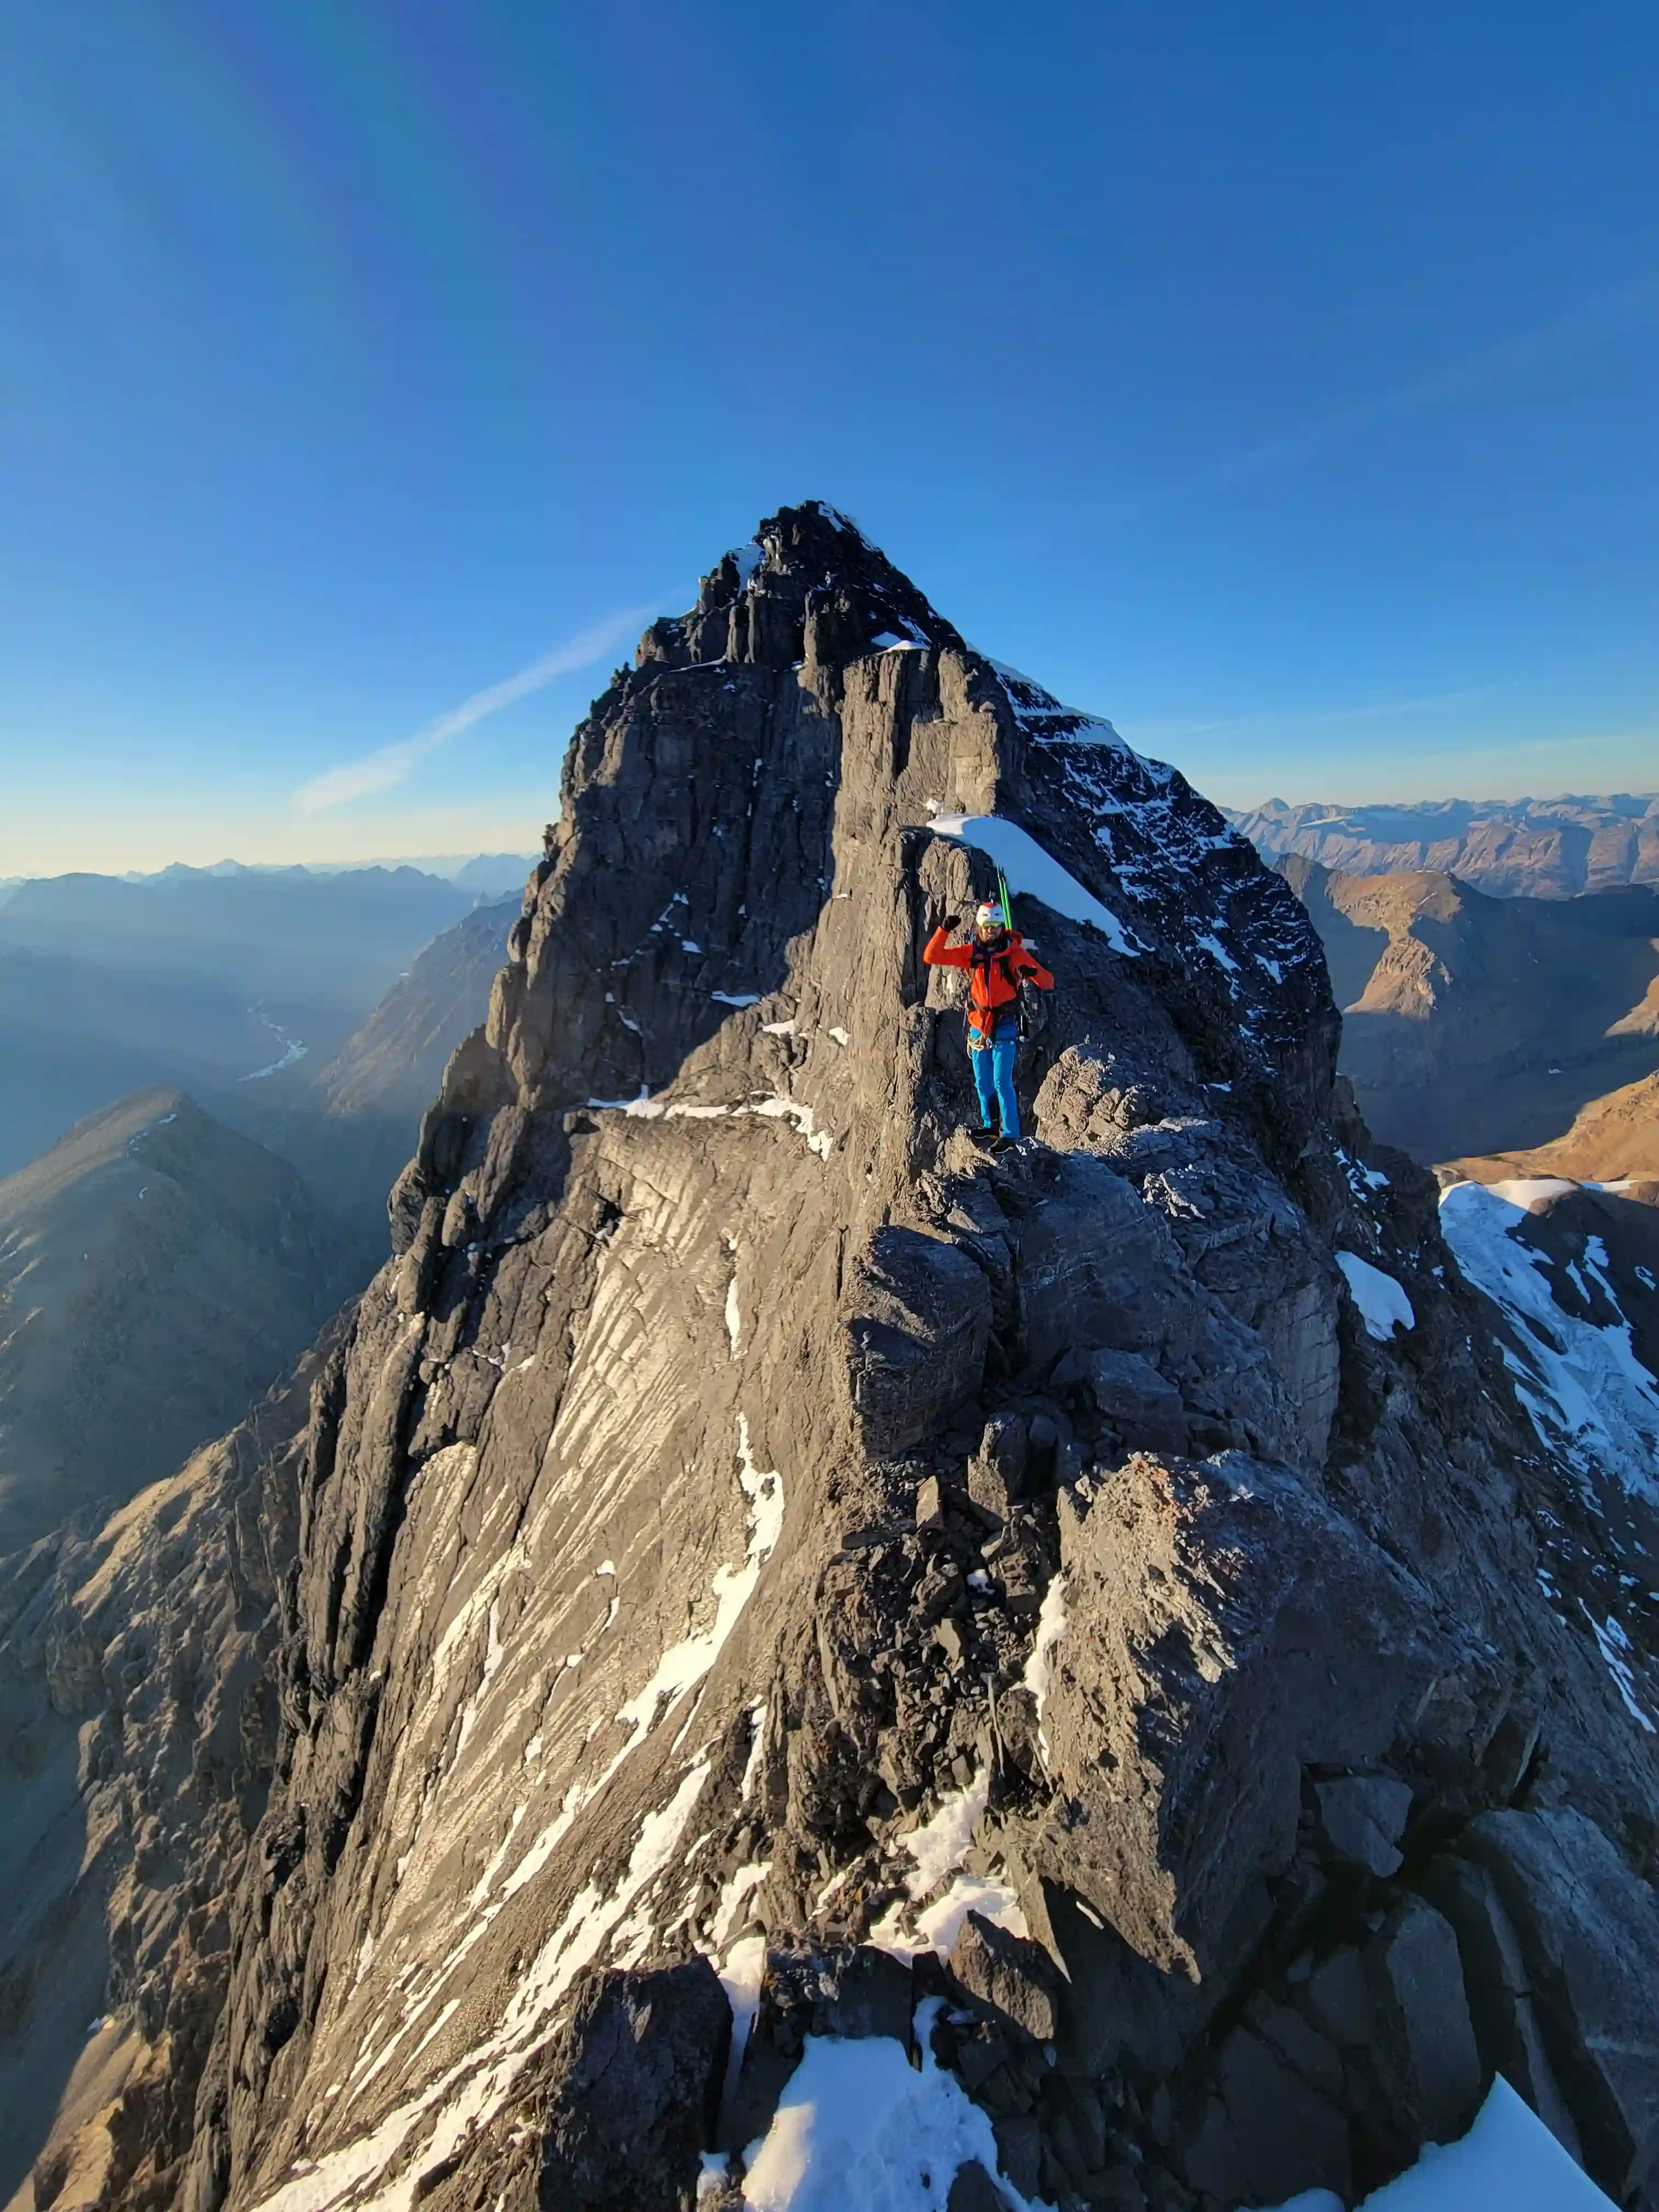
After one last hands on section heading directly along the ridge before detouring right on a narrow ledge to access a far easier small bowl feature and bypass a steep portion of ridge, some 4th-low 5th moves finish the climbing on the east face and all that remains is the uber exposed 700m of ridge to the summit. The ridge on Mount Albert is anything but straightforward requiring exposed detours around pinnacles and steep features and the notch is quite serious so there really isn't anything straightforward about the upper portion of this mountain and the whole thing has to be reversed on the way down so plan for the descent to take about as long as the way up!
THE LOWER MOUNTAIN


you end up on top of this feature
above us
the right
THE UPPER MOUNTAIN
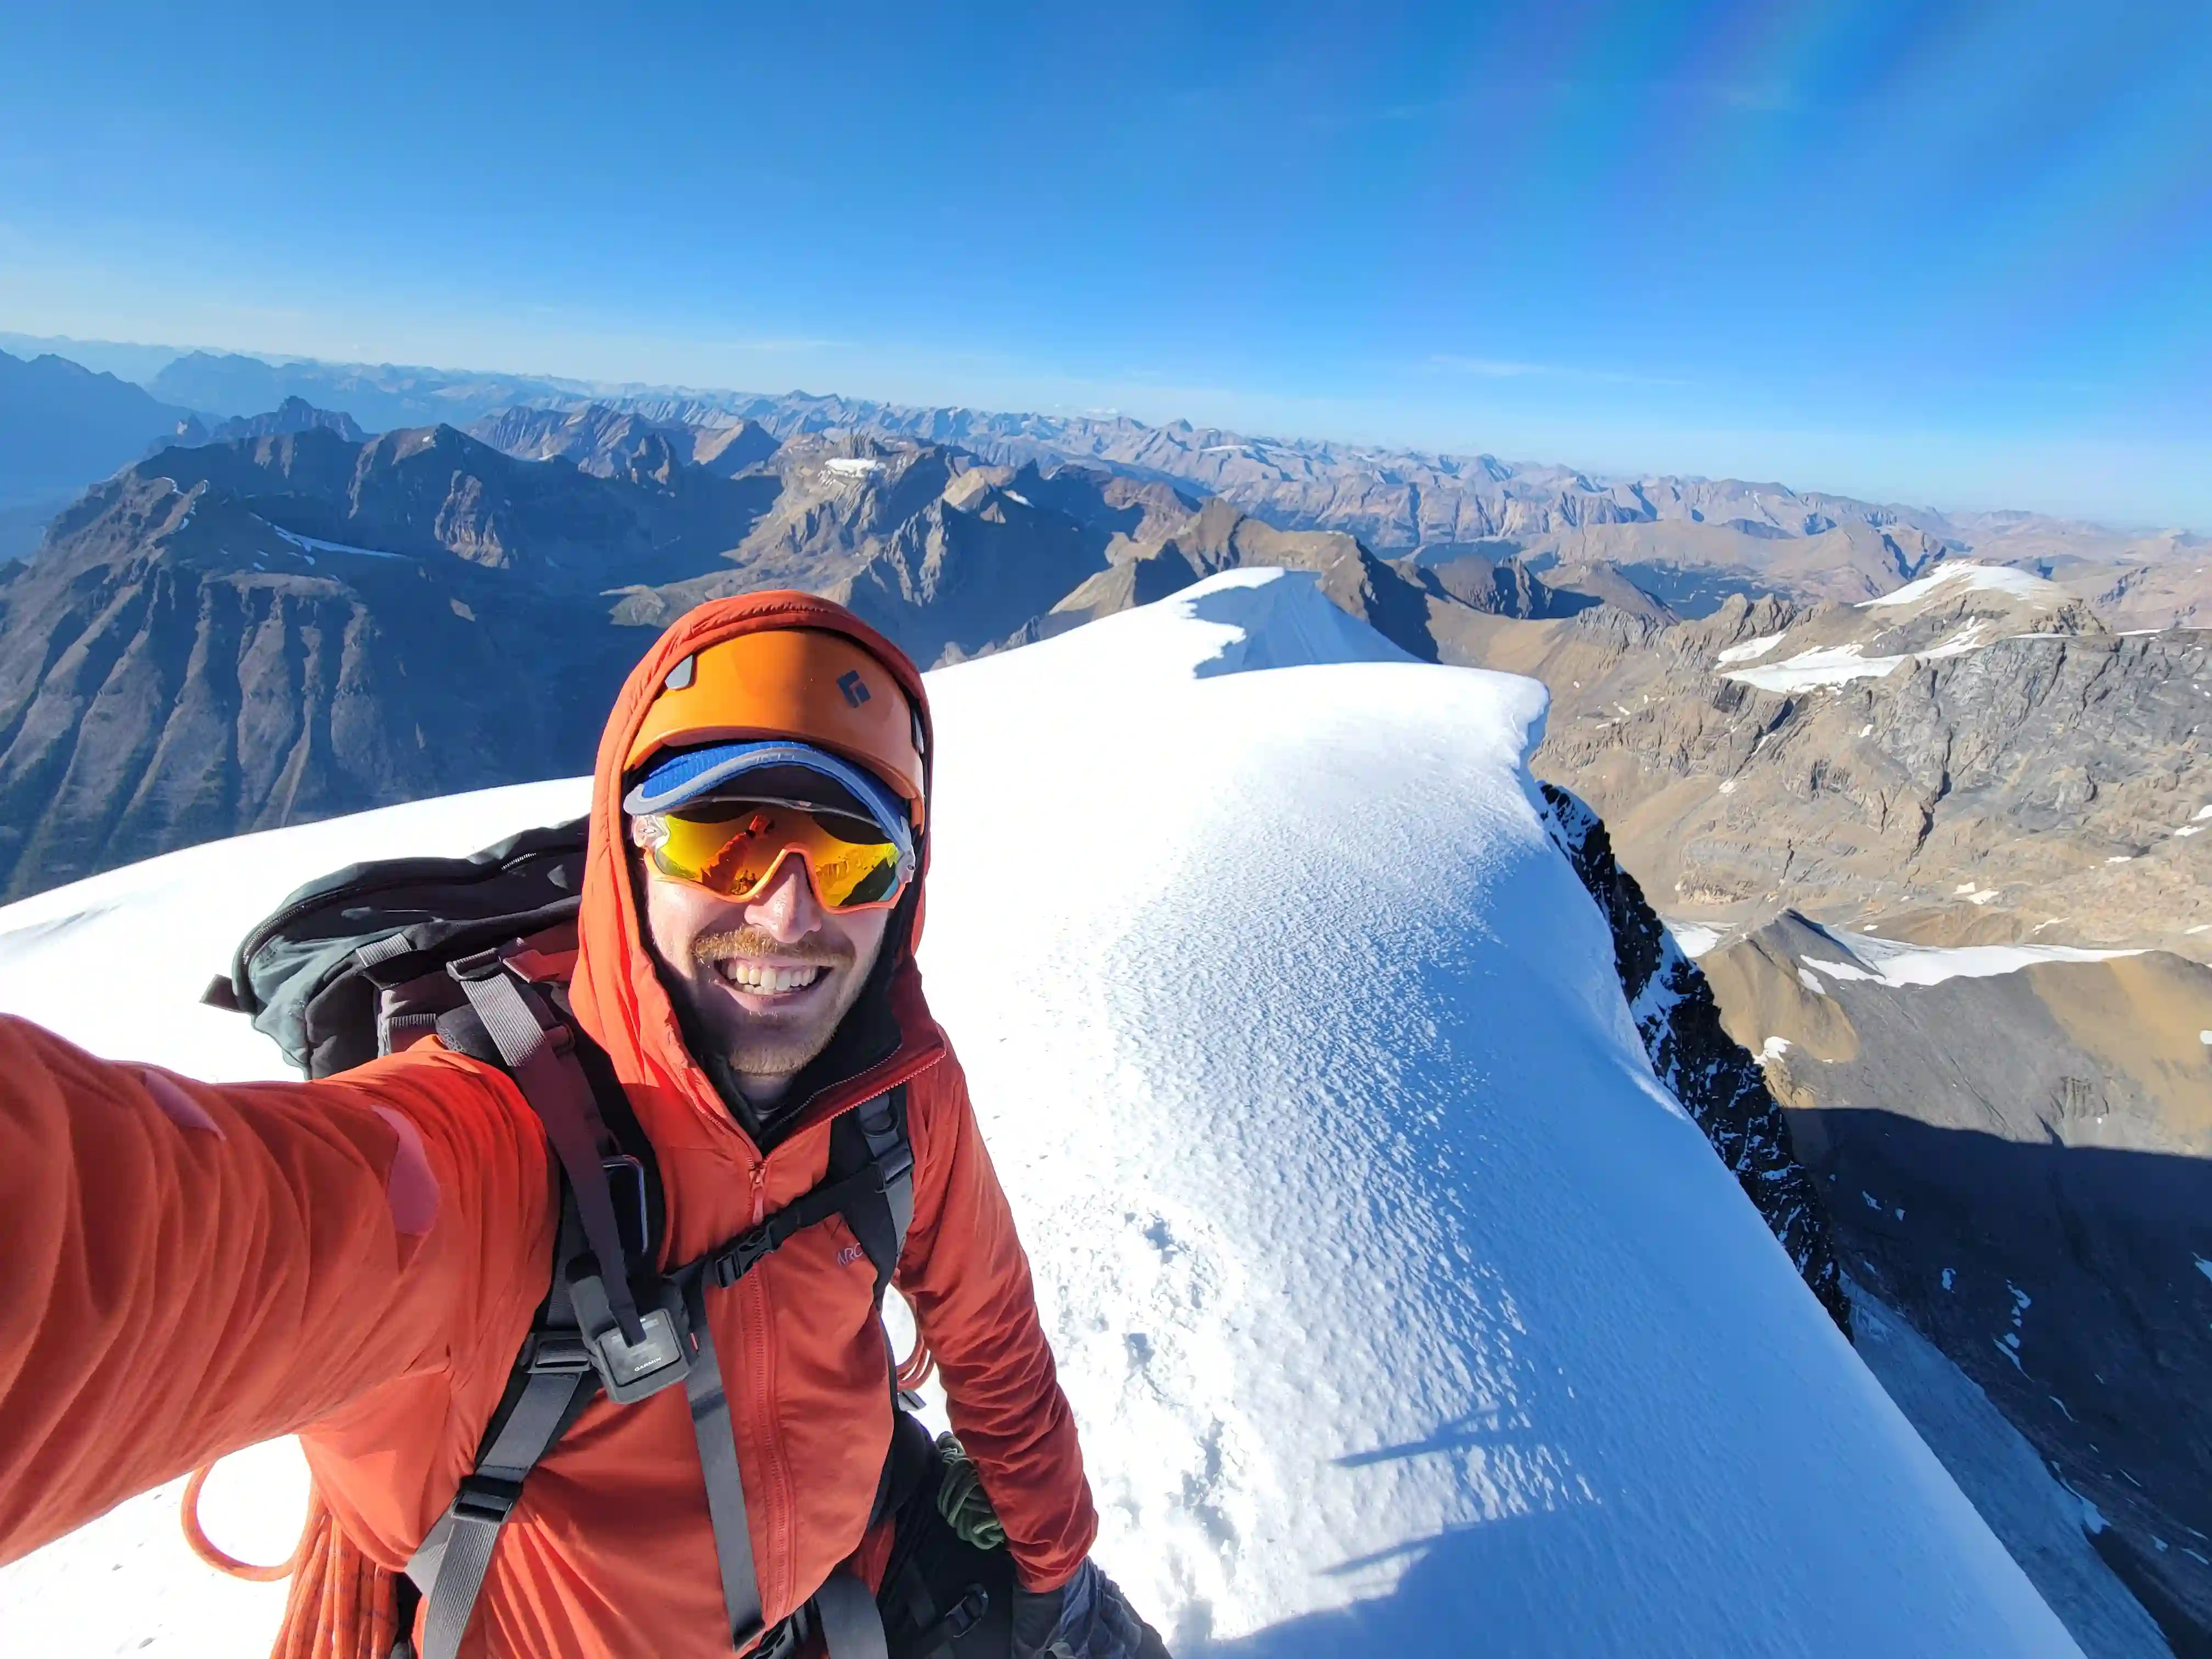
ascent, only room for 4 here so we had it at max capacity!
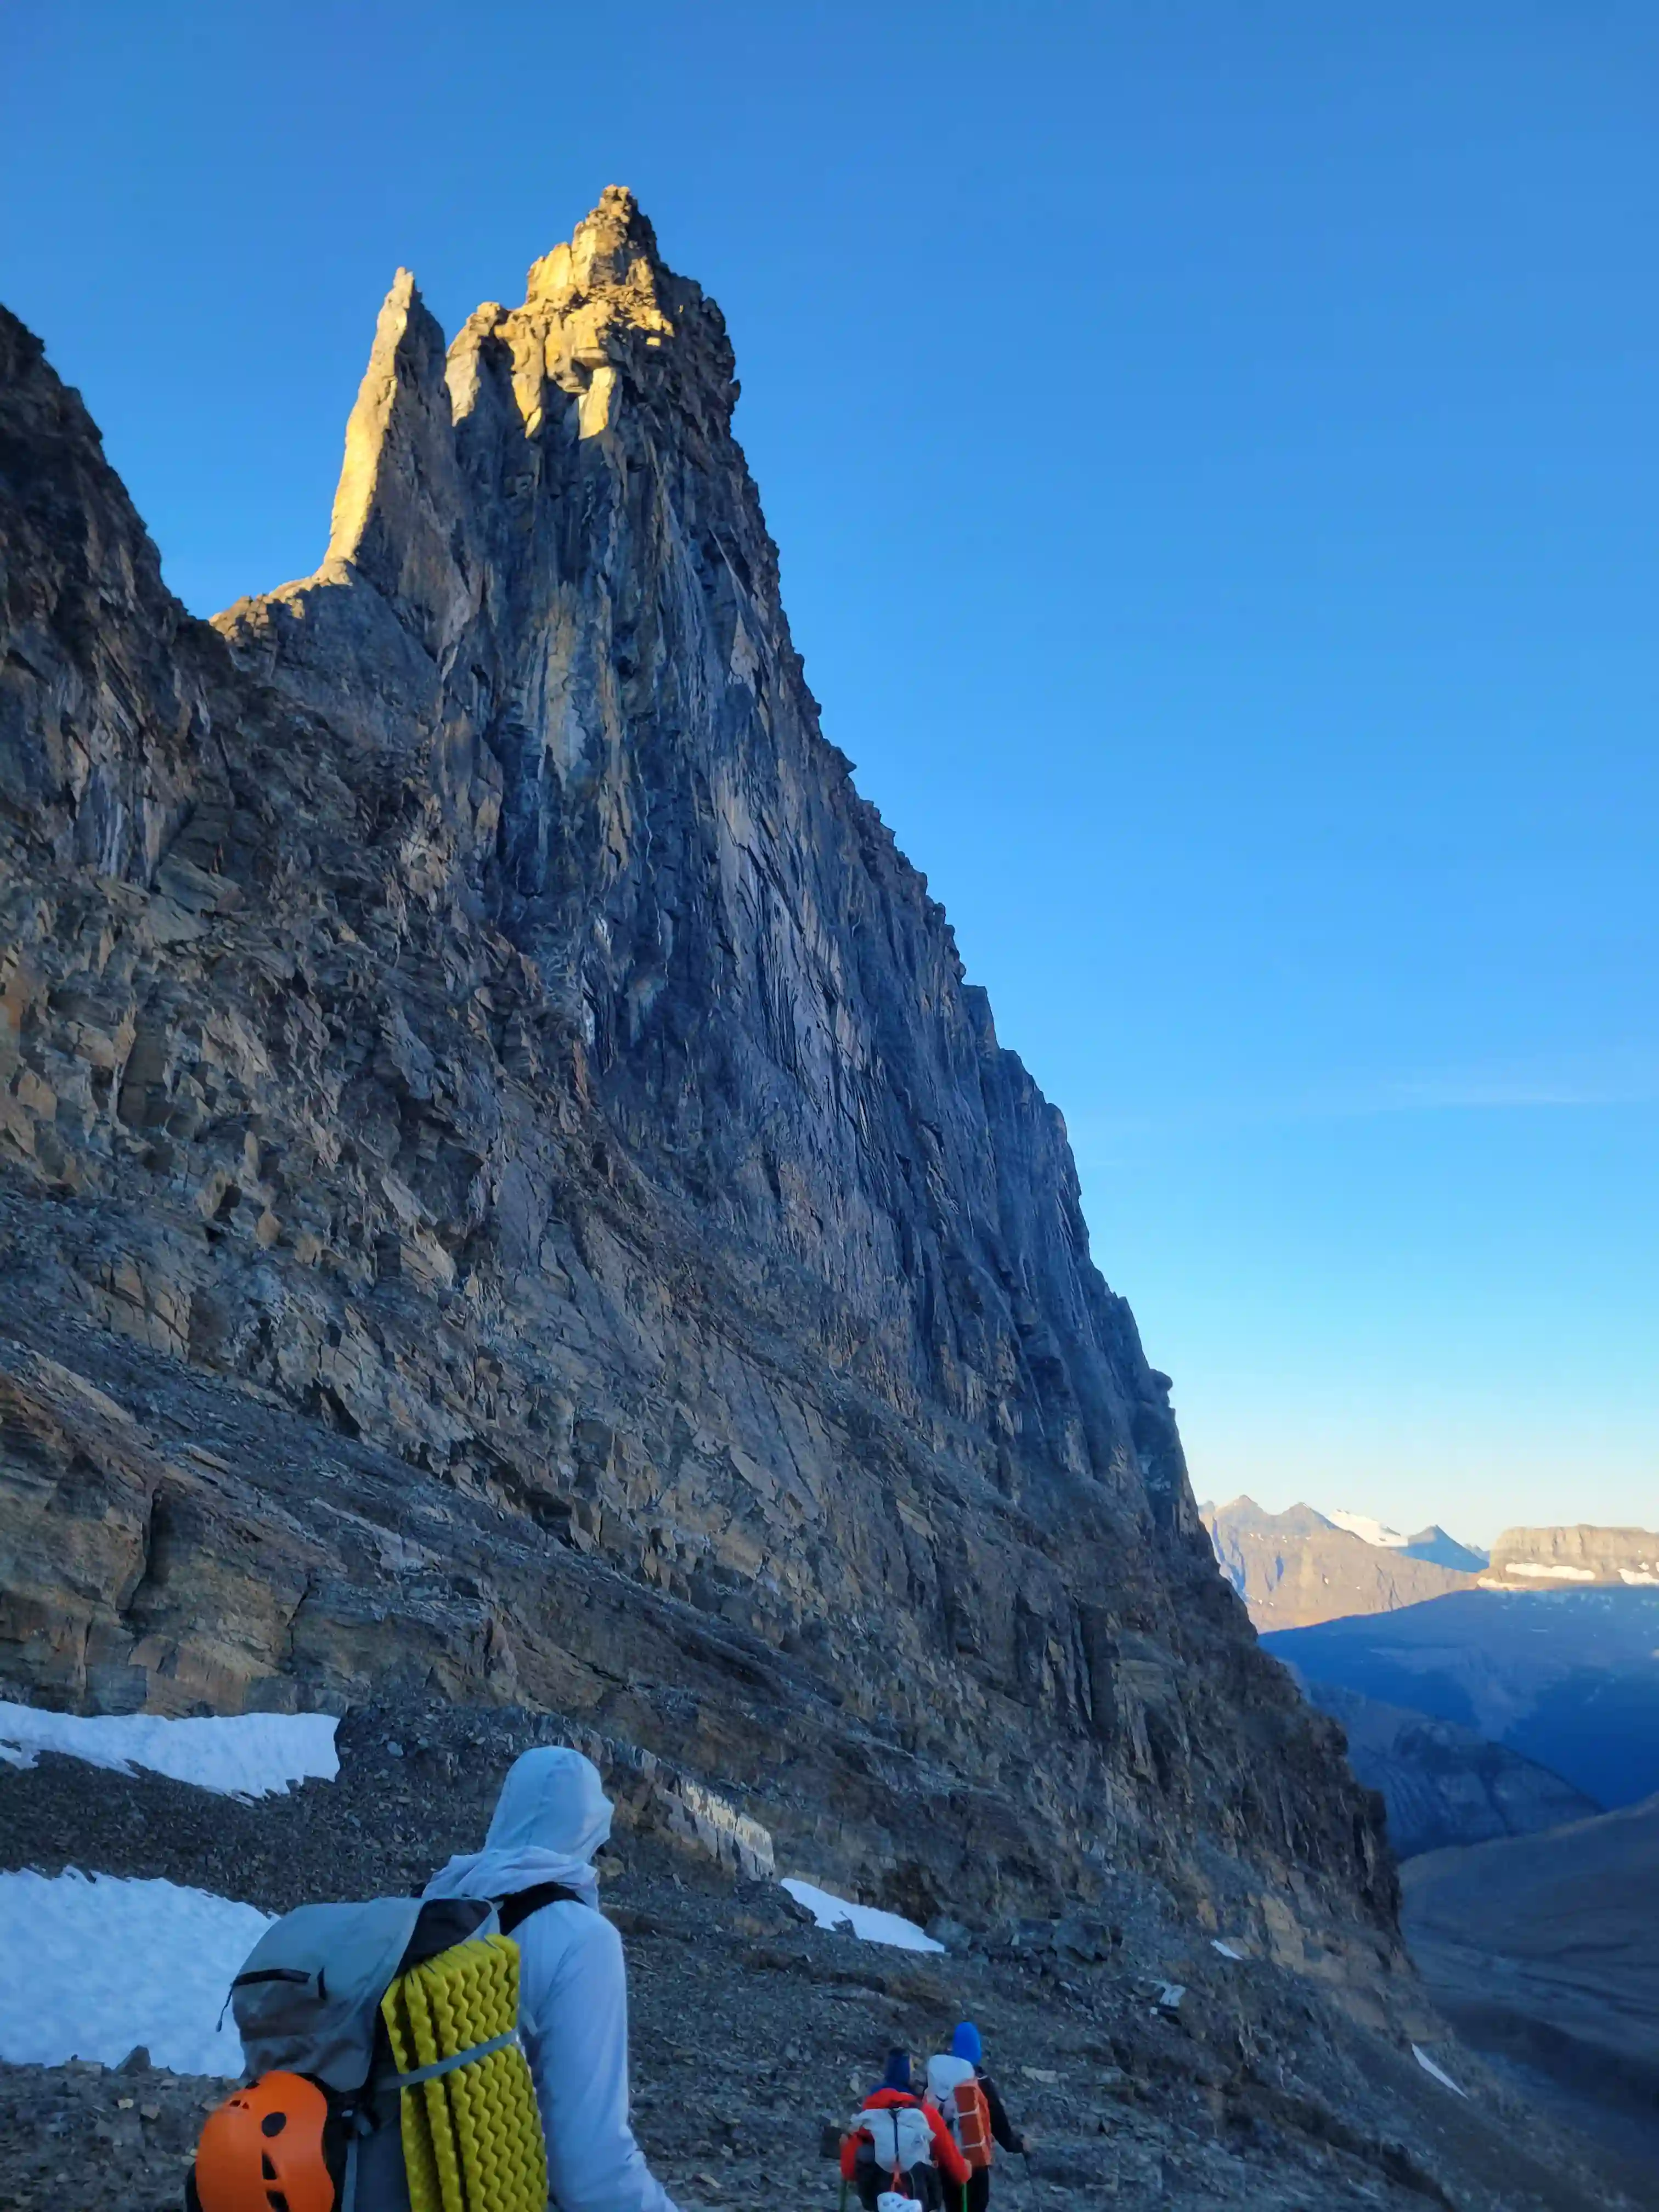
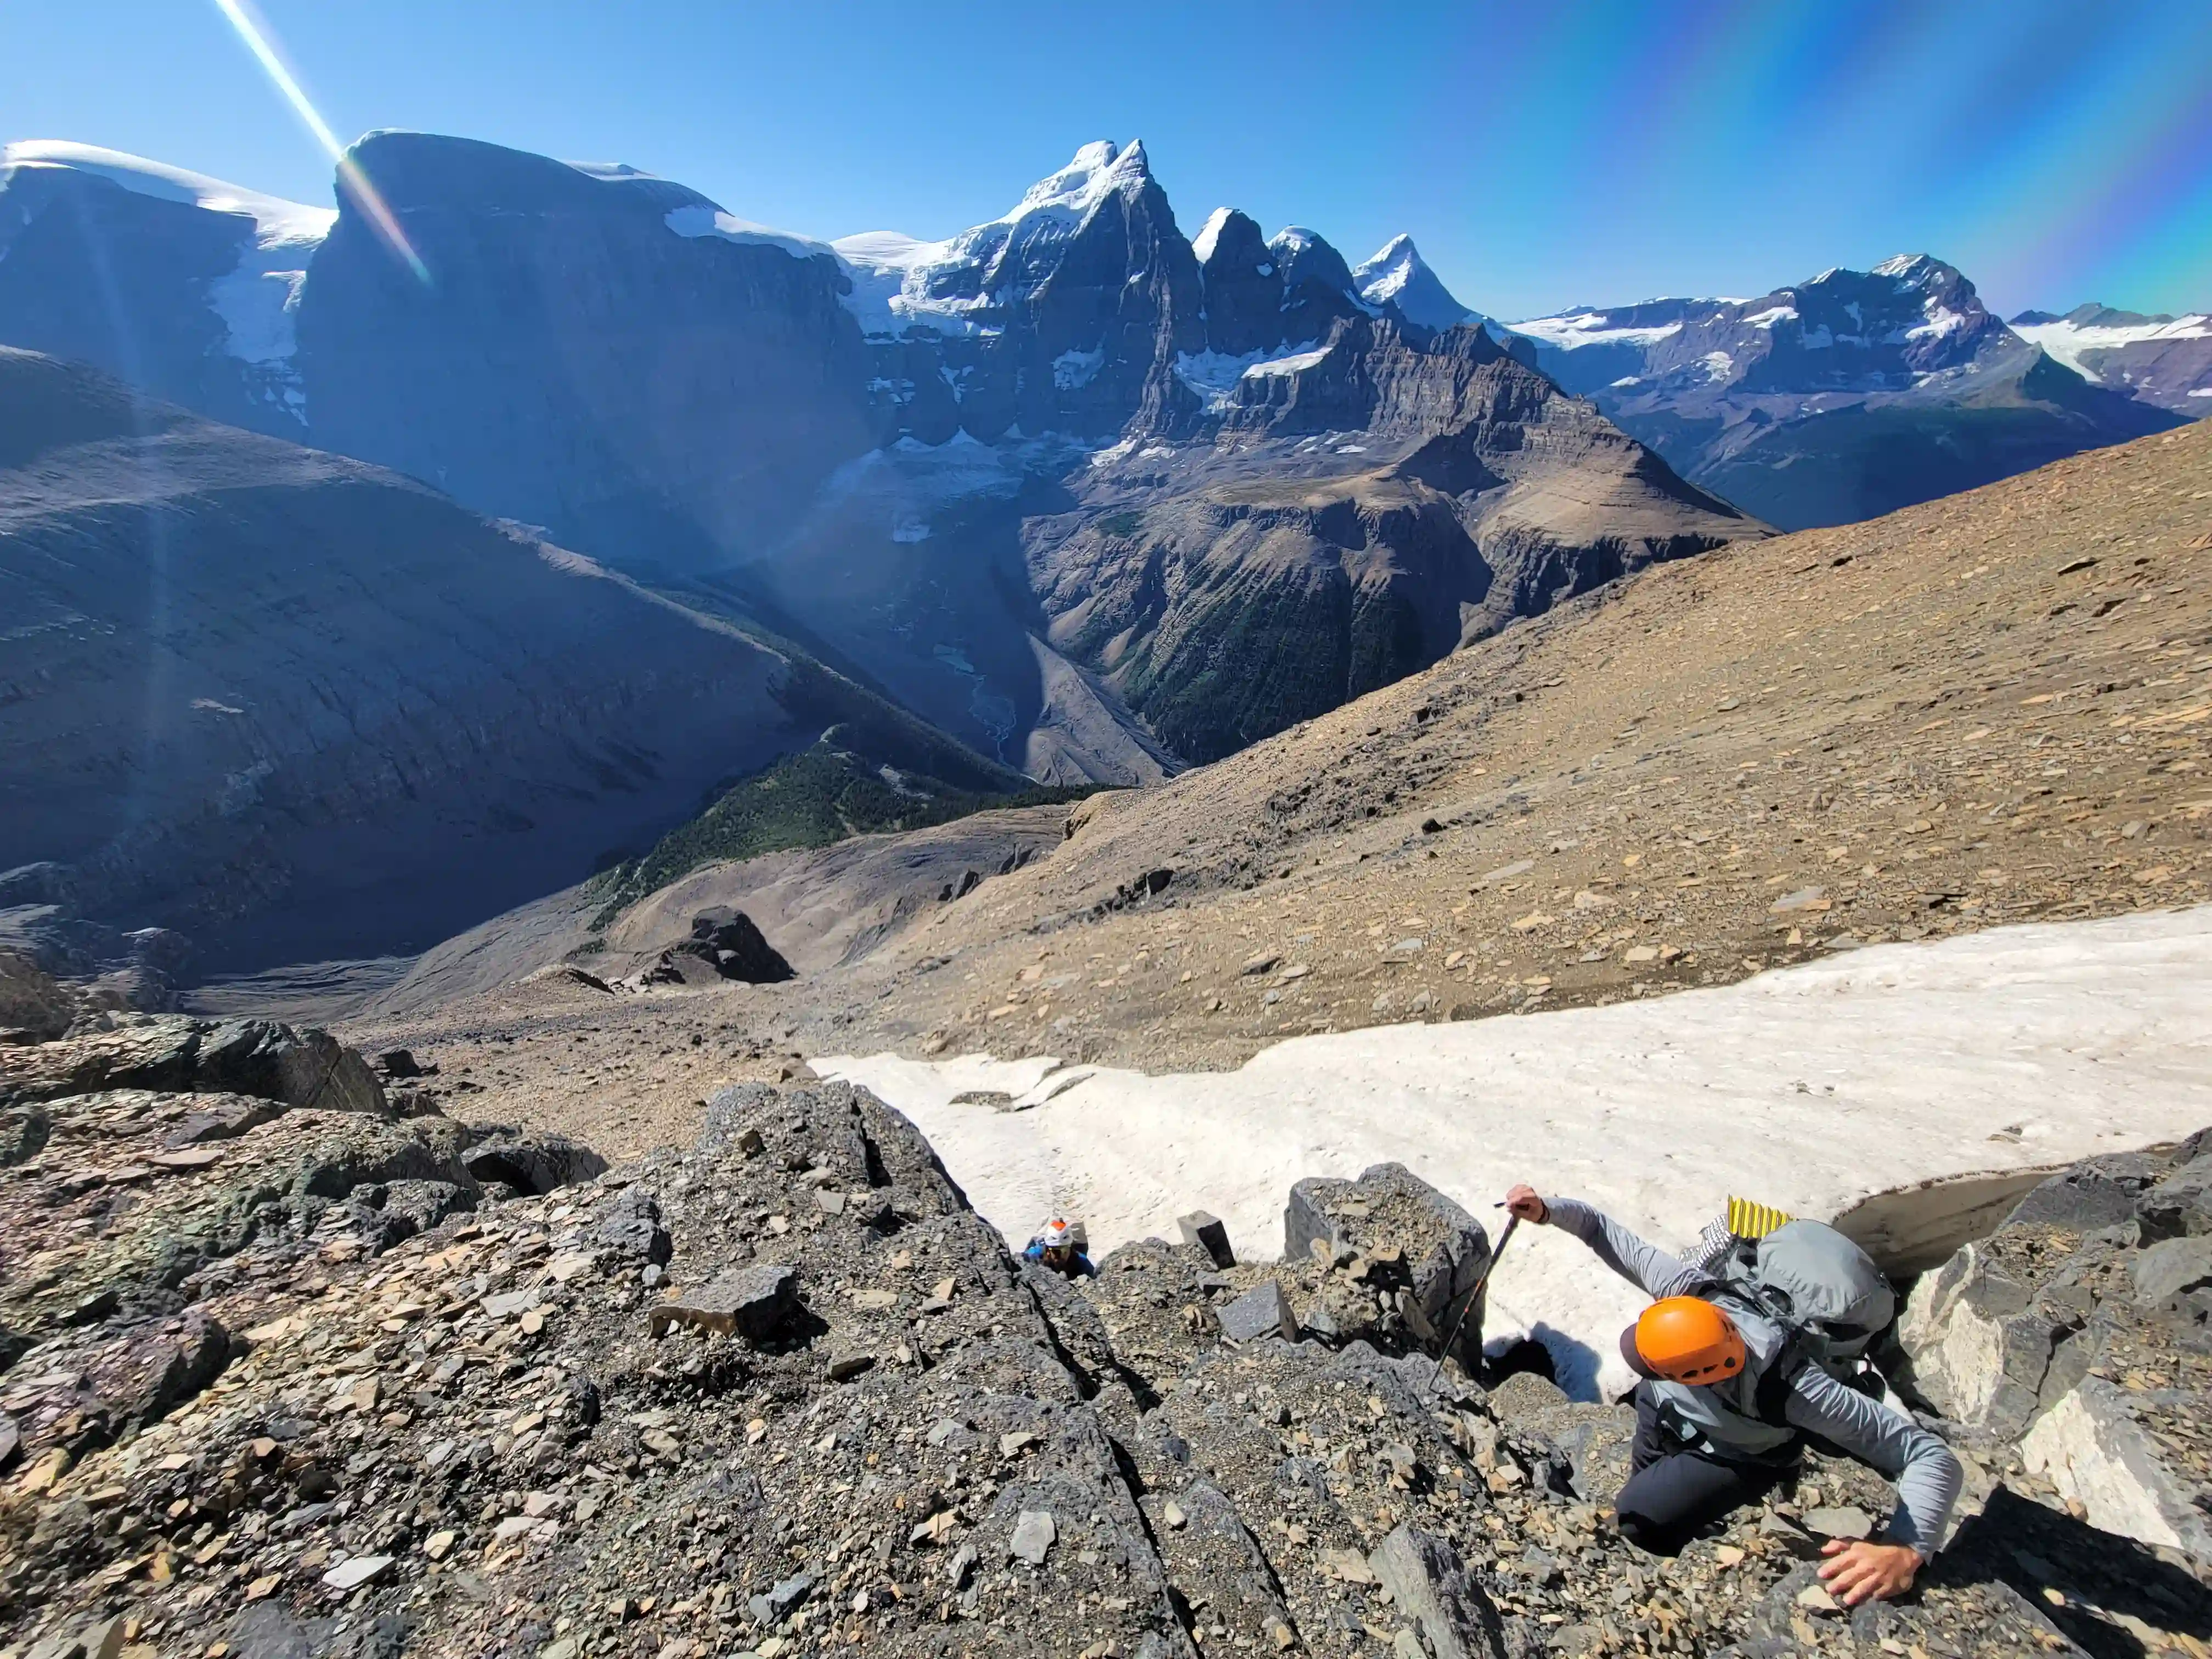
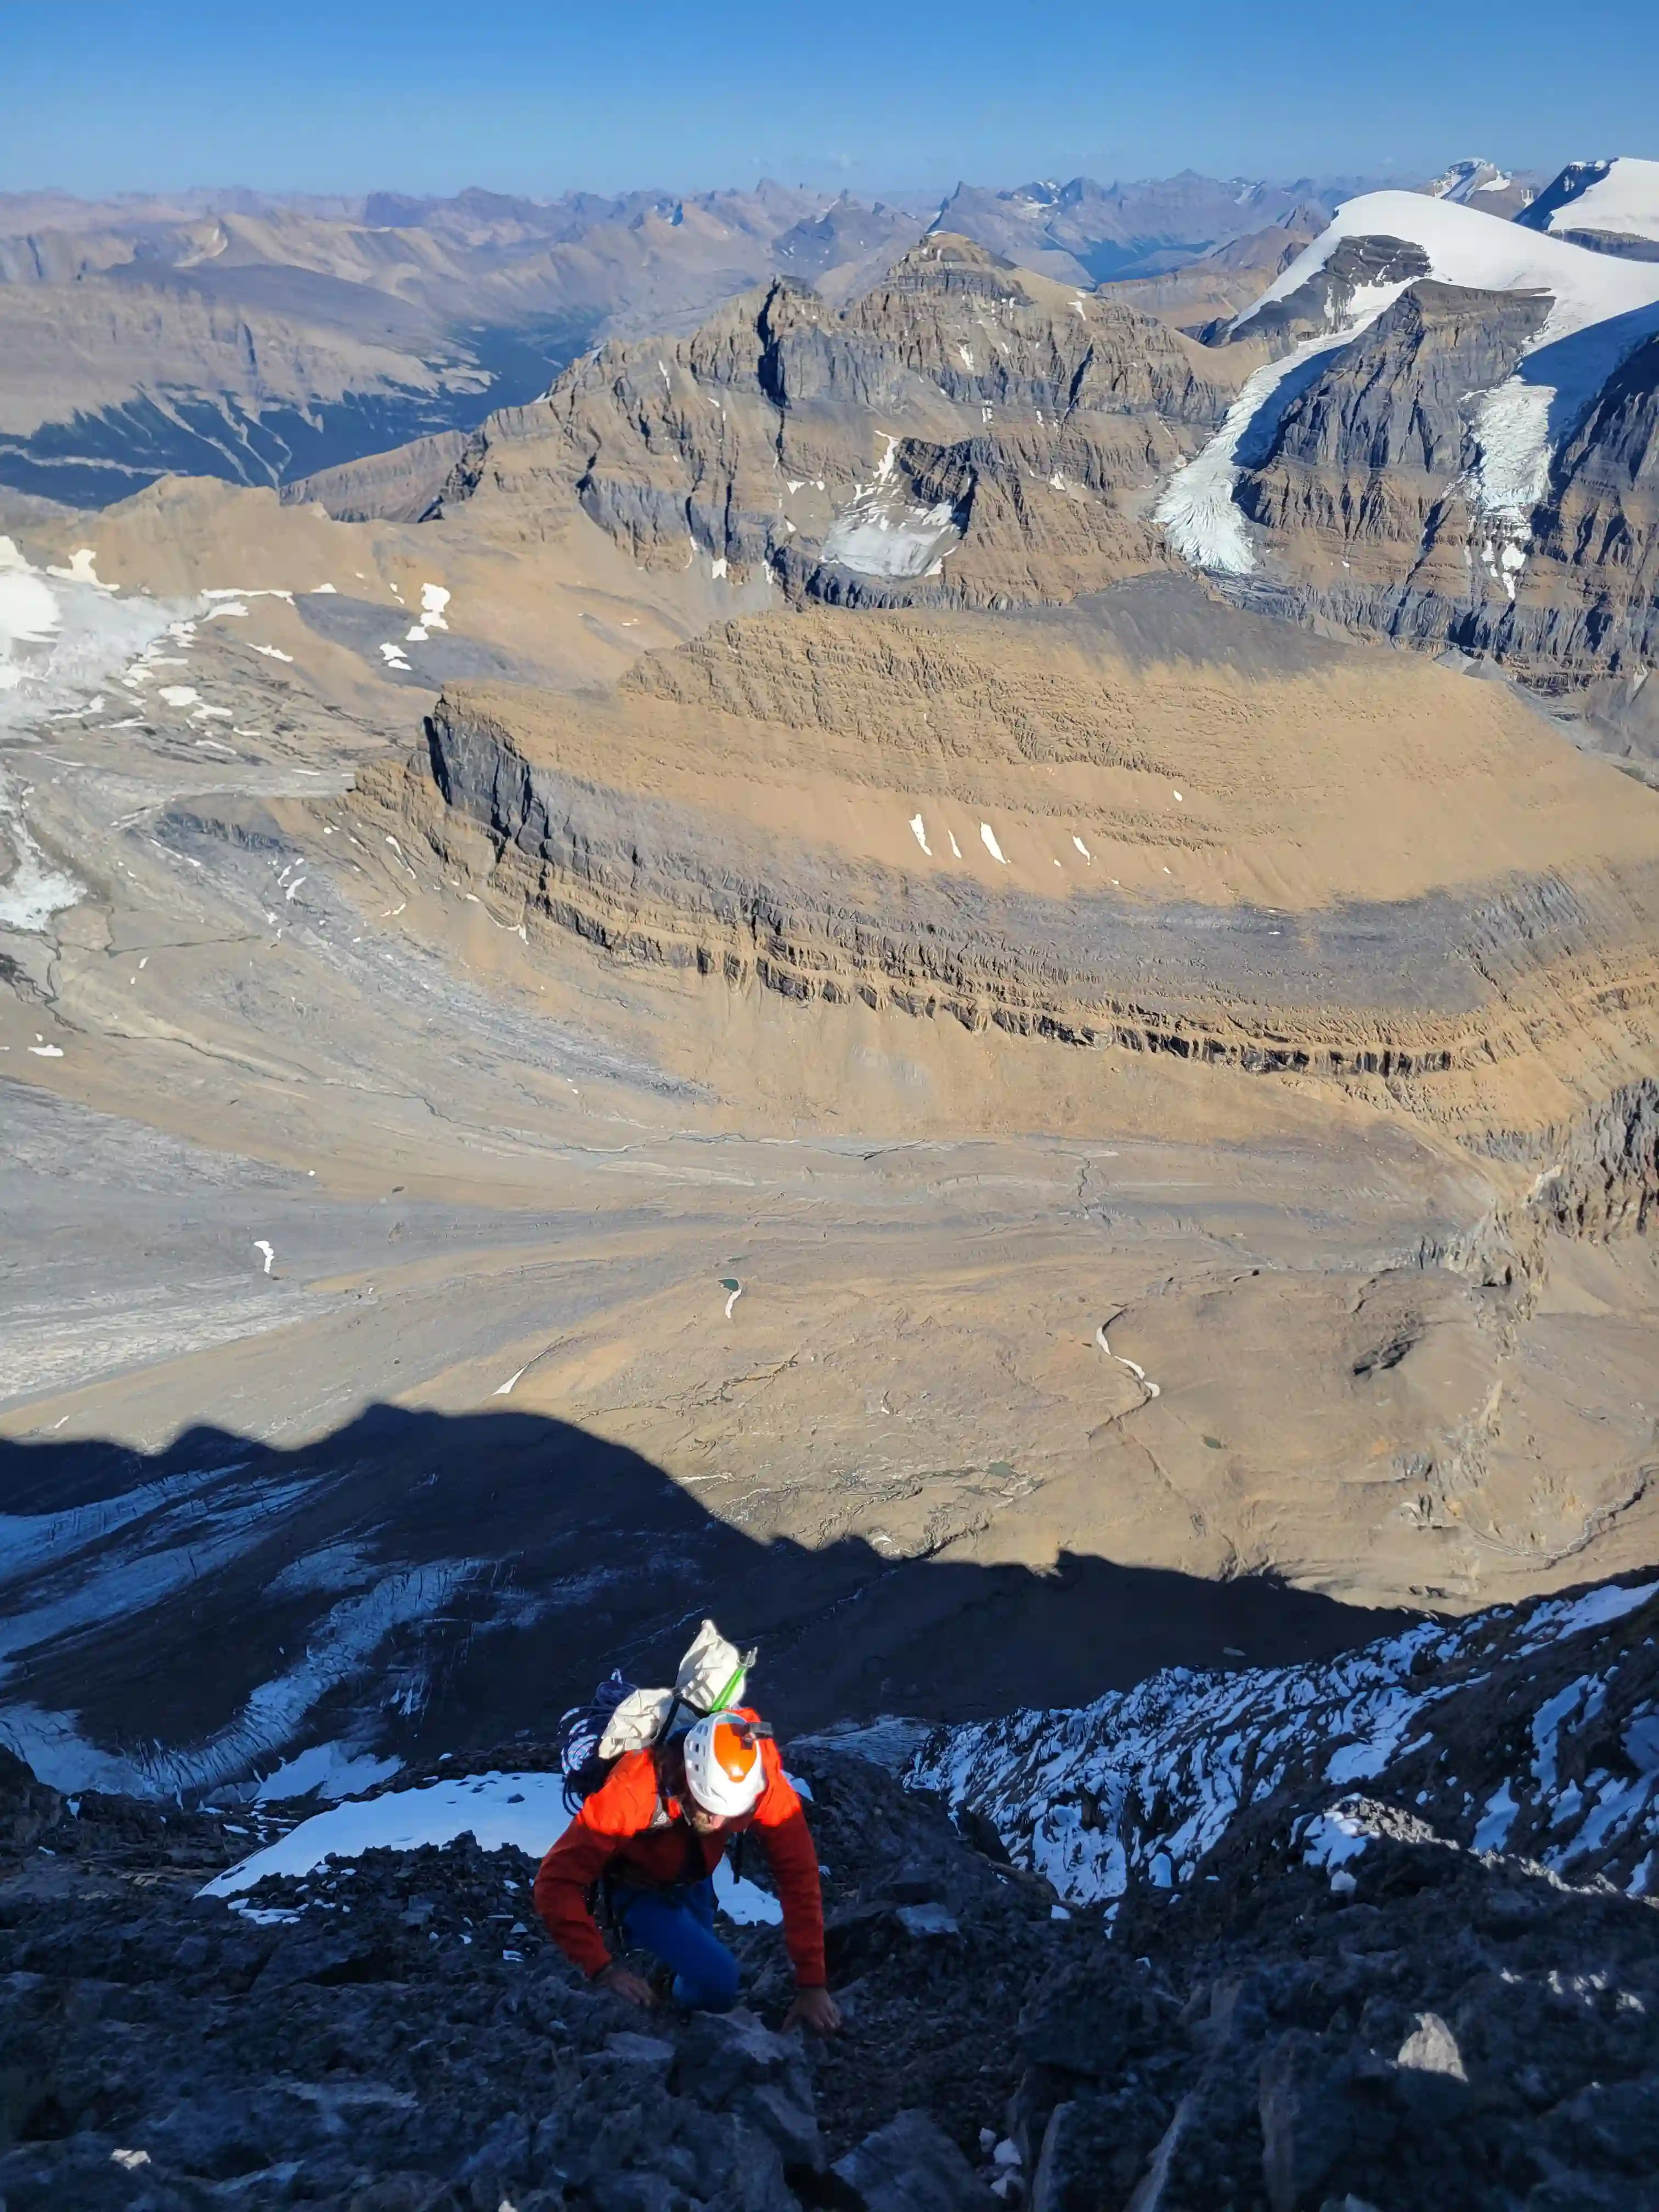
By the time we reached the bivi site it was 11:30am and the sun had been hitting the east face quite hard so we were hopeful the upper gully would be more melted out for us. We had thought at the hut that we might be able to make it all the way up and back down after summiting in one push but given the time and the fact we still had the bulk of the technical terrain remaining it was clear we'd be sleeping on the mountain. After ditching our sleeping gear and everything else we didn't need we continued along the ledge traverse to the elephant asses and the proper climbing began soon after!
Into trips like this?
I'll send you an email whenever I publish a new trip report.
half of the mountain
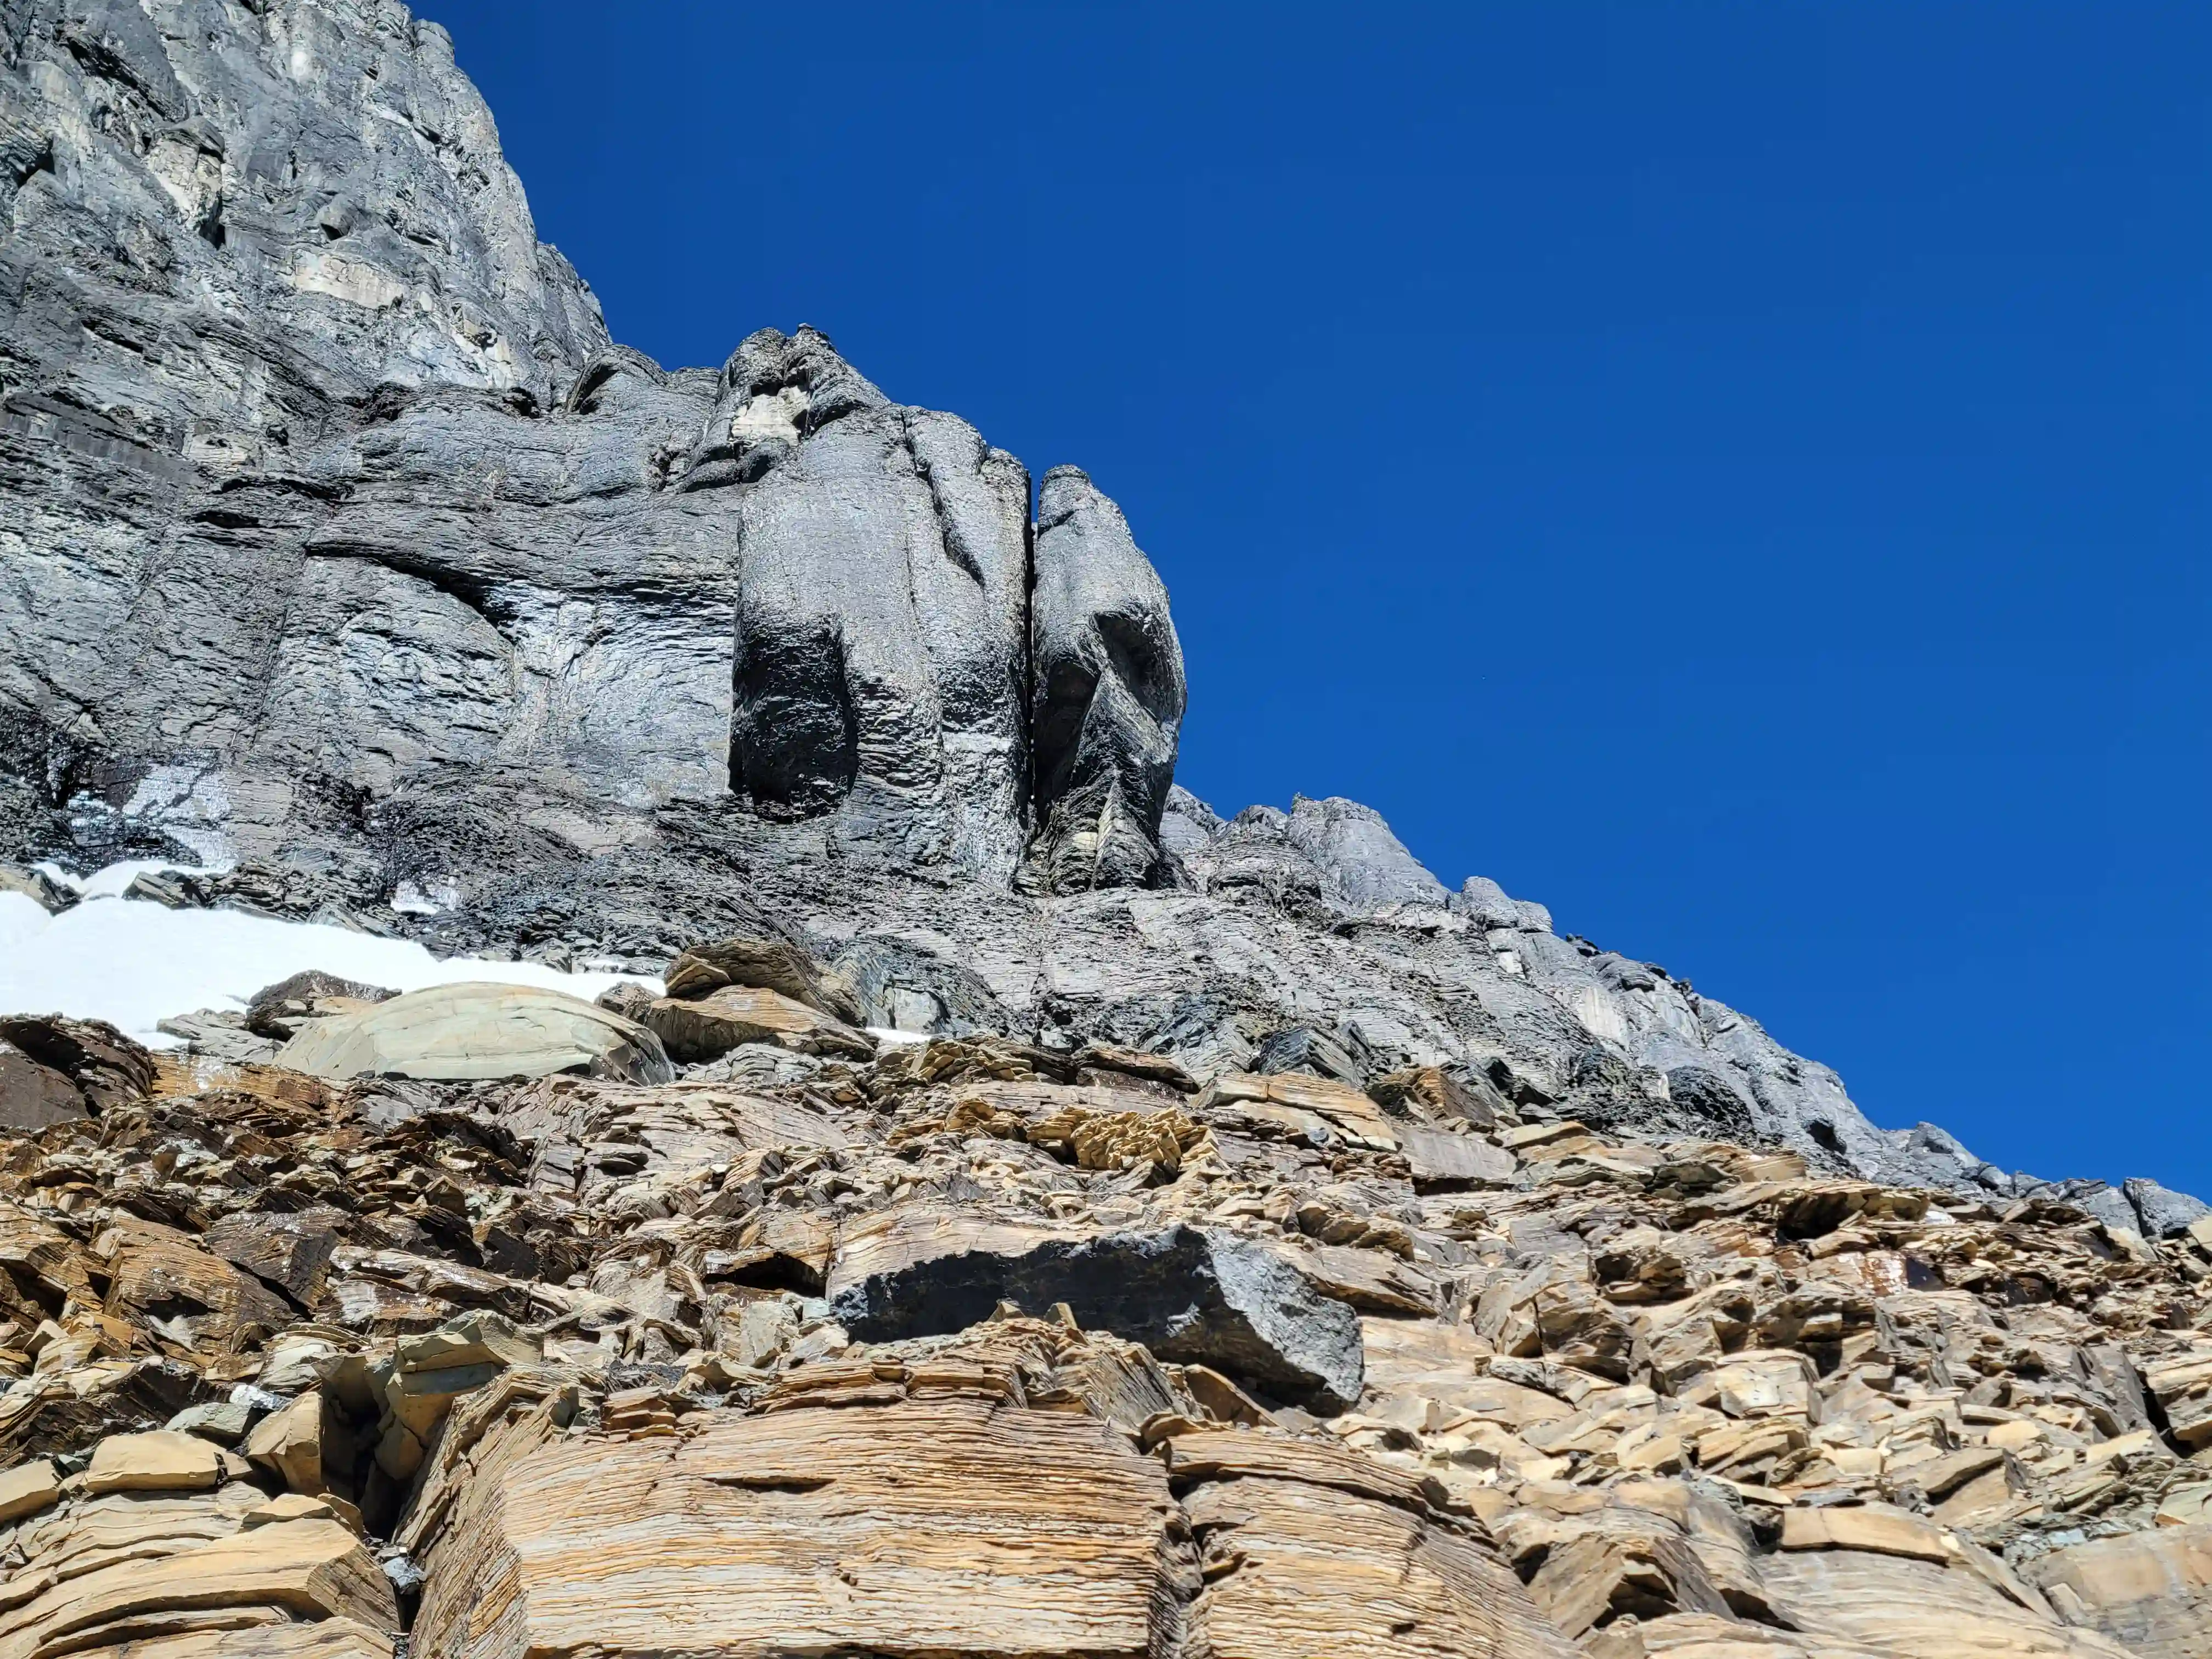
upper mountain just climbers right of it, easy to see how it got its name!
with the elephant ass feature behind
considered easier than after the ledge
traverse it's still most definitely 5th class!
ledge is where you continue ascending
a bit too far right here
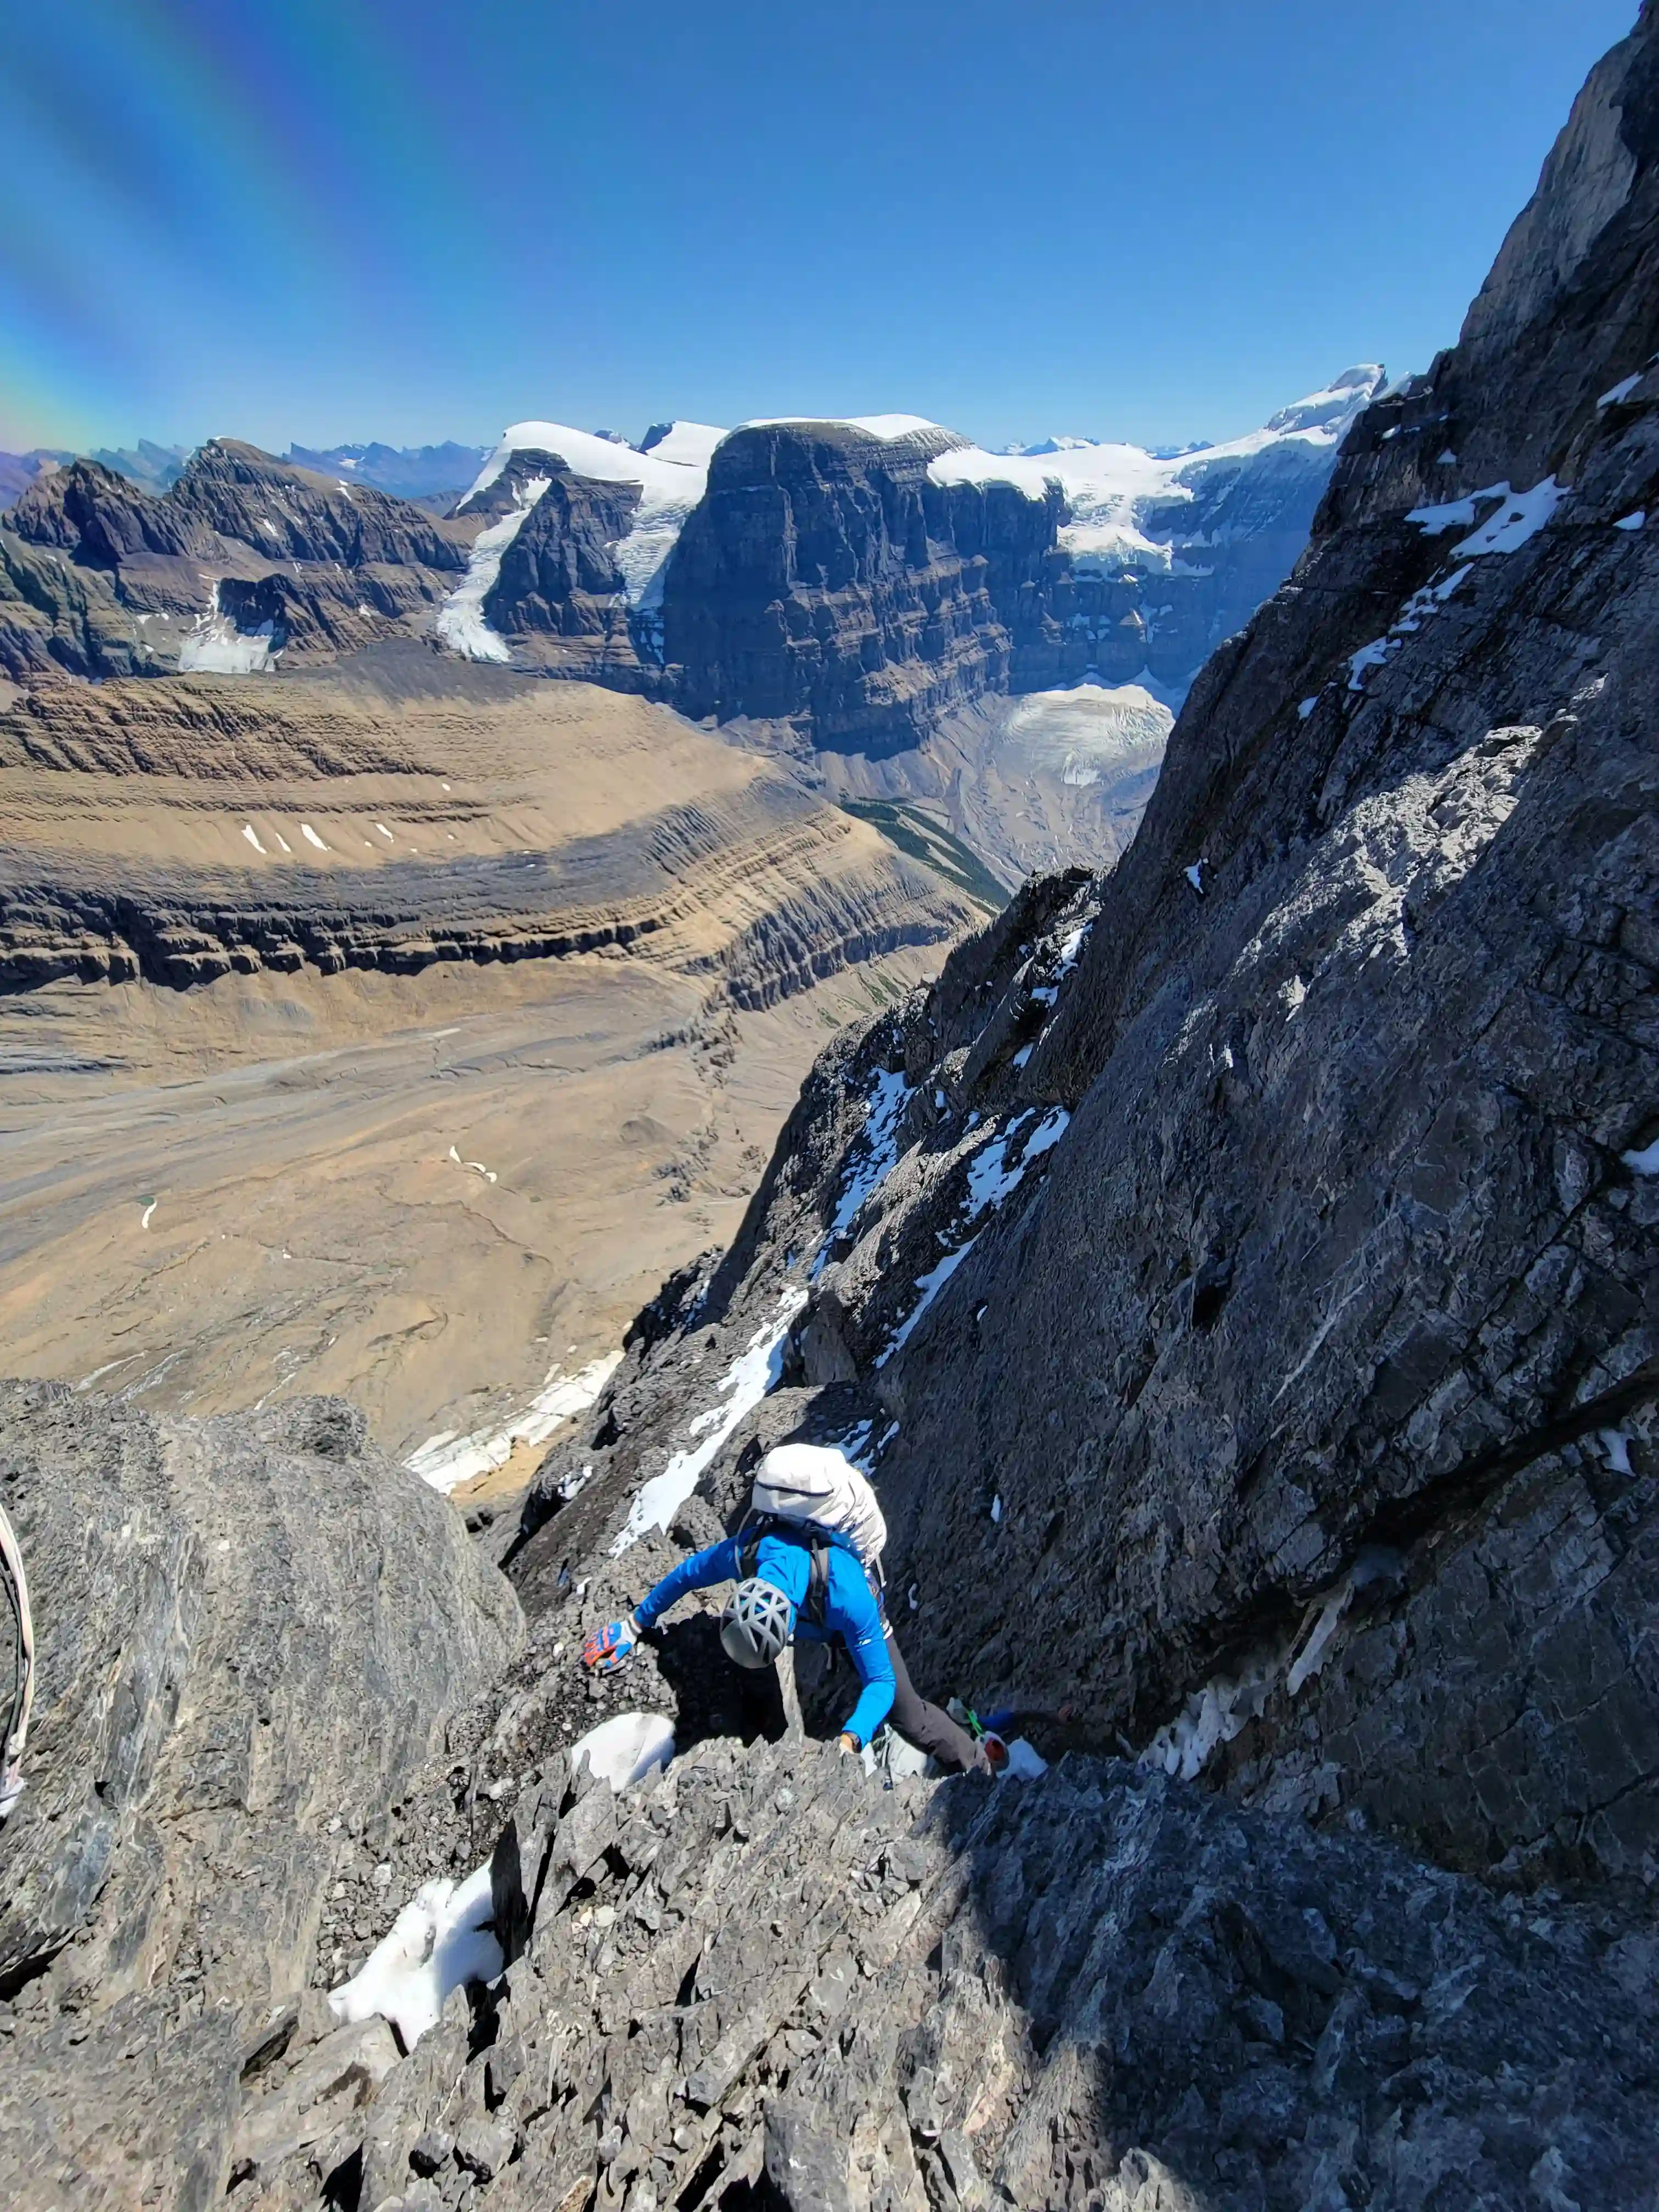
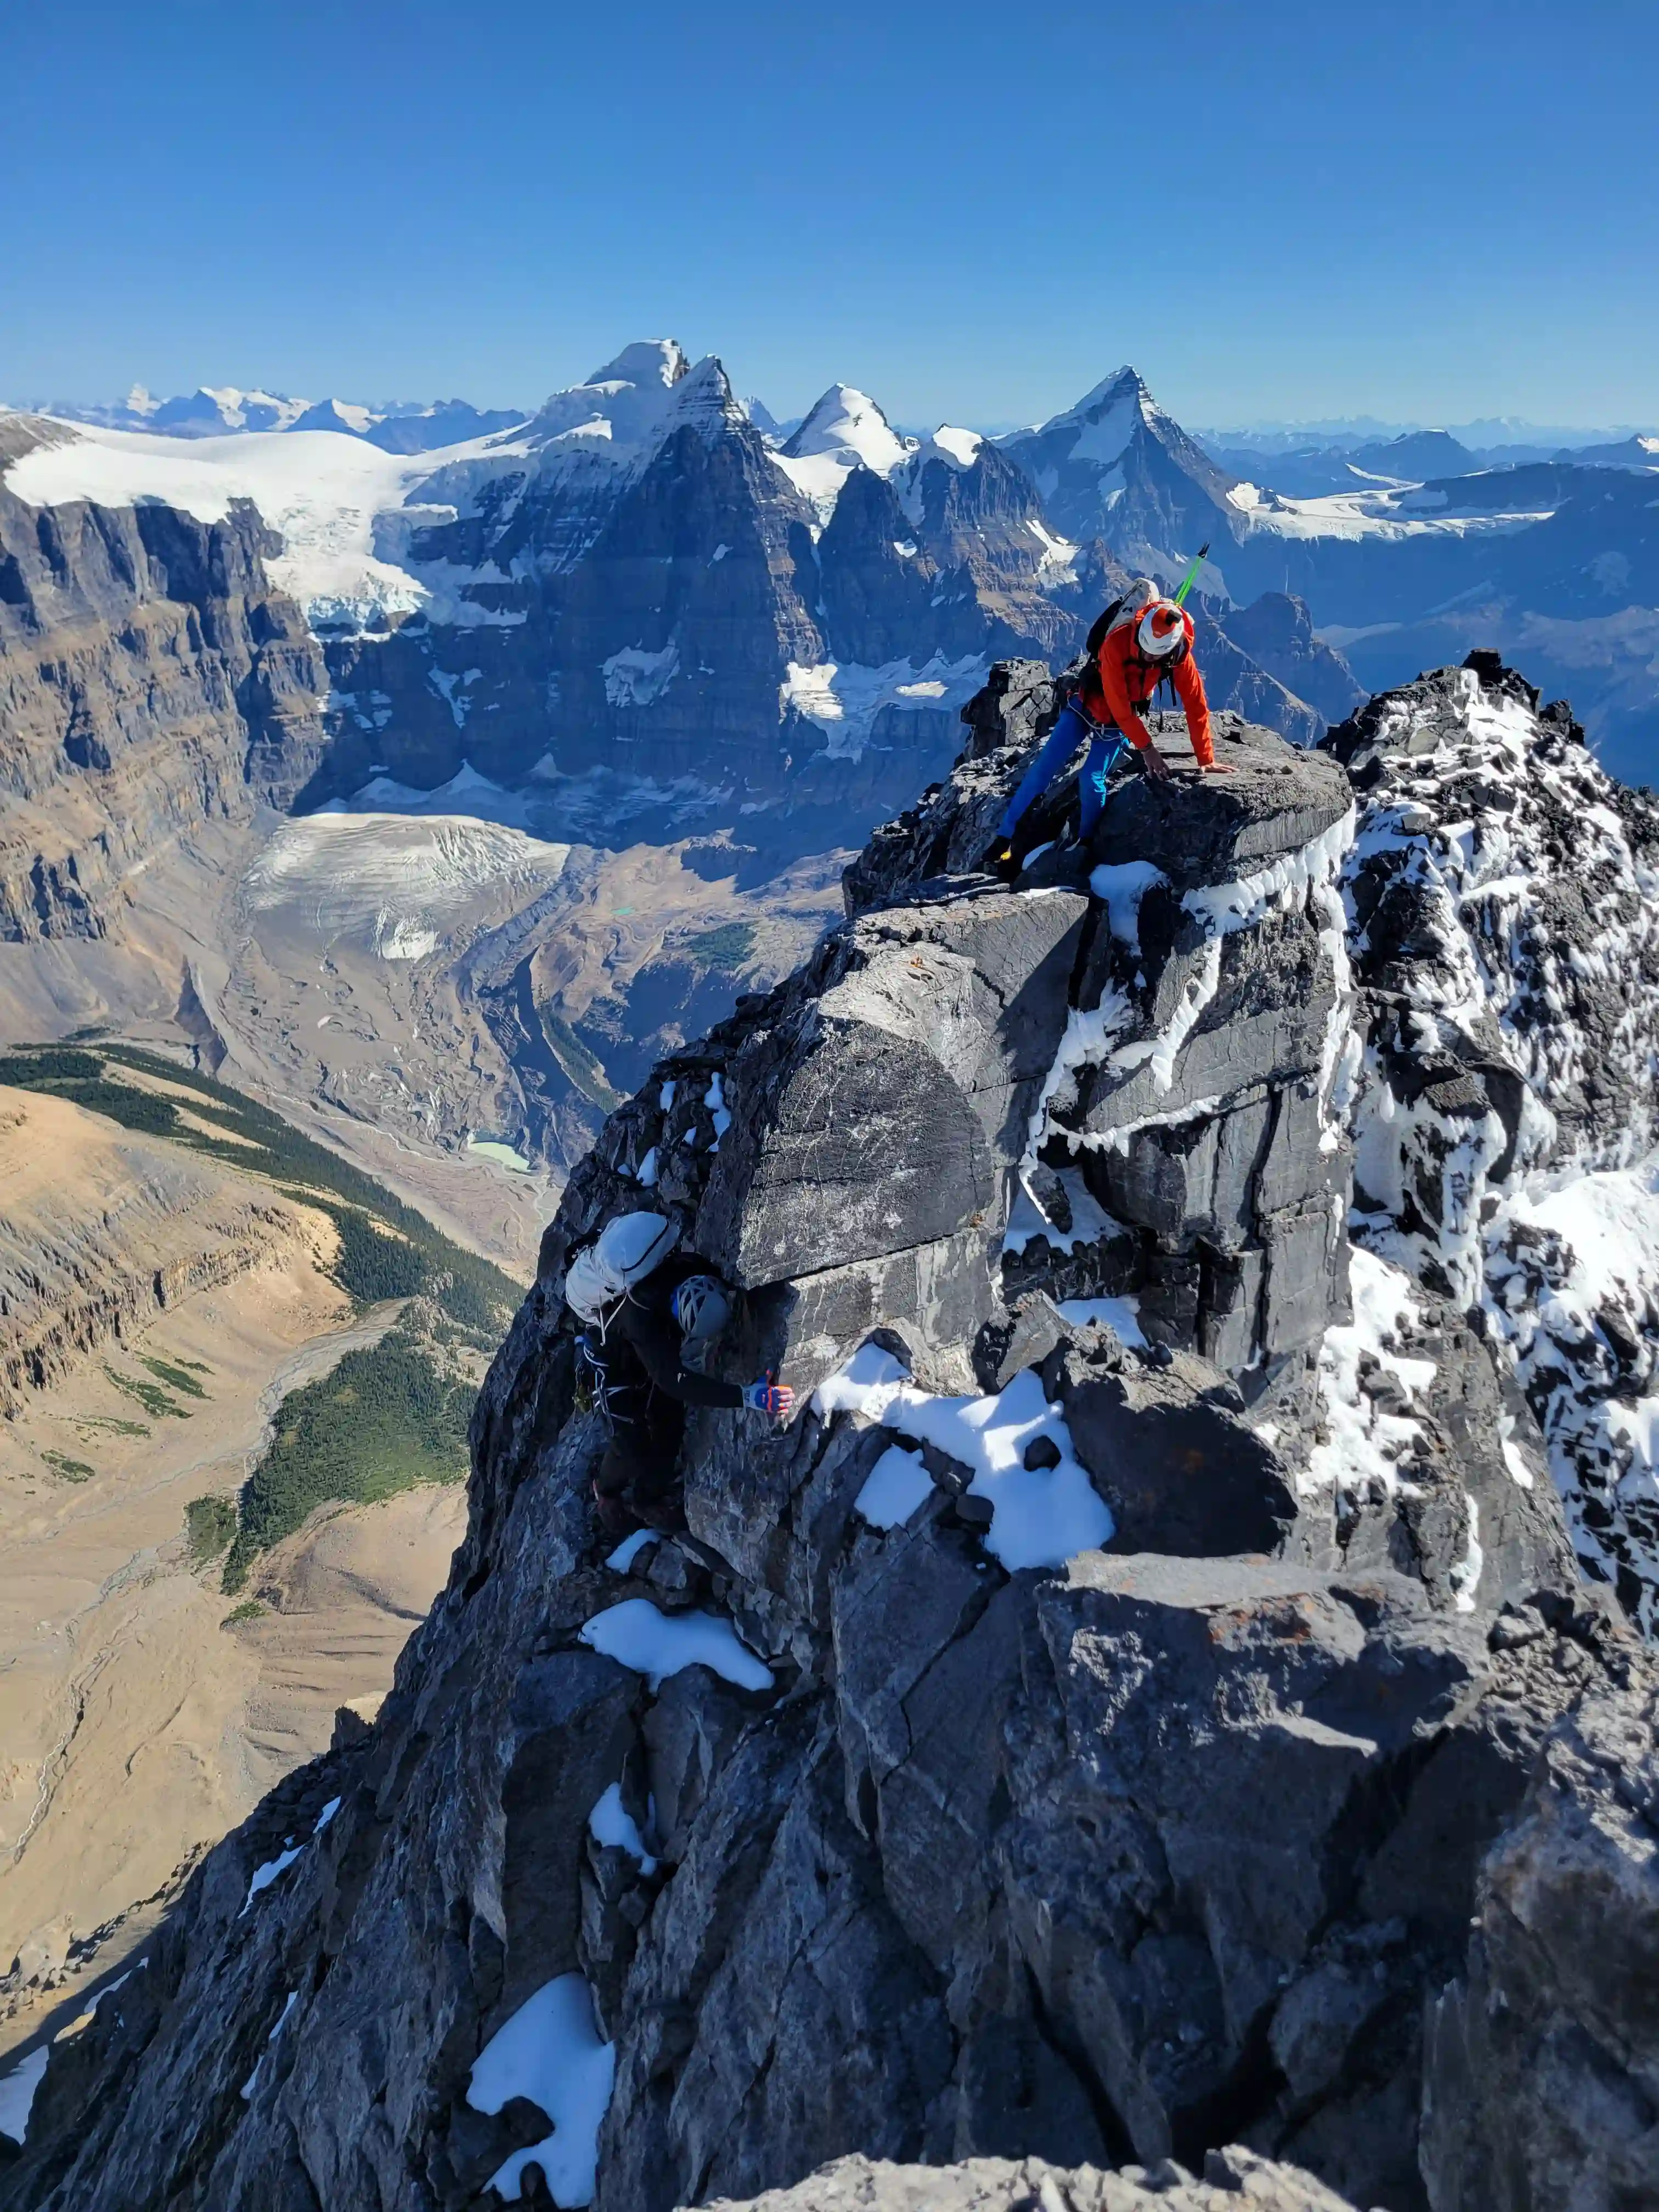
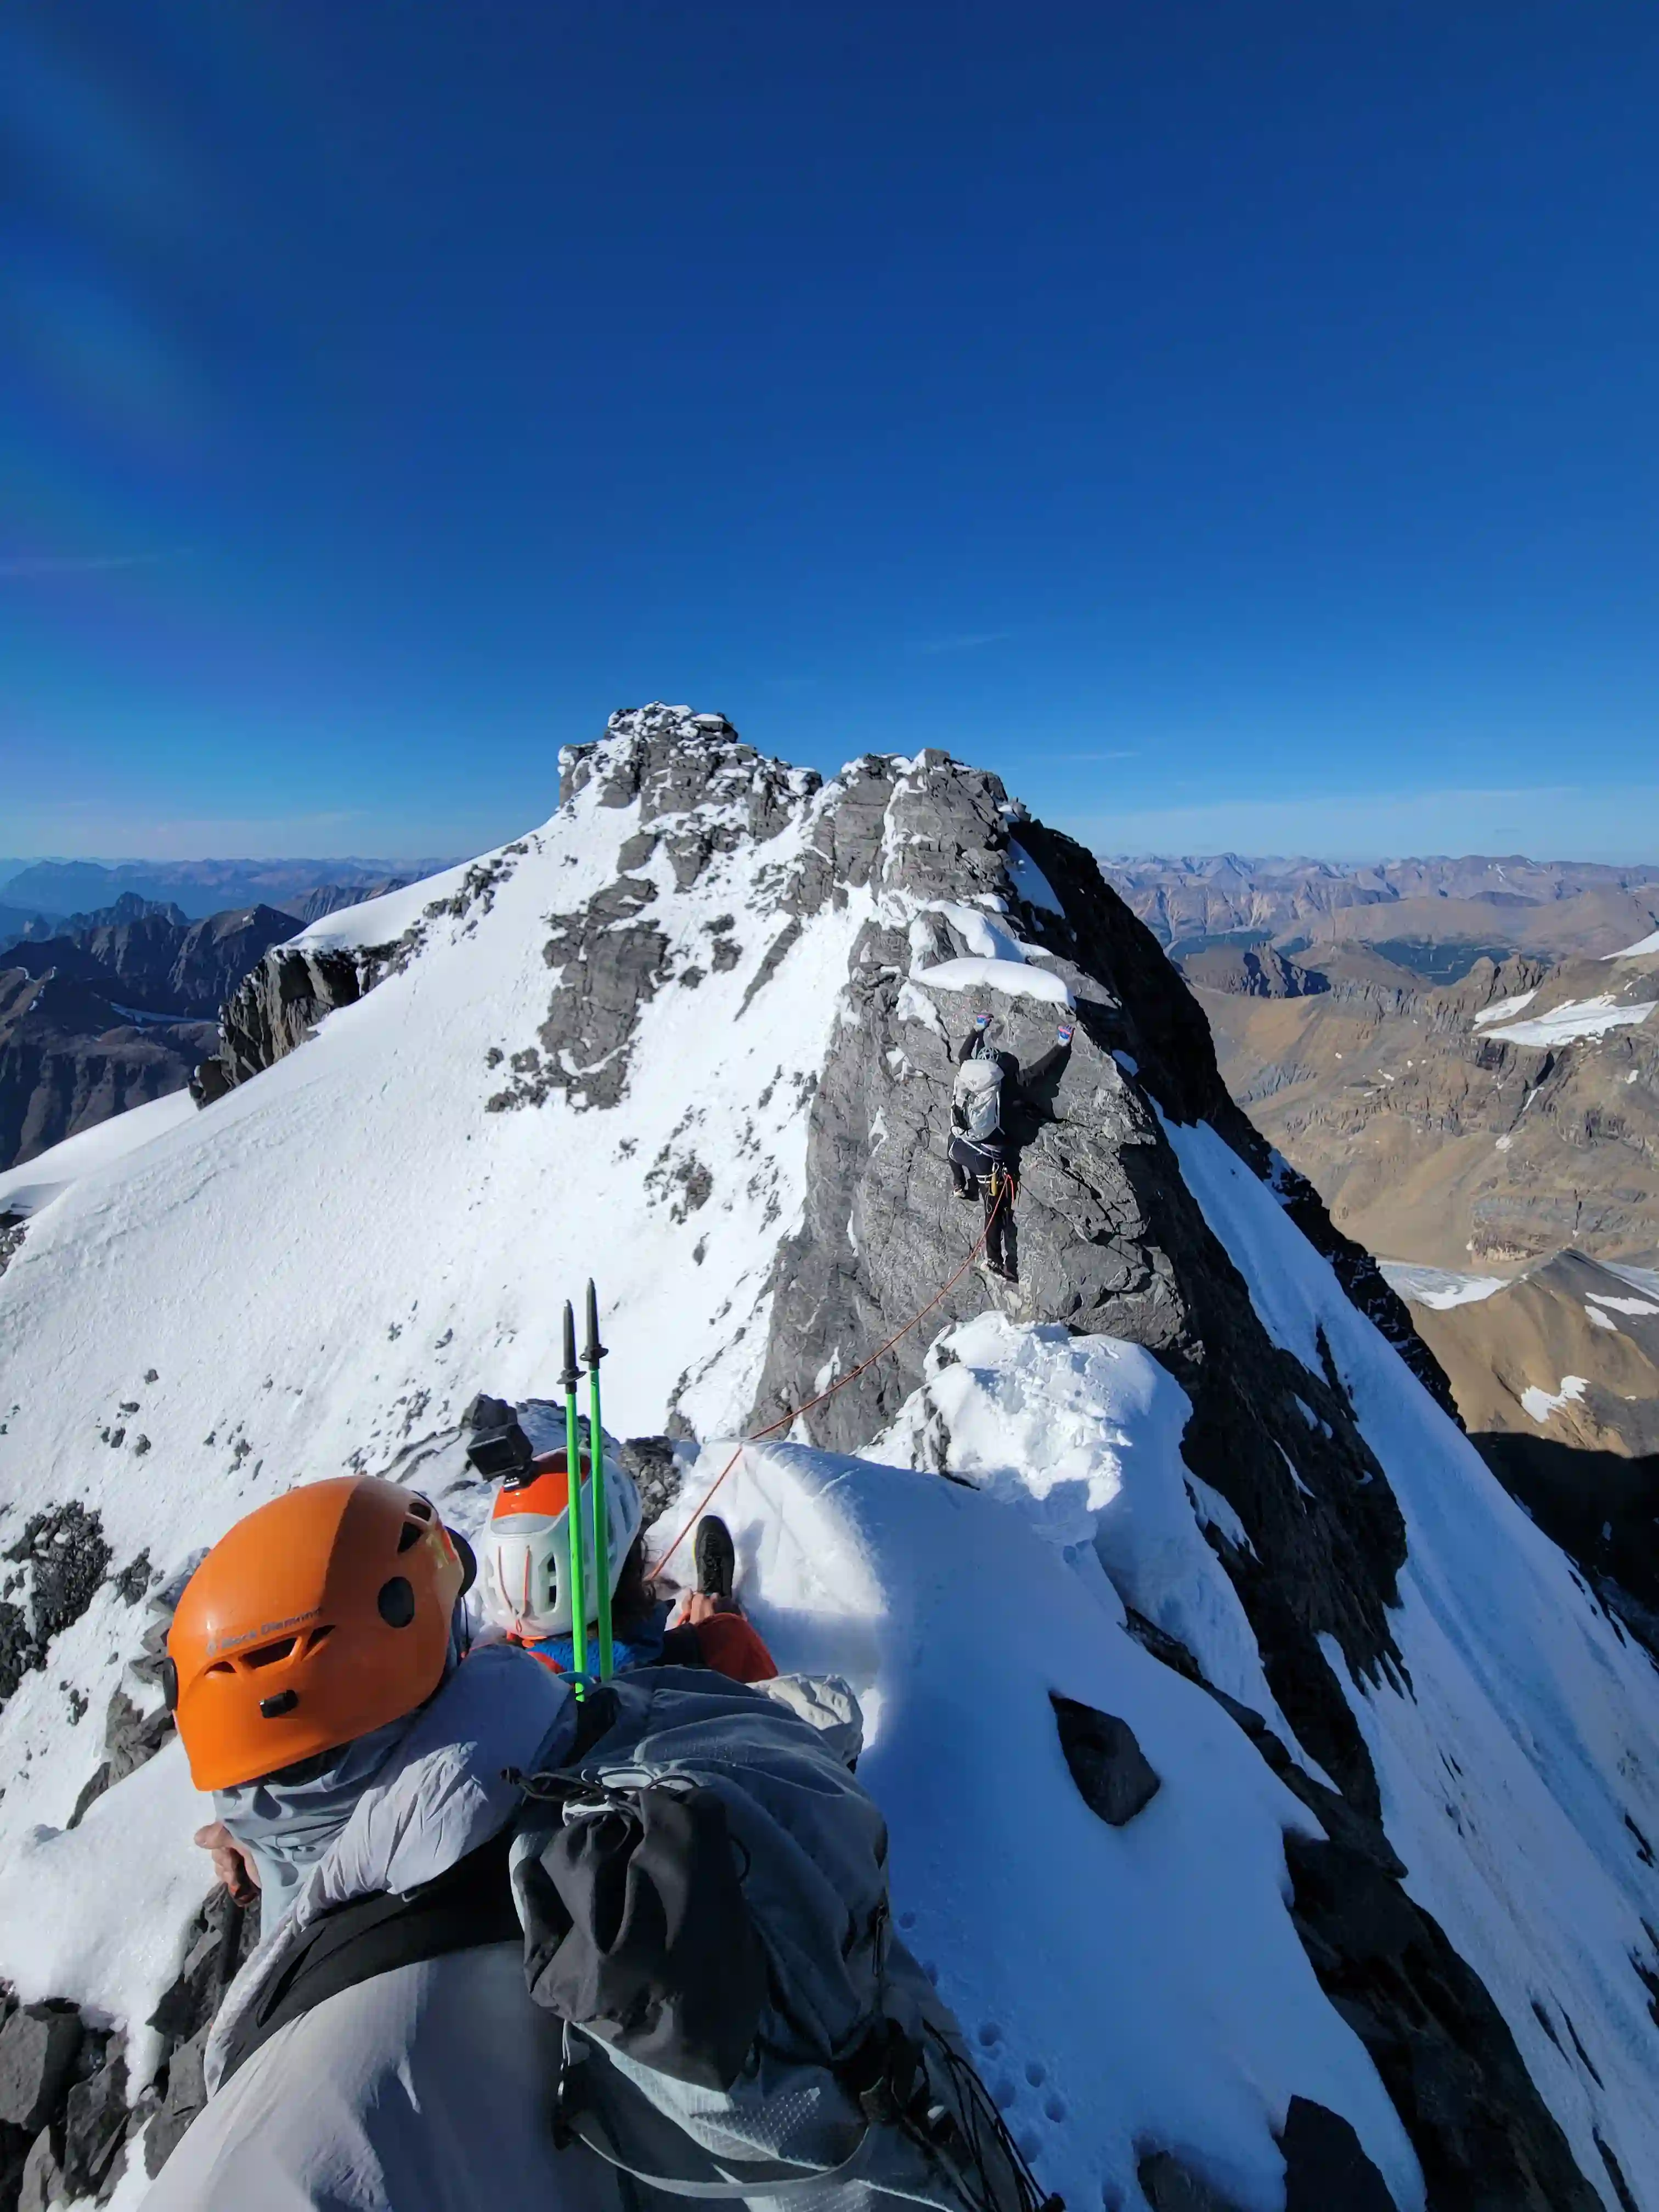
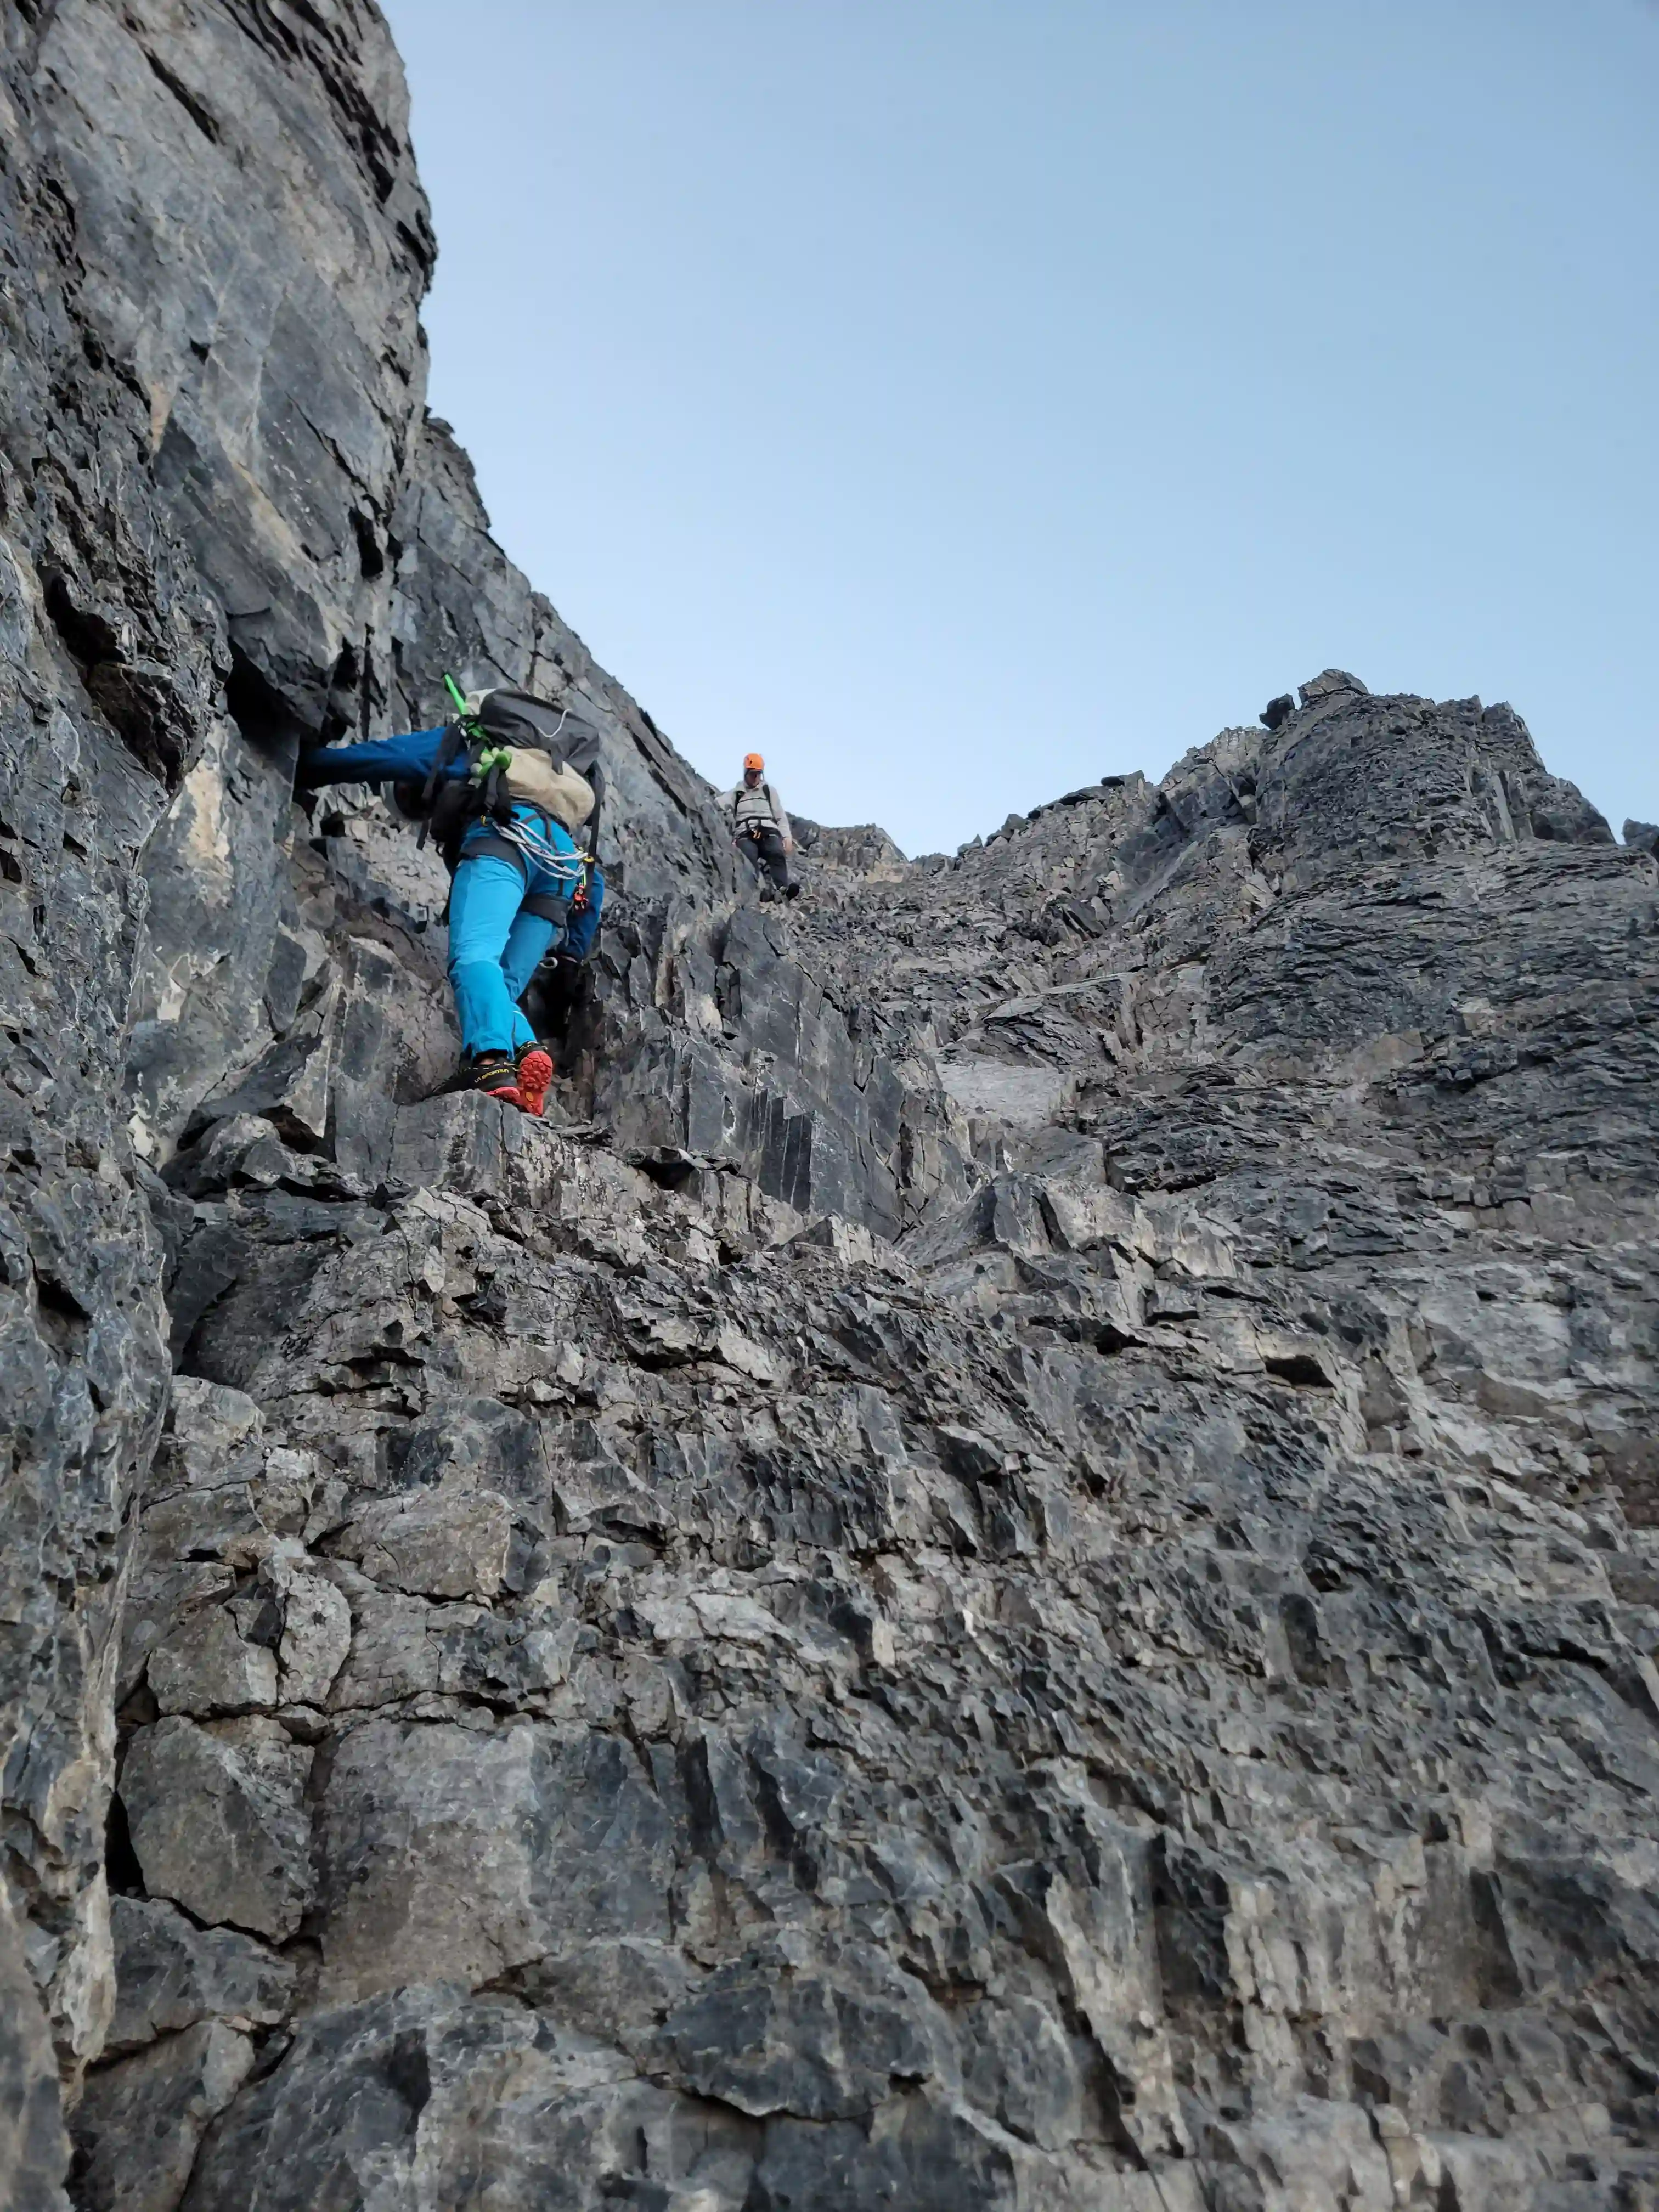
After topping out on the buttress following the 4th and final ledge traverse I decided to switch to climbing shoes as it was clear things were about to get more technical and I was glad I did. Things ramped up quickly with smaller holds and quite slabby terrain but we moved quite efficiently with all of us being comfortable free soloing as we worked our way closer to the proper gully while we ascended at a slight angle right. We had anchors to clip onto along the way which was nice because Mount Alberta's upper slopes are comparable to a proper multipitch climb and it's hard to fully relax when you're not attached to the mountain.
Once we neared the gully after 2-3 pitches of climbing things got tricky because we had to choose between steep and slightly snowy / wet slab to the left or the quite wet gully proper to the right. We ended up splitting up a bit here with Darren and I taking the wet gully while Mitchell and Tim took the slabby line. From here the gully turned to snow above us making the cross-over / shooting gallery pitch seem quite challenging to follow so we ended up traversing a bit climber's left before climbing quite a bit to the left of the gully. This put us on the wrong side sizably off route but I was confident we'd be able to get back on track with a rappel at some point above so I wasn't too concerned.

you want to be on this mountain!
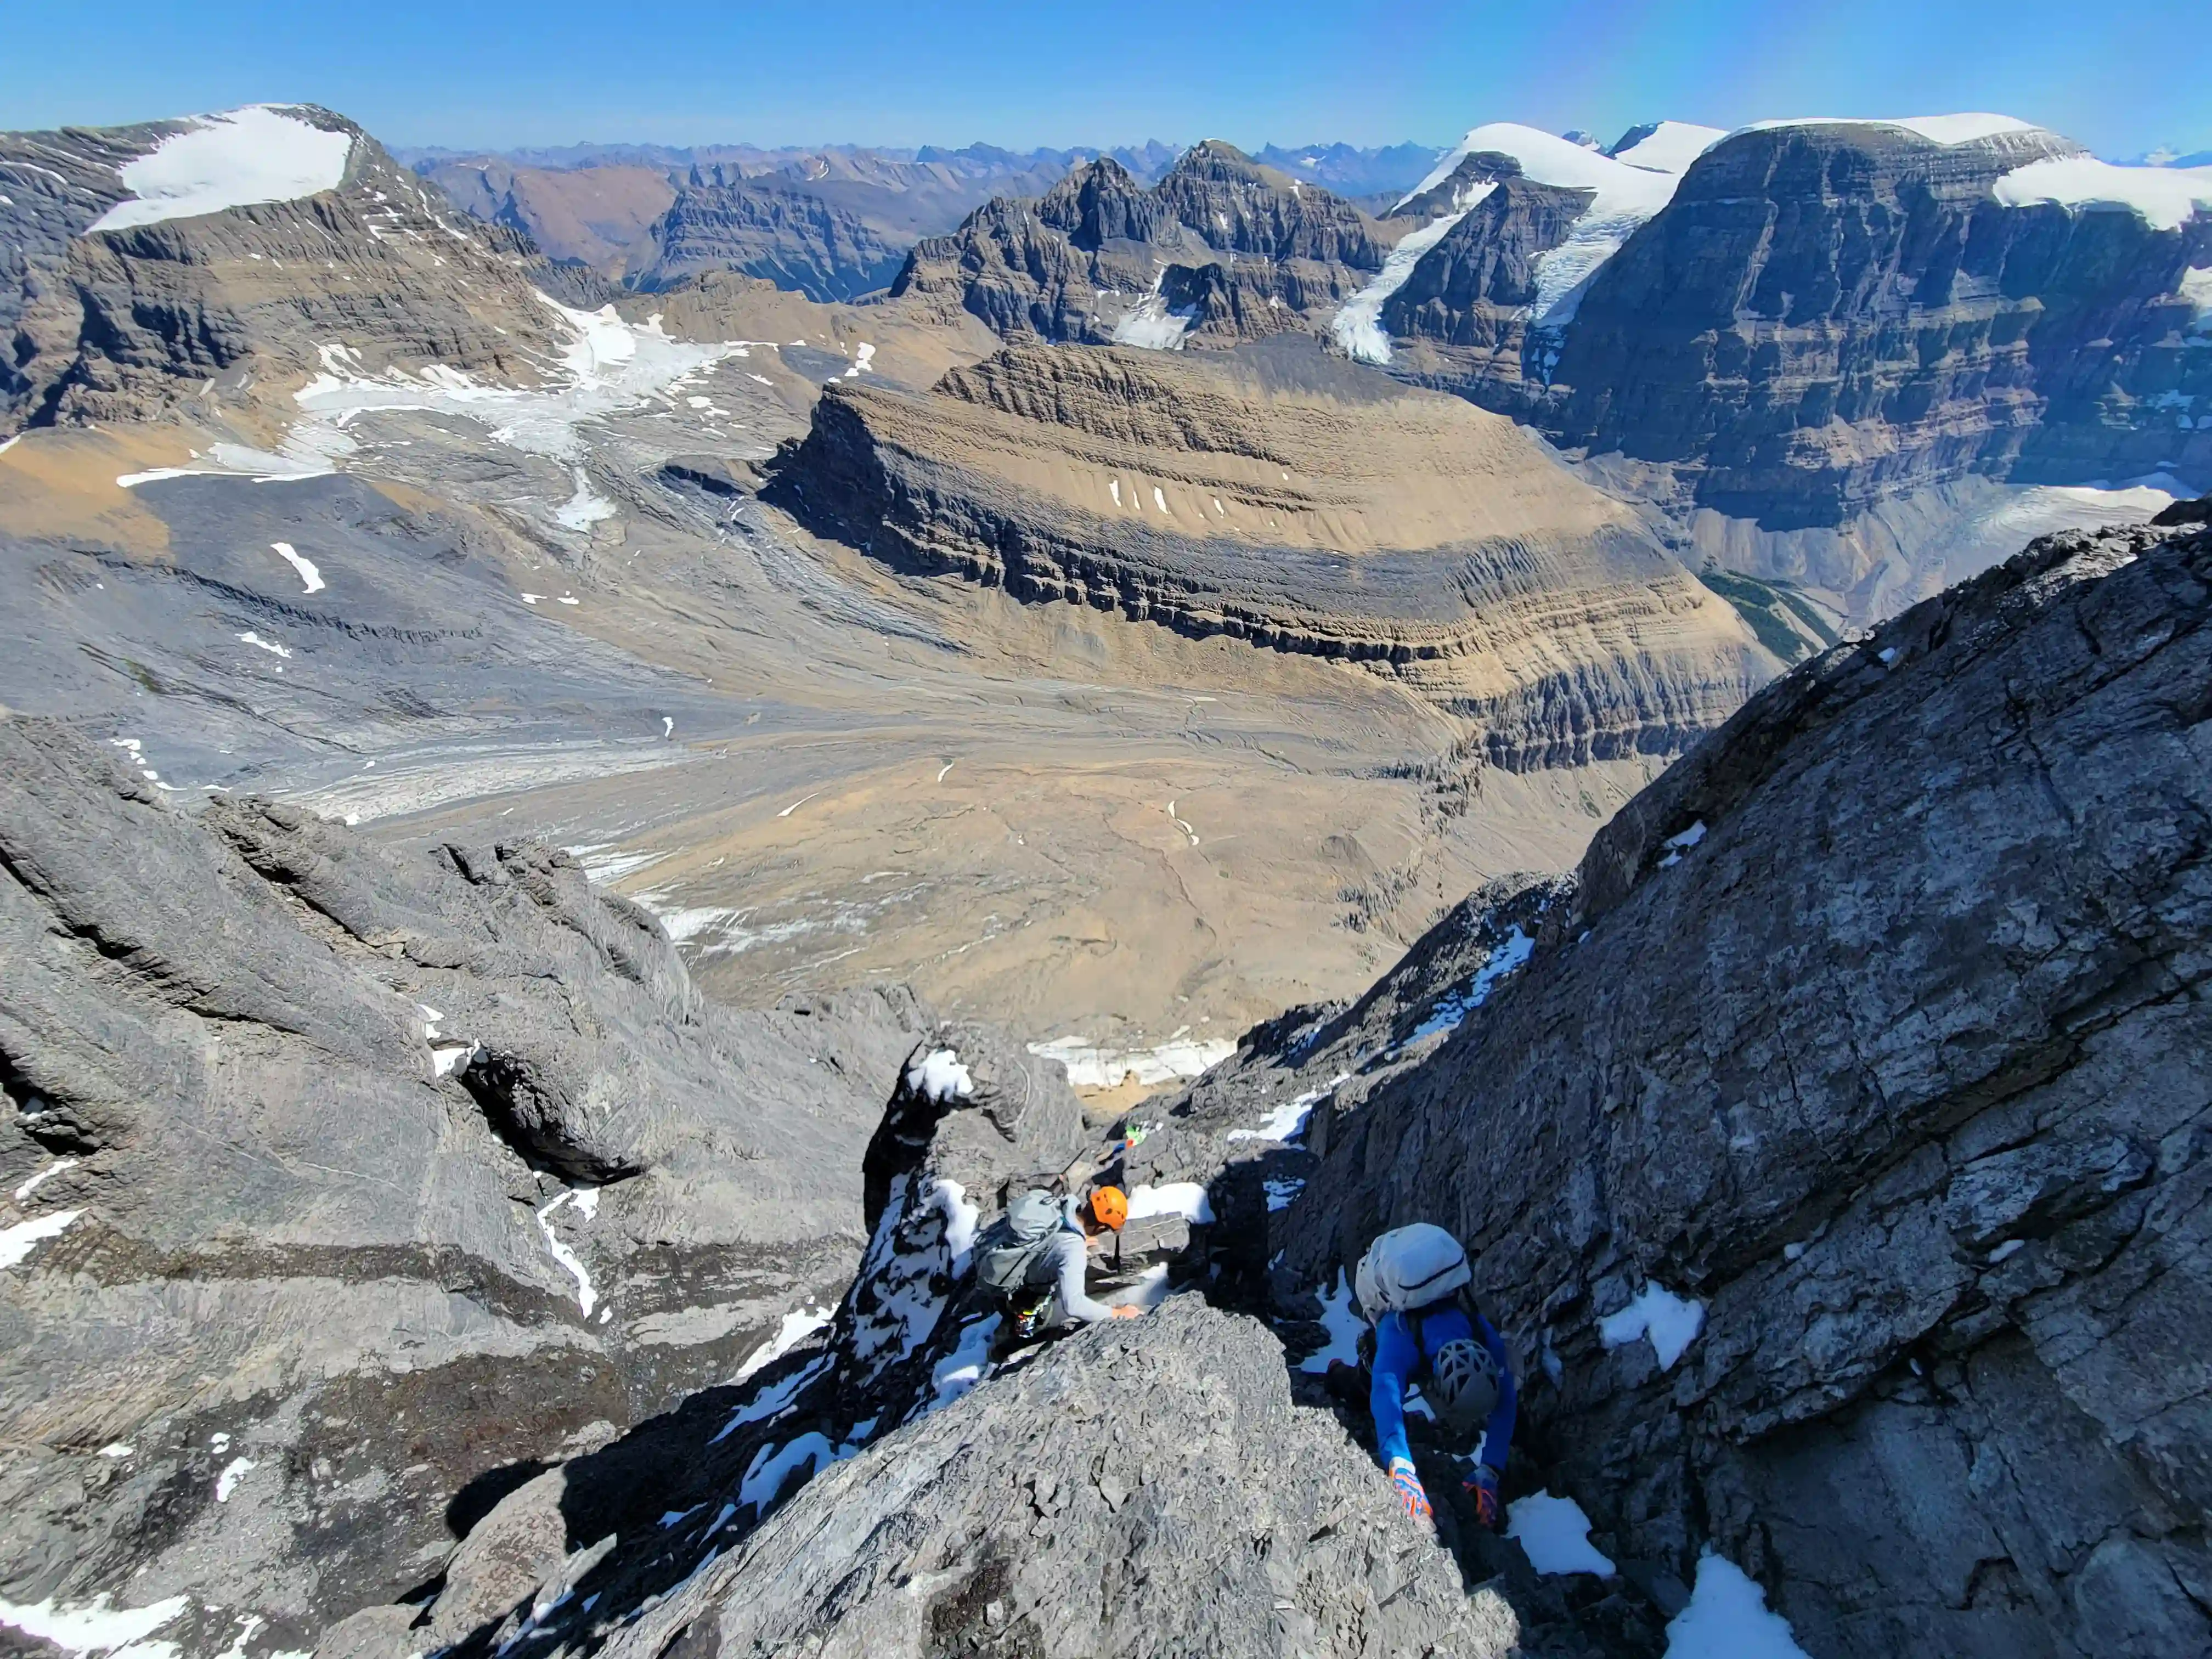
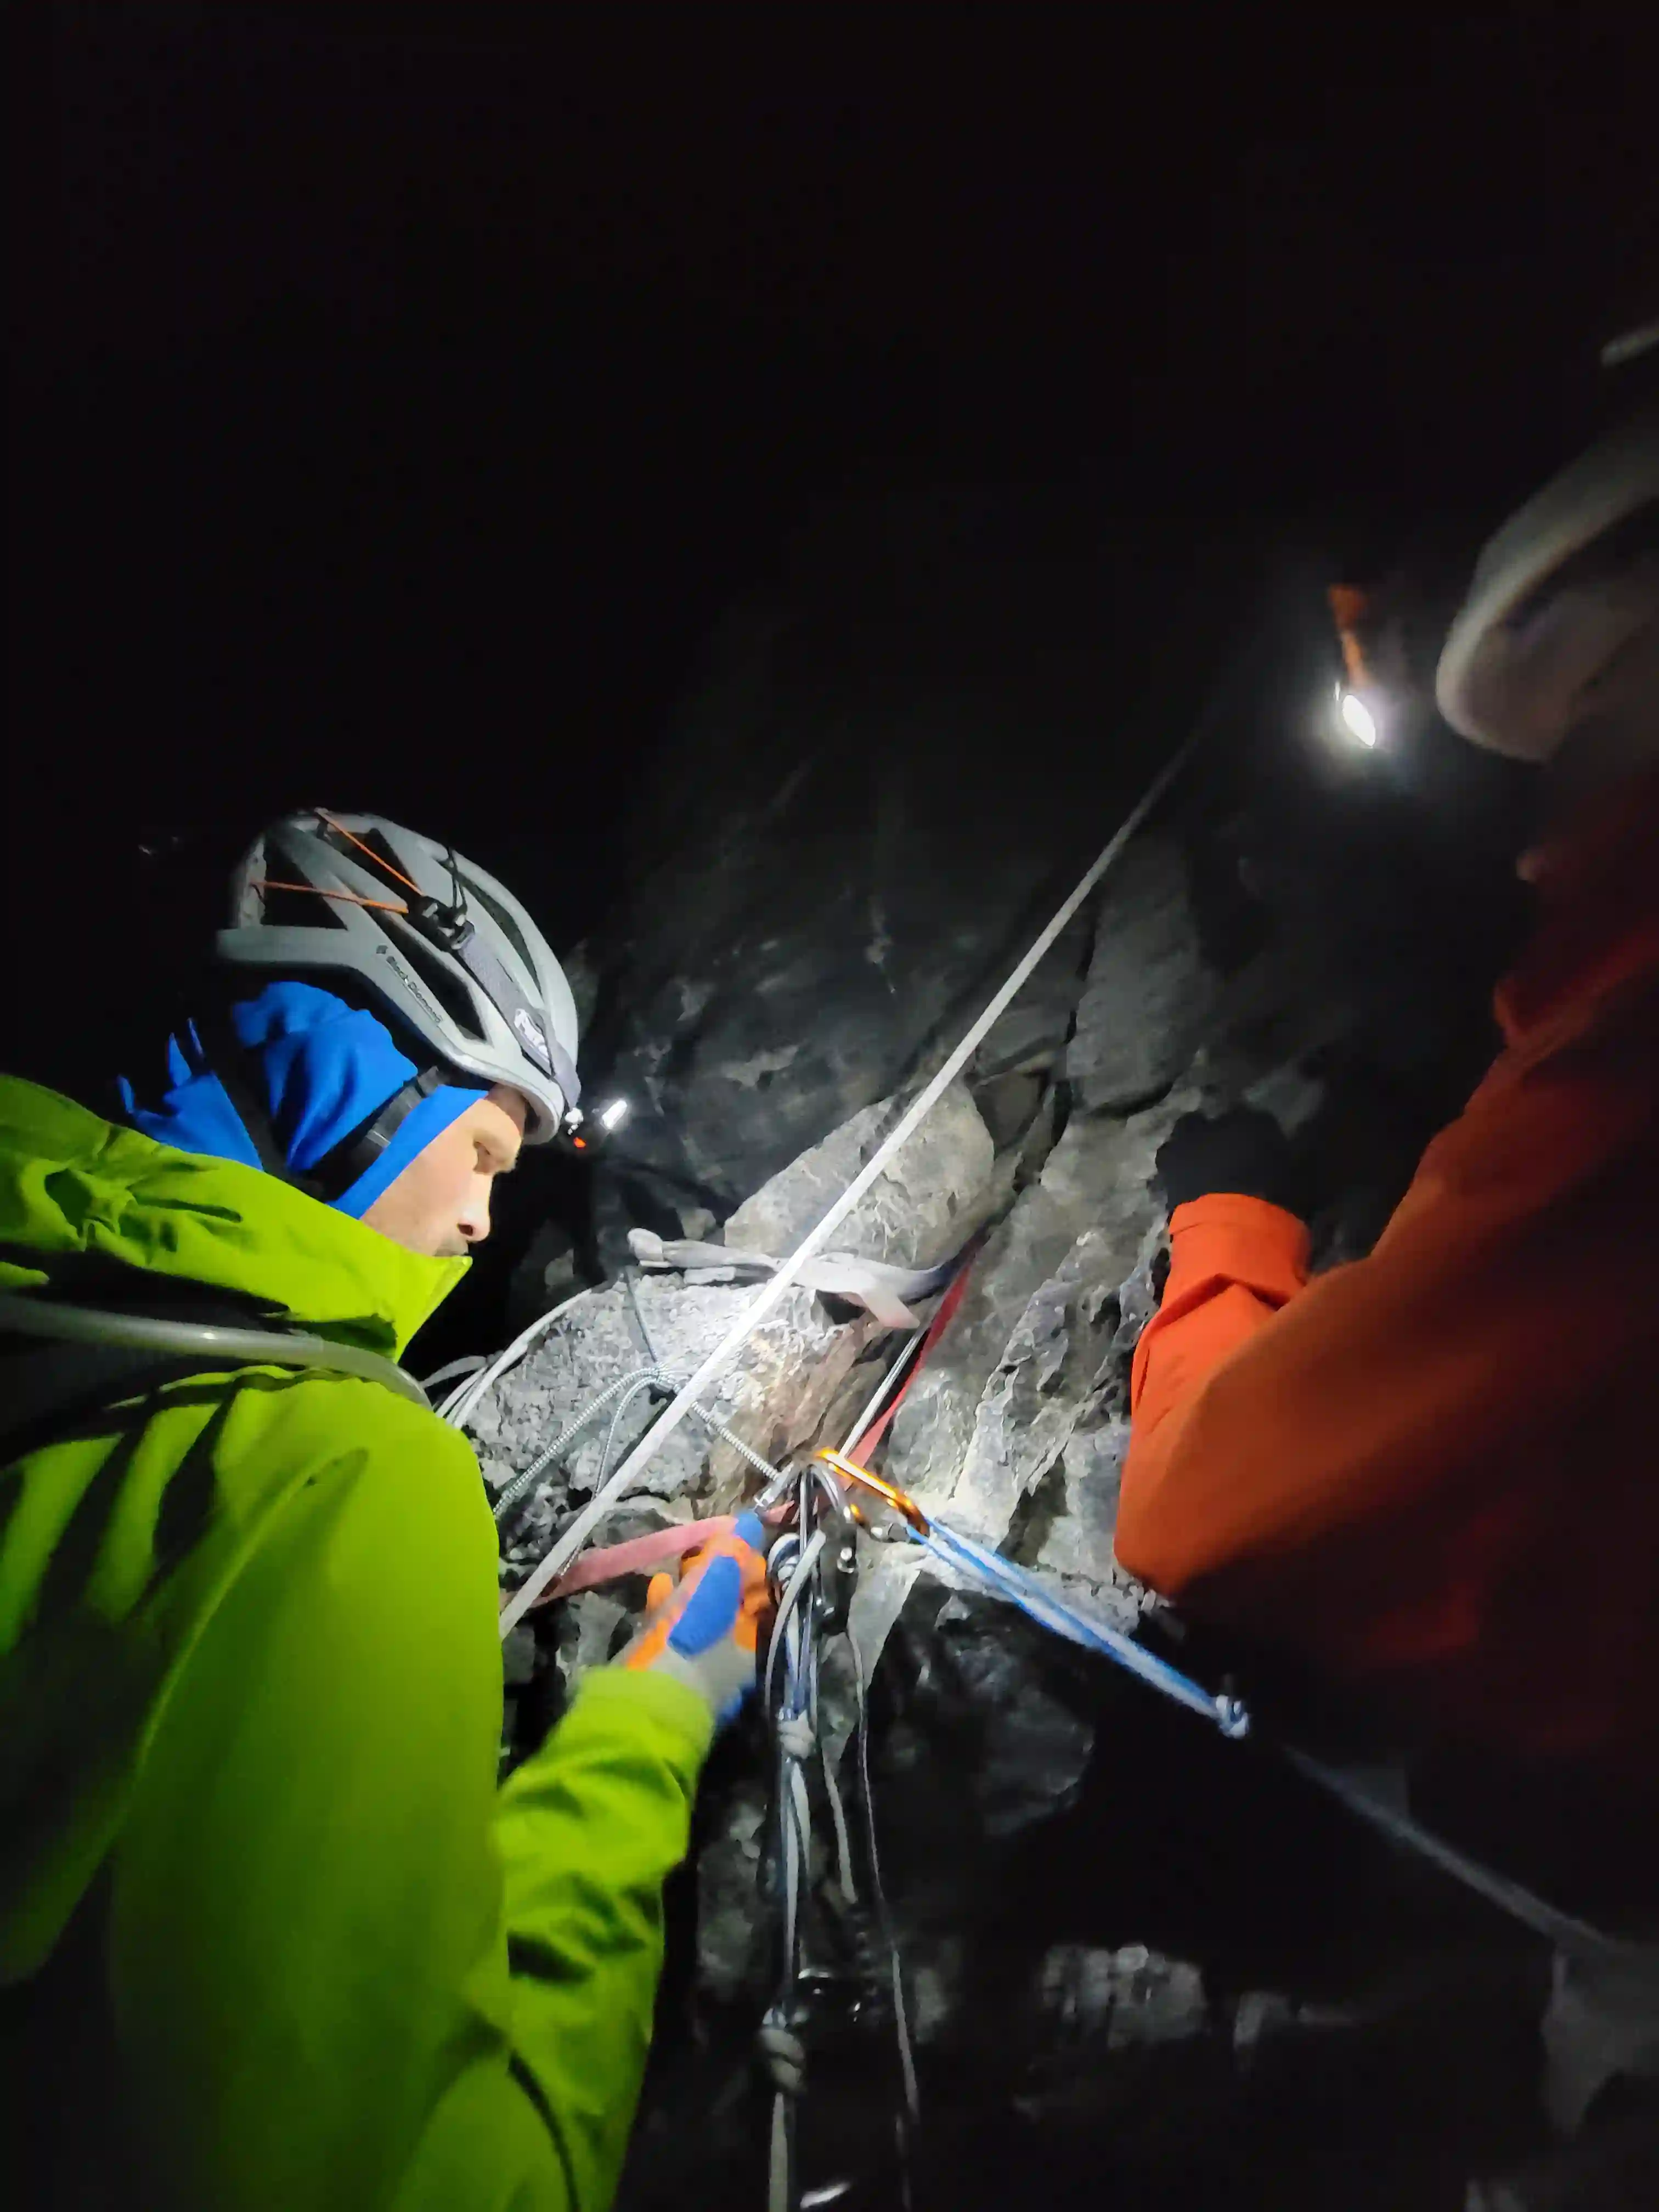
After climbing quite high on the left side of the gully it was clear we needed to get to the other side and with it being quite deep and completely full of snow a rappel was a must and thankfully near the top of the climbable terrain just below a cliff wall there was an anchor set up already so we decided to rappel across the gap from here. Mitchell rappelled first and we thought a swing rap was possible to reach a ledge on the opposite side of the gully but the angle was too steep and Mitchell ended up having to half free solo a stiff step while being attached to the rappel line with a prussik to gain it which wasn't ideal.
When it was me, Darren, and Tim's turn we did a short rap to a different rocky spot immediately across the gully below a wall we had to climb which I thought would be soloable but the rock was loose and the climbing was surprisingly stiff so thankfully with Mitchell above us already we were able to get a belay for this section which was the crux of the ascent for us. After we had all reached the anchor we continued on and from there it was just one more pitch of easier climbing to the ridge where we could finally see to the west and with a bit more climbing up the ridge with a short ledge bypass we were on the ridge proper. The downside was that by the time we had reached the ridge proper it was 5pm and we still had a lot of technical terrain to ascend let alone get back down but despite the risks of getting benighted we were invested enough that we decided to press on regardless.
on this mountain! The route goes up & right here
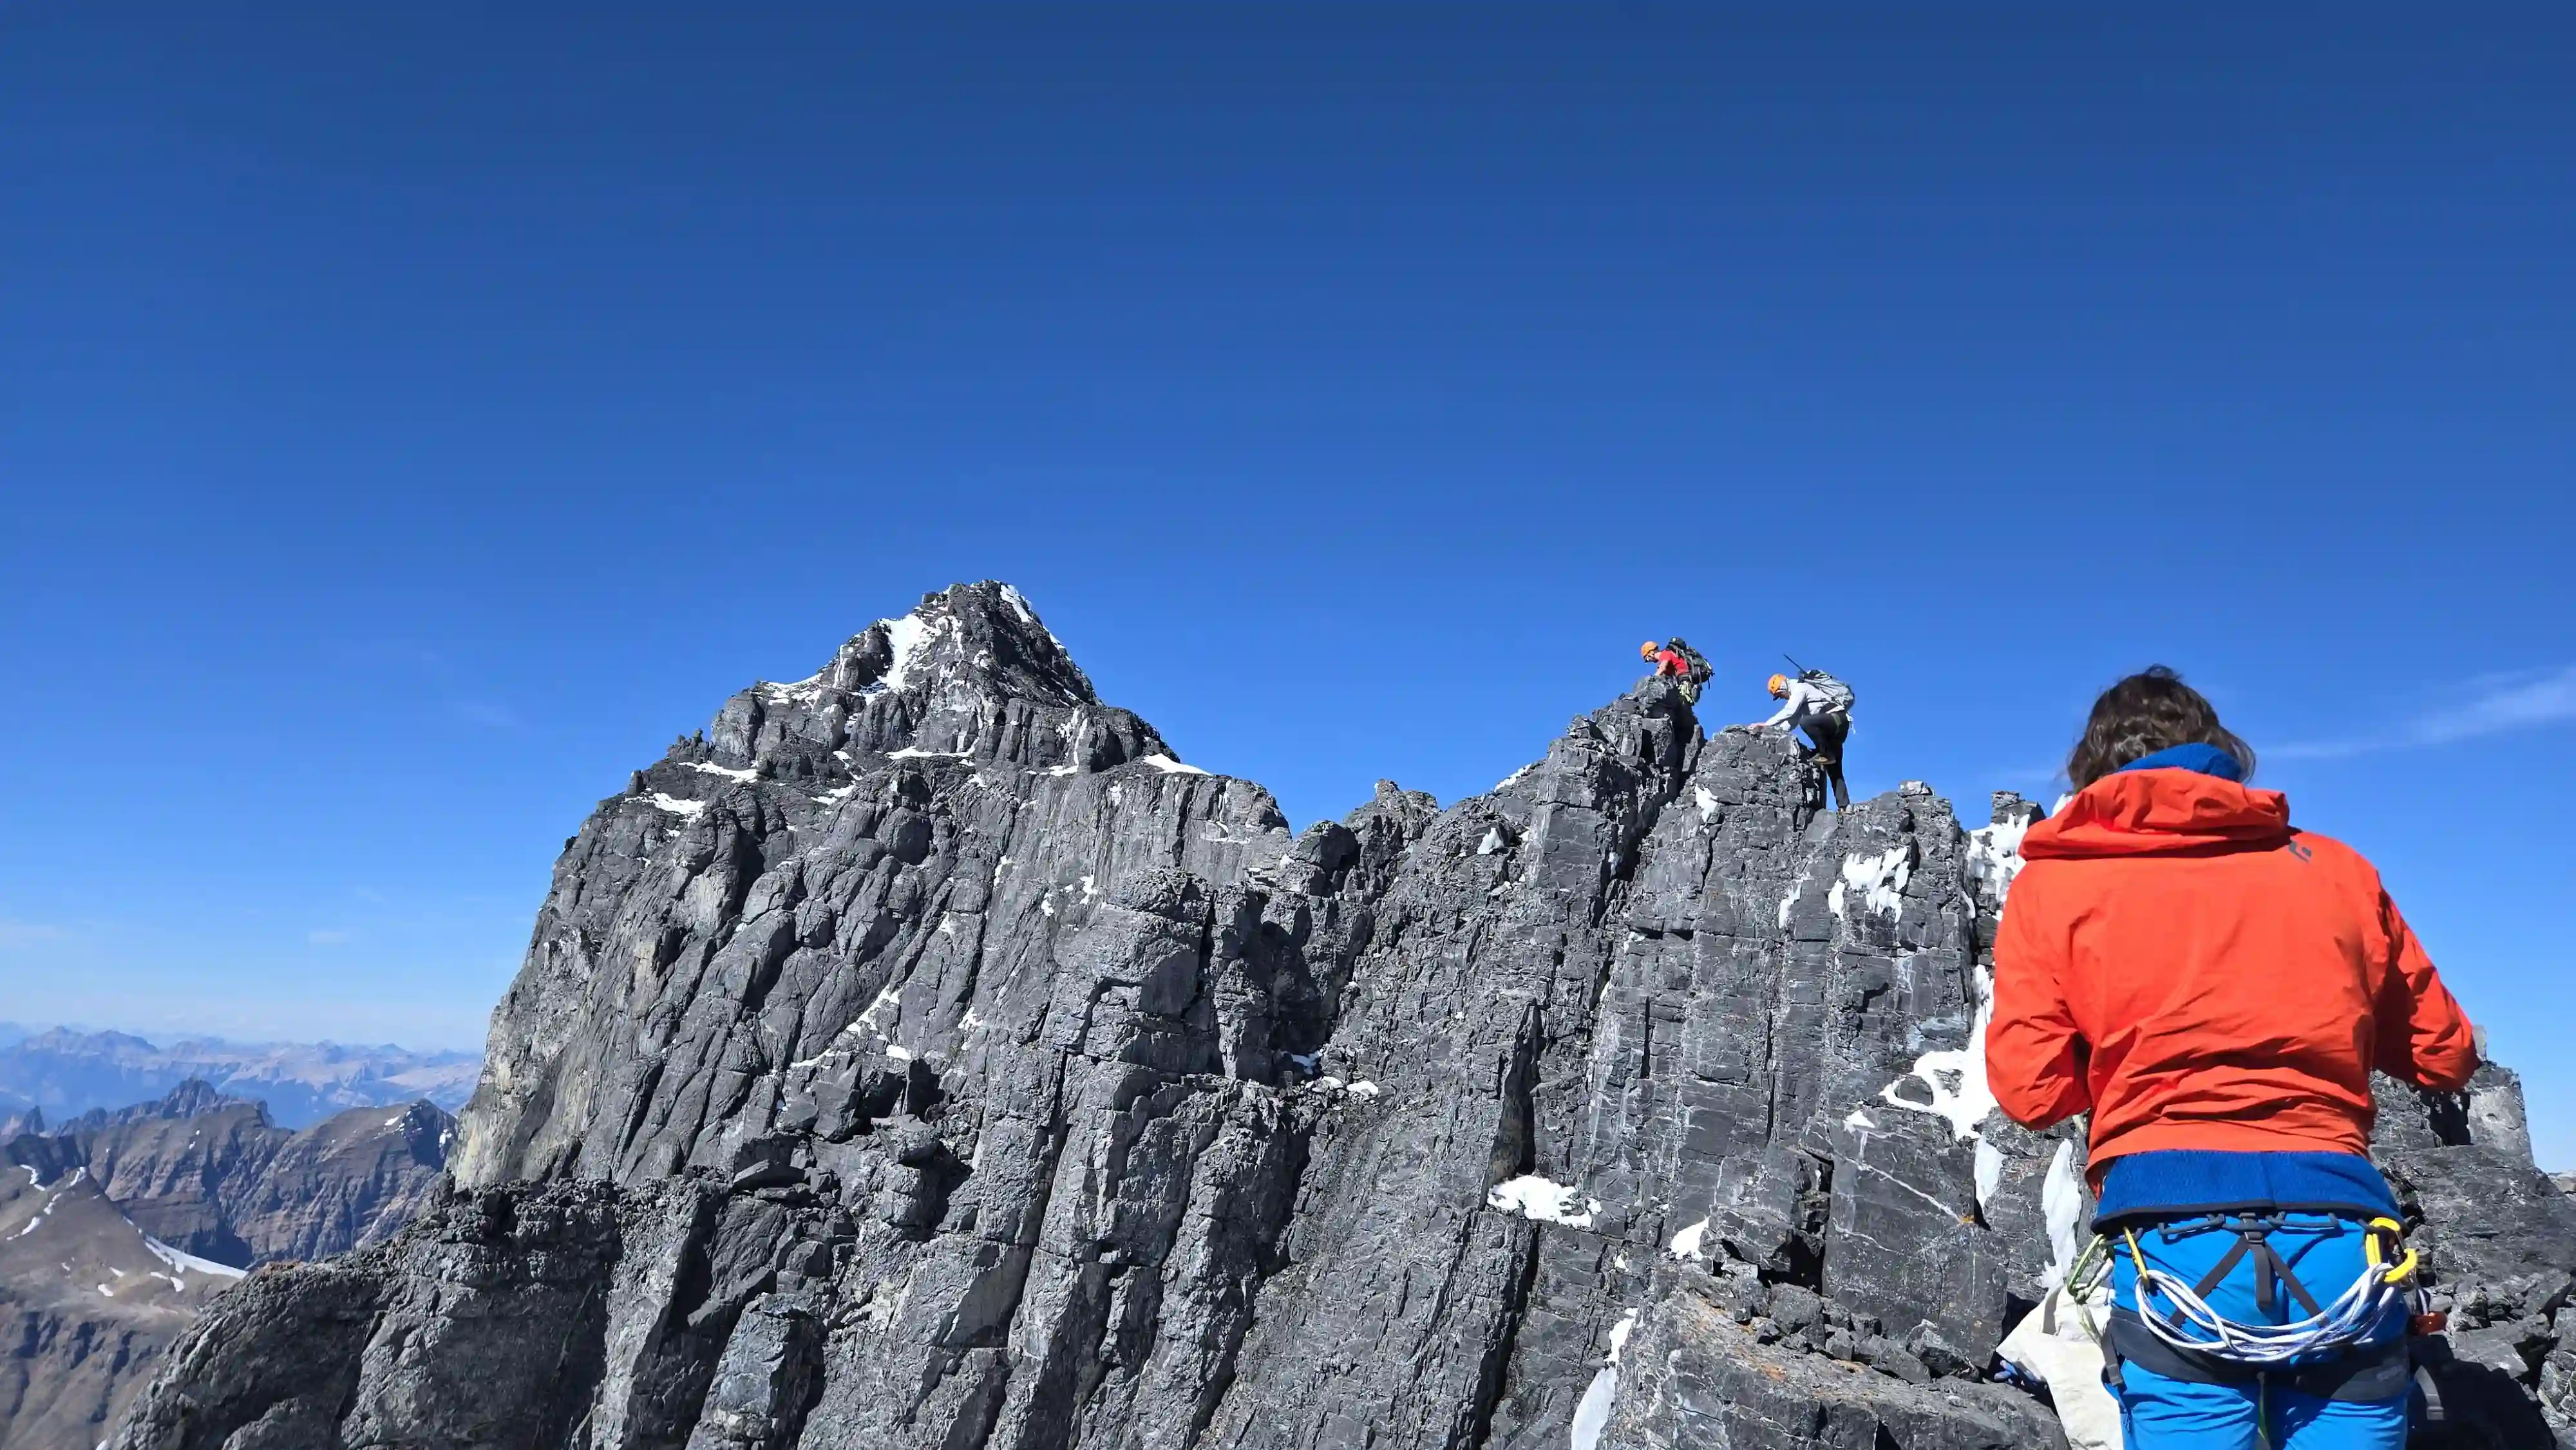
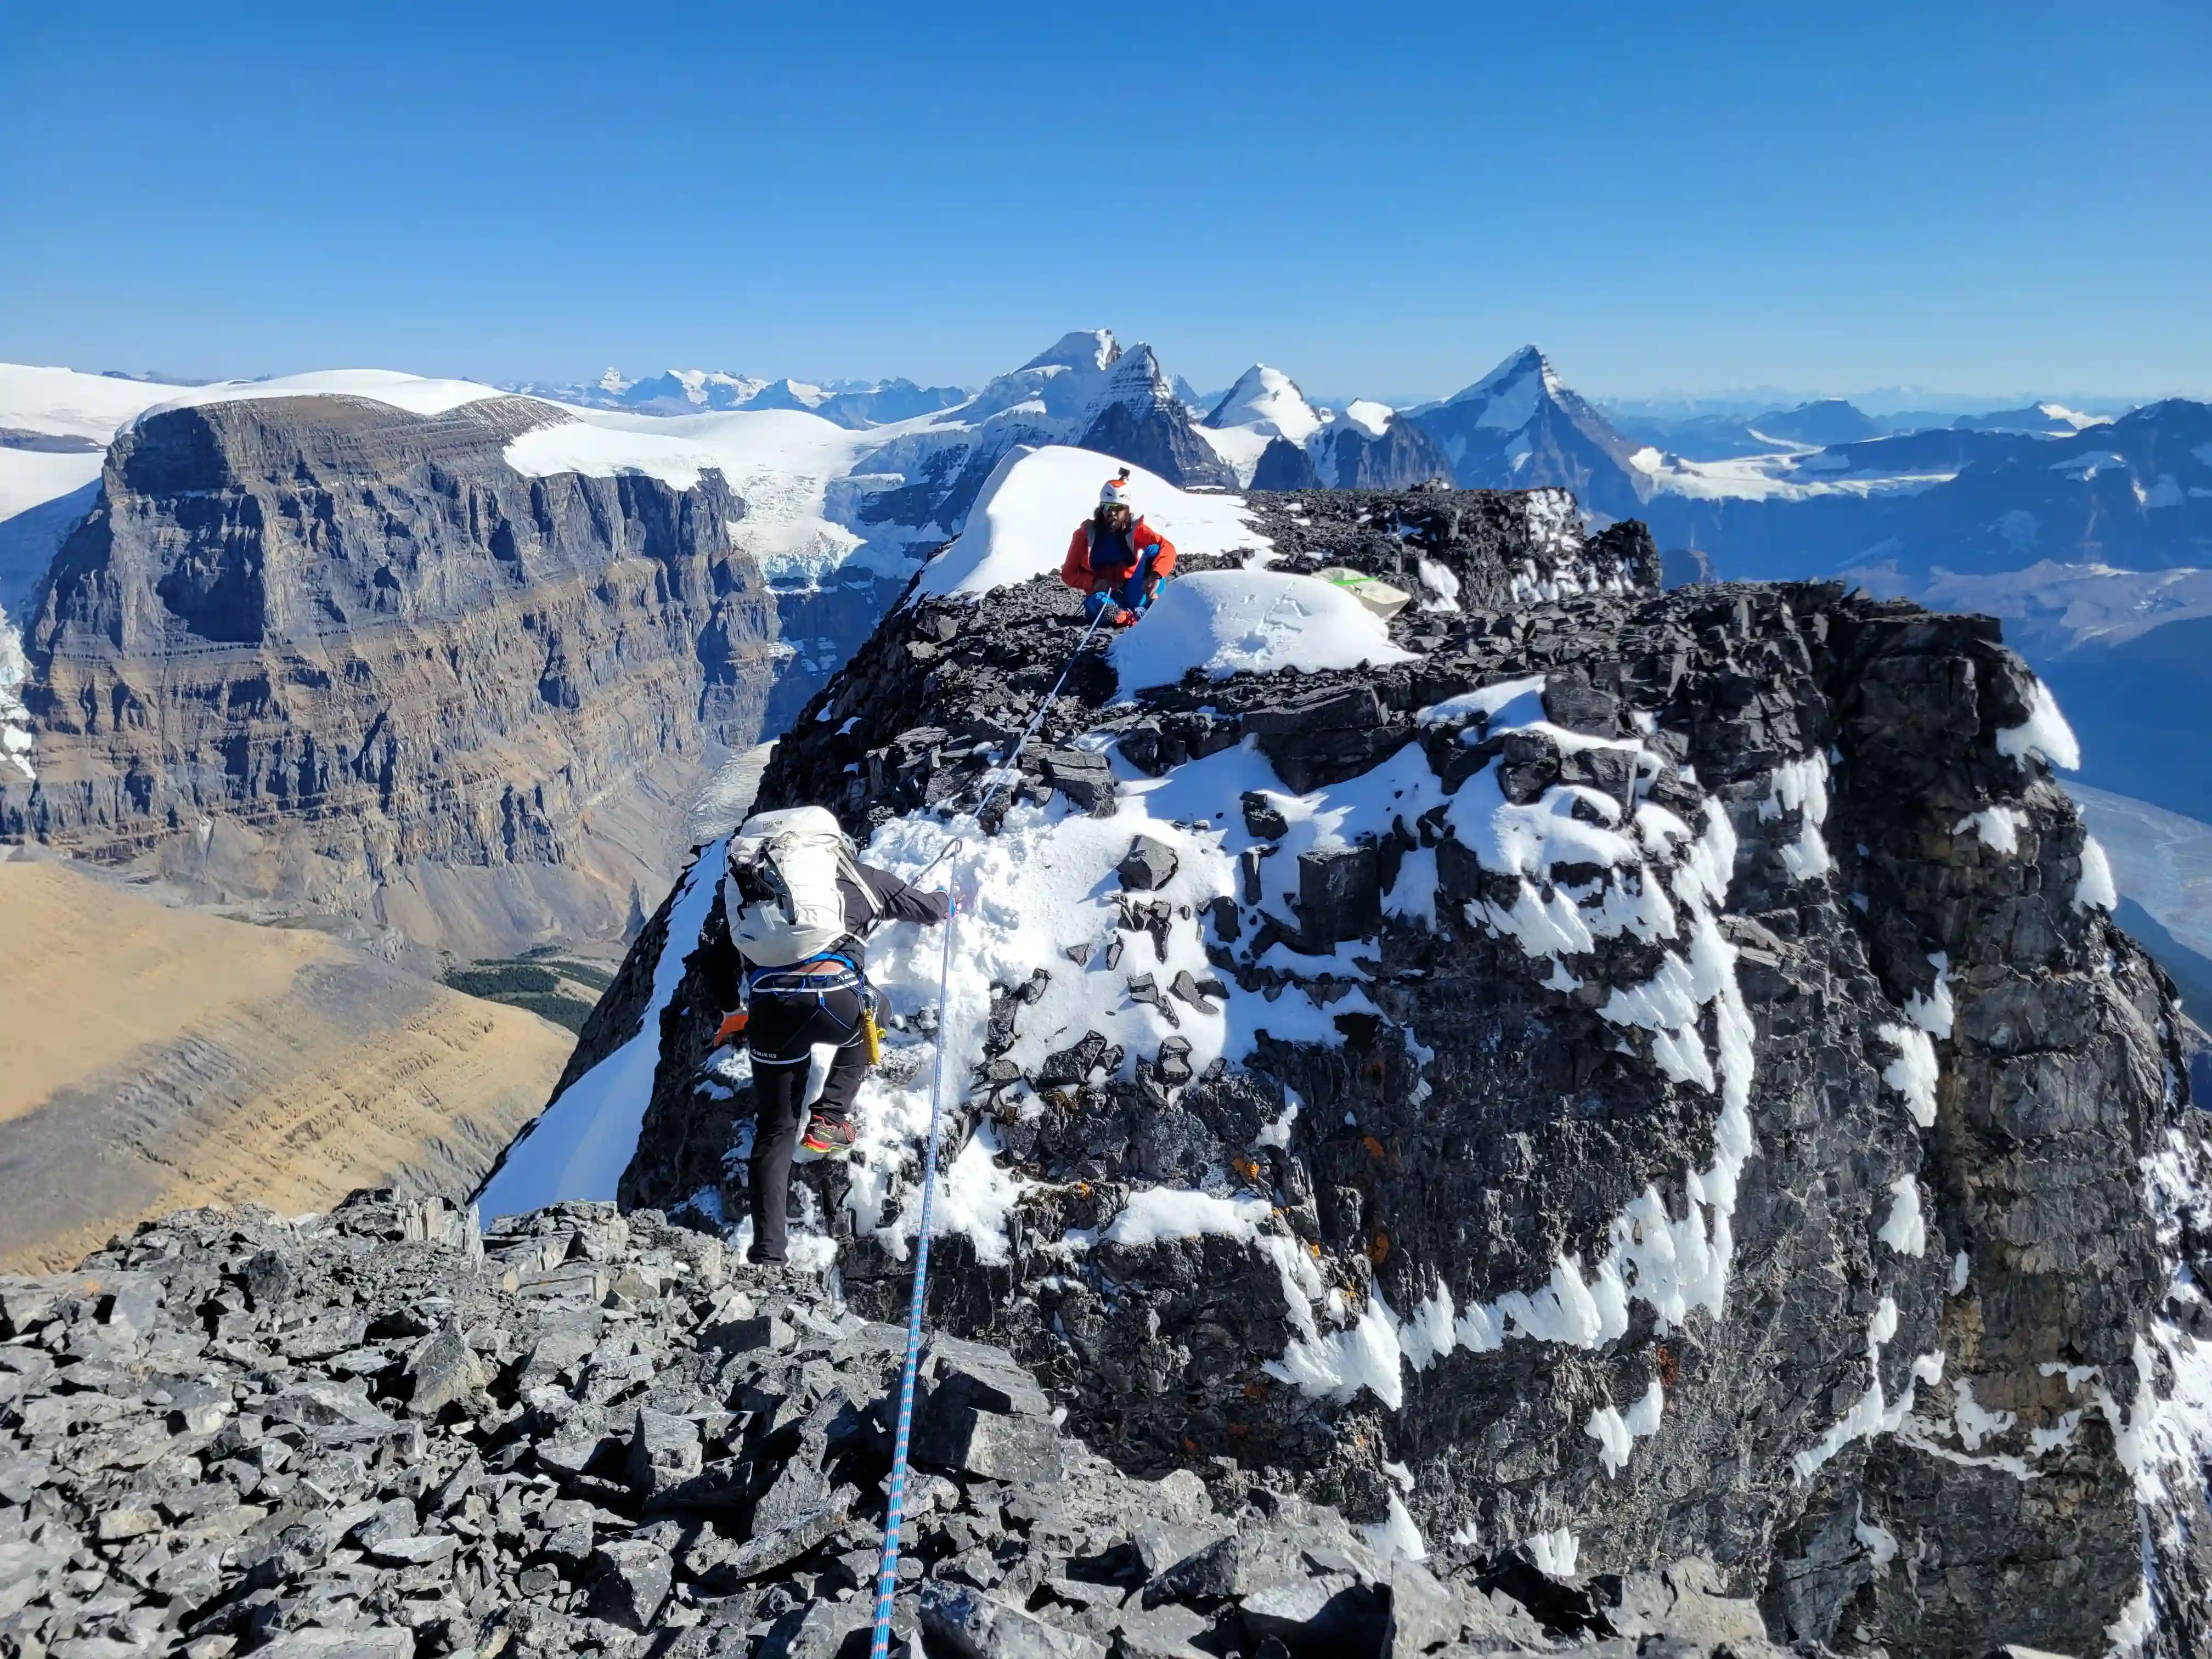
As we followed the ridge things started off nice and dry with occasional snow we were able to bypass but once we hit snow that fully covered narrow sections of ridge we realized how sketchy some of the upcoming snow covered spots might be. There weren't a whole lot of options to protect these moves so we opted for a body belay to get everyone across and soon after we hit one of the nastier ridge face bypass sections which was very exposed but thankfully dry.
After some more snow covered ridge we reached the notch which we didn't even consider downclimbing because of how snowy it was and with an anchor already set up at the top opting to rappel was an easy call. Unfortunately this wasn't the last of the difficulties for us before we reached the summit and shortly after we all made it across the notch the final section of ridge had a number of partially snow covered pinnacles that stopped us in our tracks. With some 5th class and potentially slippery sections making for some committing moves we opted to body belay again and finally once we were all through this section we were taking our last steps towards the summit after 700 tough meters of ridge!
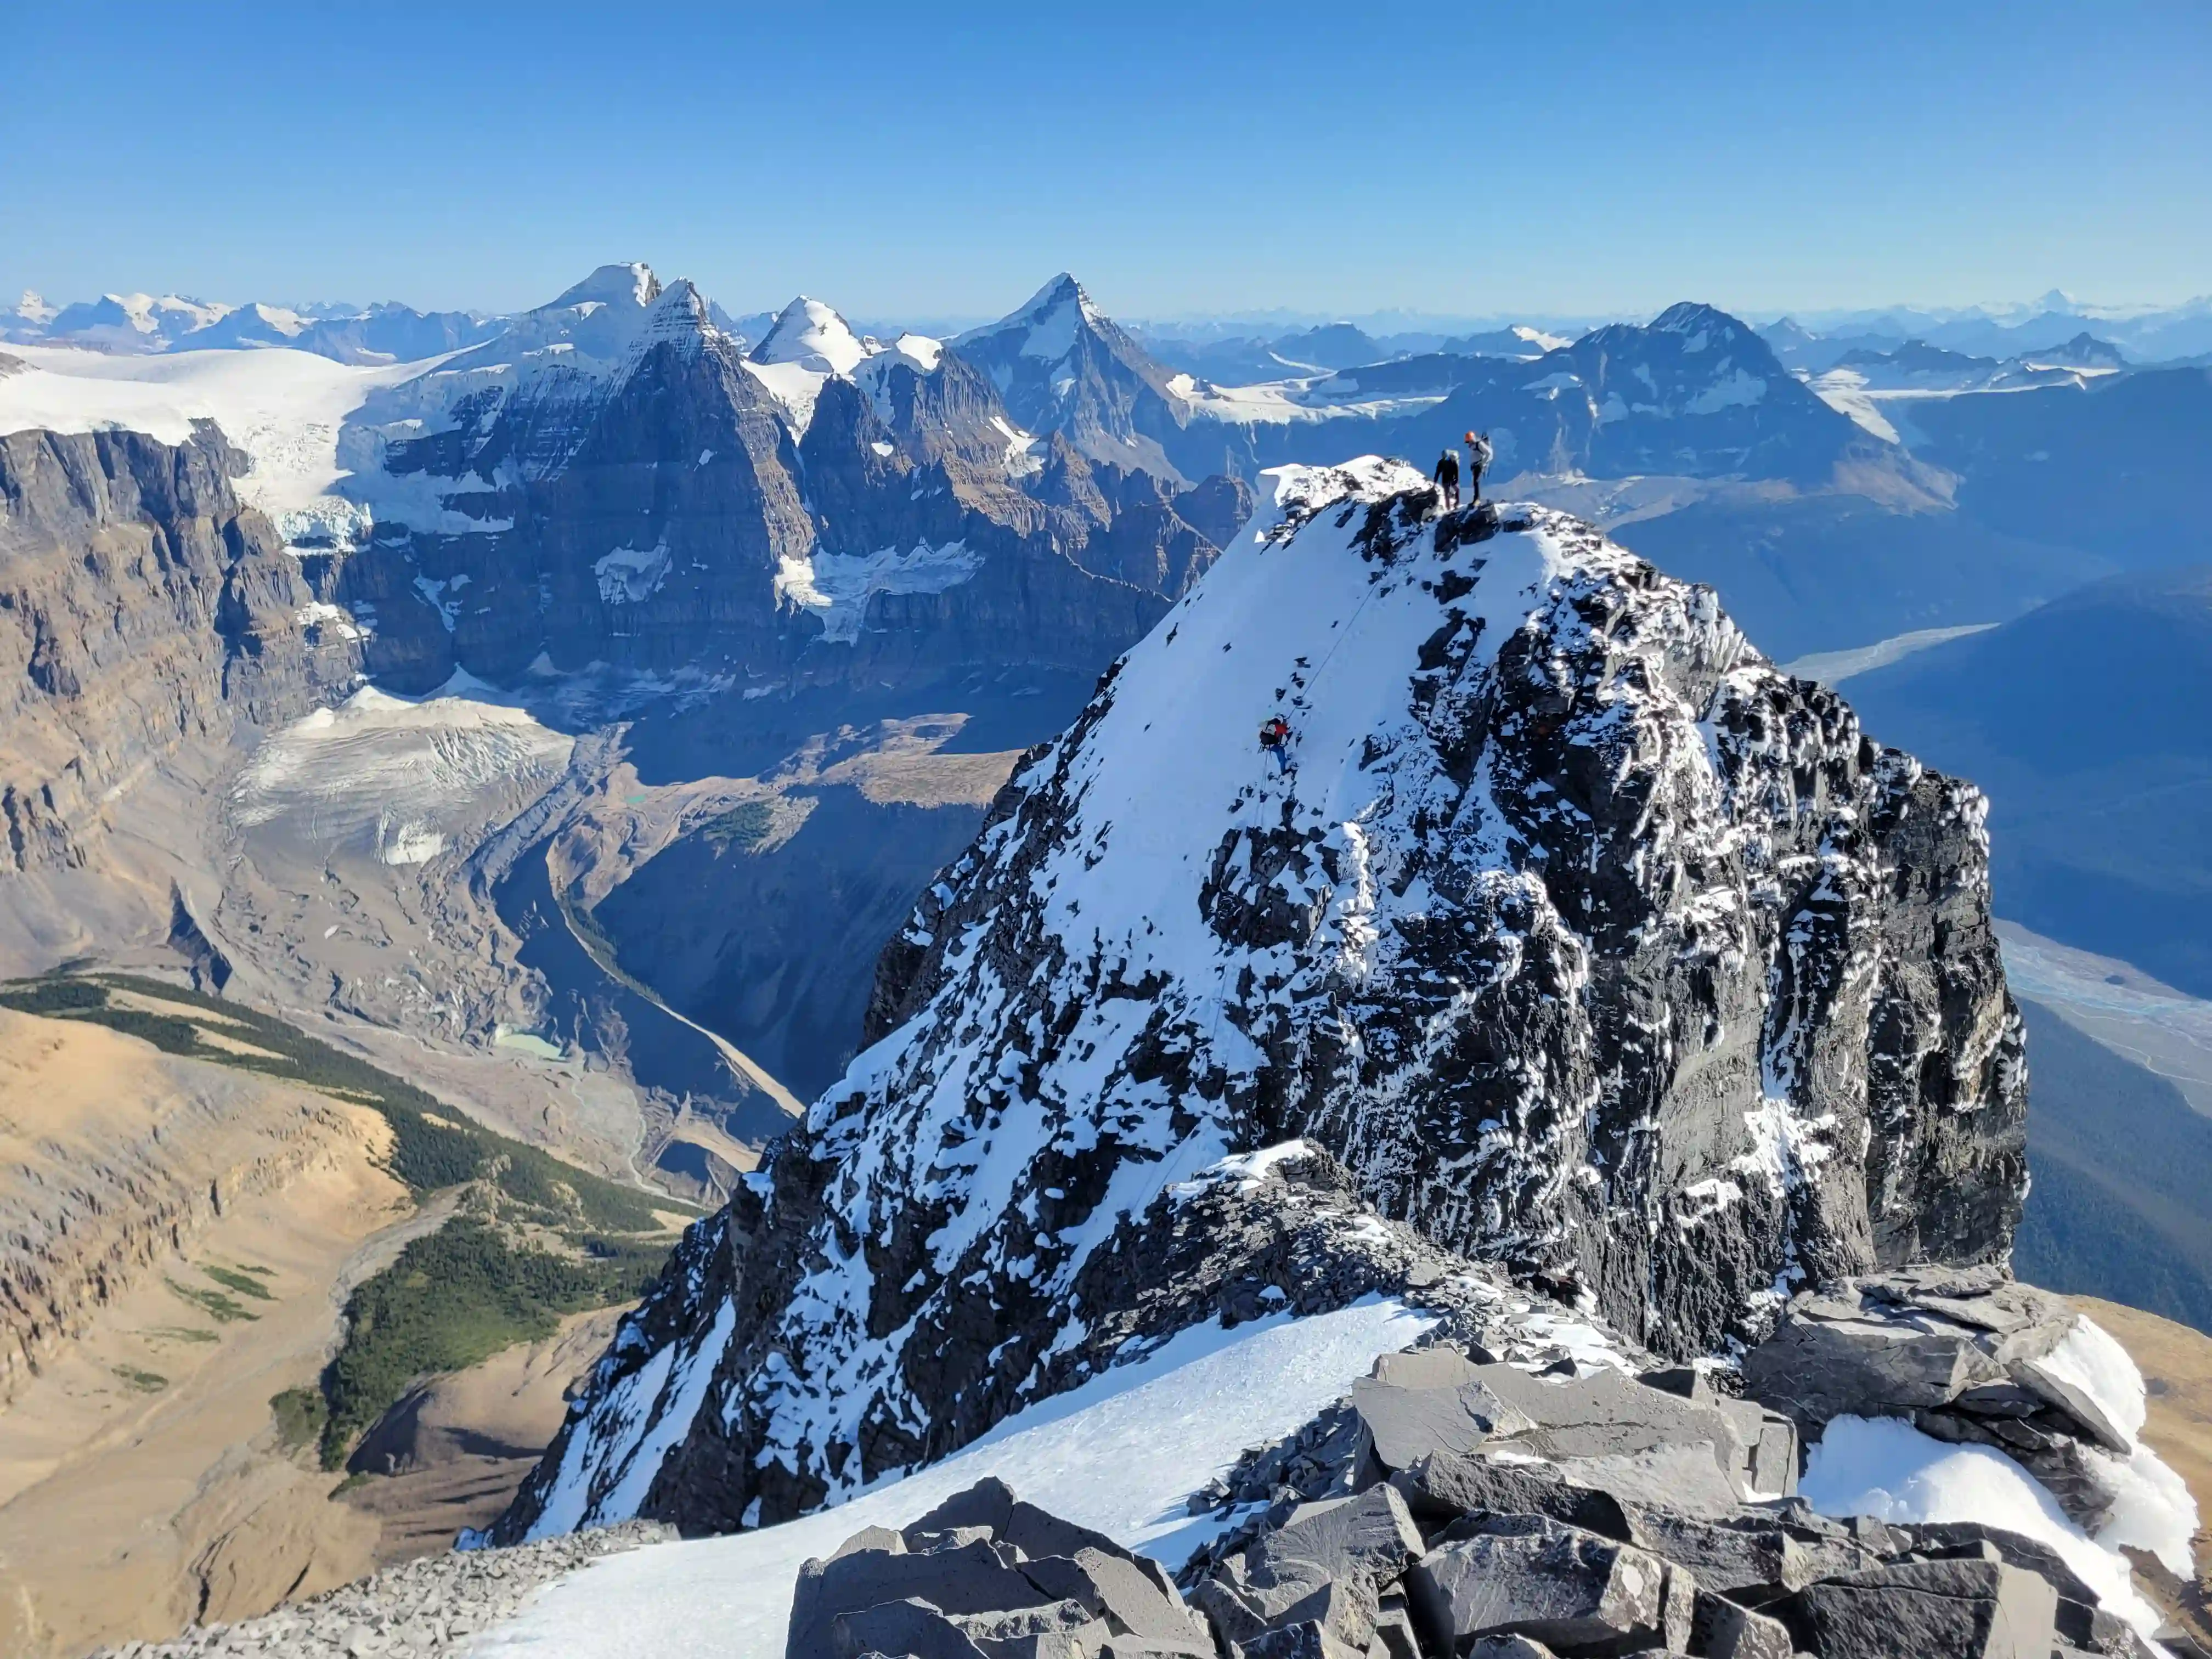
THE SUMMIT
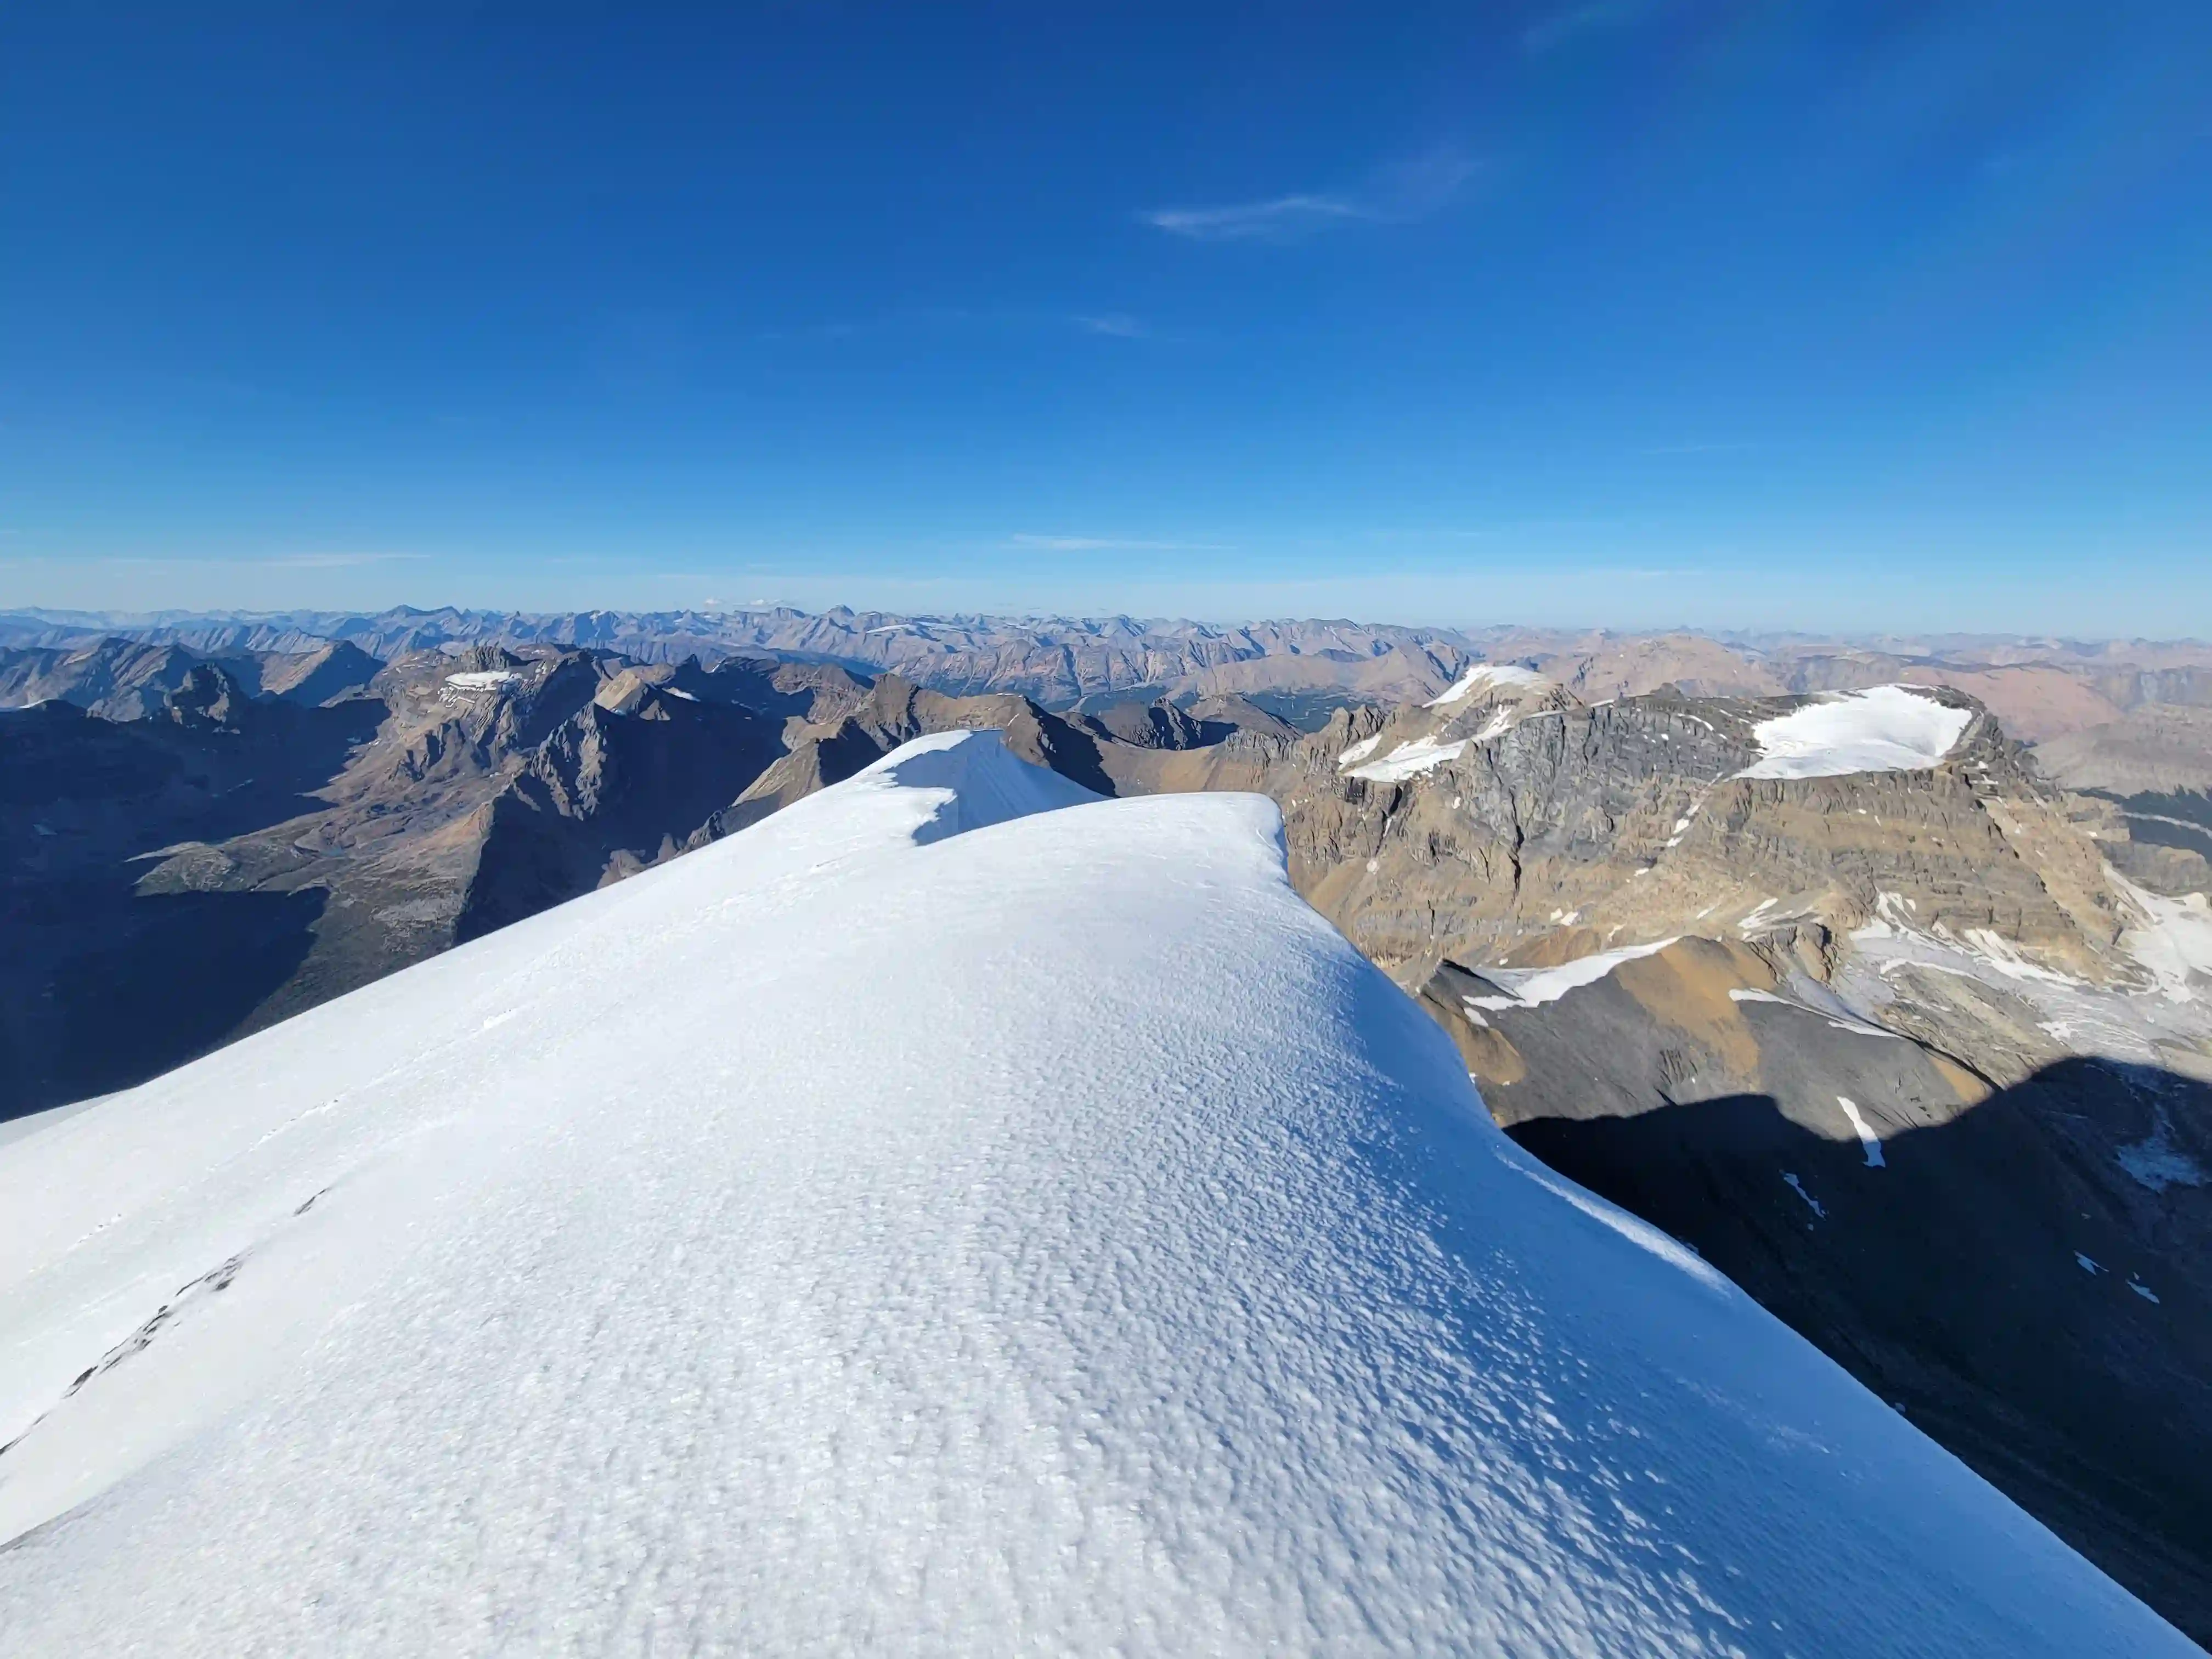
summit time... 7pm
After a complicated ridge traverse and a long day of climbing we reached the summit of Mount Alberta! The only worrying factor was that it was 7pm by the time we summited so we knew we were in for a late night and didn't spend much time at the top before heading back down. We spent 5 minutes at the top celebrating, taking photos, and looking for the iconic umbrella which we unfortunately couldn't find as it was buried in snow and after that we began reversing the long ridge.
There was a particularly flat spot on the ridge a bit before the halfway point so we had thought about spending the night there before doing the rest of the descent the next day but without our bivy gear we were pretty sure we'd freeze above 3500m despite the jackets we did have so we planned to descend to our ledge regardless of how long it took. We were able to reverse the entire ridge without using the rope aside from the notch where we left a rope so we could top rope it, and after a couple hours we were back at the low point of the ridge watching the sun go down at 9pm before rappeling down the east face, oh boy!

the notch belay spot
& Mitchell getting ready to climb

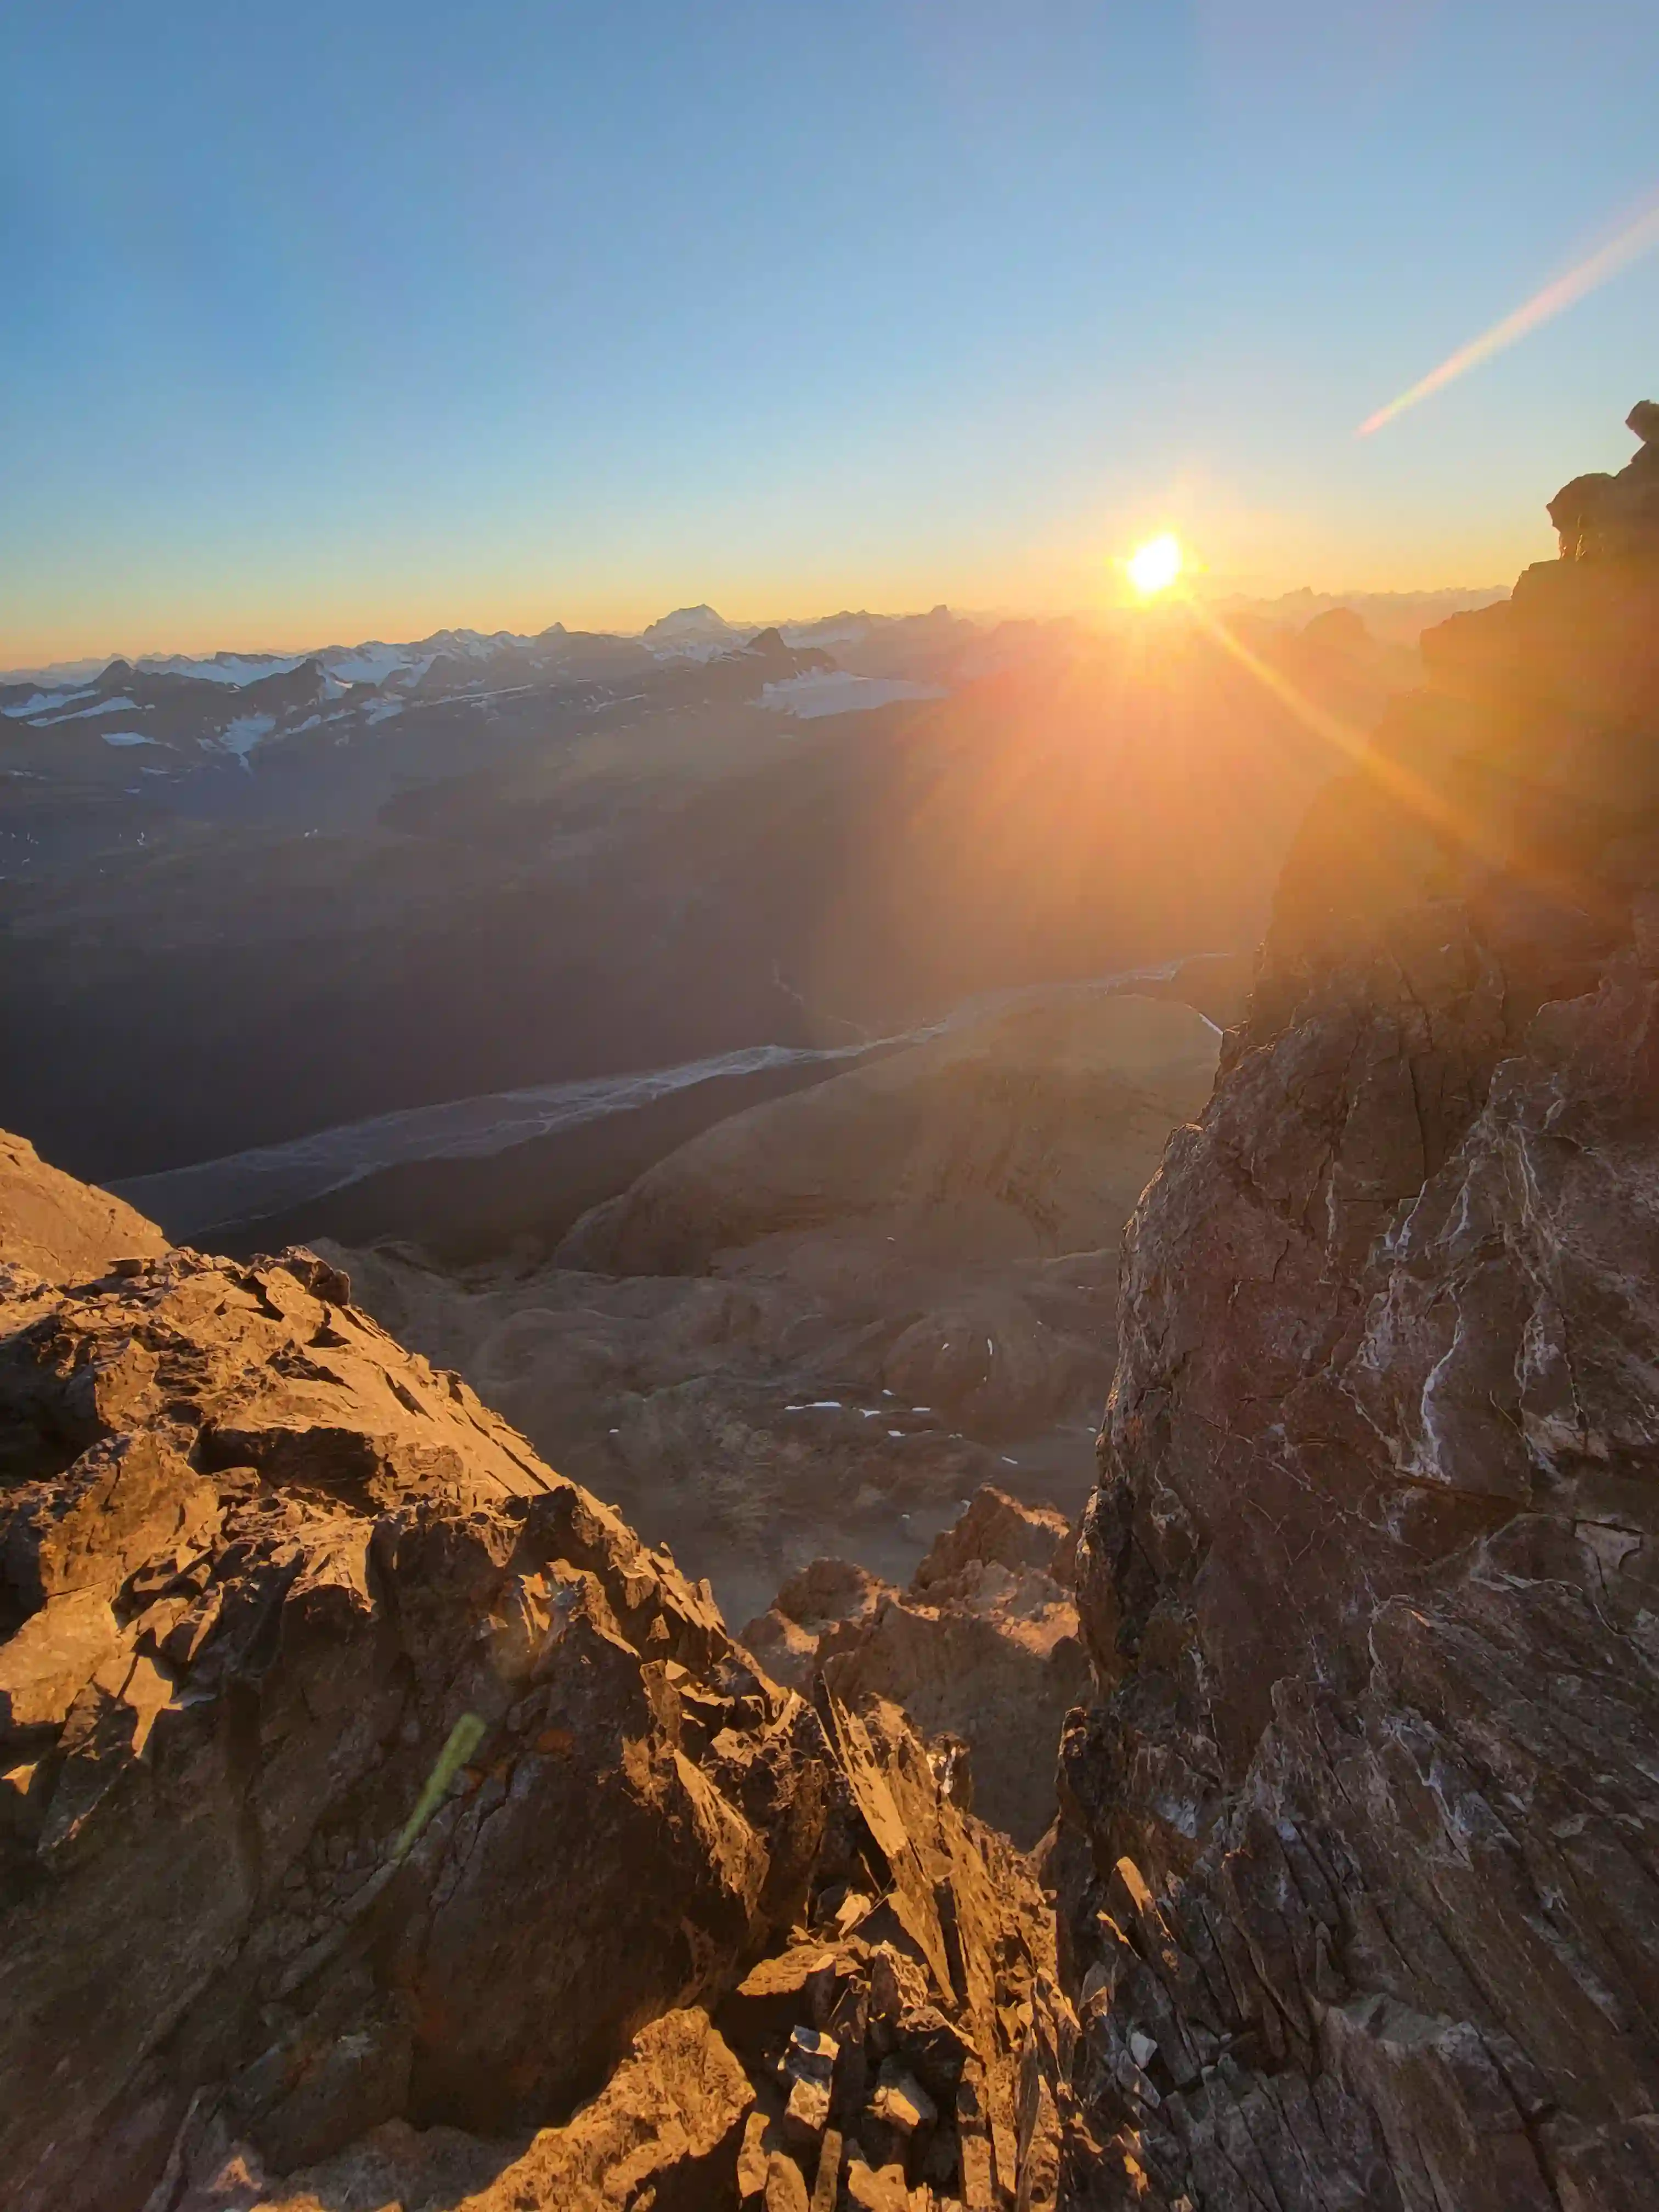
west, it's about to get dark!
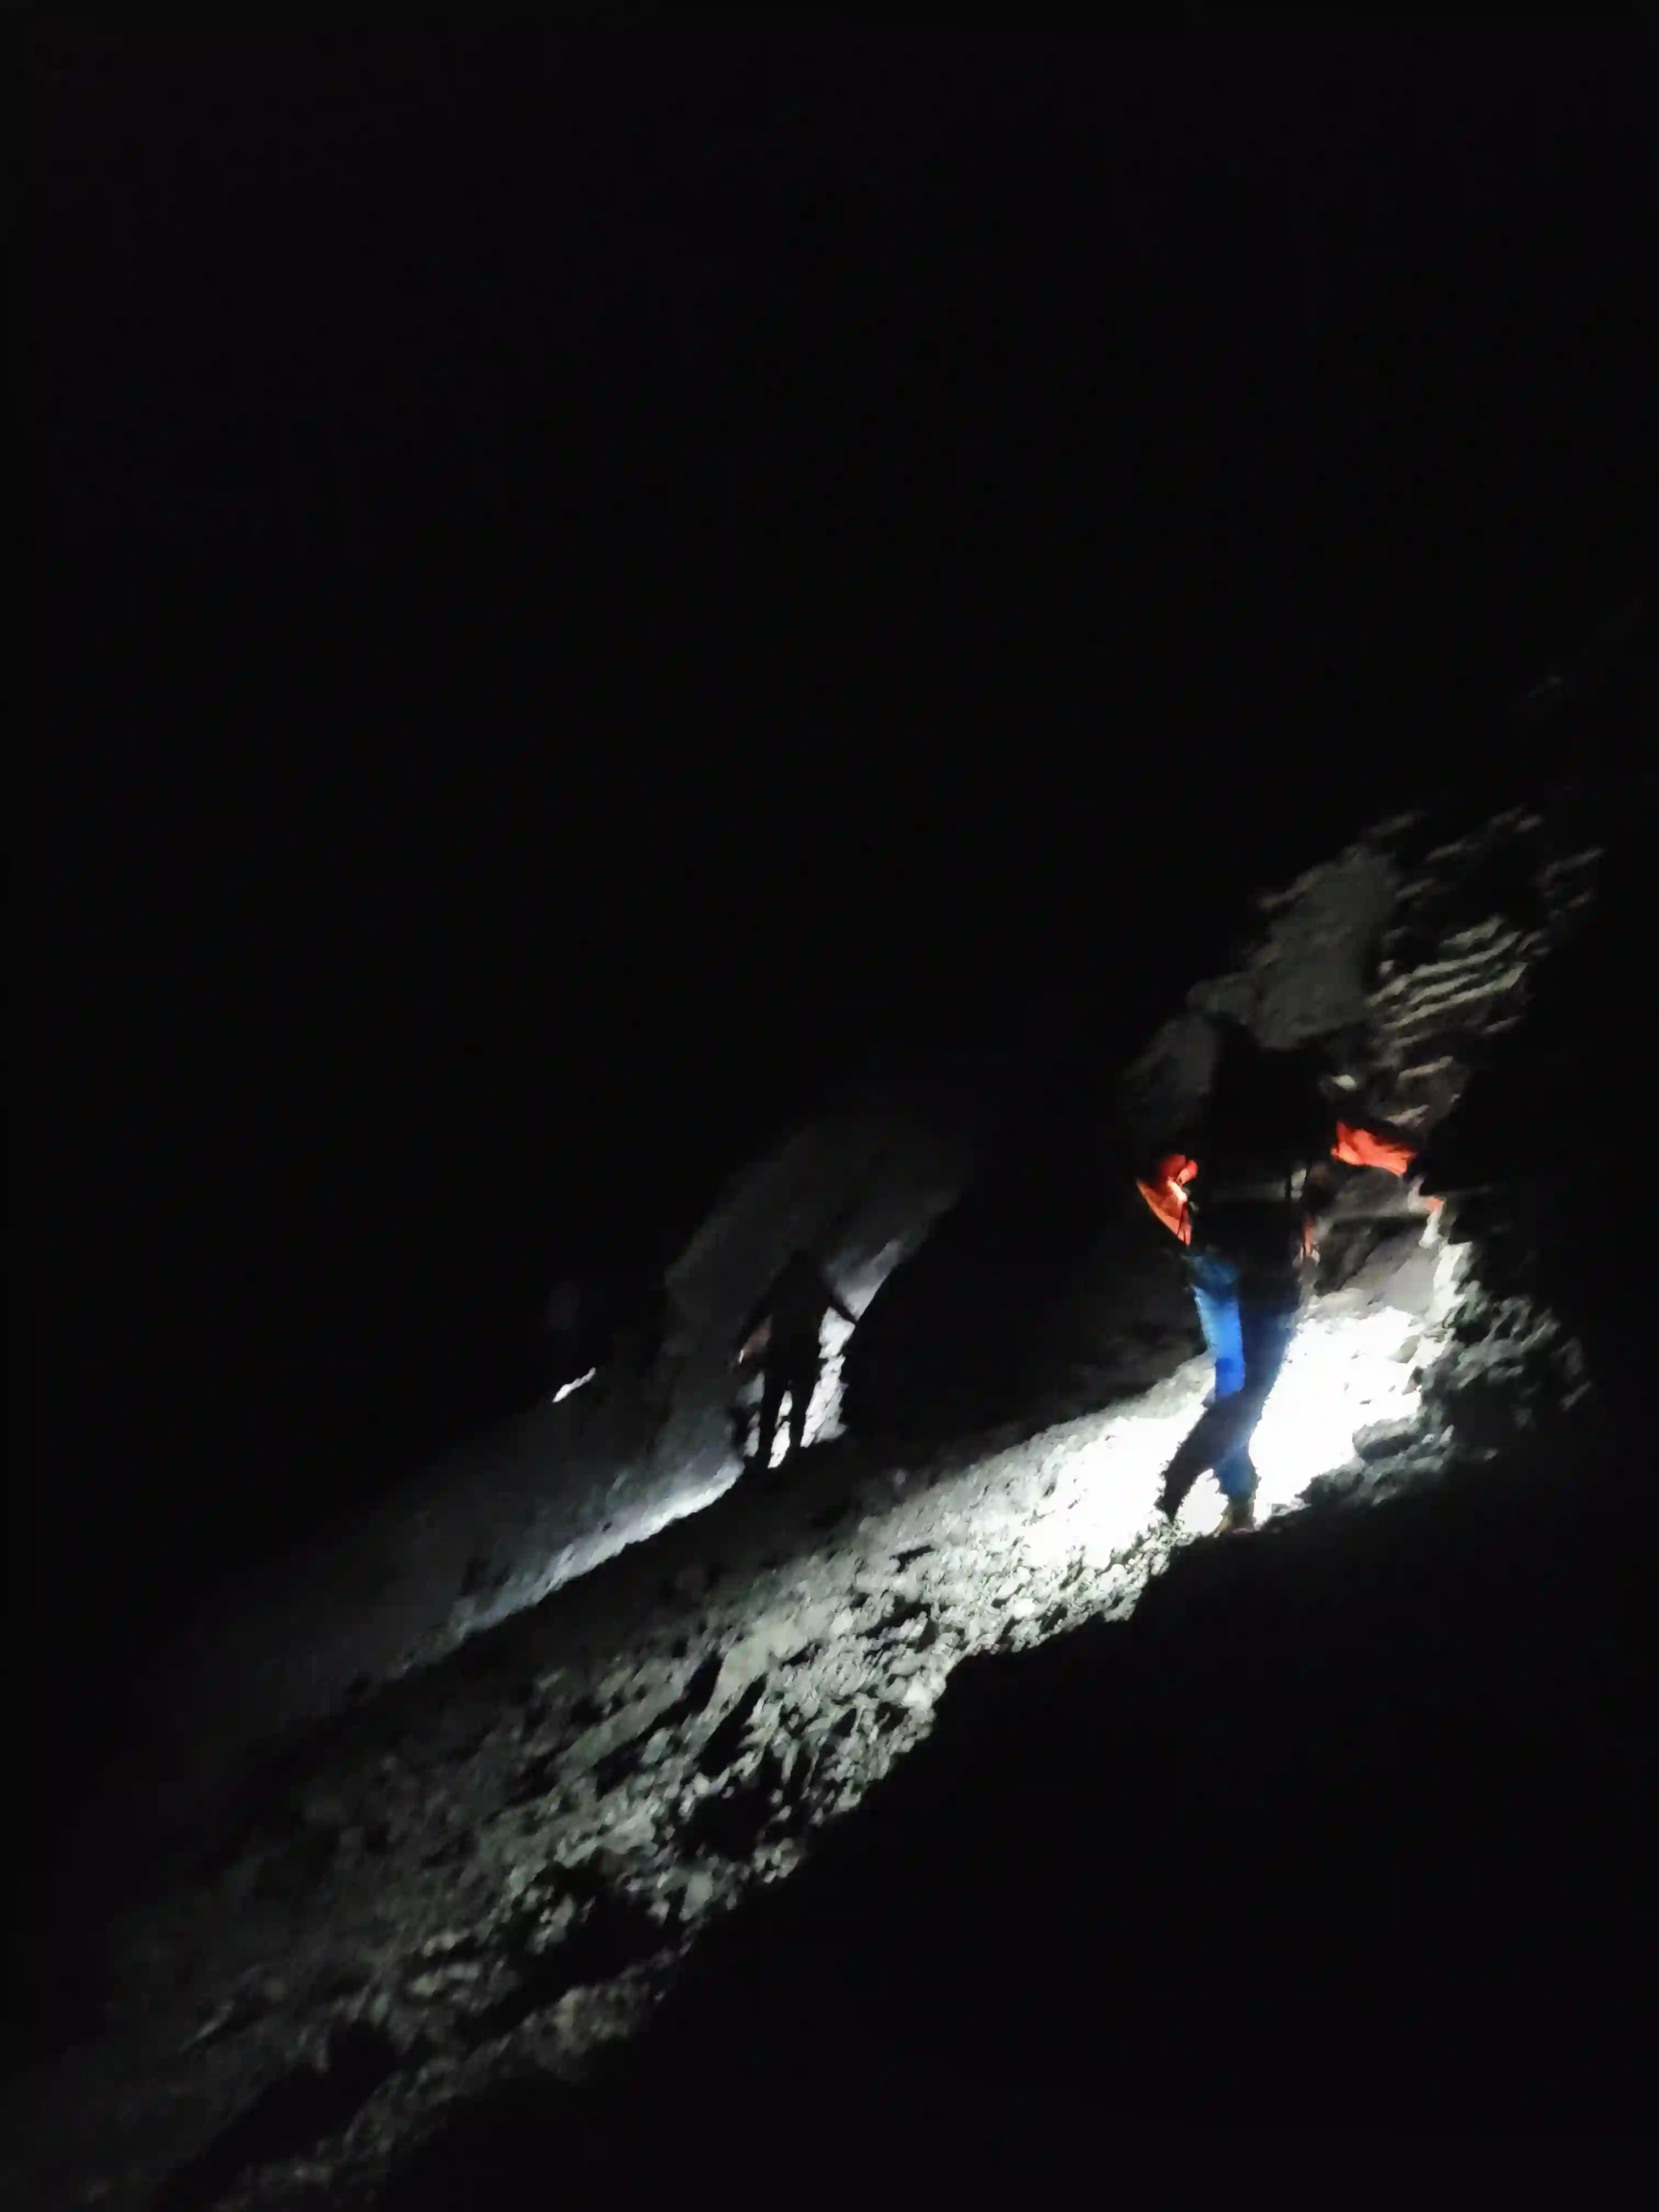
Seeing golden hour as we descended Mount Alberta's ridge was definitely pretty cool but we knew there was no chance we'd get back to our bivy ledge before late into the night and seeing the sun setting to the west before dropping down the east face for our first rappel really drove that home as we were immediately sent into the dark. We started off with a 30m rappel but when this didn't quite get us to the first anchor on the way down the face we started doing 60m rappels instead to avoid this issue and got 3 rappels done before it was completely dark. From this point on the descent was a bit of a blur as with a group of 4 things were pretty slow going with Mitchell leading the rappels since he was the most experienced with anchor building and Tim, Darren, and I following making for at least 30 minutes per rappel if not more. By the time we reached the infamous white rope I think we were a bit over 2 hours into our rappels and the temps were starting to drop but this was just the beginning of our long night on Mount Alberta.
As the temps dropped as we reached the late hours of the night it got tougher waiting for your turn to rappel at each anchor with moving around to keep warm becoming a must. Even with multiple jackets the cold was quite bad as we weren't moving much while the others rappelled and we welcomed some physical exertion every time we had to coil the ropes to get the blood pumping again. In some ways time was dragging with each rappel taking some time and resisting the urge to fall asleep at every anchor but then you'd look down at the watch after what didn't feel like all that long and another couple hours had already gone by. Mitchell did an excellent job leading the rappels on the way down considering we didn't know the terrain all that well and it was completely dark for the majority of our descent. We were able to find anchors to use all the way back down to the ledge traverse and that got us to somewhere around 9 rappels in total and then after reversing the ledge traverse we just had the elephant asses section left to get down before we were in the clear for the upper mountain.
The anchors were less straightforward through the elephant asses section and we ended up needing to back up the first one with a couple cams and had to build the second one where we opted to sling up a large boulder but after that the last rap was off a bolt from the bottom of the elephant asses and we were pretty much in the clear. By this point it was 7am and the sun was rising to the east and by the time we coiled up the ropes and got back to camp it was 7:30am. We were properly in the alpenglow by this point so we had been going for a solid 24 hours straight and despite the sunrise we were all dead tired so slept for a good 3 hours before waking up, packing the gear, and heading down for our exit.
Personally I'd the say the rock quality on Mount Alberta isn't as bad as some make it out to be and especially from the elephant asses section and on there is no shortage of solid slab aside from on the ledge traverse. Where things do get a bit nasty is there are loose rocks on top of the solid stuff all over the east face so this makes things more dangerous for big parties or multiple groups on the mountain. Where we had issues with rockfall was during our rappels where a number of times while pulling the rope we knocked a few rocks down and had to get up against the nearest wall and get down but this is pretty standard on any Canadian Rockies 11000er when you're pulling a 60m rope. Mitchell told me after we were out of technical terrain that he was sure we'd have to cut one of the ropes on the way down but thankfully we never had any issues with getting them stuck so that was a stroke of luck for us I guess!
next anchor, did 60m rappels from here on
getting cold!
party that's been benighted here!
in this lighting!
better than this!
final trailed section of our exit
things off!
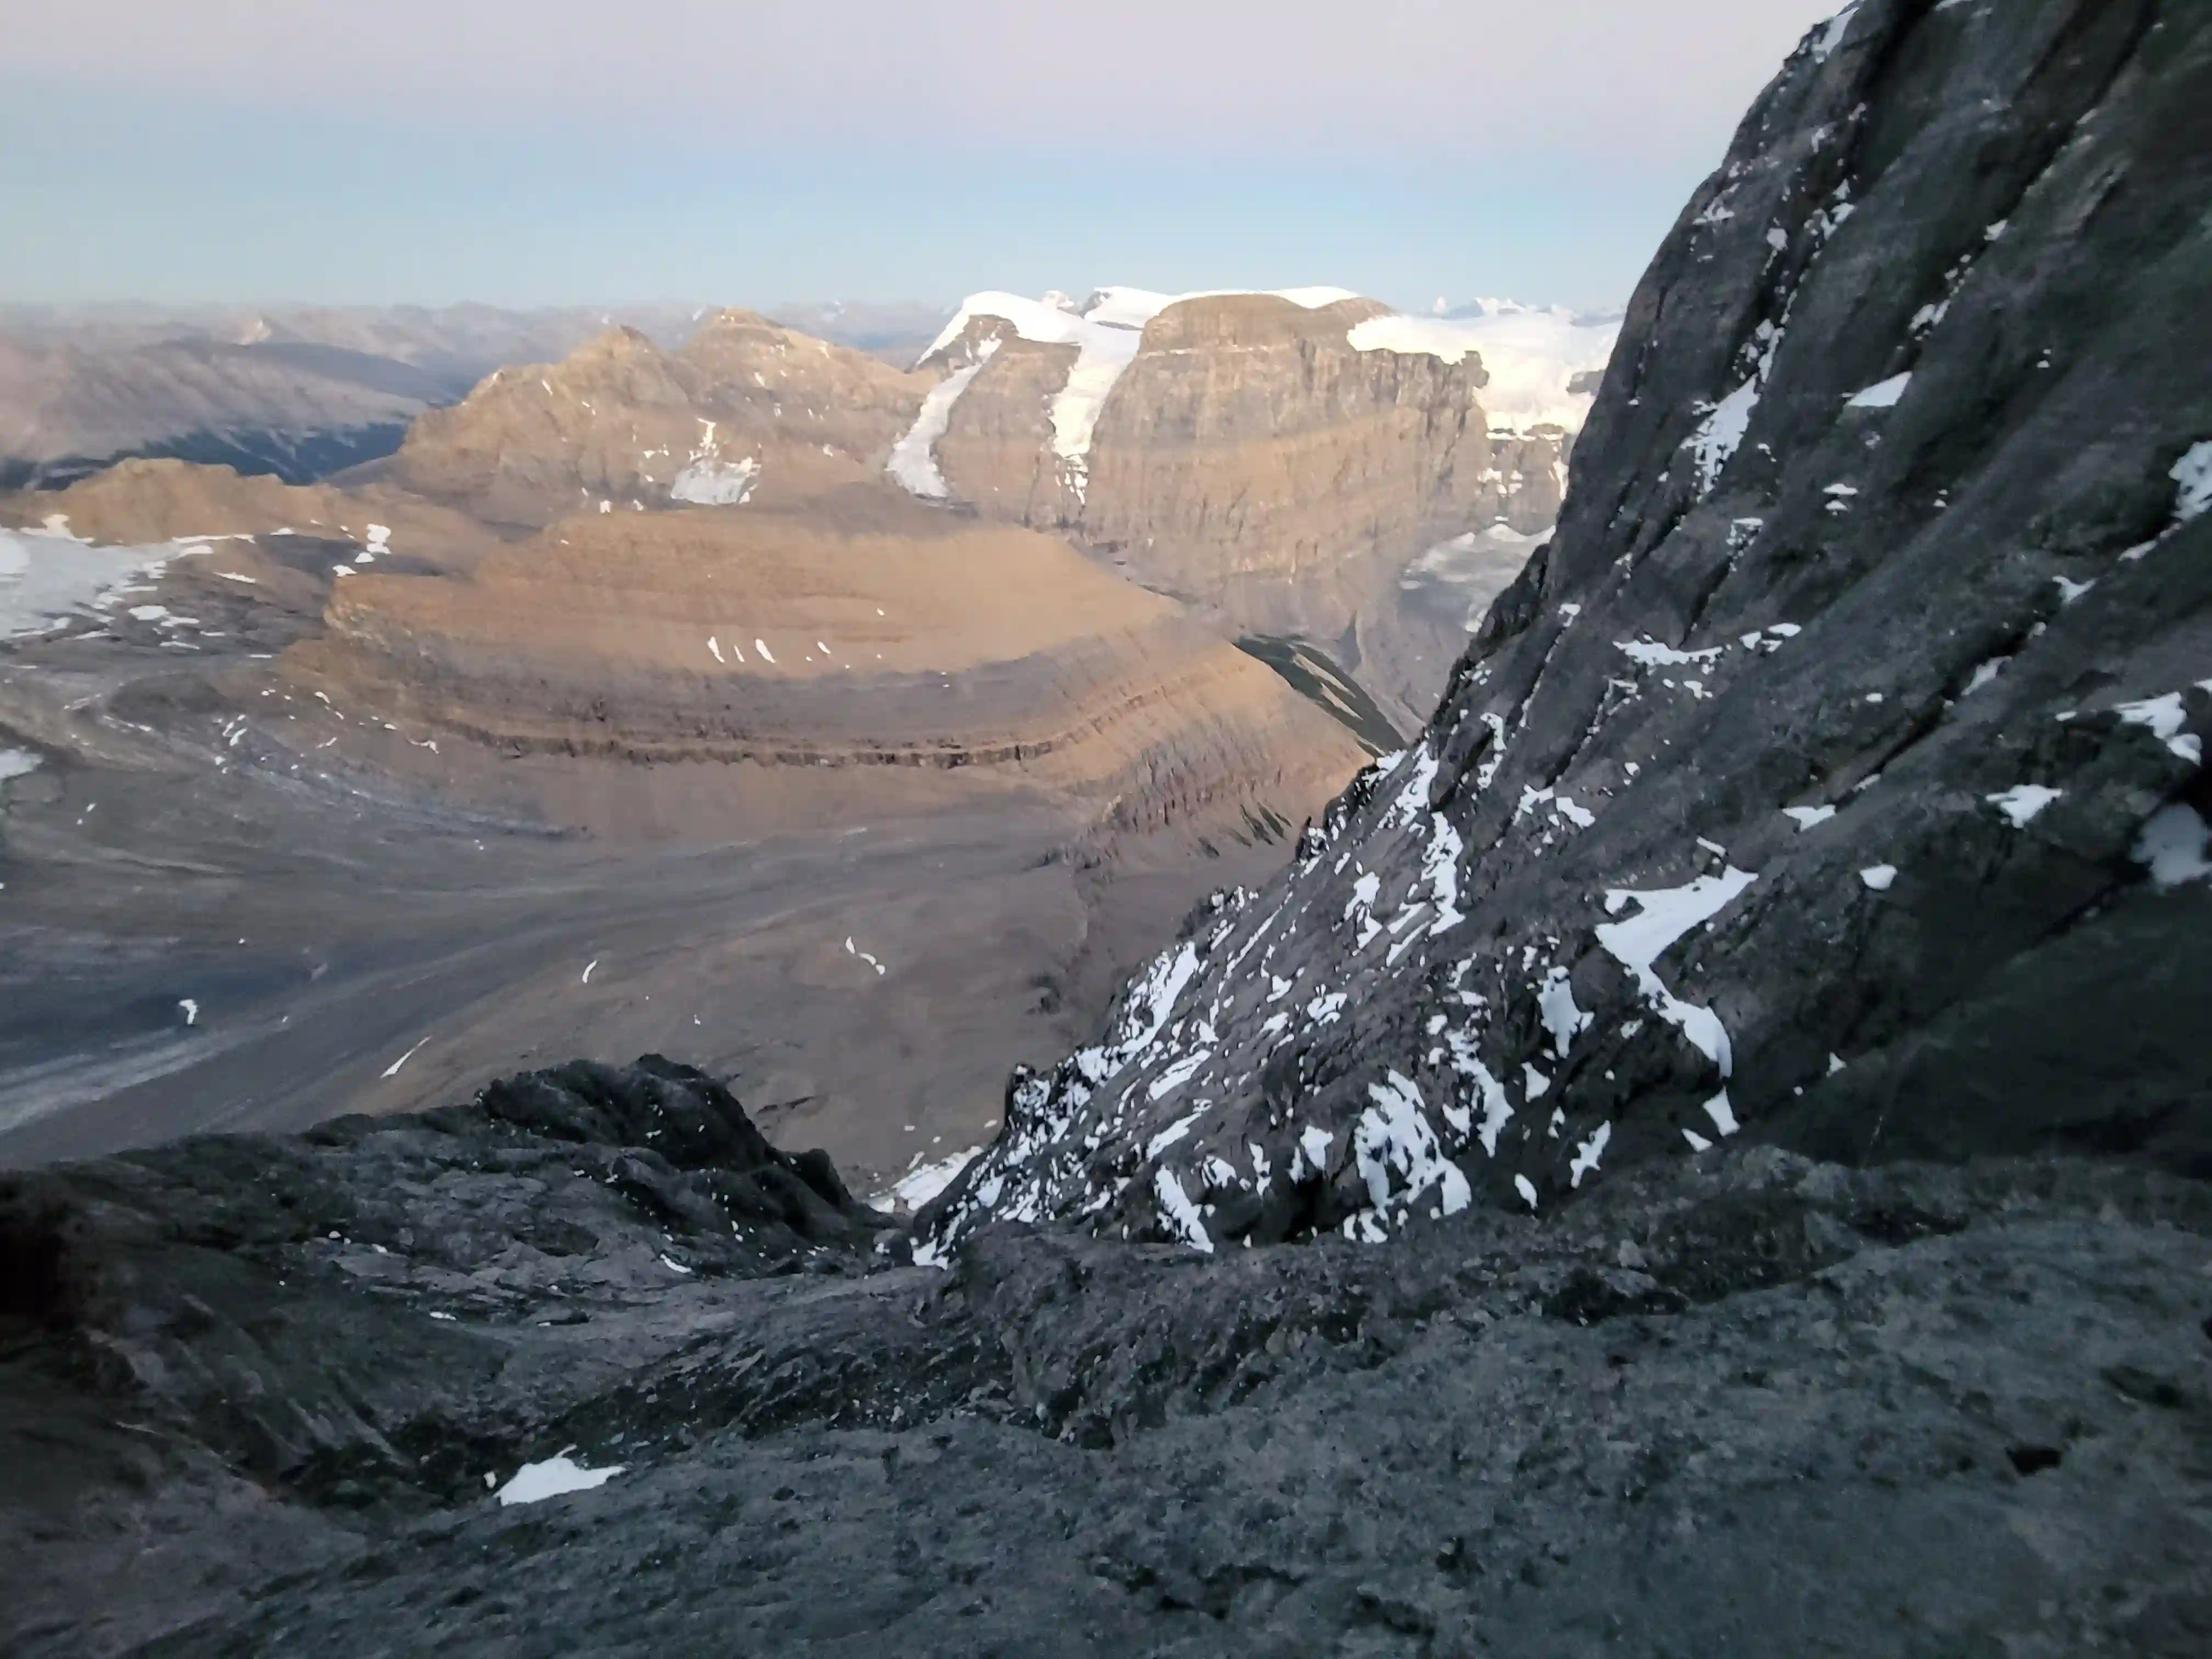
From the bivi site we made good time getting back to the Alberta hut with things feeling quite tame compared to our descent of the upper mountain. The elevation gain back up to the hut and the Woolley shoulder was tough but after that it was descending all the way back to the Sunwapta River. We were all definitely starting to feel it by the last few kilometers with the lack of good sleep and not much food left but once we got back to the river crossing it was refreshing to cool off the feet to wrap up the trip.
All in all this trip for Mount Alberta is probably one of the wildest things I've ever done and it was awesome to pull off such an epic summit just a month after the 100 year anniversary of the first ascent in suboptimal conditions with such an awesome crew. There's no doubt in my mind that this is the toughest peak on Bill Corbett's 11000ers list and to get it done in one fell swoop took a bit of luck and guts from the whole group and I have Darren, Tim, and Mitchell to thank for helping to make this trip a wildly successful one! Given that it was a particularly bad year for snow throughout the summer it is entirely possible we were the second and final ascent of Mount Alberta of 2025 with just the Japanese group getting it before us as far as I know when they went for the 100 year anniversary summit in full on conditions. While we didn't get the nice dry conditions and selfies with the iconic summit umbrella that we would've in a warmer year, what we did get was smoke free bluebird views and all things considered I'd say it was worth it to see clear views of the Columbia Icefield giants in one of the wildest places in the Canadian Rockies I've seen to date!
Before this trip and while out on Mount Alberta I had been keeping in touch with Ian Matthews over the inReach who I had teamed up with on
Whitehorn Mountain
a month prior about potentially going for another 11ker objective if the bluebird weather window extended past our Mount Alberta trip, and with high pressure and zero cloud cover for the coming days things were looking good! Despite tired legs and a shorter than ideal car camp sleep in the Icefields Visitor Center lot following our 3 day push for Mount Alberta I was up early the next morning to head to Lake Louise and meet up with Ian, and after stocking up on food for the coming days we were headed towards Field gunning for the choss bosses of the range to cap off the season,
The Goodsirs!
Follow the full progression
I'm working through all 58 11000ers of the Canadian Rockies and beyond. You'll get notified when the latest climbs go live.
Other related trip reports:
Mount Columbia |
Woolley & Diadem |
The Goodsirs ||
Deltaform Mountain |
Mount Assiniboine & Lunette
11000ers of the Canadian Rockies
© Haldan Borglum | Peak by Peak. All rights reserved.